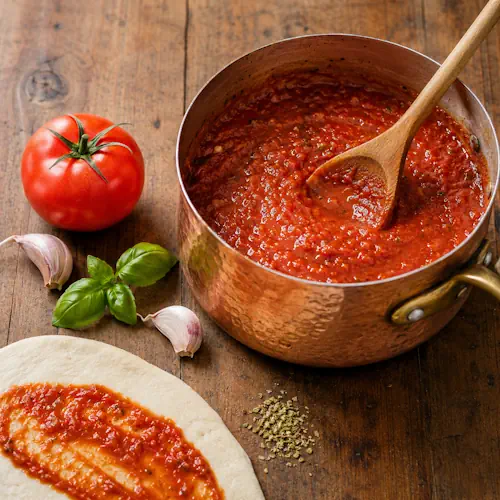
Fresh No-Cook Pizza Sauce

No-cook pizza sauce in a bowl with crushed tomatoes, oregano, garlic and fresh basil

Fresh No-Cook Pizza Sauce

Fresh No-Cook Pizza Sauce combines crushed tomatoes, tomato paste, olive oil, garlic, and Italian herbs. It is ready in minutes and delivers a bright tomato flavour without using the stovetop.
Couverts4 servings
estimated costs pp $0.35
Deel op Facebook Print Recipe

Equipment

  • Measuring cups
  • Measuring spoons
  • Mixing Bowl, Medium
  • Whisk

Ingredients

Instructions

  • Add the crushed tomatoes and tomato paste to a medium mixing bowl.
  • Whisk until the tomato paste is completely incorporated.
  • Pour in the extra-virgin olive oil.
  • Add the dried oregano, dried basil, garlic powder, kosher salt, black pepper, sugar, and red pepper flakes.
  • Whisk until the sauce is smooth and evenly combined.
  • Taste and adjust the seasoning when necessary.
  • Cover the mixing bowl.
  • Let the sauce rest for 10 minutes so the herbs can soften and the flavours can blend.
  • Stir the sauce again before use.
  • Spread the sauce directly over prepared pizza dough.

Notes & Wine Advice

Serving Suggestions

Spread the sauce thinly over pizza dough before adding mozzarella, vegetables, herbs, or cooked meat. It also works as a cold dip for breadsticks and our Golden Garlic Butter Knots. One batch provides enough sauce for four individual pizzas or one large pizza.

Recipe Notes

Choose good-quality crushed tomatoes with a naturally thick consistency. Watery tomatoes can make pizza dough soggy. Resting the sauce for 10 minutes allows the dried herbs to soften and distribute their flavour throughout the tomatoes.

Variations

Add finely chopped fresh basil for a brighter herbal flavour. Increase the red pepper flakes for more heat or leave out some for a milder result. Smoked paprika, onion powder, grated garlic, or a small splash of balsamic vinegar can provide additional depth.

Storage and Freezing

Refrigerate the sauce in an airtight container for up to four days. Stir it thoroughly before use. Freeze individual portions for up to three months and thaw them overnight in the refrigerator. Drain off excess liquid if the thawed sauce has separated.

Wine Advice

A light-bodied Pinot Noir complements the fresh tomato flavour without overpowering it. A medium-bodied Chianti is an excellent choice when the finished pizza includes mozzarella, mushrooms, herbs, or cured meat.

Nutrition values

Calories: 50 kcal | koolhydraten: 8 g | Eiwitten: 2 g | Vet: 2 g | Verzadigd vet: 0 g | Natrium: 280 mg | Suiker: 4 g
————————————————————————————————–

About No-Cook Pizza Sauce

No-cook pizza sauce is a quick mixture of crushed tomatoes, concentrated tomato paste, olive oil, garlic, and dried Italian herbs. Because the sauce is not heated separately, it retains a brighter and fresher tomato flavour. The sauce cooks directly on the pizza while the crust and toppings bake.

This recipe has been recalculated from eight portions to four. It makes approximately one cup, which is enough for four individual pizzas or one large family pizza. Preparation takes only five minutes, followed by a short resting period that allows the herbs and seasoning to blend.

Why Fresh Pizza Sauce Works

Fresh pizza sauce works particularly well when the tomatoes are naturally thick and flavourful. Crushed tomatoes form the main base, while tomato paste concentrates the flavour and reduces excess moisture. Olive oil rounds out the acidity and helps distribute the herbs and spices.

The sauce does not need separate cooking because it heats on the pizza in a hot oven. This saves time and preserves more of the tomatoesโ€™ fresh character. It also makes the recipe convenient for quick dinners, family pizza nights, and last-minute meals.

Balancing Flavour and Consistency

A small amount of sugar softens the natural acidity of canned tomatoes without making the finished sauce sweet. Oregano and basil provide traditional Italian aromas, while garlic powder distributes evenly without leaving raw pieces. Red pepper flakes contribute gentle warmth.

Consistency is as important as flavour. A watery sauce can soak into pizza dough before the crust has time to set. If the crushed tomatoes contain a large quantity of liquid, drain off some of it before measuring. The finished mixture should spread easily but remain in place.

Using the Sauce on Homemade Pizza

Allow approximately ยผ cup of sauce for each individual pizza. Spread it thinly and leave a narrow border uncovered around the edge. More sauce does not necessarily create a better pizza; an excessive amount can make the centre heavy and difficult to bake.

Pair it with our Whole Wheat Pizza Dough for a hearty base or use the Sicilian Pizza Dough for a thick sheet-pan crust. The sauce is also suitable for our gluten-free Parmesan Zucchini Pizza Crust.

Cooked and Uncooked Sauce Compared

An uncooked sauce tastes brighter and usually requires less preparation. It is an excellent choice for pizzas baked quickly at a high temperature. A cooked sauce has a deeper, sweeter, and more concentrated flavour because some of the moisture evaporates during simmering.

When you prefer a richer sauce, try our Rustic Italian Pizza Sauce. Both versions can be used with the same toppings, so the choice depends primarily on the desired flavour and available preparation time.

More Ways to Use It

This sauce can also be used on flatbreads, pizza rolls, toasted sandwiches, and savoury pastries. Serve it as a dip for breadsticks, garlic bread, or baked mozzarella. Browse the pizza recipes, sauce collection, and Italian recipes for more serving ideas.

Fresh basil, chopped parsley, smoked paprika, onion powder, or grated garlic can be used to customise the flavour. Add fresh herbs shortly before using the sauce so their colour and aroma remain vibrant.

Safe Storage

Transfer leftover sauce to an airtight container and refrigerate it for up to four days. Use a clean spoon each time and return the container to the refrigerator promptly. Freeze smaller portions when longer storage is required.

Thaw frozen sauce overnight in the refrigerator and stir it thoroughly before use. Follow current FDA safe food-handling guidance when refrigerating, freezing, thawing, and serving homemade sauces.

With its bright tomato flavour, Italian herbs, and five-minute preparation, no-cook pizza sauce is a practical homemade alternative to bottled pizza sauce.

Rustic Italian Pizza Sauce

Rustic Italian pizza sauce in a bowl with crushed tomatoes, garlic, oregano and fresh basil

Rustic Italian Pizza Sauce

Rustic Italian Pizza Sauce is a rich cooked tomato sauce flavoured with garlic, oregano, basil, and chilli flakes. It takes only 25 minutes to prepare and makes enough sauce for four generously topped individual pizzas.
Couverts4 servings
estimated costs pp $0.40
Deel op Facebook Print Recipe

Equipment

  • Measuring cups
  • Measuring spoons
  • Saucepan, Medium
  • Wooden spoon

Ingredients

Instructions

  • Heat the olive oil in a medium saucepan over medium heat.
  • Add the minced garlic.
  • Cook for 1 minute while stirring continuously until fragrant.
  • Add the crushed tomatoes and tomato paste.
  • Stir until the tomato paste is completely incorporated.
  • Add the dried oregano, dried basil, kosher salt, black pepper, sugar, and red pepper flakes.
  • Stir until the seasonings are evenly distributed.
  • Reduce the heat to low.
  • Simmer the sauce uncovered for 20 minutes.
  • Stir occasionally to prevent the sauce from catching on the bottom.
  • Taste and adjust the seasoning when necessary.
  • Remove the saucepan from the heat.
  • Let the sauce cool before spreading it over pizza dough.

Notes & Wine Advice

Serving Suggestions

Spread the cooled sauce thinly over homemade pizza dough before adding cheese and other toppings. It also works as a dip for garlic bread, breadsticks, or our Golden Garlic Butter Knots. One batch provides enough sauce for four individual pizzas or one large sheet-pan pizza.

Recipe Notes

Simmer the sauce uncovered so excess moisture can evaporate. This produces a concentrated sauce that is less likely to make pizza dough soggy. Let it cool before spreading it over raw dough, and avoid using an excessively thick layer.

Variations

Add extra red pepper flakes for a spicier sauce or omit some for a milder version. Fresh basil can replace dried basil after cooking. Finely chopped onion, smoked paprika, fennel seeds, or a splash of balsamic vinegar can provide additional depth.

Storage and Freezing

Refrigerate the cooled sauce in an airtight container for up to five days. The flavour becomes deeper after resting overnight. Freeze individual portions for up to three months, then thaw them in the refrigerator before reheating or spreading over pizza dough.

Wine Advice

A medium-bodied Italian Chianti complements the tomatoes, garlic, oregano, and basil. When the finished pizza has mild vegetable or mozzarella toppings, a crisp Pinot Grigio provides a lighter alternative.

Nutrition values

Calories: 7045 kcal | koolhydraten: 8 g | Eiwitten: 2 g | Vet: 4 g | Verzadigd vet: 1 g | Natrium: 280 mg | Suiker: 4 g
————————————————————————————————–

About Rustic Italian Pizza Sauce

Rustic Italian pizza sauce combines crushed tomatoes, concentrated tomato paste, garlic, olive oil, oregano, basil, and chilli flakes. Brief stovetop cooking reduces the tomatoes and blends the seasonings, creating a rich sauce that spreads easily without making pizza dough unnecessarily wet. It works with thick, thin, whole-wheat, and vegetable-based pizza crusts.

This version has been recalculated from eight portions to four. It produces approximately one cup of sauce, enough for four individual pizzas or one generously sized sheet-pan pizza. The smaller batch is practical for a family pizza night and reduces the likelihood of unused sauce remaining in the refrigerator.

Why Cooked Pizza Sauce Works

Cooked pizza sauce develops a deeper flavour than a quick uncooked tomato mixture. Heating the garlic briefly in olive oil releases its aroma, while simmering concentrates the tomatoes and softens their acidity. Tomato paste contributes additional body, colour, and savoury intensity.

Reducing the moisture is particularly helpful for homemade pizza. A watery sauce can soak into raw dough and prevent the centre from baking properly. Simmering the mixture uncovered creates a thicker consistency that remains in place when toppings are added.

Balancing the Tomato Flavour

Canned crushed tomatoes provide a consistent texture and flavour throughout the year. Choose tomatoes without added herbs so the seasoning can be controlled. Tomato paste should be stirred thoroughly into the crushed tomatoes to prevent concentrated pockets from remaining in the finished sauce.

A small quantity of sugar balances the natural acidity without making Rustic Italian Pizza Sauce noticeably sweet. Oregano and basil provide familiar Italian aromas, while black pepper and red pepper flakes add warmth. Taste the sauce after simmering because tomato products differ in saltiness and acidity.

Using the Sauce on Different Crusts

Allow the sauce to cool before placing it on raw dough. Hot sauce may soften the dough and make shaping more difficult. Spread a thin, even layer and leave a narrow border uncovered around the edge. Too much sauce can overwhelm the crust and make the pizza difficult to slice.

Use it with our Sicilian Pizza Dough for a thick sheet-pan pizza or choose our Whole Wheat Pizza Dough for a nuttier base. It also works with the gluten-free Parmesan Zucchini Pizza Crust.

More Ways to Use the Sauce

This tomato herb sauce is not limited to pizza. Serve it warm as a dip for garlic bread, breadsticks, mozzarella sticks, or roasted vegetables. It can also be spooned over baked pasta, used in toasted sandwiches, or spread inside savoury rolls.

Browse the pizza collection for topping ideas, the sauce recipes for more homemade condiments, and the Italian recipe collection for complementary dishes. Fresh mozzarella, mushrooms, peppers, olives, onions, and basil all pair naturally with this sauce.

Storage and Freezing

Cool the sauce completely before transferring it to an airtight container. Refrigerate it for up to five days. Its flavour often improves after one night because the garlic and dried herbs have more time to infuse the tomatoes.

Freeze the sauce in individual portions for up to three months. Small containers or an ice-cube tray make it easy to thaw only the required quantity. Defrost it in the refrigerator and stir thoroughly before use. If it appears watery after thawing, simmer it briefly to restore the thicker consistency.

Follow current FDA safe food-handling guidance when cooling, refrigerating, freezing, and reheating homemade sauces. With concentrated tomato flavour, aromatic herbs, and controlled moisture, rustic Italian pizza sauce provides a dependable foundation for homemade pizza.


Golden Garlic Butter Knots

Golden garlic butter knots brushed with melted butter, minced garlic and fresh parsley

Golden Garlic Butter Knots

Golden Garlic Butter Knots are soft homemade bread knots brushed with melted butter, fresh garlic, and parsley. Their fluffy centres and golden surfaces make them ideal with pasta, soup, salad, or as a warm party snack.
Couverts4 servings
estimated costs pp $0.45
Deel op Facebook Print Recipe

Equipment

  • Baking sheet
  • Kitchen towel
  • Mixing Bowl, Large
  • Mixing Bowl, Small
  • Parchment paper
  • Pastry brush

Ingredients

For the Dough

For the Garlic Butter

Instructions

For the Dough

  • Pour the warm water into a small mixing bowl.
  • Add the granulated sugar and stir until dissolved.
  • Sprinkle the active dry yeast over the water.
  • Let the yeast mixture stand for 5 minutes until frothy.
  • Combine the all-purpose flour and kosher salt in a large mixing bowl.
  • Pour in the yeast mixture and olive oil.
  • Stir until a rough dough forms.
  • Transfer the dough to a lightly floured work surface.
  • Knead for 7 minutes until smooth and elastic.
  • Place the dough in a lightly oiled mixing bowl.
  • Cover the bowl with a clean kitchen towel.
  • Let the dough rise in a warm place for 1 hour or until doubled in size.

For Shaping

  • Preheat the oven to 375ยฐF (190ยฐC).
  • Line a baking sheet with parchment paper.
  • Press down the risen dough gently to release excess air.
  • Divide the dough into 4 equal portions.
  • Roll each portion into a rope approximately 8 inches long.
  • Tie each rope loosely into a knot.
  • Tuck the loose ends underneath each knot.
  • Arrange the knots evenly on the prepared baking sheet.

For the Garlic Butter

  • Combine the melted butter, minced garlic, and chopped parsley in a small mixing bowl.
  • Brush half of the garlic butter over the shaped knots.

For Baking

  • Bake for 20 minutes until the knots are golden brown and cooked through.
  • Remove the baking sheet from the oven.
  • Brush the warm knots immediately with the remaining garlic butter.
  • Serve warm.

Notes & Wine Advice

Serving Suggestions

Serve the garlic knots warm with pasta, lasagne, tomato soup, minestrone, or a fresh salad. They are also excellent with marinara sauce for dipping. For an Italian bread selection, serve them alongside our Garlic Rosemary Focaccia.

Recipe Notes

Use warm rather than hot water so the yeast remains active. Tie the dough ropes loosely because the knots expand during baking. Applying half the garlic butter before baking adds flavour, while the remaining butter gives the finished knots a glossy, aromatic surface.

Variations

Add grated Parmesan or mozzarella during the final five minutes of baking. Replace parsley with fresh basil, rosemary, or oregano. Chilli flakes provide gentle heat, while a pinch of smoked paprika creates a warmer flavour. For smaller party knots, divide the dough into eight portions and reduce the cooking time.

Storage and Reheating

Store cooled knots in an airtight container at room temperature for up to two days. Reheat them in the oven for several minutes before serving. They can also be frozen for up to two months and reheated directly from frozen at a moderate temperature.

Wine Advice

A lightly oaked Chardonnay complements the butter and roasted garlic. A medium-bodied Chianti is a better choice when the knots accompany tomato-based pasta, pizza, or lasagne.

Nutrition values

Serving: 1 garlic knot | Calories: 220 kcal | koolhydraten: 31 g | Eiwitten: 5 g | Vet: 8 g | Verzadigd vet: 2 g | Natrium: 300 mg | Suiker: 3 g
————————————————————————————————–

About Golden Garlic Butter Knots

Golden garlic butter knots are soft, fluffy pieces of homemade bread shaped by hand and finished with melted butter, fresh garlic, and parsley. They have a lightly crisp golden surface and a tender centre that pulls apart easily. Serve them with pasta, soup, salad, or a bowl of warm marinara sauce.

This recipe has been recalculated from eight portions to four. Instead of leaving a choice between rolls and knots, the dough is shaped specifically into four generous knots. This provides a consistent result and makes the instructions easier to follow.

Preparing Soft Garlic Knots

Soft garlic knots begin with properly activated yeast. Warm water and sugar encourage active dry yeast to wake up and produce foam. The mixture should become visibly frothy within approximately five minutes. If nothing happens, the yeast may be inactive or the water temperature may have been unsuitable.

After the yeast mixture is combined with flour, salt, and olive oil, the dough needs approximately seven minutes of kneading. This develops gluten and creates an elastic structure capable of trapping gas during rising. The dough should feel smooth and soft rather than dry or crumbly.

Rising and Shaping the Dough

Place the kneaded dough in a lightly oiled bowl and cover it with a clean kitchen towel. Let it rise in a warm place until doubled in size. This usually takes about one hour, although a cool room may require additional time.

Divide the risen dough into four equal portions. Rolling each piece into a rope creates the length needed for shaping. Tie the rope loosely and tuck the ends underneath. A tight knot may restrict expansion, while loose shaping allows the dough to rise naturally in the oven.

Keep the four pieces similar in size so they finish baking simultaneously. A kitchen scale can be used for precise portions, but dividing the dough carefully by eye is sufficient for this small batch.

Adding the Garlic Butter

Fresh garlic provides a stronger and cleaner flavour than garlic powder. Mince it finely so it spreads evenly across the dough and does not leave large pieces that can burn. Parsley adds freshness and colour without competing with the butter and garlic.

Brush half the mixture over the unbaked knots. This allows some of the flavour to bake into their surfaces. Reserve the rest and apply it as soon as the bread leaves the oven. The warm knots absorb the melted butter and develop an aromatic, glossy finish.

Serving Ideas for Homemade Bread Knots

Homemade bread knots are especially good with tomato-based pasta, lasagne, ravioli, and pizza. They can also accompany minestrone, creamy vegetable soup, or a simple green salad. Browse the pasta recipes, soup collection, and Italian recipes for complementary dishes.

For a party platter, serve the knots with marinara, pesto, or a creamy cheese sauce. Our Broccoli Sunflower Seed Pesto provides a fresh vegetable-based dipping option. Smaller knots can be made for parties, but they should be checked several minutes earlier.

Storing and Reheating

These knots taste best while warm and freshly brushed with garlic butter. Once completely cool, keep them in an airtight container at room temperature for up to two days. Reheat them briefly in the oven so the surfaces become soft and fragrant again.

Freeze cooled knots in a freezer-safe container for up to two months. They can be thawed first or reheated carefully from frozen. Brush them with a little melted butter after reheating when they appear dry.

Follow current FDA safe food-handling guidance when storing butter-based baked goods. With active yeast, sufficient kneading, loose shaping, and two applications of garlic butter, golden garlic butter knots provide a dependable homemade addition to almost any savoury meal.


Garlic Rosemary Focaccia

Garlic rosemary focaccia with a golden dimpled crust, fresh herbs and olive oil

Garlic Rosemary Focaccia

Garlic Rosemary Focaccia is a soft Italian bread with a golden crust, airy centre, fragrant rosemary, and savoury garlic. Serve it warm as a side dish, sandwich bread, or appetiser with olive oil and balsamic vinegar.
Couverts4 servings
estimated costs pp $0.70
Deel op Facebook Print Recipe

Equipment

  • Baking sheet
  • Kitchen towel
  • Measuring spoons
  • Mixing Bowl, Large
  • Mixing Bowl, Small
  • oven
  • Parchment paper

Ingredients

Instructions

  • For the Dough
  • Pour the warm water into a small mixing bowl.
  • Add the granulated sugar and stir until dissolved.
  • Sprinkle the active dry yeast over the water.
  • Let the yeast mixture stand for 10 minutes until frothy.
  • Combine the all-purpose flour and kosher salt in a large mixing bowl.
  • Pour in the activated yeast mixture and olive oil.
  • Stir until a rough dough forms.
  • Transfer the dough to a lightly floured work surface.
  • Knead for 7 minutes until smooth and elastic.
  • Place the dough in a lightly oiled mixing bowl.
  • Cover the bowl with a clean kitchen towel.
  • Let the dough rise in a warm place for 1ยฝ hours or until doubled in size.
  • For Shaping and Topping
  • Preheat the oven to 425ยฐF (220ยฐC).
  • Line a baking sheet with parchment paper.
  • Press down the risen dough gently to release excess air.
  • Transfer the dough to the prepared baking sheet.
  • Press the dough into a rectangle or round approximately 1 inch thick.
  • Drizzle the surface with 1 tablespoon of olive oil.
  • Press your fingertips firmly into the dough to create dimples.
  • Distribute the minced garlic and chopped rosemary over the surface.
  • Sprinkle with coarse sea salt.
  • Cover the dough loosely with the kitchen towel.
  • Let the shaped focaccia rise for another 30 minutes.
  • For Baking
  • Bake for 25 minutes until golden brown with crisp edges.
  • Remove the focaccia from the oven.
  • Let it cool slightly before cutting it into four portions.
  • Serve warm or at room temperature.

Notes & Wine Advice

Serving Suggestions

Serve the focaccia warm with extra-virgin olive oil, balsamic vinegar, soup, pasta, or salad. Slice it horizontally for sandwiches or cut it into strips for a party platter. It pairs especially well with our Classic Italian Caprese Salad.

Recipe Notes

The water should be warm but not hot enough to damage the yeast. Press the dimples deeply into the dough without tearing through the bottom. Keep the garlic pieces small and press them gently into the surface so they do not burn during baking.

Variations

Add halved cherry tomatoes, olives, thinly sliced red onion, or roasted peppers before baking. Replace rosemary with thyme, oregano, or sage. For a richer topping, add grated Parmesan. Chilli flakes or cracked black pepper provide additional warmth.

Storage and Freezing

Store cooled focaccia in an airtight container at room temperature for up to two days. Reheat it briefly in the oven before serving. Individual portions can be wrapped and frozen for up to two months. Thaw at room temperature and warm them in the oven.

Wine Advice

A medium-bodied Italian Chianti complements the garlic, rosemary, and olive oil. A crisp Pinot Grigio is a lighter choice when the bread accompanies salad, mozzarella, or grilled vegetables.

Nutrition values

Serving: 1 piece | Calories: 375 kcal | koolhydraten: 65 g | Eiwitten: 9 g | Vet: 9 g | Verzadigd vet: 1 g | Natrium: 790 mg | Suiker: 1 g
————————————————————————————————–

About Garlic Rosemary Focaccia

Garlic rosemary focaccia is a soft Italian yeast bread with a golden exterior, airy centre, and deeply dimpled surface. Extra-virgin olive oil enriches the dough and helps the edges become crisp, while fresh rosemary and garlic provide a fragrant savoury topping. The bread can accompany dinner, form the base of a sandwich, or be served in strips with oil and balsamic vinegar.

This recipe has been adjusted from six portions to four. The quantities have been recalculated so the finished bread remains manageable for a smaller household while retaining the original balance between flour, water, yeast, oil, and seasoning.

Making Soft Italian Focaccia

Soft Italian focaccia depends on a dough that contains enough moisture. It should feel supple and slightly tacky rather than stiff or dry. Adding too much flour during kneading can produce a heavy bread, so dust the work surface lightly and only add more when the dough is impossible to handle.

Kneading develops gluten, giving the dough enough strength to retain the gas produced by the yeast. After approximately seven minutes, it should become smoother and more elastic. Place it in a lightly oiled bowl and keep it covered so the surface cannot dry out during rising.

Activating the Yeast Correctly

Warm water and a small amount of sugar help activate the dry yeast. After approximately 10 minutes, a frothy layer should appear. This indicates that the yeast is alive and ready to raise the dough. If no foam develops, replace the mixture before adding it to the flour.

Water temperature matters. Cold water slows the process, while excessively hot water can kill the yeast. It should feel comfortably warm when touched. The dough is ready after its first rise when it has approximately doubled in size, which may take up to 1ยฝ hours depending on room temperature.

Creating the Traditional Dimpled Surface

After the first rise, transfer the dough to a parchment-lined baking sheet and press it into an even shape. Avoid forcing it when it springs back. Let it rest for five minutes and then continue shaping once the gluten has relaxed.

Drizzle olive oil over the surface before pressing in the dimples. These indentations collect small pools of oil and give Garlic Rosemary Focaccia its recognisable appearance. Distribute the minced garlic and rosemary evenly, then finish with coarse salt.

Keep garlic pieces small and press them lightly into the dough. Garlic left sitting loosely on top can darken too quickly in the hot oven. The second rise allows the shaped bread to become airy again before baking.

Serving Ideas and Toppings

Serve focaccia with soup, pasta, roasted vegetables, or a fresh salad. It is particularly useful for absorbing sauces and flavoured oils. Browse the bread recipes, Italian collection, and side dishes for complementary meal ideas.

The topping is easy to customise. Cherry tomatoes and olives create a colourful version, while red onion adds sweetness. Parmesan gives the bread a richer finish, although it makes the recipe unsuitable for dairy-free and vegan diets. Fresh thyme, oregano, or sage can replace the rosemary.

Storing and Reheating the Bread

Focaccia tastes best on the day it is baked. Once completely cool, store it in an airtight container at room temperature for up to two days. Reheat it for several minutes in a hot oven to refresh the crust without drying the centre.

Freeze individual portions when longer storage is needed. Wrap them securely and freeze for up to two months. Thaw the bread at room temperature before reheating. Follow current FDA safe food-handling guidance when cooling, storing, and serving homemade baked goods.

With adequate kneading, two patient rises, and a generous aromatic topping, garlic rosemary focaccia delivers crisp edges, a tender crumb, and unmistakable Italian flavour.


Gaucho Pepper Grill Marinade

Gaucho grill marinade coating grilled tofu, mushrooms, zucchini and bell peppers

Gaucho Pepper Grill Marinade

Gaucho Pepper Grill Marinade combines tamari, Dijon mustard, olive oil, and plenty of black pepper. This robust Argentine-inspired marinade gives tofu, tempeh, mushrooms, and vegetables a savoury flavour for grilling, roasting, or baking.
Couverts4 servings
estimated costs pp $0.95
Deel op Facebook Print Recipe

Equipment

  • Measuring cups
  • Measuring spoons
  • Mixing Bowl, Medium
  • Whisk

Ingredients

Instructions

For the Marinade

  • Pour the tamari into a medium mixing bowl.
  • Add the extra-virgin olive oil and Dijon mustard.
  • Add the freshly ground black pepper.
  • Whisk vigorously until the marinade is smooth and emulsified.

For Marinating

  • Place tofu, tempeh, portobello mushrooms, or prepared vegetables in a shallow non-reactive container.
  • Pour the marinade evenly over the chosen ingredients.
  • Turn the ingredients several times until completely coated.
  • Cover the container and refrigerate for 8 hours.
  • Turn the ingredients once or twice during marinating to distribute the flavour.
  • Remove the ingredients from the marinade and allow the excess liquid to drain.
  • Grill, roast, or bake the marinated ingredients until cooked and browned.
  • Brush lightly with the remaining marinade during cooking.
  • Discard any used marinade after cooking.

Notes & Wine Advice

Serving Suggestions

Use this marinade with pressed tofu, tempeh, portobello mushrooms, aubergine, zucchini, bell peppers, or thick onion slices. Serve the grilled ingredients with rice, roasted potatoes, salad, or our Turkish Red Bulgur Salad.

Recipe Notes

The original quantity already produces enough marinade for four servings, so it has not been multiplied by four. Press tofu before marinating so it absorbs more flavour. Tamari is used instead of ordinary soy sauce to keep the marinade gluten-free, but it still contains soy and is not suitable for a soy-free diet.

Variations

Add one teaspoon of smoked paprika for a deeper barbecue flavour. Fresh rosemary or oregano provides an herbal variation, while one tablespoon of maple syrup balances the mustard and pepper. Add minced garlic or chilli flakes for a sharper and spicier finish.

Storage and Food Safety

Unused marinade can be refrigerated in a sealed container for up to five days. Marinade that has been in contact with raw ingredients should not be served as a sauce unless it is boiled safely first. The simplest option is to reserve a clean portion before adding the ingredients.

Wine Advice

A medium-bodied Pinot Noir complements grilled mushrooms, smoky vegetables, and black pepper. A crisp Chardonnay works particularly well with the tangy Dijon mustard and grilled tofu.

Nutrition values

Calories: 175 kcal | koolhydraten: 5 g | Eiwitten: 3 g | Vet: 16 g | Verzadigd vet: 2 g | Natrium: 1650 mg | Suiker: 1 g
————————————————————————————————–

About Gaucho Grill Marinade

Gaucho grill marinade is a bold Argentine-inspired mixture of tamari, Dijon mustard, extra-virgin olive oil, and freshly ground black pepper. It brings salty, tangy, peppery, and savoury flavours to tofu, tempeh, mushrooms, and vegetables. The simple four-ingredient mixture is especially useful for grilling because it coats ingredients evenly and helps their surfaces brown.

Traditional Argentine grilling is strongly associated with meat and open-fire cooking. This plant-based interpretation borrows the robust seasoning style while applying it to vegetables and meat alternatives. It provides enough intensity for ingredients such as tofu and mushrooms, which can absorb strong flavours without losing their own character.

Why This Argentine Marinade Works

This Argentine marinade balances three different liquid ingredients. Tamari provides salt and umami, Dijon mustard contributes tang and helps emulsify the mixture, and olive oil carries the seasoning across the surface. Freshly ground black pepper supplies warmth and gives the recipe its distinctive flavour.

Mustard also helps the oil and tamari combine temporarily. Whisk the ingredients vigorously until the marinade looks evenly blended. It may separate slightly while standing, so stir or shake it again before use. Turning the ingredients during marinating ensures that every side receives an even coating.

Choosing Ingredients to Marinate

Firm or extra-firm tofu is one of the best choices. Press it before use to remove excess moisture, then cut it into thick slabs or large cubes. Tempeh has a firmer texture and naturally nutty flavour that pairs well with mustard and pepper. Both can be refrigerated in the marinade for eight hours.

Portobello mushrooms absorb the seasoning readily and develop a rich texture on the grill. Aubergine, zucchini, bell peppers, onions, and cauliflower are also suitable. Cut vegetables into substantial pieces so they remain easy to turn and do not become overly soft during cooking.

Seitan can be marinated with this mixture, but it contains wheat gluten. Therefore, a meal prepared with seitan is not gluten-free or wheat-free even though the marinade itself can qualify when certified gluten-free tamari and mustard are used.

Getting Better Results on the Grill

Let excess marinade drain before placing the ingredients on a hot grill. Too much liquid can drip onto the heat source and prevent clean browning. Grill tofu and vegetables until marked and cooked through, turning them only when the first side releases easily.

Reserve a clean portion of the marinade before adding any ingredients when you want to brush it on during cooking. This keeps the basting portion separate and avoids cross-contamination. Browse our barbecue recipes and outdoor cooking collection for more dishes suitable for this preparation method.

Serving Ideas and Variations

Serve the grilled ingredients in rice bowls, wraps, sandwiches, or salads. They also work with roasted potatoes, corn, grilled bread, or a fresh tomato salad. Explore the vegan recipes and vegetable collection for suitable side dishes and complete meal combinations.

Smoked paprika adds a deeper fire-cooked character, while rosemary or oregano introduces herbal freshness. Maple syrup can soften the salt and mustard when a sweeter barbecue profile is preferred. Garlic, cayenne, or chilli flakes increase the marinadeโ€™s intensity.

Salt Content and Safe Storage

Tamari is naturally high in sodium, so this recipe is not suitable for a low-sodium or low-salt diet. A reduced-sodium tamari can lower the total, although the marinade will still contain a significant amount of salt. Avoid adding additional salt until the cooked food has been tasted.

Store unused Gaucho Pepper Grill Marinade in an airtight container in the refrigerator for up to five days. Discard used marinade unless it is brought to a safe boil before reuse. Follow current FDA safe food-handling guidance when marinating, refrigerating, grilling, and reusing sauces.

With only four ingredients and five minutes of preparation, gaucho grill marinade gives plant-based barbecue dishes a powerful savoury flavour and a peppery Argentine-inspired finish.


Parmesan Zucchini Pizza Crust

Parmesan zucchini pizza crust topped with mozzarella, tomatoes, peppers and fresh basil

Parmesan Zucchini Pizza Crust

Parmesan Zucchini Pizza Crust is a savoury, low-carb alternative to traditional pizza dough. Grated zucchini, Parmesan, almond flour, egg, and Italian herbs create a crisp-edged base ready for your favourite toppings.
Couverts4 servings
estimated costs pp $1.40
Deel op Facebook Print Recipe

Equipment

  • Baking sheet
  • Box grater
  • Kitchen towel
  • Mixing Bowl, Large
  • oven
  • Parchment paper

Ingredients

Instructions

For the Zucchini Crust

  • Preheat the oven to 425ยฐF (220ยฐC).
  • Line a baking sheet with parchment paper.
  • Grate the zucchini coarsely.
  • Place the grated zucchini in the centre of a clean kitchen towel.
  • Gather the towel around the zucchini and squeeze firmly to remove as much moisture as possible.
  • Transfer the drained zucchini to a large mixing bowl.
  • Add the grated Parmesan cheese, almond flour, egg, garlic powder, dried oregano, kosher salt, and black pepper.
  • Stir until the ingredients form a moist, dough-like mixture.
  • Transfer the mixture to the prepared baking sheet.
  • Press it into an even round approximately ยผ inch thick.
  • Bake for 20 minutes until the centre is firm and the edges are golden and crisp.

For the Toppings

  • Remove the baking sheet carefully from the oven.
  • Spread the desired sauce and toppings evenly over the crust.
  • Return the pizza to the oven.
  • Bake for another 7 minutes until the toppings are hot and the cheese has melted.
  • Let the pizza rest for 5 minutes before slicing and serving.

Notes & Wine Advice

Serving Suggestions

Top the crust lightly with tomato sauce, mozzarella, mushrooms, bell peppers, olives, or fresh basil. Serve it with our Classic Italian Caprese Salad or a leafy green salad for a complete meal. Avoid overly wet toppings because they can soften the vegetable crust.

Recipe Notes

Removing moisture from the grated zucchini is essential. Squeeze it firmly in a clean kitchen towel until very little liquid remains. Spread the mixture in an even layer so the centre cooks at the same rate as the edges. Let the baked pizza rest before slicing so the crust can firm up.

Variations

Replace the dried oregano with Italian seasoning or dried basil. Add chilli flakes for gentle heat or finely chopped rosemary for a stronger herbal flavour. Pecorino Romano can replace the Parmesan. For individual pizzas, divide the mixture into four smaller rounds and begin checking them earlier.

Storage and Reheating

Refrigerate the untopped or finished crust in an airtight container for up to three days. Separate stacked portions with parchment paper. Reheat them in a hot oven or air fryer until warmed through and crisp around the edges. Microwave reheating will produce a softer crust.

Wine Advice

A crisp Pinot Grigio complements the zucchini, Parmesan, and herbs. A dry Rosรฉ is another suitable choice when the pizza is topped with tomatoes, peppers, olives, or fresh basil.

Nutrition values

Calories: 285 kcal | koolhydraten: 10 g | Eiwitten: 18 g | Vet: 21 g | Verzadigd vet: 6 g | Natrium: 650 mg | Suiker: 3 g
————————————————————————————————–

About Parmesan Zucchini Pizza Crust

Parmesan Zucchini Pizza Crust transforms fresh zucchini into a savoury, gluten-free pizza base with golden edges and a tender centre. Instead of wheat flour and yeast, the recipe uses almond flour, grated Parmesan, and egg to bind the vegetables together. Garlic and oregano supply familiar Italian flavours, making the crust suitable for tomato sauce, cheese, vegetables, and other pizza toppings.

This recipe is particularly useful during summer, when zucchini is plentiful and an alternative to traditional bread-based pizza is welcome. The crust contains fewer carbohydrates than conventional pizza dough, but it should not be expected to have exactly the same texture. It remains slightly softer and more delicate than a wheat crust while still being firm enough to slice and serve.

Removing Moisture from the Zucchini

Zucchini contains a considerable amount of water. If that moisture remains in the mixture, the crust can become soft, wet, and difficult to lift from the baking sheet. Squeezing the grated zucchini is therefore the most important preparation step in the entire recipe.

Place the zucchini in the centre of a clean kitchen towel, gather the fabric around it, and twist firmly. Continue squeezing until very little liquid comes through the towel. The volume of zucchini will reduce noticeably. This concentrated vegetable pulp forms a much more stable base and allows Parmesan Zucchini Pizza Crust to develop crisp edges.

How the Low-Carb Pizza Base Holds Together

Almond flour absorbs some remaining moisture while adding a mild nutty flavour. Egg acts as the primary binder, and Parmesan melts into the mixture as it cooks. The cheese also supplies salt, savoury depth, and browning. Together, these ingredients create a low-carb pizza base without conventional flour.

Press the mixture into an even layer approximately ยผ inch thick. A crust that is too thick may remain soft in the middle, while an extremely thin one can become brittle around the edges. Keeping the thickness consistent helps the entire base finish cooking at approximately the same time.

Pre-Baking for a Firmer Result

The crust must be baked before any sauce or toppings are added. This initial baking period sets the egg, melts the Parmesan, and evaporates additional moisture. It also produces the golden surface needed to support the toppings.

Once the centre feels firm and the edges are browned, remove the baking sheet and add a restrained quantity of toppings. Too much tomato sauce or a large pile of moisture-rich vegetables can undo the work of draining and pre-baking the zucchini. Drain fresh mozzarella and cook watery mushrooms or spinach before using them.

Pizza Toppings and Serving Ideas

Tomato sauce, mozzarella, sliced cherry tomatoes, and basil make a simple Italian-inspired pizza. Pesto can replace the tomato sauce; try our Broccoli Sunflower Seed Pesto for a vegetable-rich variation. Mushrooms, peppers, olives, onions, artichokes, and grilled aubergine are also suitable.

Explore the pizza recipes for more topping ideas or browse the vegetable collection for seasonal combinations. The crust can also be baked as four individual rounds for personalised pizzas, which works particularly well for children or casual family dinners.

Dietary Considerations

This recipe contains no wheat flour and can be gluten-free when all packaged ingredients are certified accordingly. It is also suitable for vegetarian, low-carb, and keto-style menus. However, almond flour means the crust is not nut-free, while Parmesan and egg make it unsuitable for vegan, dairy-free, lactose-free, and egg-free diets.

People with strict dietary or allergy requirements should inspect the labels on Parmesan, almond flour, dried herbs, and any chosen toppings. Cross-contact can occur during manufacturing even when an ingredient does not naturally contain gluten or soy.

Storage and Reheating

Allow leftover pizza to cool before refrigerating it in an airtight container for up to three days. Place parchment paper between slices to prevent sticking. Reheat the pizza in a hot oven or air fryer to refresh the edges. A microwave can be used, but it will make the vegetable crust softer.

Follow current FDA safe food-handling guidance when storing dishes containing eggs and cheese. With thoroughly drained zucchini, an even thickness, and careful topping, Parmesan Zucchini Pizza Crust provides a flavourful vegetable-based alternative to ordinary pizza dough.


Sicilian Sheet Pan Dough

Sicilian pizza dough baked into a thick golden sheet pan crust with tomato sauce and mozzarella

Sicilian Sheet Pan Dough

Sicilian Sheet Pan Dough creates a thick, fluffy pizza base with a crisp golden underside and pleasantly chewy centre. This easy yeast dough is ideal for tomato sauce, mozzarella, vegetables, herbs, and other favourite pizza toppings.
Couverts4 servings
estimated costs pp $0.60
Deel op Facebook Print Recipe

Equipment

  • Baking sheet
  • Kitchen towel
  • Mixing Bowl, Large
  • oven
  • plastic wrap
  • Rolling Pin

Ingredients

Instructions

For the Dough

  • Pour the warm water into a large mixing bowl.
  • Add the granulated sugar and stir until dissolved.
  • Sprinkle the active dry yeast over the water.
  • Let the mixture stand for 10 minutes until frothy.
  • Add the olive oil and kosher salt to the activated yeast.
  • Gradually add the all-purpose flour while stirring.
  • Continue mixing until a rough dough forms.
  • Transfer the dough to a lightly floured work surface.
  • Knead for 7 minutes until the dough is smooth and elastic.
  • Place the dough in a lightly greased mixing bowl.
  • Cover the bowl with plastic wrap or a clean kitchen towel.
  • Let the dough rise in a warm place for 1ยฝ hours or until doubled in size.

For Shaping and Baking

  • Preheat the oven to 425ยฐF (220ยฐC).
  • Grease a baking sheet lightly with olive oil.
  • Press down the risen dough gently to release excess air.
  • Transfer the dough to the prepared baking sheet.
  • Roll or stretch the dough evenly to fit the baking sheet.
  • Cover the dough loosely and let it rest for 15 minutes.
  • Bake the untopped pizza base for 15 minutes until lightly golden and beginning to crisp.
  • Remove the baking sheet carefully from the oven.
  • Add the desired sauce, cheese, vegetables, and other toppings.
  • Return the pizza to the oven.
  • Bake for another 7 minutes until the crust is golden and the cheese is melted and bubbling.
  • Let the pizza rest briefly before slicing and serving.

Notes & Wine Advice

Serving Suggestions

Top the pizza base with tomato sauce, fresh mozzarella, sliced tomatoes, basil, and olive oil. Mushrooms, roasted peppers, olives, onions, artichokes, or grilled zucchini are also suitable. Serve the pizza with our Classic Italian Caprese Salad for a complete Italian-inspired meal.

Recipe Notes

The water should feel warm but not hot because excessive heat can kill the yeast. A properly activated yeast mixture becomes foamy within 10 minutes. Greasing the baking sheet with olive oil prevents sticking and helps create the characteristic crisp underside.

Variations

Replace 100 grams of all-purpose flour with fine semolina for a slightly firmer texture. Add dried oregano, garlic powder, or finely chopped rosemary to the dough. For a whole-wheat variation, replace up to half of the all-purpose flour with whole-wheat flour and add a little extra water when necessary.

Storage and Freezing

Refrigerate risen dough in a lightly oiled, covered bowl for up to 24 hours. Allow it to return to room temperature before shaping. The dough can also be frozen after its first rise for up to three months. Thaw it overnight in the refrigerator before bringing it to room temperature.

Wine Advice

A crisp Italian Pinot Grigio works well with mozzarella, tomato, and vegetable toppings. For pizzas topped with mushrooms, cured meat, or a rich tomato sauce, choose a light-bodied Sangiovese.

Nutrition values

Calories: 515 kcal | koolhydraten: 96 g | Eiwitten: 13 g | Vet: 8 g | Verzadigd vet: 1 g | Natrium: 490 mg | Suiker: 1 g
————————————————————————————————–

About Sicilian Pizza Dough

Sicilian pizza dough creates a thick, airy base with a crisp olive-oil-coated underside and a soft, pleasantly chewy interior. Unlike a thin round pizza, this dough is stretched across a baking sheet and allowed to retain enough thickness to develop a bread-like crumb. It provides a sturdy base for tomato sauce, cheese, vegetables, herbs, and other generous toppings.

This recipe uses six basic ingredients: flour, water, yeast, olive oil, sugar, and salt. The preparation is straightforward, but the rising and resting periods should not be rushed. These pauses give the yeast time to produce air bubbles and allow the gluten to relax, making the dough easier to stretch without tearing or springing back.

Creating a Thick Pizza Crust

A successful thick pizza crust begins with correctly activated yeast. The water should be comfortably warm rather than hot. Sugar gives the yeast an immediate food source, and a layer of foam should appear after approximately 10 minutes. If the mixture remains completely inactive, the yeast may be expired or the water may have been too hot or cold.

Gradually incorporating the flour makes it easier to judge the texture. The dough should be soft and slightly tacky but manageable. Avoid adding large amounts of extra flour during kneading because an overly dry dough produces a dense crust. Seven minutes of kneading develops enough gluten to hold the gases created during rising.

Rising and Shaping the Dough

Place the kneaded dough in a lightly greased bowl and cover it to prevent the surface from drying out. A warm, draught-free location helps it rise reliably. After approximately 1ยฝ hours, the dough should have doubled in volume. Room temperature affects this process, so visual appearance is more dependable than the clock alone.

Press the risen dough down gently and transfer it to an oiled baking sheet. Stretch it towards the corners with your fingertips or use a rolling pin. If it repeatedly contracts, leave it untouched for five minutes before continuing. This short pause relaxes the gluten and makes shaping Sicilian Sheet Pan Dough considerably easier.

Why the Base Is Baked First

Pre-baking the untopped base helps prevent a soggy centre, particularly when using tomato sauce, fresh mozzarella, or moisture-rich vegetables. During this initial bake, the dough begins to set and the olive-oil-coated bottom becomes lightly crisp. The toppings are then added and baked until hot and bubbling.

Spread sauces and toppings evenly, but avoid overloading the base. Excess sauce or watery vegetables can soften the crust. Drain fresh mozzarella thoroughly and cook mushrooms, zucchini, or spinach before adding them when they contain considerable moisture.

Topping and Serving Ideas

A classic combination includes tomato sauce, mozzarella, basil, and extra-virgin olive oil. For another Italian flavour, spread a small amount of our Broccoli Sunflower Seed Pesto over the base. Browse the pizza collection for additional topping combinations and serving ideas.

Roasted peppers, onions, olives, mushrooms, artichokes, aubergine, and zucchini all work well. Meat toppings should be cooked before being distributed over the pizza. Serve the finished pizza with a fresh dish from the salad recipes or explore more traditional ideas in the Italian recipe collection.

Making the Dough Ahead

The dough can be prepared a day before baking. After kneading, place it in a lightly oiled covered bowl and refrigerate it. The slower cold rise develops a deeper flavour. Remove the dough from the refrigerator approximately one hour before shaping so it can soften and return towards room temperature.

To freeze the dough, let it complete its first rise, press out the excess air, and wrap it securely. Freeze it for up to three months. Thaw it overnight in the refrigerator and let it warm before stretching. Follow current FDA safe food-handling guidance when storing dough and handling perishable pizza toppings.

With adequate rising time, gentle shaping, and a lightly oiled baking sheet, Sicilian pizza dough produces a dependable homemade base that remains fluffy inside while becoming crisp and golden underneath.


Honey Peanut Butter Dip

Honey peanut butter dip served with apple slices, bananas, strawberries and pretzels

Honey Peanut Butter Dip

Honey Peanut Butter Dip is a smooth, protein-rich snack made with creamy peanut butter, Greek yogurt, honey, and vanilla. Serve it with fresh fruit, pretzels, crackers, or vegetable sticks for an easy party dip or lunchbox treat.
Couverts4 servings
estimated costs pp $0.65
Deel op Facebook Print Recipe

Equipment

  • Measuring cups
  • Measuring spoons
  • Mixing Bowl, Medium
  • serving bowl
  • Whisk

Ingredients

Instructions

  • Add the creamy peanut butter and Greek yogurt to a medium mixing bowl.
  • Pour in the honey and vanilla extract.
  • Add a pinch of kosher salt.
  • Whisk until the ingredients form a smooth and creamy dip.
  • Taste and add a small amount of extra honey when additional sweetness is desired.
  • Transfer the peanut butter dip to a serving bowl.
  • Serve immediately with fresh fruit, pretzels, crackers, or vegetable sticks.

Notes & Wine Advice

Serving Suggestions

Serve the dip with apple wedges, banana pieces, strawberries, pear slices, grapes, pretzels, or whole-grain crackers. Celery and carrot sticks provide a less sweet option. It can also be spooned over pancakes, waffles, oatmeal, or our Mojito Berry Fruit Salad.

Recipe Notes

Use smooth peanut butter for the creamiest consistency. Natural peanut butter may need to be stirred thoroughly before measuring because its oil can separate. When the dip is too thick, whisk in one teaspoon of milk at a time until it reaches the desired consistency.

Variations

Add ground cinnamon, cocoa powder, finely chopped dark chocolate, or a little orange zest. For a crunchier texture, stir in chopped roasted peanuts. Greek yogurt can be replaced with a thick dairy-free yogurt, and maple syrup can replace the honey when preparing a vegan variation.

Storage

Transfer leftover dip to an airtight container and refrigerate it for up to four days. Stir well before serving because the ingredients may separate slightly during storage. Do not freeze the dip, as thawing can make the yogurt grainy and watery.

Wine Advice

A lightly sweet Riesling complements the honey and roasted peanut flavour. A fruity dry Rosรฉ is a fresher option when the dip is served with strawberries, apples, or other fresh fruit.

Nutrition values

Calories: 180 kcal | koolhydraten: 12 g | Eiwitten: 6 g | Vet: 14 g | Verzadigd vet: 3 g | Natrium: 125 mg | Suiker: 8 g
————————————————————————————————–

About Honey Peanut Butter Dip

Honey Peanut Butter Dip is a quick, creamy snack that combines nutty peanut butter with tangy Greek yogurt, floral honey, and aromatic vanilla. The mixture takes only five minutes to prepare and requires no cooking. Its smooth texture makes it suitable for dipping fruit, pretzels, crackers, and vegetable sticks, while its familiar flavour appeals to both children and adults.

The recipe makes four portions and works well as an afternoon snack, lunchbox addition, simple dessert, or party dip. Peanut butter supplies richness and protein, while Greek yogurt lightens the consistency and adds a pleasant tang. Honey provides enough sweetness to turn the mixture into a treat without making it taste like cake frosting.

Why This Creamy Fruit Dip Works

This creamy fruit dip uses a small number of ingredients that each perform a clear role. Peanut butter forms the thick base, Greek yogurt makes it lighter and easier to scoop, and honey balances the yogurtโ€™s acidity. Vanilla adds warmth and gives the mixture a dessert-like aroma. A pinch of salt strengthens the peanut flavour and prevents the sweetness from becoming flat.

The dip requires no food processor or electric mixer. A whisk is sufficient when the peanut butter is soft and thoroughly stirred. If the peanut butter has been refrigerated, let it stand at room temperature briefly before mixing. This makes it easier to combine with the yogurt and produces a smoother result.

Choosing the Ingredients

Conventional creamy peanut butter produces the most stable and consistent dip. Natural peanut butter also works, but its separated oil must be mixed back into the spread before measuring. Choose a variety without large peanut pieces when you want an especially smooth texture.

Plain Greek yogurt provides body and prevents Honey Peanut Butter Dip from becoming runny. Full-fat yogurt creates the richest result, while low-fat Greek yogurt makes a lighter dip. Flavoured yogurt is not recommended because it can introduce too much sugar and compete with the honey and vanilla.

Use a mild honey so its flavour supports rather than overwhelms the peanuts. Strong varieties can still work, but they will become more noticeable in the finished dip. For a vegan version, replace the Greek yogurt with a thick plant-based yogurt and use maple syrup instead of honey.

Easy Serving Ideas

Apple wedges and banana pieces are natural partners for the sweet, nutty dip. Strawberries, pears, grapes, pineapple, and melon also work well. Brush sliced apples or pears lightly with lemon juice when preparing them in advance to slow browning. Browse our fruit recipes for more serving inspiration.

For a sweet-and-salty snack board, add pretzels, crackers, rice cakes, and toasted bread. Celery sticks offer a crisp, refreshing contrast and turn the dip into a variation on the familiar peanut-butter-and-celery snack. Explore the snack collection and dip recipes for more easy combinations.

Customising the Flavour

A small amount of ground cinnamon gives the dip a warmer flavour that pairs especially well with apples and pears. Cocoa powder creates a chocolate-peanut variation, while chopped dark chocolate adds texture. Orange zest, toasted coconut, or chopped roasted peanuts can also be stirred through the finished mixture.

If the dip is too thick, add milk one teaspoon at a time. If it becomes too thin, add a little more peanut butter or Greek yogurt. Make these adjustments gradually because the consistency changes quickly. When serving the dip at a party, place it in a shallow bowl so fruit and crackers can be dipped easily.

Storage and Food Safety

Keep Honey Peanut Butter Dip refrigerated in an airtight container and use it within four days. Stir it before serving if a small amount of liquid collects on the surface. Keep the dip chilled until shortly before serving and discard portions that have remained at room temperature for an extended period.

Use separate utensils when serving anyone with a peanut allergy and remember that this recipe is not nut-free. Follow current FDA safe food-handling guidance when storing yogurt-based dips and serving foods containing common allergens.

With only five ingredients and five minutes of preparation, Honey Peanut Butter Dip provides a practical balance of creamy texture, gentle sweetness, and satisfying peanut flavour.


Champagne Dijon Sauce

Champagne Dijon sauce served warm over sliced grilled beef

Champagne Dijon Sauce

Champagne Dijon Sauce is an elegant French-inspired sauce combining dry Champagne, tangy Dijon mustard, cream, butter, and fresh tarragon. Serve this smooth sauce over grilled steak, roasted beef, or beef tenderloin.
Couverts4 servings
estimated costs pp $1.60
Deel op Facebook Print Recipe

Equipment

  • Measuring cups
  • Measuring spoons
  • Saucepan, Small
  • Whisk

Ingredients

Instructions

  • Combine the Champagne and Dijon mustard in a small saucepan.
  • Place the saucepan over medium heat and bring the mixture to a gentle simmer, whisking occasionally.
  • Reduce the heat to low once the Champagne mixture begins to simmer.
  • Stir in the heavy cream.
  • Simmer gently for 3 to 4 minutes until the sauce thickens slightly.
  • Add the unsalted butter and whisk until it has melted completely and the sauce is smooth.
  • Stir in the chopped fresh tarragon.
  • Season with kosher salt and freshly ground black pepper to taste.
  • Remove the saucepan from the heat.
  • Drizzle the warm sauce over grilled steak, roasted beef, or beef tenderloin and serve immediately.

Notes & Wine Advice

Serving Suggestions

Spoon the warm sauce over grilled ribeye, filet mignon, roast beef, or beef tenderloin. Complete the meal with roasted asparagus, green beans, mashed potatoes, or our White Wine Rosemary Potatoes. A crisp green salad provides a fresh contrast to the creamy sauce.

Recipe Notes

Use dry Champagne or another good-quality dry sparkling wine. Allow the wine and mustard to simmer before adding the cream, but keep the heat low afterward to prevent the sauce from separating. Whisk in the butter near the end to give the sauce a smooth, glossy finish.

Variations

Replace fresh tarragon with finely chopped chives or parsley for a milder herbal flavour. Add a minced shallot before the Champagne for extra savoury depth. For a thicker sauce, let the Champagne reduce for another two minutes before adding the cream. Brandy can replace a small portion of the Champagne for a richer variation.

Storage and Reheating

Store leftover sauce in an airtight container in the refrigerator for up to three days. Reheat it slowly in a small saucepan over low heat while whisking frequently. Do not let it boil because excessive heat can cause the cream and butter to separate.

Wine Advice

Serve the sauce with the same dry Champagne or sparkling wine used in its preparation. An unoaked Chardonnay is a suitable still-wine alternative, particularly when the sauce accompanies beef tenderloin or a delicately seasoned steak.

Nutrition values

Serving: 2 tablespoons | Calories: 95 kcal | koolhydraten: 3 g | Eiwitten: 1 g | Vet: 8 g | Verzadigd vet: 5 g | Natrium: 210 mg | Suiker: 1 g
————————————————————————————————–

About Champagne Dijon Sauce

Champagne Dijon Sauce is an elegant finishing sauce that gives grilled or roasted beef a refined French-inspired character. Dry Champagne provides acidity and a delicate fruitiness, while Dijon mustard contributes tang and gentle heat. Heavy cream softens these sharper flavours, and butter creates a rich, glossy finish. Fresh tarragon completes the sauce with a subtle anise-like aroma that pairs especially well with mustard and wine.

Despite its luxurious presentation, the sauce takes only about 15 minutes to prepare. It is therefore an excellent option when you want to make steak, beef tenderloin, or roast beef feel suitable for a dinner party without adding a complicated preparation. Explore our beef recipes for more dishes that benefit from a rich finishing sauce.

Why This Champagne Mustard Sauce Works

Champagne mustard sauce succeeds because its rich and sharp ingredients balance one another. The wineโ€™s acidity cuts through the natural richness of beef, while Dijon mustard gives the sauce enough intensity to remain noticeable alongside a well-seared steak. Cream rounds out the acidity without removing its freshness, and butter helps bind the ingredients into a smooth consistency.

Simmering the Champagne and mustard first is an important part of the method. This step reduces some of the liquid, concentrates the flavour, and cooks away much of the wineโ€™s raw alcoholic sharpness. Once the cream is added, the heat should remain low. Gentle cooking allows the sauce to thicken while reducing the risk of curdling or separating.

Choosing the Champagne and Mustard

A dry Champagne, Crรฉmant, Cava, or other dry sparkling wine can be used. Avoid a noticeably sweet wine because sweetness may overwhelm the mustard and make the finished sauce taste unbalanced. You do not need the most expensive bottle, but choose one that you would be happy to drink with the meal.

Smooth Dijon mustard is ideal because it blends evenly into the cream. Whole-grain mustard can be substituted when you prefer more texture and a slightly rustic appearance. Fresh tarragon is included rather than treated as optional because its herbal flavour gives Champagne Dijon Sauce a distinctive French profile. If tarragon is unavailable, chives provide a milder alternative.

Serving the Dijon Cream Sauce

This Dijon cream sauce is particularly good with filet mignon and beef tenderloin, whose mild flavours leave room for the Champagne and tarragon to shine. It also complements ribeye, sirloin, roast beef, and grilled steak. For another complete beef dish, try our Balsamic Ribeye Steak Salad.

Serve roasted potatoes, asparagus, mushrooms, or green beans alongside the beef. Our White Wine Rosemary Potatoes reinforce the wine notes and absorb the extra sauce. For more inspiration, browse the sauce collection and side-dish recipes.

Variations for Other Meals

Although designed for beef, Champagne Dijon Sauce can also accompany roasted chicken or pork tenderloin. For a complementary pork option with a sweeter profile, see our White Wine Ham Glaze. When serving lamb, our Lemon Dijon Lamb Sauce offers a brighter alternative.

A finely minced shallot can be softened in the butter before the Champagne is added. This produces a deeper savoury flavour and slightly more texture. For a stronger herbal character, add extra tarragon immediately before serving. A teaspoon of lemon juice can brighten the finished sauce if the cream has softened the acidity too much.

Storage and Food Safety

Champagne Dijon Sauce is best served immediately, while its texture is smooth and glossy. Refrigerate leftovers in a sealed container for up to three days. Reheat them gently over low heat and whisk continuously. If the sauce becomes too thick, loosen it with a teaspoon of cream or water.

Do not boil the sauce during reheating, as high heat can cause the dairy ingredients to separate. Follow current FDA safe food-handling guidance when cooling, refrigerating, and reheating cream-based sauces.

With its combination of sparkling wine, Dijon mustard, cream, butter, and tarragon, this sauce turns a straightforward beef dinner into a polished meal. Its short preparation time and balanced flavour make it equally useful for intimate dinners, festive holidays, and elegant entertaining.


White Wine Ham Glaze

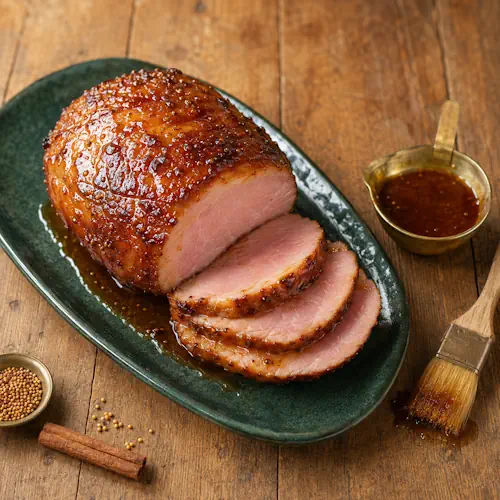
White wine ham glaze with Dijon mustard, brown sugar, cinnamon and cloves on roasted ham

White Wine Ham Glaze

White Wine Ham Glaze combines Sauvignon Blanc, Dijon mustard, brown sugar, apple cider vinegar, tamari, and warm spices. It creates a glossy, caramelised finish for roasted ham.
Couverts4 servings
estimated costs pp $1.25
Deel op Facebook Print Recipe

Equipment

Ingredients

Instructions

  • Pour the white wine into a small saucepan.
  • Add the Dijon mustard, brown sugar, apple cider vinegar, tamari, cinnamon, and cloves.
  • Set the saucepan over medium heat.
  • Whisk until the sugar has dissolved.
  • Bring the mixture to a gentle simmer.
  • Reduce the heat to low.
  • Simmer for 15 minutes while stirring frequently.
  • Remove the saucepan from the heat when the glaze has slightly thickened.
  • Whisk in the olive oil and black pepper.
  • Reserve a clean portion of the glaze for serving.
  • Brush the remaining glaze over the cooked ham during the final 20 minutes of roasting.
  • Apply another layer of glaze every 5 minutes.
  • Remove the ham from the oven when the surface is glossy and caramelised.
  • Serve with the reserved wine sauce.

Notes & Wine Advice

Serving Suggestions

Use the glaze during the final 20 minutes of roasting a fully cooked ham. Serve the ham with roasted potatoes, green beans, glazed carrots, Brussels sprouts, or a fresh salad. Offer the reserved sauce separately at the table.

Recipe Notes

Simmer the glaze gently and stir frequently because the brown sugar can scorch. The mixture thickens further as it cools. Reserve the serving portion before the basting brush touches the ham to prevent cross-contamination.

Variations

Replace the white wine with apple juice for an alcohol-free glaze. Add orange zest, maple syrup, honey, ginger, or smoked paprika for a different flavour. Whole-grain mustard can replace part of the Dijon mustard for extra texture.

Dietary Advice

Use certified gluten-free tamari and Dijon mustard when necessary. The glaze is dairy-free, egg-free, lactose-free, nut-free, and wheat-free. It contains soy and alcohol and is therefore unsuitable for soy-free or alcohol-free diets.

Wine Advice

Use a fruity, dry Sauvignon Blanc in the glaze and serve the same wine with the meal. A light Pinot Noir also complements the sweet, savoury, and gently spiced ham.

Nutrition values

Serving: 2 tablespoons | Calories: 80 kcal | koolhydraten: 18 g | Eiwitten: 1 g | Vet: 2 g | Verzadigd vet: 0 g | Natrium: 490 mg | Suiker: 9 g
————————————————————————————————–

About White Wine Ham Glaze

White Wine Ham Glaze combines dry white wine, Dijon mustard, brown sugar, apple cider vinegar, tamari, cinnamon, and cloves. This mustard ham glaze creates a glossy, sweet, tangy, and savoury coating that caramelises during the final stage of roasting.

The glaze is designed for four servings and works particularly well with recipes from our Pork Recipes category. It can also be used in smaller quantities with roasted chicken, pork tenderloin, pork chops, or other savoury dishes that benefit from a sweet wine sauce.

White Wine Ham Glaze

Dry white wine provides acidity, fruitiness, and depth without making the glaze overly sweet. Sauvignon Blanc is a useful choice because its fresh character balances the brown sugar and rich ham. Use a wine that you would also be comfortable serving with the meal.

The alcohol reduces while the sauce simmers and during roasting, but some may remain. Replace the wine with apple juice or alcohol-free white wine when preparing the glaze for children or anyone who avoids alcohol.

Balancing Mustard and Brown Sugar

Dijon mustard cuts through the sweetness and gives the sauce a smooth consistency. It also helps combine the wine, vinegar, and olive oil. Choose certified gluten-free mustard when that dietary requirement applies.

Dark brown sugar contains molasses, providing a deeper flavour than white sugar. It also encourages the surface of the ham to caramelise. Stir the glaze frequently as it simmers because sugar can settle against the bottom of the saucepan and burn.

Mustard Ham Glaze

This mustard ham glaze receives additional savoury flavour from tamari. Tamari is used instead of regular soy sauce so the recipe can remain gluten-free, but the packaging must still be checked for certification. Because tamari is salty, the glaze does not need additional salt.

Apple cider vinegar prevents the sugar from becoming cloying. Cinnamon and cloves add gentle warmth associated with holiday cooking. Measure both carefully because too much can overpower the wine, mustard, and natural flavour of the ham.

Creating a Caramelised Finish

Apply the glaze only during the final 20 minutes of roasting. Adding it too early can cause the sugar to burn before the ham is thoroughly heated. Brush on a thin, even layer and repeat every five minutes to build a glossy coating.

Watch the surface closely during the final minutes. Caramelised sugar can change from golden to burned quickly. If the glaze darkens too rapidly, loosely cover the ham with foil or reduce the oven temperature.

Serving with Holiday Meals

White Wine Ham Glaze is particularly suitable for dishes collected under our Christmas Recipes, Easter Recipes, and Sauce Recipes categories. Serve the glazed ham with roasted potatoes, carrots, green beans, Brussels sprouts, or baked squash.

For another mustard-based sauce with a fresher lemon flavour, try our Lemon Dijon Lamb Sauce. That recipe pairs naturally with lamb but can also accompany roasted vegetables and other grilled meats.

Safe Basting and Storage

Reserve some clean glaze before beginning to baste the ham. Place that portion in a separate container for serving. Do not dip a brush that has touched meat back into sauce intended for the table.

Refrigerate unused glaze in an airtight container for up to three days. Reheat it gently in a saucepan and add a splash of wine or water if it becomes too thick. Follow current FDA safe food-handling guidance when heating, serving, cooling, and storing ham.

White Wine Ham Glaze gives roasted ham a glossy surface and a balanced combination of wine, mustard, sweetness, and warm spice.