Dark Chocolate Orange Mousse

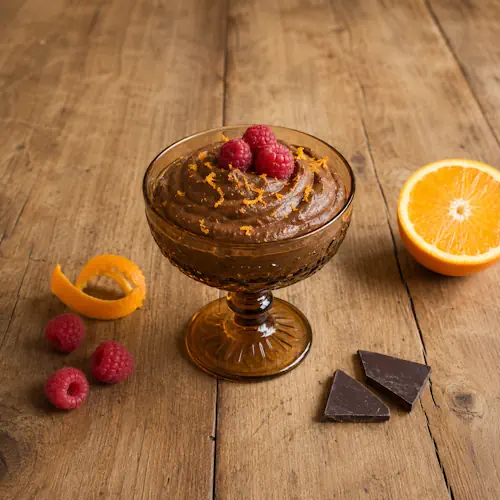
Dark chocolate orange mousse topped with fresh raspberries and finely grated orange zest

Dark Chocolate Orange Mousse

Dark Chocolate Orange Mousse is a light yet intensely flavoured dessert made with dark chocolate, orange zest, cocoa, coffee, Greek yogurt, and whipped egg whites. Fresh raspberries provide a bright finishing touch.
Couverts4 servings
Preparation 20 minutes
Preparation time:5 minutes
Chilling Time 2 hours
estimated costs pp $1.20
Deel op Facebook Print Recipe

Equipment

  • Electric hand mixer
  • Heatproof Mixing Bowl
  • Mixing Bowls, 2 Small
  • Ramekins or Dessert Glasses, 4
  • Saucepan, Small
  • Silicone spatula
  • Whisk
  • Zester

Ingredients

For the Chocolate Mousse

  • 80 g Gluten-Free Dark Chocolate chopped
  • 1 tablespoon Gluten-Free Cocoa Powder
  • ยฝ teaspoon Gluten-Free Instant Coffee
  • 1 medium Orange finely grated zest
  • 2 tablespoons Water
  • 2 large Pasteurised Egg Whites
  • 1 tablespoon Caster Sugar
  • 50 g Fat-Free Greek Yogurt

For Serving

  • 100 g Fresh Raspberries

Instructions

For the Chocolate Mixture

  • Fill a small saucepan with approximately 1 inch of water.
  • Bring the water to a gentle simmer.
  • Place the chopped dark chocolate in a heatproof mixing bowl.
  • Set the bowl over the saucepan without allowing its base to touch the water.
  • Stir occasionally until the chocolate has completely melted.
  • Remove the bowl from the saucepan.
  • Let the melted chocolate cool slightly.
  • Combine the cocoa powder, instant coffee, orange zest, and water in a small mixing bowl.
  • Stir until smooth.
  • Add the cocoa mixture to the melted chocolate.
  • Whisk until evenly combined.
  • Stir the Greek yogurt into the cooled chocolate mixture.

For the Egg Whites

  • Place the pasteurised egg whites in a clean mixing bowl.
  • Whisk with an electric hand mixer until soft peaks form.
  • Gradually add the caster sugar.
  • Continue whisking until the egg whites are thick and glossy.

For the Mousse

  • Fold one-quarter of the whipped egg whites into the chocolate mixture.
  • Add the remaining egg whites.
  • Fold gently until evenly combined without knocking out too much air.
  • Divide the mousse among four ramekins or dessert glasses.
  • Cover and refrigerate for 2 hours.

For Serving

  • Remove the mousse from the refrigerator shortly before serving.
  • Top each portion with fresh raspberries.
  • Serve chilled.

Notes & Wine Advice

Serving Suggestions

Serve the mousse chilled with fresh raspberries, orange segments, grated dark chocolate, or a small spoonful of whipped cream. Add crisp almond biscuits for texture when nut allergies are not a concern. For a larger dessert table, serve it alongside our Balsamic Strawberry Mango Salad.

Recipe Notes

Allow the melted chocolate to cool slightly before adding the yogurt and egg whites. Chocolate that is too hot can deflate or partially cook the whites. Fold gently with a silicone spatula to retain enough air for a light texture. Pasteurised egg whites are used because the mousse is not fully cooked.

Variations

Replace the raspberries with strawberries, blueberries, or orange segments. Add a pinch of cinnamon or chilli powder for warmth. For a stronger coffee flavour, increase the instant coffee slightly. Milk chocolate can be used, but it will produce a sweeter and less intense mousse.

Homemade Chocolate Orange Wedges

For a firmer alternative, melt 200 grams of gluten-free dark chocolate with 20 grams of unsalted butter and the zest of one orange. Pour the mixture into two orange-skin halves lined with plastic wrap. Let it set, remove it from the skins, and cut it into ten wedges.

Wine Advice

A small glass of Banyuls complements the dark chocolate and orange without becoming overwhelmed. A lightly sparkling Moscato dโ€™Asti is a fresher option when the mousse is served with raspberries or strawberries.

Nutrition values

Serving: 1 ramekin | Calories: 189 kcal | koolhydraten: 21 g | Eiwitten: 5 g | Vet: 10 g | Verzadigd vet: 6 g | Natrium: 35 mg | Suiker: 14 g
————————————————————————————————–

About Dark Chocolate Orange Mousse

Dark chocolate orange mousse combines rich chocolate, fragrant orange zest, cocoa, coffee, Greek yogurt, and airy whipped egg whites. Fresh raspberries provide acidity and colour, creating a balanced dessert that feels indulgent without requiring cream or a large amount of added sugar.

The recipe makes four individual portions and requires only five minutes of gentle heating to melt the chocolate. Two hours of chilling allows the mousse to set and gives the chocolate, coffee, and orange flavours time to blend.

Why Orange Chocolate Mousse Works

Orange chocolate mousse uses citrus zest rather than juice in the chocolate base. The zest contains aromatic oils that provide a strong orange flavour without adding much liquid. This helps preserve the mousseโ€™s light but stable consistency.

Coffee is included in a small quantity to strengthen the dark chocolate flavour. The finished dessert should not taste strongly of coffee. Cocoa powder deepens the chocolate character, while Greek yogurt adds tang and prevents the mousse from becoming excessively rich.

Melting the Chocolate Safely

A heatproof bowl set over gently simmering water melts the chocolate gradually. The bottom of the bowl must not touch the water because direct heat can cause the chocolate to overheat. Keep steam and water away from the chocolate, as even a small amount can make it seize.

Stir only occasionally until the pieces have melted. Remove the bowl from the heat and allow the chocolate to cool slightly before adding the cocoa mixture and yogurt. It should remain fluid but should no longer feel hot.

Creating a Light Mousse Texture

Whipped egg whites provide the air that gives this dessert its mousse texture. Use a clean, grease-free bowl because traces of fat can prevent the whites from whipping correctly. Beat them to soft peaks before gradually adding the caster sugar.

Adding one-quarter of the whipped whites first loosens the chocolate mixture. The remaining whites can then be folded in more easily. Use broad, gentle movements with a silicone spatula and stop as soon as no white streaks remain.

Using Pasteurised Egg Whites

The egg whites are not heated to a temperature that reliably destroys harmful bacteria. Pasteurised egg whites are therefore the safer choice, particularly when serving children, older adults, pregnant people, or anyone with a weakened immune system.

Carton egg whites may whip differently between brands, so check that the product is suitable for whipping. Keep the mousse refrigerated until serving and do not leave it at room temperature for an extended period.

Serving and Decorating

Fresh raspberries balance the richness of Dark Chocolate Orange Mousse and make each portion visually appealing. Strawberries, blueberries, orange segments, or cherries can also be used. Grated chocolate or thin strips of orange zest create a simple decorative finish.

For another chocolate dessert, try our Chocolate White Chocolate Banana Bread. Browse the chocolate recipes, dessert collection, and fruit recipes for more combinations.

Preparing the Mousse Ahead

The mousse can be prepared the day before serving. Cover each ramekin or glass and refrigerate it, then add the raspberries shortly before presentation. This prevents the berries from releasing moisture onto the surface.

Store leftovers in the refrigerator and use them within two days. Freezing is not recommended because the yogurt and egg-white structure may separate after thawing.

Food Safety and Storage

Use fresh, pasteurised egg whites and clean equipment. Refrigerate the mousse promptly after dividing it among the serving dishes. Keep it covered to prevent it from absorbing odours from other refrigerated foods.

Follow current FDA safe food-handling guidance when working with eggs, dairy products, fresh berries, and chilled desserts.

With carefully melted chocolate, gently folded egg whites, and a bright citrus finish, dark chocolate orange mousse delivers a light texture and an intense dessert flavour.
Balsamic Strawberry Mango Salad

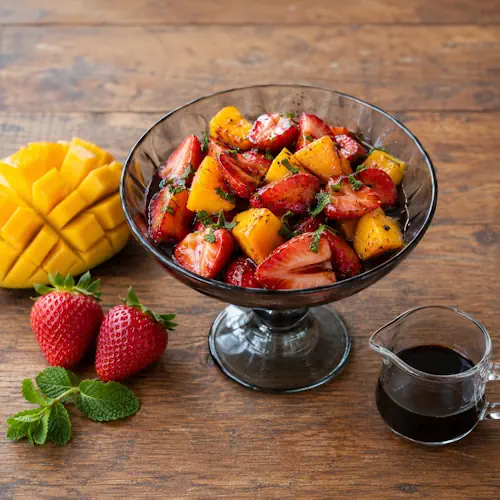
Balsamic strawberry mango salad with fresh mint and glossy fruit syrup in four serving bowls

Balsamic Strawberry Mango Salad

Balsamic Strawberry Mango Salad combines ripe strawberries and sweet mango with balsamic vinegar, sugar, and fresh mint. Overnight chilling creates a fruity syrup and gives this colourful no-cook dessert a rich, tangy finish.
Couverts4 servings
Preparation 10 minutes
Chilling and Standing Time 9 hours
estimated costs pp $2.25
Deel op Facebook Print Recipe

Equipment

Ingredients

  • 500 g Strawberries hulled and thickly sliced
  • 1 large Mango peeled, pitted and sliced
  • 2 tablespoons Caster Sugar
  • 3 tablespoons Balsamic Vinegar
  • 2 tablespoons Fresh Mint chopped

Instructions

  • For the Fruit Salad
  • Place the sliced strawberries in a large shallow non-metallic mixing bowl.
  • Add the sliced mango.
  • Sprinkle the caster sugar evenly over the fruit.
  • Pour the balsamic vinegar over the strawberries and mango.
  • Toss gently until all the fruit is lightly coated.
  • Cover the bowl tightly with plastic wrap.
  • Refrigerate the fruit for 8 hours.
  • For Serving
  • Remove the fruit from the refrigerator.
  • Let it stand at room temperature for 1 hour.
  • Stir the fruit gently to redistribute the balsamic syrup.
  • Divide the strawberries and mango among four serving bowls.
  • Drizzle the remaining syrup over each portion.
  • Sprinkle with chopped fresh mint.
  • Serve at room temperature.

Notes & Wine Advice

Serving Suggestions

Serve the fruit at room temperature so the mango, strawberries, and balsamic syrup have their fullest flavour. Enjoy it on its own or spoon it over vanilla ice cream, Greek yogurt, panna cotta, pancakes, waffles, or sponge cake. For a larger fruit selection, add our Mojito Berry Fruit Salad.

Recipe Notes

Use a glass, ceramic, or food-safe plastic bowl because balsamic vinegar can react with some metals. Choose ripe but firm fruit so it retains its shape during overnight chilling. Allowing the salad to stand before serving removes the refrigerator chill and improves its flavour.

Variations

Replace the mango with 125 grams of blueberries for a berry-focused variation. Add several grinds of black pepper before serving to accentuate the sweetness of the strawberries. Fresh basil can replace the mint, while orange zest adds a brighter citrus aroma.

Storage

Store the covered fruit salad in the refrigerator and use it within two days. The fruit will gradually soften and release more juice. Freezing is not recommended because the strawberries and mango will lose their fresh texture after thawing.

Wine Advice

A lightly sparkling Moscato dโ€™Asti complements the ripe strawberries and mango without overpowering them. A chilled dry Rosรฉ provides a fresher contrast to the sweet fruit and tangy balsamic syrup.

Nutrition values

Serving: 1 bowl | Calories: 110 kcal | koolhydraten: 27 g | Eiwitten: 1 g | Vet: 0 g | Verzadigd vet: 0 g | Natrium: 5 mg | Suiker: 23 g
————————————————————————————————–

About Balsamic Strawberry Mango Salad

Balsamic strawberry mango salad combines ripe summer fruit with caster sugar, balsamic vinegar, and fresh mint. Overnight chilling allows the strawberries and mango to release their juices, creating a naturally colourful syrup with a balance of sweetness and acidity. The result is a simple no-cook dessert for four.

The fruit is served at room temperature rather than directly from the refrigerator. This small step makes the flavours more noticeable and allows the balsamic syrup to loosen. Fresh mint provides colour and a cooling herbal finish immediately before serving.

Why Balsamic Fruit Salad Works

Balsamic fruit salad works because the vinegarโ€™s acidity balances the natural sweetness of ripe fruit. Good balsamic vinegar also contributes subtle caramel and grape flavours that complement strawberries particularly well. Mango adds tropical sweetness and a softer texture.

Caster sugar draws liquid from the fruit through osmosis. As the strawberries and mango rest, this liquid combines with the vinegar to form a thin syrup. The fruit therefore seasons itself without requiring cooking or a separately prepared dressing.

Choosing the Best Strawberries

Look for strawberries with an even red colour, fresh green leaves, and no soft or damaged patches. Large berries should be cut into thick slices so they remain recognisable after chilling. Very thin slices may soften too much overnight.

Wash the strawberries before removing their leaves. Washing them after hulling allows water to enter the fruit, which can dilute their flavour. Dry them thoroughly before slicing so the balsamic mixture remains concentrated.

Preparing the Mango

Choose a mango that gives slightly when pressed but does not feel mushy. An underripe mango will be firm and tart, while an overripe one may collapse when tossed with the strawberries. Slice the flesh into pieces similar in thickness to the strawberries.

Mango varieties differ in sweetness and fibre. Smooth, ripe flesh produces the most pleasant texture. If the mango is exceptionally sweet, the balsamic vinegar becomes particularly useful for keeping the dessert balanced.

Chilling and Serving the Fruit

Use a shallow non-metallic bowl so more fruit comes into contact with the sugar and balsamic vinegar. Glass or ceramic is ideal. Cover the bowl securely to prevent the fruit from absorbing refrigerator odours.

After eight hours of chilling, remove the salad and let it stand for one hour. Stir gently before dividing it among four bowls. Spoon the syrup from the bottom over every portion and add the mint only at the end so it remains fresh and green.

Easy Serving Ideas

Serve the salad plain for a light dessert or pair it with vanilla ice cream, whipped cream, mascarpone, or Greek yogurt. It also makes a colourful topping for pancakes, waffles, French toast, cheesecake, or pavlova.

For another warm-weather dessert, browse the fruit recipes, dessert collection, and no-bake recipes. During colder months, our Spiced Red Wine Pears provide a warmer fruit-based alternative.

Variations and Flavour Additions

Blueberries can replace the mango or be added alongside it. Fresh raspberries, peaches, nectarines, or pineapple also work, although softer fruits should be folded in carefully. Black pepper may sound unusual, but a small amount intensifies the strawberry flavour.

Fresh basil creates a more savoury herbal note, while orange or lemon zest adds brightness. Chopped pistachios can provide crunch, but they make the dessert unsuitable for a nut-free diet. Avoid adding them when serving guests with allergies.

Storage and Food Safety

Keep the prepared fruit refrigerated and use it within two days. The texture becomes softer over time as the sugar and vinegar continue drawing out moisture. Always use a clean serving spoon and return leftovers to the refrigerator promptly.

Follow current FDA safe food-handling guidance when washing, preparing, storing, and serving fresh fruit. With ripe ingredients and enough resting time, balsamic strawberry mango salad delivers a bright and refreshing summer dessert.


Orange Citrus Shortbread Cookies

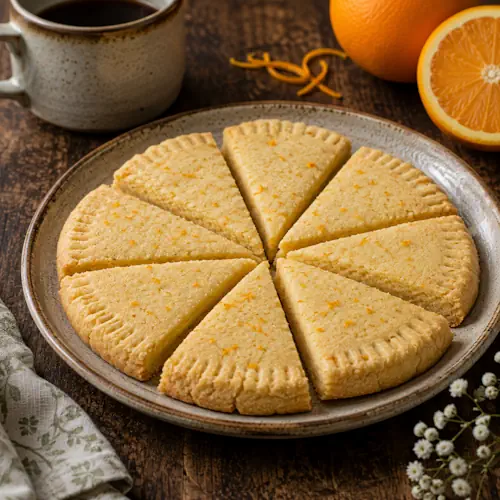
Buttery gluten-free orange shortbread cookies arranged on a rustic ceramic plate with fresh oranges and coffee on a warm dark wooden table.

Orange Citrus Shortbread Cookies

Buttery gluten-free shortbread cookies with a fresh orange flavour and delicate crumbly texture. These simple citrus cookies are lightly golden, crisp and perfect with coffee, tea or as part of a homemade high tea.
Couverts4
Total time 45 minutes
estimated costs pp $0.85
Deel op Facebook Print Recipe

Equipment

  • airtight container
  • Baking sheet
  • Mixing bowl
  • Rolling Pin
  • Wire rack

Ingredients

  • ยฝ teaspoon baking powder gluten-free
  • 100 g butter unsalted and softened, plus extra for greasing
  • 50 g caster sugar
  • 175 g plain flour gluten-free
  • 1 orange rind finely grated

Instructions

  • Beat the softened butter in a mixing bowl until smooth. Add the caster sugar and grated orange rind and cream together until light and fluffy.
  • Add the plain flour and baking powder and mix until a soft dough forms.
  • Roll the dough into a circle approximately 5 mm thick and decorate the edge with the back of a fork.
  • Cut the dough into 10 equal wedges and transfer them to a greased baking sheet. Chill for 15 minutes.
  • Preheat the oven to 190ยฐC (375ยฐF), Gas Mark 5.
  • Bake for 12โ€“15 minutes, until lightly golden.
  • Leave the cookies on the baking sheet for 2 minutes, then transfer them to a wire rack and cool completely.
  • Store in an airtight container at room temperature for 3โ€“4 days.

Notes & Wine Advice

Serving Advice

Serve these orange shortbread cookies with freshly brewed coffee or tea, or include them as part of a relaxed High Tea. They are also delicious with fresh orange segments, Greek yogurt or a small scoop of vanilla ice cream.

Recipe Notes

Use finely grated orange rind without the bitter white pith for the freshest citrus flavour. Chilling the shaped dough for 15 minutes helps the cookies retain their shape during baking. Allow them to cool completely on a wire rack, as the shortbread becomes firmer and crisper as it cools.

Variations

For a stronger citrus flavour, add a little extra finely grated orange rind. The same basic shortbread can also be prepared with lemon rind for a different citrus variation. Keep all flour and baking powder gluten-free when preparing the cookies for a gluten-free diet.

Storage Advice

Allow the cookies to cool completely before placing them in an airtight container. Store at room temperature for 3 to 4 days to maintain their crisp, crumbly texture. For more recipes suitable for preparing and storing, browse the Store Food recipes.

Wine Advice

A lightly sweet Moscato dโ€™Asti is an excellent match for these orange shortbread cookies. Its gentle sweetness, fresh fruit and delicate bubbles complement the buttery texture and bright citrus flavour without overpowering the cookies.

Nutrition values

Serving: 65 gr | Calories: 37047 kcal | koolhydraten: 5 g | Eiwitten: 20 g | Vet: 12 g | Verzadigd vet: 12 g | Natrium: 135 mg | Suiker: 14 g
————————————————————————————————–

About Orange Citrus Shortbread Cookies

Orange Citrus Shortbread Cookies combine the rich, crumbly character of traditional shortbread with the fresh fragrance of orange. Butter, caster sugar and flour form the simple foundation, while finely grated orange rind gives every bite a light citrus flavour. Using gluten-free plain flour makes this version suitable for anyone looking for a homemade Gluten-Free treat.

The Character of Shortbread

Shortbread is known for its simple ingredients and distinctive buttery texture. Unlike many other cookies, it does not rely on eggs to bind the dough. Butter provides both richness and structure, while sugar contributes sweetness and helps create the delicate texture.

The small amount of baking powder in this recipe gives the cookies a slightly lighter result while preserving the characteristic shortbread crumb. Because the ingredient list is short, the quality and flavour of the butter are particularly noticeable.

Adding Fresh Orange Flavour

Fresh orange rind transforms the basic shortbread dough without adding extra liquid. The aromatic oils in the outer orange peel provide plenty of citrus flavour while allowing the dough to retain the consistency required for rolling and shaping.

Grate only the coloured outer layer of the orange. The white pith underneath can taste bitter and does not provide the same fragrant citrus character.

Working with Gluten-Free Flour

Gluten-free shortbread behaves slightly differently from conventional wheat-based dough because it lacks gluten. Handle the dough gently and avoid unnecessary working once the ingredients have come together.

Roll it to approximately 5 mm thick before cutting it into wedges. Keeping the pieces similar in size helps them bake evenly and gives the finished batch a consistent appearance.

Why Chill the Dough?

The shaped cookies are refrigerated for 15 minutes before baking. Chilling firms the butter again after the dough has been mixed and rolled, helping the wedges retain their shape when they enter the hot oven.

This short resting period is particularly useful for maintaining the decorative edge made with the back of a fork. Transfer the chilled baking sheet directly to the preheated oven for the best result.

Baking the Shortbread

The cookies bake at 190ยฐC until lightly golden. Shortbread does not need to become deeply browned. A pale golden colour indicates that the cookies are baked while preserving their delicate texture.

Leave them on the baking sheet for approximately 2 minutes after removing them from the oven. Freshly baked shortbread is fragile, so this short cooling period makes the wedges easier to transfer safely to the wire rack.

Serving with Coffee or Tea

The buttery texture and fresh orange flavour make these cookies particularly suitable for serving with coffee or tea. They can be included among other small cakes and biscuits for a High Tea or served simply as an afternoon treat.

Fresh orange segments provide a light accompaniment, while Greek yogurt or vanilla ice cream can turn the cookies into a more substantial Dessert.

Cookies for Special Occasions

Homemade shortbread is easy to portion and store, making these orange cookies suitable for Gift-Giving. Once completely cool, they can be packed carefully in a suitable airtight container.

The delicate citrus flavour also makes them suitable for occasions such as Motherโ€™s Day, a weekend tea or another special gathering.

Storing Homemade Shortbread

Moisture is the main enemy of crisp shortbread. Always allow the cookies to cool completely before storing them, otherwise trapped warmth can create condensation inside the container and soften their texture.

Stored in an airtight container at room temperature, the cookies should remain at their best for approximately 3 to 4 days. Keep them away from direct sunlight and sources of heat.

A Simple Gluten-Free Treat

Using gluten-free plain flour and gluten-free baking powder makes it possible to retain the familiar simplicity of shortbread without conventional wheat flour. When cooking for someone with a strict gluten-free requirement, always check individual ingredient labels and consider possible cross-contact during preparation.

These Orange Citrus Shortbread Cookies bring together buttery richness, crisp edges and fragrant orange in a straightforward homemade Treats recipe. Their simple preparation and bright citrus flavour make them equally at home beside an everyday cup of tea or on a carefully arranged high-tea table.

Zesty Lemon Coconut Cookies

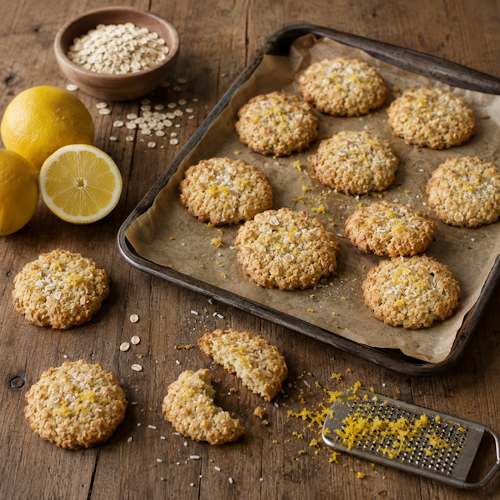
Lemon coconut cookies topped with desiccated coconut and fresh lemon zest

Zesty Lemon Coconut Cookies

Zesty Lemon Coconut Cookies combine fresh lemon juice and zest with oats, millet flakes, and desiccated coconut. These crisp-edged, softly textured cookies are gluten-free, dairy-free, egg-free, and ideal for afternoon tea or a sweet snack.
Couverts4 servings
Preparation 20 minutes
Preparation time:15 minutes
estimated costs pp $1.20
Deel op Facebook Print Recipe

Equipment

  • Baking sheet
  • Fine grater
  • Large mixing bowl
  • Measuring cups
  • Measuring spoons
  • medium mixing bowl
  • Parchment paper
  • Silicone spatula
  • wire cooling rack

Ingredients

For the Wet Mixture

  • 125 ml Olive Oil
  • 4 tablespoons Unsweetened Soya Yogurt
  • 1 medium Lemon juiced
  • 2 medium Lemons zested

For the Dry Mixture

  • 125 g Light Muscovado Sugar
  • 165 g Gluten-Free All-Purpose Flour
  • 75 g Gluten-Free Rolled Oats
  • 40 g Millet Flakes
  • 40 g Desiccated Coconut

For the Topping

  • 1 tablespoon Desiccated Coconut
  • 1 medium Lemon zested

Instructions

Prepare the Wet Mixture

  • Pour the olive oil into a medium mixing bowl.
  • Add the unsweetened soya yogurt.
  • Add the lemon juice and the zest of two lemons.
  • Whisk until evenly combined.

Prepare the Dry Mixture

  • Place the light muscovado sugar in a large mixing bowl.
  • Add the gluten-free all-purpose flour.
  • Add the gluten-free rolled oats, millet flakes, and desiccated coconut.
  • Stir until the dry ingredients are evenly combined.

Make the Cookie Dough

  • Pour the wet mixture into the dry mixture.
  • Stir with a silicone spatula until a soft dough forms.
  • Divide the dough into 20 evenly sized portions.
  • Roll each portion into a ball.

Shape and Bake the Cookies

  • Preheat the oven to 350ยฐF (180ยฐC).
  • Line a baking sheet with parchment paper.
  • Arrange the dough balls on the prepared baking sheet with space between them.
  • Press each ball down gently to form a thick cookie.
  • Sprinkle the cookies with the remaining desiccated coconut.
  • Finish with the zest of one lemon.
  • Bake for 12 to 15 minutes until lightly golden.

Cool the Cookies

  • Remove the baking sheet from the oven.
  • Allow the cookies to cool on the baking sheet for 5 minutes.
  • Transfer them to a wire cooling rack.
  • Let the Zesty Lemon Coconut Cookies cool completely before serving.

Notes & Wine Advice

Serving Suggestions

Serve these cookies with tea, coffee, fresh fruit, or dairy-free yogurt. They also work well on a high-tea platter or packaged in a small airtight container as a homemade gift.

Recipe Notes

Use certified gluten-free flour and rolled oats when preparing the cookies for someone with coeliac disease. Finely grate only the yellow part of the lemon peel because the white pith underneath has a bitter flavour.

Variations

Add vanilla extract, ground ginger, poppy seeds, or finely chopped dried apricots. Orange can replace the lemon for a sweeter citrus flavour. Sunflower oil can replace the olive oil when a more neutral-tasting cookie is preferred.

Storage

Store the completely cooled cookies in an airtight container at room temperature and consume them within three days. Place parchment paper between layers to prevent sticking. The cookies can also be frozen for up to one month.

Wine Advice

A lightly sparkling Moscato dโ€™Asti complements the lemon and coconut without overpowering their fresh flavours. A sweet Riesling is another suitable choice for dessert or high tea.

Nutrition values

Serving: 5 cookies | Calories: 730 kcal | koolhydraten: 90 g | Eiwitten: 9 g | Vet: 38 g | Verzadigd vet: 9 g | Natrium: 70 mg | Suiker: 35 g
————————————————————————————————–

About Zesty Lemon Coconut Cookies

Lemon Coconut Cookies combine fresh lemon juice and zest with desiccated coconut, rolled oats, and millet flakes. Soya yogurt keeps the dough moist without dairy, while muscovado sugar provides a subtle caramel flavour. These fragrant cookies have crisp edges, a tender centre, and plenty of fresh citrus character.

The recipe contains no eggs, dairy products, or wheat-based flour. It is therefore suitable for several dietary requirements when every packaged ingredient is certified gluten-free. The cookies work well as an afternoon snack, a high-tea treat, or a homemade edible gift.

Using Fresh Lemon

Fresh lemon juice supplies acidity and a clean citrus flavour. Lemon zest contains aromatic oils that give the cookies a stronger fragrance without adding more liquid. Use a fine grater and remove only the yellow outer layer because the white pith underneath tastes bitter.

Wash and dry the lemons before grating them. Zest the fruit before squeezing because an intact lemon is easier to handle. The topping of lemon zest and coconut makes the flavour immediately recognisable and gives the baked cookies a lightly textured surface.

Oats, Millet and Coconut

Gluten-free rolled oats add structure and a slightly chewy texture. Millet flakes contribute a mild, nutty flavour and help prevent the cookies from becoming overly soft. Desiccated coconut absorbs moisture while supporting both the flavour and texture.

People with coeliac disease should use oats specifically labelled gluten-free. Standard oats may come into contact with wheat, barley, or rye during growing, transport, or processing. Check the flour, baking ingredients, yogurt, and millet flakes for suitable labelling as well.

Preparing the Cookie Dough

Mix the liquid and dry ingredients separately before combining them. This distributes the sugar, grains, coconut, and flour evenly. Stir only until a soft dough forms. If the dough feels very sticky, allow it to rest for five minutes so the oats and coconut can absorb some moisture.

Divide the dough into 20 evenly sized balls so the cookies bake at the same rate. Press each ball down gently because the dough may not spread considerably in the oven. Leave enough room between the portions for hot air to circulate.

Baking and Cooling

Bake the cookies until their edges and surfaces become lightly golden. They may still feel slightly soft when removed from the oven but will firm as they cool. Leave them on the baking sheet for several minutes before moving them to a wire rack.

Cooling on a rack prevents condensation from collecting underneath. Wait until the cookies have cooled completely before storing them. Warm cookies release steam inside a closed container, which can make their texture soft and sticky.

Serving Ideas and Variations

Serve Lemon Coconut Cookies with tea, coffee, fresh berries, or dairy-free yogurt. They also pair naturally with our Fresh Organic Carrot Juice at breakfast or brunch. For a larger selection of homemade treats, add our Spiced Carrot Lentil Muffins.

Add poppy seeds, vanilla, ground ginger, or chopped dried apricots for variation. Orange juice and zest can replace the lemon for a sweeter citrus cookie. Use sunflower oil instead of olive oil when you prefer a neutral background flavour.

Storage and Food Safety

Store the cooled cookies in an airtight container at room temperature and consume them within three days. Place parchment paper between layers if the surfaces feel slightly sticky. Freeze them in a sealed freezer-safe container for up to one month and thaw at room temperature.

Follow current FDA safe food-handling guidance when preparing ingredients and storing baked products. With fresh citrus, textured grains, and coconut, Lemon Coconut Cookies offer a bright alternative to traditional gluten-free biscuits.


Spiced Carrot Lentil Muffins

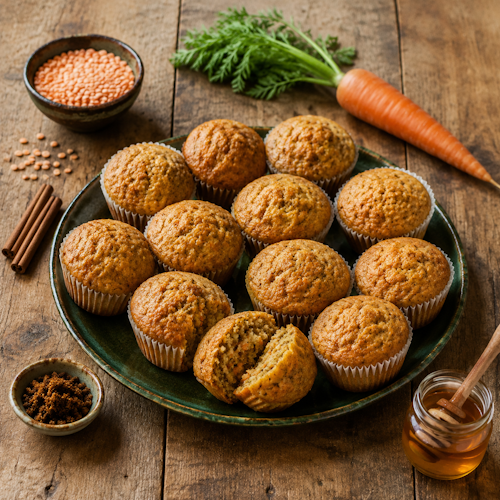
Spiced carrot lentil muffins with grated carrot and warming spices

Spiced Carrot Lentil Muffins

Spiced Carrot Lentil Muffins combine red lentils, grated carrot, apple sauce, flaxseed, and warming spices. These gluten-free muffins are softly sweetened with muscovado sugar and honey and make a nourishing breakfast or snack.
Couverts4 servings
Preparation 25 minutes
Preparation time:20 minutes
Total time 45 minutes
estimated costs pp $1.05
Deel op Facebook Print Recipe

Equipment

  • 12-hole muffin tin
  • blender or food processor
  • Box grater
  • Fine-mesh sieve
  • Large mixing bowl
  • Measuring cups
  • Measuring spoons
  • medium saucepan
  • paper muffin cases
  • Silicone spatula
  • wire cooling rack

Ingredients

For the Lentils

  • 75 g Red Lentils
  • 275 ml Water

For the Dry Mixture

  • 275 g Gluten-Free All-Purpose Flour
  • 2 tablespoons Ground Flaxseed
  • 1ยฝ teaspoons Gluten-Free Baking Powder
  • 50 g Dark Muscovado Sugar
  • 1 teaspoon Ground Cinnamon
  • ยฝ teaspoon Ground Cloves

For the Wet Mixture

  • 3 tablespoons Gluten-Free Apple Sauce
  • 3 tablespoons Clear Honey
  • 3 tablespoons Sunflower Oil
  • 1 large Egg
  • 1 large Carrot peeled and grated
  • 3 tablespoons Unsweetened Soya Milk

Instructions

Prepare the Lentils

  • Place 12 paper muffin cases in a 12-hole muffin tin.
  • Add the red lentils and water to a medium saucepan.
  • Bring the water to a boil over medium-high heat.
  • Reduce the heat and simmer the lentils for 8 minutes until soft.
  • Drain the lentils thoroughly and allow them to cool slightly.

Prepare the Dry Mixture

  • Place the gluten-free all-purpose flour in a large mixing bowl.
  • Add the ground flaxseed and gluten-free baking powder.
  • Add the dark muscovado sugar, ground cinnamon, and ground cloves.
  • Whisk until the dry ingredients are evenly combined.

Prepare the Wet Mixture

  • Transfer the drained lentils to a blender or food processor.
  • Add the apple sauce, clear honey, sunflower oil, and egg.
  • Blend until smooth and evenly combined.
  • Pour the wet mixture into the dry ingredients.
  • Begin folding the mixtures together with a silicone spatula.
  • Add the grated carrot when the batter is almost combined.
  • Pour in the unsweetened soya milk.
  • Fold gently until no dry patches remain.

Bake the Muffins

  • Preheat the oven to 350ยฐF (180ยฐC).
  • Divide the batter evenly among the 12 prepared muffin cases.
  • Bake for 18 to 20 minutes until risen and golden.
  • Insert a toothpick into the centre of a muffin to check that it is baked through.
  • Remove the muffin tin from the oven.
  • Transfer the muffins to a wire cooling rack.
  • Allow the Spiced Carrot Lentil Muffins to cool before serving.

Notes & Wine Advice

Serving Suggestions

Serve the muffins at breakfast, during brunch, or as a portable afternoon snack. They pair well with fresh fruit, dairy-free yogurt, apple slices, or a small amount of nut-free seed butter.

Recipe Notes

Drain the cooked lentils thoroughly so they do not make the batter too wet. Fold the wet and dry mixtures together only until combined. Overmixing can make gluten-free muffins dense rather than tender.

Variations

Add orange zest, raisins, chopped dates, or a small amount of ground ginger. Maple syrup can replace the honey for a different flavour. Check the consistency before baking and add a small amount of extra soya milk only if the batter is too firm.

Storage

Store the cooled muffins in an airtight container at room temperature for up to two days or refrigerate them for up to five days. They can also be frozen for up to two months. Thaw individual muffins before reheating briefly.

Wine Advice

A lightly sparkling Moscato dโ€™Asti complements the carrot, honey, cinnamon, and cloves. For breakfast, tea, coffee, or fresh carrot juice is a more natural pairing.

Nutrition values

Serving: 3 3 muffins | Calories: 423 kcal | koolhydraten: 72 g | Eiwitten: 10 g | Vet: 12 g | Verzadigd vet: 2 g | Natrium: 260 mg | Suiker: 24 g
————————————————————————————————–

About Spiced Carrot Lentil Muffins

Spiced Carrot Lentil Muffins combine cooked red lentils, grated carrot, apple sauce, flaxseed, and warming spices in a softly sweetened gluten-free bake. Muscovado sugar and honey provide sweetness, while cinnamon and cloves give the muffins a warm aroma. They are suitable for breakfast, brunch, picnics, or a portable snack.

Red lentils may sound unusual in a muffin recipe, but their mild flavour blends easily with the carrot and spices. Once cooked and processed, they create a smooth purรฉe that adds moisture and structure. The finished muffins taste more like gently spiced carrot cake than a savoury lentil dish.

Why Red Lentils Work in Muffins

Red lentils soften quickly and break down more readily than green or brown varieties. Simmer them until tender, then drain them thoroughly. Excess cooking water can make the batter too wet and prevent the muffins from rising properly.

Blending the lentils with the apple sauce, honey, oil, and egg creates a smooth wet mixture. This distributes the lentils evenly and prevents noticeable pieces from remaining in the crumb. Allow them to cool slightly before blending so the egg is not exposed to excessive heat.

Preparing the Carrot

Use a fresh, firm carrot and grate it finely. Fine strands soften during baking and blend into the muffins more successfully than thick pieces. There is no need to squeeze out the moisture because the carrot helps keep the gluten-free crumb tender.

Carrot pairs naturally with cinnamon, cloves, apple, and dark muscovado sugar. For another simple way to use this vegetable, try our Fresh Organic Carrot Juice or nutrient-rich Carrot Spinach Juice.

Working with Gluten-Free Flour

Choose a gluten-free all-purpose flour blend intended for baking. Different blends absorb liquid differently, so the consistency may vary slightly. The batter should be thick enough to hold its shape but soft enough to divide easily among the paper cases.

Ground flaxseed helps bind the ingredients and supports the structure of the crumb. Gluten-free baking powder supplies the lift. Check every packaged ingredient carefully when baking for someone with coeliac disease because cross-contamination can occur during manufacturing.

Mixing and Baking

Combine the dry ingredients thoroughly before adding the lentil mixture. Fold gently and add the grated carrot when the batter is nearly combined. Avoid prolonged mixing because it can produce heavy muffins, even when gluten-free flour is used.

Divide the batter evenly among 12 paper cases so all the muffins bake at the same rate. They are ready when risen, lightly golden, and a toothpick inserted in the centre comes out without wet batter. Transfer them to a wire rack to prevent condensation around the paper cases.

Serving Ideas and Variations

Serve the carrot and lentil muffins with fresh fruit, dairy-free yogurt, apple sauce, or a warm drink. Three muffins form one generous serving, but individual muffins also work well as smaller snacks. They can be included in a brunch spread alongside our Macadamia Yogurt Granola.

Add raisins, chopped dates, orange zest, or ground ginger for variation. Maple syrup can replace the honey, although the flavour and moisture level may change slightly. Sunflower seeds or pumpkin seeds can be sprinkled over the batter before baking for extra texture.

Storage and Food Safety

Allow Spiced Carrot Lentil Muffins to cool completely before storing them. Keep them in an airtight container at room temperature for up to two days or refrigerate them for up to five days. Freeze individual muffins for up to two months and thaw them before reheating.

Follow current FDA safe food-handling guidance when working with eggs, cooling baked goods, and storing leftovers. With their tender texture, warming spices, and less familiar lentil ingredient, Spiced Carrot Lentil Muffins offer a practical alternative to standard carrot muffins.


Crispy Carrot & Cumin Seed Crackers

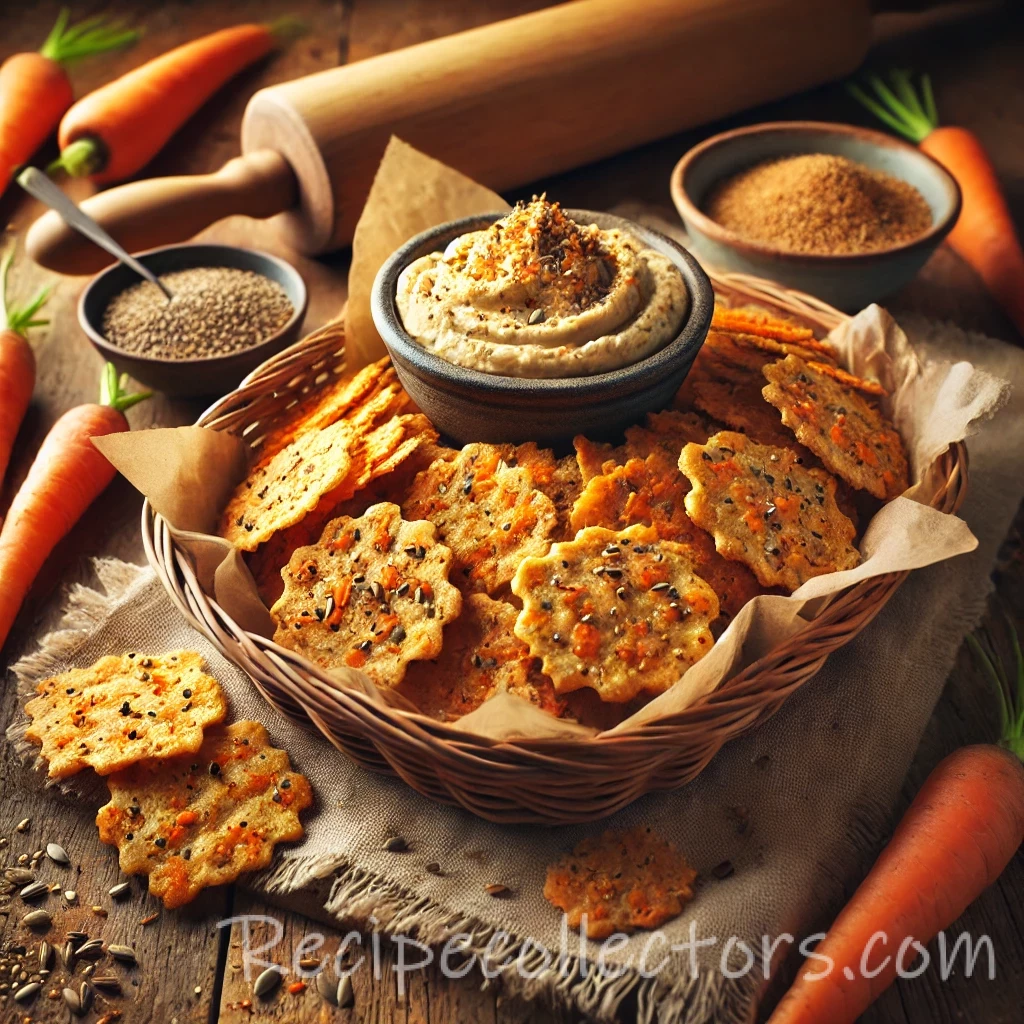
Crispy Carrot & Cumin Seed Crackers

Crunchy carrot and cumin seed crispbreads, packed with seeds and flavor, perfect for snacking.
Couverts20
Preparation 10 minutes
Preparation time:30 minutes
Total time 35 minutes
Deel op Facebook Print Recipe

Equipment

  • Baking sheet
  • blender or food processor
  • Wire rack

Ingredients

  • 100 g whole Almonds toasted
  • 2 Carrots peeled and grated
  • 1 ยฝ tbsp Cumin seeds
  • 1 tbsp Olive oil + extra for greasing
  • 50 g Pumpkin seeds
  • 50 g Sesame seeds
  • 50 g Sunflower seeds
  • 3 tbsp Pesto
  • 2-3 tbsp cold Water

Instructions

  • Place the sunflower, pumpkin, and sesame seeds, almonds, and 1 tablespoon of the cumin seeds in a blender or food processor and pulse until broken down.
  • Add the grated carrots, pesto, oil, and water and process until a thick paste forms.
  • Spread the crispbread mixture over a greased baking sheet to about 5 mm (ยผ inch) thick, then score into 20 rectangles and sprinkle over the remaining cumin seeds.
  • Bake in a preheated oven, 200ยฐC (400ยฐF), Gas Mark 6, for 25 minutes until golden and firm.
  • Cut through the score lines to separate the crispbreads, then turn over and bake for a further 5โ€“6 minutes until crisp and golden.
  • Transfer to a wire rack and leave to cool.
  • Store in an airtight container and eat within 4โ€“5 days.

Notes & Wine Advice

Serving Tip:
Store in an airtight container and eat within 4โ€“5 days.
Wine Advice:
(Wine pairing is not typically applicable for crispbreads, but consider a light, dry white wine like Pinot Grigio if serving with dips or cheese.)

Nutrition values

Calories: 100 kcal | koolhydraten: 5 g | Eiwitten: 4 g | Vet: 8 g | Suiker: 1 g
————————————————————————————————–

Smoked Salmon Sesame Blini Bites

Smoked Salmon Sesame Blini Bites

Savory gluten-free blinis topped with smoked salmon, crรจme fraรฎche, and sesame seeds, perfect for appetizers.
Couverts25
Preparation 20 minutes
Preparation time:20 minutes
Deel op Facebook Print Recipe

Equipment

  • blender or food processor
  • Frying pan

Ingredients

  • Chopped Chives to garnish
  • 2 tbsp chopped Coriander leaves
  • 4 tbsp low-fat Crรจme fraรฎche
  • 1 Egg
  • 100 g gluten-free plain Flour
  • 1 red Chilli deseeded and chopped
  • Salt and pepper
  • 150 ml soya Yogurt
  • 8 spring Onions finely sliced
  • 150 g smoked Salmon sliced
  • 1 tbsp Sesame seeds
  • 1 tbsp Sunflower oil
  • 2 tbsp cold Water

Instructions

  • Place the flour, egg, yogurt, and water in a blender or food processor and process to form a smooth batter.
  • Pour into a bowl, then stir in the chili, spring onions, coriander, sesame seeds, salt, and pepper.
  • Cover and chill for 20 minutes.
  • Heat a frying pan with a little of the oil and then wipe with kitchen paper.
  • Add dessertspoonfuls of the mixture and cook for 1 minute on each side until lightly golden, then remove from the pan and keep warm.
  • Repeat with the remaining batter.
  • Top each blini with a little dollop of crรจme fraรฎche, a piece of smoked salmon, and a sprinkling of chopped chives and sprinkle with a little extra pepper.

Notes & Wine Advice

Serving Tip:
Serve immediately for the best texture and flavor.
Wine Advice:
Pair with a dry sparkling wine like Prosecco or a crisp Sauvignon Blanc to complement the smoked salmon.

Nutrition values

Calories: 70 kcal | koolhydraten: 5 g | Eiwitten: 4 g | Vet: 4 g | Suiker: 1 g
————————————————————————————————–

Fresh Vietnamese Shrimp Rice Paper Rolls

Fresh Vietnamese Shrimp Rice Paper Rolls

Light and refreshing Vietnamese rice paper rolls filled with shrimp, herbs, and vermicelli noodles.
Couverts12
Preparation 15 minutes
toasting sesame seeds 2 minutes
Total time 15 minutes
Deel op Facebook Print Recipe

Equipment

  • Large bowl
  • Nonstick frying pan
  • Serving dish

Ingredients

  • ยผ Cucumber cut into matchsticks
  • Gluten-free sweet chili dipping sauce 2 tbsp
  • Gluten-free Thai fish sauce 1 tbsp
  • Handful of Coriander leaves chopped
  • Iceberg lettuce ยผ, shredded
  • Lime juice juice of 1 lime
  • Lime wedges to serve
  • Handful of Mint chopped
  • 125 g cooked peeled Prawns
  • 12 round Rice paper sheets
  • 150 g cold cooked Rice vermicelli
  • 1 tbsp Sesame seeds
  • Handful of Thai basil chopped

Instructions

  • Heat a nonstick frying pan over a medium-low heat and dry-fry the sesame seeds for 2 minutes, stirring frequently, until golden brown and toasted.
  • Set aside.
  • Mix together the prawns, cucumber, herbs, vermicelli, and lettuce in a large bowl.
  • Soak 1 rice sheet in a bowl of warm water for 20 seconds, then drain on kitchen paper.
  • Fill with the prawn mixture, leaving about 2.
  • 5 cm (1 inch) at the top and the bottom of the sheet.
  • Fold over the top and bottom edges and roll up.
  • Repeat with the remaining rice sheets and filling.
  • Whisk together the remaining dipping sauce ingredients and toasted sesame seeds in a serving dish and serve with the rolls and lime wedges.

Notes & Wine Advice

Serving Tip:
Serve immediately with the dipping sauce and lime wedges.
Wine Advice:
Pair with a crisp Sauvignon Blanc or a light-bodied Riesling to complement the fresh flavors.

Nutrition values

Calories: 120 kcal | koolhydraten: 15 g | Eiwitten: 8 g | Vet: 2 g | Suiker: 3 g
————————————————————————————————–

Spicy turkey burgers with salsa

Spicy turkey burgers with salsa

Couverts4
Total time 35 minutes
Deel op Facebook Print Recipe

Ingredients

  • 400 g 13 oz minced turkey
  • 2 cm ยพ inch piece of fresh root ginger, peeled and grated
  • 4 spring onions finely chopped
  • 1 red chilli deseeded and finely chopped
  • 1 egg yolk
  • 2 tablespoons chopped coriander leaves
  • 4 Little Gem lettuces

Salsa

  • 1 red pepper cored, deseeded and diced
  • 100 g 3ยฝ oz tomatoes, diced
  • 1 small red onion finely diced
  • ยฝ tablespoon chopped parsley
  • ยฝ tablespoon chopped coriander leaves
  • 1 tablespoon red wine vinegar
  • ยฝ tablespoon olive oil

Instructions

  • Mix together the minced turkey, ginger, spring onions, chilli, egg yolk and coriander in a bowl.
  • Using wet hands, shape the mixture into 4 burgers.
  • Heat a lightly oiled frying pan and cook the burgers for 5โ€“6 minutes on each side until golden and cooked through.
  • Meanwhile, for the salsa, mix together the red pepper, tomatoes, onion, parsley, coriander, vinegar and oil in a bowl.
  • Serve the burgers on a bed of lettuce leaves, topped with the salsa.

Notes & Wine Advice

For Asian turkey salad,

mix together 3 finely sliced shallots with ยผ teaspoon salt and leave to stand for 10 minutes. Whisk together the juice of 1 lime, 2 tablespoons gluten-free fish sauce, 1 tablespoon rice vinegar, 1 tablespoon caster sugar, 2 crushed garlic cloves and 1 finely diced red chilli. In a large bowl, toss together 350 g (11ยฝ oz) cooked turkey, cut into strips, 400 g (13 oz) finely shredded Chinese cabbage, 1 large peeled and grated carrot, 100 g (3ยฝ oz) bean sprouts and a small handful each of mint and basil. Toss in the shallots and dressing and leave to stand for 5 minutes, then serve sprinkled with 50 g (2 oz) chopped roasted peanuts.

Nutrition values

Calories: 149 kcal
————————————————————————————————–

Spicy Devilled Chicken Thighs

Spicy Devilled Chicken Thighs

Spicy devilled chicken thighs marinated in a tangy mustard and Tabasco sauce, grilled to perfection.
Couverts4
Preparation 10 minutes
Preparation time:18 minutes
Deel op Facebook Print Recipe

Equipment

  • Griddle pan or frying pan
  • Shallow dish

Ingredients

  • 8 boneless skinless Chicken thighs (about 600g/1ยผ lb total)
  • 2 Garlic cloves crushed
  • Gluten-free Dijon mustard 2 tbsp
  • Salad leaves to serve
  • Gluten-free soy sauce 1 tbsp
  • Tabasco sauce 6 drops

Instructions

  • Make the devil sauce.
  • Mix together the mustard, Tabasco, garlic, and soy sauce in a shallow dish.
  • Open out the chicken thighs and trim away any fat.
  • Dip the thighs in the devil sauce and coat each piece well.
  • Heat a large griddle pan or frying pan.
  • Add the chicken pieces flat on the pan and cook for 8โ€“10 minutes on each side until cooked through.
  • Serve hot or cold with salad leaves.

Notes & Wine Advice

Serving Tip:
Serve hot or cold with a fresh salad.
Wine Advice:
Pair with a light-bodied red wine like Pinot Noir or a crisp dry Rosรฉ to complement the spicy flavors.

Nutrition values

Calories: 280 kcal | koolhydraten: 3 g | Eiwitten: 30 g | Vet: 16 g | Suiker: 1 g
————————————————————————————————–