

Crispy Sweet and Sour Tofu

Sweet and sour tofu with toasted cashews, red bell pepper and onion in a glossy sauce

Crispy Sweet and Sour Tofu

Crispy Sweet and Sour Tofu combines golden tofu cubes, toasted cashews, bell pepper, and onion with a tangy maple-tamari sauce. This colourful vegan stir-fry is ready in approximately 35 minutes.
Couverts4 servings
estimated costs pp $2.35
Deel op Facebook Print Recipe

Equipment

Ingredients

Instructions

  • Place the tofu in a tofu press and remove as much moisture as possible.
  • Cut the pressed tofu into evenly sized cubes.
  • Place the tofu cubes in a large mixing bowl.
  • Add the cornstarch.
  • Toss gently until every tofu cube is evenly coated.
  • Heat 1 tablespoon vegetable oil in a wok over medium-high heat.
  • Add the coated tofu in a single layer.
  • Cook for 5 to 7 minutes.
  • Turn the tofu regularly until every side is golden and crisp.
  • Transfer the cooked tofu to a plate.
  • Add the remaining 1 tablespoon vegetable oil to the wok.
  • Add the cashews, red bell pepper, and diced onion.
  • Stir-fry for 3 to 4 minutes until the vegetables begin to soften and the cashews are lightly toasted.
  • Add the minced garlic and grated ginger.
  • Stir-fry for 1 minute until fragrant.
  • Combine the rice vinegar, ketchup, tamari, and maple syrup in a small mixing bowl.
  • Stir until the sauce is smooth.
  • Pour the sauce over the vegetables and cashews.
  • Bring the sauce to a gentle simmer.
  • Return the crispy tofu to the wok.
  • Fold everything together gently until the tofu is coated with sauce.
  • Cook for another 2 to 3 minutes until the sauce thickens.
  • Add the kosher salt and black pepper.
  • Taste and adjust the seasoning when necessary.
  • Remove the wok from the heat.
  • Serve immediately with steamed rice or noodles.

Notes & Wine Advice

Serving Suggestions

Serve the tofu with steamed jasmine rice, brown rice, or rice noodles. Garnish with sliced green onions, cilantro, sesame seeds, or additional toasted cashews. Steamed broccoli, sugar snap peas, or bok choy can be added for a larger and more vegetable-rich meal.

Recipe Notes

Press the tofu thoroughly before coating it with cornstarch. Excess moisture prevents the surface from becoming crisp. Cook the tofu in a single layer and avoid moving it constantly. Let each side remain in contact with the hot wok long enough to develop a golden crust.

Variations

Add pineapple chunks for a fruitier sweet and sour flavour. Broccoli, mushrooms, carrots, baby corn, or sugar snap peas can replace part of the bell pepper. For extra heat, add chilli flakes, sriracha, or sliced fresh chilli to the sauce.

Storage

Refrigerate leftover tofu and sauce in an airtight container for up to three days. The coating will soften during storage. Reheat the dish in a hot wok or skillet rather than the microwave when you want to restore some of the tofuโ€™s texture.

Wine Advice

A crisp Sauvignon Blanc balances the sweetness of the maple syrup and ketchup with fresh acidity. A dry Riesling also works well with the rice vinegar, ginger, and savoury tamari sauce.

Nutrition values

Serving: 1 portion | Calories: 350 kcal | koolhydraten: 30 g | Eiwitten: 15 g | Vet: 22 g | Verzadigd vet: 3 g | Natrium: 720 mg | Suiker: 12 g
————————————————————————————————–

About Sweet and Sour Tofu

Sweet and Sour Tofu combines crisp cornstarch-coated tofu with toasted cashews, red bell pepper, onion, garlic, and ginger. A simple sauce made with rice vinegar, ketchup, tamari, and maple syrup supplies the familiar balance of tangy, sweet, and savoury flavours. The dish is completely plant-based and can be served with rice or noodles.

This recipe provides four portions and takes approximately 35 minutes from preparation to serving. Most ingredients are readily available, and the complete meal cooks in one wok after the tofu has been pressed and coated. Using tamari instead of regular soy sauce keeps the recipe gluten-free, provided the remaining packaged ingredients are also certified accordingly.

Why Crispy Cashew Tofu Works

Crispy cashew tofu depends on removing moisture before cooking. Tofu contains considerable water, even after it has been drained from its package. Pressing it creates a firmer texture and allows the cornstarch to cling evenly to the surface.

Cornstarch forms a thin coating that becomes golden in hot oil. Toss the cubes gently so they do not crumble. Each piece should receive a light, even dusting rather than a thick layer. Excess cornstarch can collect in the wok and burn before the tofu finishes cooking.

Frying the Tofu Evenly

Heat the wok before adding the first tablespoon of vegetable oil. Arrange the tofu in one layer with a little room between the pieces. When the wok is too small, cook the tofu in two batches. Crowding lowers the temperature and causes the cubes to steam instead of fry.

Allow the first side to develop a crust before turning the tofu. Moving it too early can tear the coating. Once several sides are crisp and golden, transfer the cubes to a plate while preparing the vegetables and sauce.

Balancing the Sauce

Rice vinegar provides acidity, while maple syrup adds sweetness. Ketchup contributes tomato flavour, colour, sweetness, and body. Tamari supplies salt and savoury depth. Combining these ingredients before adding them to the wok ensures that the sauce coats the vegetables evenly.

Taste the sauce before adding extra salt. Tamari is naturally salty, and different brands vary considerably. The sauce thickens quickly after it reaches a simmer, particularly when it comes into contact with the remaining cornstarch coating on the tofu.

Cooking the Cashews and Vegetables

Toast the cashews briefly with the bell pepper and onion. This strengthens their nutty flavour while keeping them crisp. The vegetables should soften slightly but retain some bite. Garlic and ginger are added later because they cook quickly and can become bitter if exposed to high heat for too long.

Return the tofu only after the sauce begins simmering. Fold it through gently and cook for no more than a few minutes. Extended simmering softens the crust, so serve the dish promptly after the sauce has thickened.

Serving Ideas and Variations

Jasmine rice is a natural accompaniment, although brown rice and rice noodles also work. Pineapple adds extra sweetness and acidity. Broccoli, carrots, mushrooms, bok choy, or sugar snap peas can be included according to availability.

For another filling plant-based meal, try our Smoky Veggie Bean Chili. Both recipes provide four substantial portions, although the chilli is slower-cooked and the tofu dish offers a crisper texture.

Storage and Food Safety

Refrigerate leftovers within two hours and consume them within three days. Reheat the tofu in a wok or skillet until thoroughly hot. Current FDA safe food-handling guidance provides more information about preparing, cooling, storing, and reheating cooked foods.

With crisp tofu, toasted nuts, colourful vegetables, and a glossy sauce, Sweet and Sour Tofu offers a quick and satisfying vegan dinner with a balanced combination of textures and flavours.
Red Wine Pot Roast

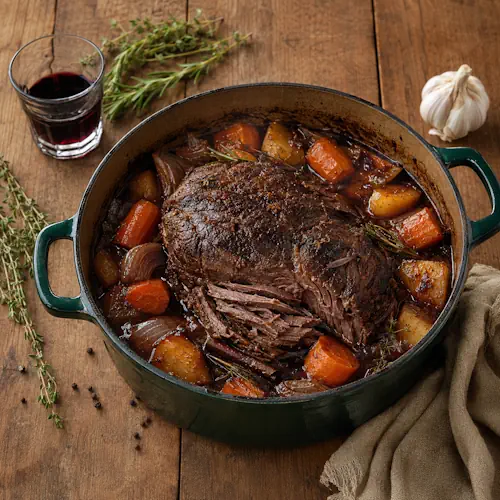
Red wine pot roast with tender beef, potatoes and carrots in an aromatic spiced sauce

Red Wine Pot Roast

Red Wine Pot Roast is slowly braised with carrots, potatoes, fresh herbs, cinnamon, cloves, and peppercorns. The beef becomes fork-tender while the red wine creates a rich, aromatic sauce.
Couverts4 servings
estimated costs pp $6.75
Deel op Facebook Print Recipe

Equipment

Ingredients

Instructions

  • Preheat the oven to 325ยฐF (165ยฐC).
  • Pat the beef chuck roast dry with kitchen paper.
  • Season the beef generously with kosher salt.
  • Heat the olive oil in a Dutch oven over medium-high heat.
  • Place the beef in the hot oil.
  • Sear it for 4 to 5 minutes on each side until deeply browned.
  • Transfer the seared beef to a plate.
  • Add the sliced onion to the Dutch oven.
  • Cook for approximately 3 minutes until it begins to soften.
  • Add the minced garlic.
  • Cook for another minute until fragrant.
  • Add the tomato paste.
  • Cook for 1 minute while stirring continuously.
  • Pour the red wine into the Dutch oven.
  • Scrape the bottom of the pot with a wooden spoon to release the browned pieces.
  • Add the beef broth, thyme, rosemary, cinnamon stick, whole cloves, and black peppercorns.
  • Stir until the tomato paste is incorporated.
  • Bring the cooking liquid to a gentle simmer.
  • Return the beef and any accumulated juices to the Dutch oven.
  • Arrange the potatoes and carrots around the roast.
  • Cover the Dutch oven with its lid.
  • Transfer it carefully to the preheated oven.
  • Braise for 2ยฝ to 3 hours.
  • Check the beef near the end of the cooking time.
  • Remove the Dutch oven when the beef is fork-tender and pulls apart easily.
  • Transfer the roast to a cutting board.
  • Cover it loosely with aluminium foil.
  • Let the beef rest for 10 minutes.
  • Remove the cinnamon stick and whole cloves from the sauce.
  • Remove any visible peppercorns when preferred.
  • Taste the sauce and adjust the salt when necessary.
  • Simmer the sauce briefly on the stovetop when a thicker consistency is desired.
  • Slice or pull the rested beef into large pieces.
  • Serve the beef with the potatoes, carrots, and red wine sauce.

Notes & Wine Advice

Serving Suggestions

Serve the beef with the braised potatoes, carrots, and red wine sauce. Crusty bread is useful for absorbing the sauce, while green beans, Brussels sprouts, or a fresh salad provide a lighter contrast. Mashed potatoes can replace the potatoes cooked in the Dutch oven.

Recipe Notes

Use a dry red wine that you would also enjoy drinking. Dry the beef thoroughly before searing so it develops a dark crust. Remove the cinnamon stick and cloves before serving. The whole peppercorns can also be removed when you prefer a completely smooth sauce.

Variations

Add mushrooms, parsnips, celery, or pearl onions. Replace half of the red wine with additional beef broth for a milder wine flavour. Star anise or a strip of orange peel can add another aromatic note, but use these ingredients sparingly.

Storage

Refrigerate leftover beef, vegetables, and sauce together in an airtight container for up to three days. Keeping the meat in the sauce helps it remain moist. Reheat gently in a covered pan or Dutch oven and add a little broth if the sauce becomes too thick.

Wine Advice

Serve a full-bodied Cabernet Sauvignon when you want a structured wine that matches the beef and spices. A smooth Merlot provides a softer pairing with the sweet carrots, onions, and aromatic sauce.

Nutrition values

Serving: 1 portion beef with vegetables and sauce | Calories: 670 kcal | koolhydraten: 35 g | Eiwitten: 45 g | Vet: 35 g | Verzadigd vet: 13 g | Natrium: 710 mg | Suiker: 8 g
————————————————————————————————–

About Red Wine Pot Roast

Red Wine Pot Roast is a slow-braised beef dinner with potatoes, carrots, onions, garlic, and a warmly spiced sauce. A cinnamon stick, whole cloves, black peppercorns, thyme, and rosemary give the cooking liquid an aromatic character. After several hours in the oven, the chuck roast becomes tender enough to slice or pull apart with a fork.

The dish is prepared almost completely in one Dutch oven. Browning the beef, softening the onion, building the sauce, and braising the roast all happen in the same pot. This preserves the flavour left behind during searing and reduces the amount of washing up after dinner.

How Spiced Beef Pot Roast Becomes Tender

Spiced beef pot roast needs gentle heat and sufficient time. Chuck roast contains fat and connective tissue that make it flavourful but initially firm. During slow braising, the connective tissue softens and contributes body to the sauce. The meat becomes moist and tender instead of dry.

Cooking time can vary according to the size and shape of the roast. Begin checking after 2ยฝ hours, but do not remove the beef simply because the stated time has passed. Insert a fork into the thickest section. When the meat still resists, cover the pot and continue cooking.

Developing the Sauce

Pat the beef dry and sear every side in hot olive oil. Browning creates a savoury crust and leaves concentrated pieces attached to the bottom of the Dutch oven. After removing the roast, cook the onion and garlic in the same pot.

Tomato paste strengthens the savoury character and gives the sauce additional colour. Cook it briefly before pouring in the wine. The wine loosens the browned pieces from the pot, allowing them to dissolve into the sauce rather than being left behind.

Choosing the Red Wine

A dry Cabernet Sauvignon or Merlot works well for braising. Cabernet gives the sauce a stronger structure, while Merlot produces a softer fruit character. Avoid extremely sweet wine because the carrots, onion, and long cooking process already provide natural sweetness.

The finished dish will retain some of the wineโ€™s flavour, so use a bottle that tastes pleasant on its own. Expensive wine is unnecessary, but a poor-quality product will not improve during cooking. If you prefer a milder sauce, replace part of the wine with beef broth.

Balancing the Whole Spices

Cinnamon, cloves, and peppercorns distinguish this roast from a standard version. Their purpose is to add warmth and fragrance rather than make the beef taste sweet. Use the stated quantities and avoid adding extra cloves because their flavour can quickly dominate the sauce.

Remove the cinnamon stick and cloves before serving. Whole peppercorns soften slightly but can still provide an unexpectedly strong bite. Remove visible peppercorns or strain the sauce when serving guests who prefer a smooth finish.

Cooking the Vegetables

Cut the potatoes and carrots into large chunks so they remain intact during the extended cooking time. Smaller pieces may become very soft before the beef is ready. Arrange the vegetables around the roast where they can cook in the seasoned liquid.

For firmer vegetables, add them after the beef has braised for approximately 1ยฝ hours. This requires opening the pot during cooking but gives greater control over their final texture.

Serving and Safe Storage

Serve the beef with the braised vegetables and plenty of sauce. For a more traditional version without whole spices, try our Classic Beef Pot Roast.

Refrigerate cooked beef within two hours and store it with some sauce to retain moisture. Follow current FDA safe food-handling guidance when cooking, cooling, storing, and reheating meat dishes.

With tender beef, hearty vegetables, and a fragrant wine sauce, Red Wine Pot Roast makes a warming centrepiece for winter dinners and special occasions.


Smoky Veggie Bean Chili

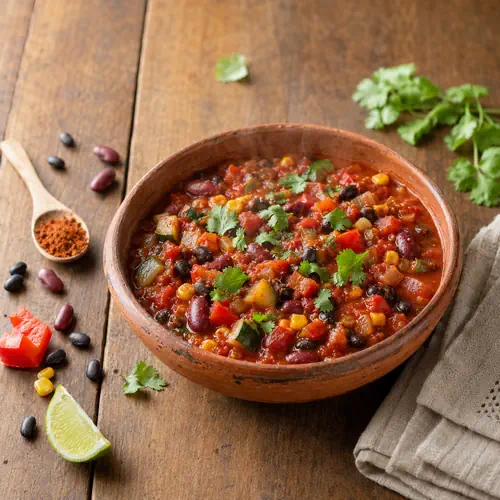
Veggie bean chili with black beans, kidney beans, corn, zucchini and fresh cilantro

Smoky Veggie Bean Chili

Smoky Veggie Bean Chili is packed with black beans, kidney beans, zucchini, corn, peppers, and tomatoes. Cumin, smoked paprika, chilli powder, and cinnamon create a warming vegan dinner.
Couverts4 servings
estimated costs pp $1.75
Deel op Facebook Print Recipe

Equipment

Ingredients

Instructions

  • Heat the olive oil in a large cooking pot over medium heat.
  • Add the diced onion and bell pepper.
  • Sautรฉ for 5 to 6 minutes until the vegetables begin to soften.
  • Add the minced garlic, diced zucchini, and corn kernels.
  • Cook for another 3 to 4 minutes while stirring occasionally.
  • Add the chilli powder, ground cumin, smoked paprika, ground cinnamon, kosher salt, and black pepper.
  • Stir continuously for 1 to 2 minutes to release the flavours of the spices.
  • Add the diced tomatoes with their juices.
  • Stir in the drained kidney beans and black beans.
  • Pour in the vegetable broth.
  • Stir until all the ingredients are evenly combined.
  • Increase the heat and bring the chilli to a gentle boil.
  • Reduce the heat to low.
  • Simmer uncovered for 30 to 40 minutes.
  • Stir occasionally to prevent the beans and vegetables from sticking to the bottom.
  • Simmer until the vegetables are tender and the chilli has thickened.
  • Add a little extra vegetable broth when the chilli becomes too thick.
  • Taste and adjust the salt, black pepper, or spices as needed.
  • Divide the chilli among four bowls.
  • Garnish with freshly chopped cilantro.
  • Serve hot.

Notes & Wine Advice

Serving Suggestions

Serve the chilli with cornbread, steamed rice, tortilla chips, or baked potatoes. Avocado, sliced jalapeรฑo, lime wedges, fresh cilantro, and dairy-free sour cream make suitable toppings. Add a crisp cabbage salad when you want a fresh contrast to the warming tomato and bean mixture.

Recipe Notes

Rinse the canned beans thoroughly to remove excess canning liquid. Simmer the chilli uncovered so moisture can evaporate and the tomato base can thicken. Cinnamon should remain a subtle background flavour, so measure it carefully and avoid adding more until the chilli has simmered.

Variations

Add mushrooms, sweet potato, carrots, celery, or an additional variety of beans. Cayenne pepper or chopped jalapeรฑo will increase the heat. For a thicker chilli, mash some of the beans against the side of the pot. Use fire-roasted tomatoes for an even smokier flavour.

Storage

Refrigerate leftover chilli in an airtight container for up to four days. The flavours often deepen overnight. Reheat it gently on the stovetop or in the microwave, adding a splash of vegetable broth if necessary. Freeze individual portions for up to three months.

Wine Advice

A fruit-forward Zinfandel complements the smoky paprika, tomatoes, and warming spices. A medium-bodied Merlot is a softer choice when the chilli is prepared without additional hot peppers.

Nutrition values

Serving: 2 cups | Calories: 270 kcal | koolhydraten: 50 g | Eiwitten: 13 g | Vet: 6 g | Verzadigd vet: 1 g | Natrium: 680 mg | Suiker: 12 g
————————————————————————————————–

About Veggie Bean Chili

Veggie Bean Chili is a hearty plant-based meal filled with black beans, kidney beans, zucchini, corn, bell pepper, onion, and tomatoes. Chilli powder, cumin, smoked paprika, and a small amount of cinnamon give the tomato base warmth and depth. The result is a substantial vegan dinner with plenty of texture, protein, and vegetables.

This recipe serves four and needs only one large cooking pot. Most of the preparation involves chopping the vegetables and draining the beans. Once everything has been added, the chilli simmers gently until the vegetables are tender and the broth has reduced into a thick sauce.

Why Smoky Vegetable Chili Works

Smoky vegetable chili depends on building flavour in stages. Onion and bell pepper cook first because they need more time to soften. Garlic, zucchini, and corn follow, allowing them to cook without becoming overly soft before the simmering stage begins.

The spices are briefly heated in the oil before the tomatoes and broth are added. This releases their aroma and distributes them throughout the pot. Stir continuously during this step because paprika and chilli powder can become bitter when allowed to burn.

Using Two Types of Beans

Black beans have a creamy interior and mild earthy flavour. Kidney beans are firmer and hold their shape well during simmering. Using both creates a more interesting texture than relying on one variety. They also supply plant-based protein and make the chilli satisfying without meat.

Drain and rinse the beans before adding them. Rinsing removes the thick canning liquid and can reduce some of the sodium. Low-sodium beans, tomatoes, and vegetable broth can be used when you want greater control over the salt level.

Balancing the Spices

Chilli powder provides the main seasoning, while cumin adds earthiness and smoked paprika contributes a gentle smoky character. Ground cinnamon may seem unusual, but a small quantity rounds out the tomatoes and warming spices. It should not be strong enough to make the finished dish taste sweet.

The heat level depends partly on the chilli powder blend. Taste the chilli after it has simmered before adding cayenne or fresh peppers. Spices become more integrated during cooking, so seasoning too aggressively at the beginning can produce an unbalanced result.

Getting the Right Consistency

Simmer the chilli uncovered for 30 to 40 minutes. This allows excess liquid to evaporate while the vegetables and beans absorb the seasoned broth. Stir occasionally, particularly near the end when the mixture becomes thicker.

For a thicker texture, mash a small quantity of beans against the inside of the pot and stir them back into the sauce. If the chilli reduces too far, add vegetable broth in small amounts. It should remain spoonable without becoming thin or soupy.

Serving Ideas and Variations

Serve the chilli in bowls with cilantro, avocado, dairy-free sour cream, lime, or sliced jalapeรฑo. Rice, cornbread, tortilla chips, or baked potatoes turn it into an even more substantial meal. For another comforting vegetarian dinner, try our Rustic Polish Potato Cabbage Rolls.

Mushrooms, sweet potato, carrots, or celery can be added. Pinto beans or cannellini beans can replace either of the listed varieties. Fire-roasted tomatoes deepen the smoky flavour, while fresh jalapeรฑo or cayenne creates extra heat.

Storage and Reheating

Cool the chilli promptly and refrigerate it in a covered container. Reheat only the required amount until thoroughly hot. Current FDA safe food-handling guidance provides further advice about cooling, storing, freezing, and reheating prepared meals.

Smoky Veggie Bean Chili is an economical one-pot dinner that combines colourful vegetables, two kinds of beans, and warming spices in a rich tomato base.


Onion Pot Roast with Gravy

Onion pot roast with tender sliced beef and rich homemade onion gravy

Onion Pot Roast with Gravy

Onion Pot Roast with Gravy features tender chuck roast slowly braised with onions, garlic, herbs, beef broth, and optional red wine. The cooking liquid is thickened into a rich gravy for serving.
Couverts4 servings
estimated costs pp $5.50
Deel op Facebook Print Recipe

Equipment

Ingredients

Instructions

  • Preheat the oven to 350ยฐF (175ยฐC).
  • Pat the beef chuck roast dry with kitchen paper.
  • Season the beef generously with kosher salt and freshly ground black pepper.
  • Heat the olive oil in a Dutch oven over medium-high heat.
  • Place the beef in the hot oil.
  • Sear it for 5 to 6 minutes, turning regularly, until browned on all sides.
  • Transfer the seared beef to a plate.
  • Add the sliced onion to the Dutch oven.
  • Sautรฉ for approximately 3 minutes until it begins to soften.
  • Add the minced garlic.
  • Cook for another minute until fragrant.
  • Pour the beef broth into the Dutch oven.
  • Add the red wine when using.
  • Scrape the bottom of the pot with a wooden spoon to release the browned pieces.
  • Stir in the chopped thyme and rosemary.
  • Return the beef and any accumulated juices to the Dutch oven.
  • Place the roast on top of the onions.
  • Bring the cooking liquid to a gentle simmer.
  • Cover the Dutch oven with its lid.
  • Transfer the Dutch oven to the preheated oven.
  • Braise for 2ยฝ to 3 hours.
  • Check the beef near the end of the cooking time.
  • Remove the pot from the oven when the meat is fork-tender and pulls apart easily.
  • Transfer the beef to a cutting board.
  • Cover it loosely with aluminium foil.
  • Let the beef rest for 10 minutes.
  • Place the Dutch oven over medium heat on the stovetop.
  • Combine the gluten-free flour and water in a small mixing bowl.
  • Stir until a smooth slurry forms.
  • Gradually whisk the slurry into the simmering cooking liquid.
  • Simmer the gravy for approximately 5 minutes while stirring continuously.
  • Cook until the gravy reaches the desired consistency.
  • Taste and adjust the salt and black pepper when necessary.
  • Slice or pull the rested beef into large pieces.
  • Serve the beef with the onions and gravy.

Notes & Wine Advice

Serving Suggestions

Serve the beef and onion gravy with mashed potatoes, roasted potatoes, buttered noodles, or crusty bread. Roasted carrots, green beans, Brussels sprouts, or a fresh green salad provide suitable vegetable accompaniments. Spoon extra gravy over the meat immediately before serving.

Recipe Notes

A three-pound chuck roast generally needs 2ยฝ to 3 hours to become fork-tender in a conventional oven. A cooking time of only 1 to 1ยฝ hours is usually insufficient for this cut. Test the meat with a fork and continue braising when it still feels firm.

Variations

Replace the red wine with additional beef broth for an alcohol-free version. Add mushrooms, carrots, celery, or parsnips to the onions. Worcestershire sauce or tomato paste can add further depth. Regular all-purpose flour can replace gluten-free flour when dietary restrictions do not apply.

Storage

Refrigerate leftover beef and gravy together in an airtight container for up to three days. Keeping the meat in the gravy prevents it from drying out. Reheat gently in a covered saucepan or Dutch oven and add a little broth if the gravy becomes too thick.

Wine Advice

A full-bodied Cabernet Sauvignon complements the rich beef and savoury onion gravy. A peppery Syrah/Shiraz is another suitable choice, especially when rosemary and black pepper are prominent.

Nutrition values

Serving: 1 portion beef with onion gravy | Calories: 590 kcal | koolhydraten: 15 g | Eiwitten: 45 g | Vet: 37 g | Verzadigd vet: 13 g | Natrium: 690 mg | Suiker: 4 g
————————————————————————————————–

About Onion Pot Roast

Onion Pot Roast is a comforting Dutch oven meal featuring chuck roast slowly braised with sliced onions, garlic, beef broth, fresh thyme, and rosemary. Optional red wine adds acidity and depth, while the concentrated cooking liquid is thickened into a savoury gravy. The result is tender beef served with soft onions and plenty of sauce.

Although some versions describe this as a quick pot roast, chuck needs sufficient time for its connective tissue to soften. A three-pound roast will usually require between 2ยฝ and 3 hours at 350ยฐF. Rushing the braising process can leave the beef cooked but still firm and difficult to shred.

Why Beef Roast with Gravy Works

Beef roast with gravy works especially well with chuck because this cut contains marbling and connective tissue. During slow cooking, the fat adds flavour while the connective tissue gradually softens. The braising liquid prevents the meat from drying out and later becomes the foundation of the gravy.

The roast should be tested with a fork rather than judged by time alone. Ovens, Dutch ovens, and individual cuts of beef vary. When the fork enters easily and the meat separates with little resistance, the roast is ready. If it remains firm, cover the pot and continue cooking.

Browning the Beef Properly

Dry the beef thoroughly before seasoning it with salt and pepper. Surface moisture causes steaming and prevents a deep brown crust from forming. Heat the oil before adding the roast and allow each side enough contact with the hot pot to develop colour.

The browned surface contributes flavour to both the meat and the gravy. Dark pieces will also stick to the bottom of the Dutch oven. These are not waste. They dissolve when the broth and wine are added, giving the cooking liquid a deeper savoury character.

Building the Onion Sauce

After the beef has been removed, cook the sliced onion in the same pot. The onion softens, absorbs the browned beef flavour, and gradually adds natural sweetness. Garlic is added near the end of sautรฉing because it cooks more quickly and can become bitter when browned excessively.

Pour in the beef broth and optional red wine, then scrape the bottom with a wooden spoon. Fresh thyme and rosemary add an aromatic finish that holds up well during the extended oven time. Return the beef to the pot only after the liquid and seasonings have been combined.

Making Smooth Gravy

Transfer the cooked roast to a cutting board and let it rest before preparing the gravy. Mix gluten-free flour with cold water until completely smooth. Adding dry flour directly to hot liquid can create lumps that are difficult to remove.

Stir the slurry gradually into the simmering cooking liquid. The gravy will continue thickening as it cooks, so add only enough slurry to reach the desired consistency. When it becomes too thick, loosen it with beef broth or water. Taste only after reduction because the flavours and salt become more concentrated.

Serving and Storage

Mashed potatoes are particularly good with the onion gravy, but noodles, roasted potatoes, rice, or bread also work. For a version that includes carrots and potatoes in the same pot, try our Classic Beef Pot Roast.

Refrigerate cooked beef within two hours and keep it with some gravy to preserve moisture. Follow current FDA safe food-handling guidance when cooking, cooling, storing, and reheating meat dishes.

With its fork-tender beef, sweet onions, fresh herbs, and rich gravy, Onion Pot Roast provides traditional comfort food with straightforward Dutch oven preparation.


Classic Beef Pot Roast

Classic beef pot roast with tender carrots, potatoes and onions in a rich herb sauce

Classic Beef Pot Roast

Classic Beef Pot Roast is slowly braised with carrots, potatoes, onions, garlic, and fresh herbs. The beef becomes fork-tender while the vegetables absorb the rich broth and optional red wine.
Couverts4 servings
estimated costs pp $6.25
Deel op Facebook Print Recipe

Equipment

Ingredients

Instructions

  • Preheat the oven to 325ยฐF (165ยฐC).
  • Pat the beef chuck roast dry with kitchen paper.
  • Season the beef generously with kosher salt and freshly ground black pepper.
  • Heat the olive oil in a Dutch oven over medium-high heat.
  • Place the beef in the hot oil.
  • Sear it for 3 to 4 minutes on each side until deeply browned.
  • Transfer the seared beef to a plate.
  • Add the onions, carrots, potatoes, and crushed garlic to the Dutch oven.
  • Sautรฉ the vegetables for approximately 5 minutes.
  • Return the beef to the Dutch oven and place it on top of the vegetables.
  • Pour the beef broth around the roast.
  • Add the red wine when using.
  • Sprinkle the chopped thyme and rosemary over the beef and vegetables.
  • Season lightly with additional kosher salt and black pepper.
  • Bring the cooking liquid to a gentle simmer.
  • Cover the Dutch oven with its lid.
  • Transfer it carefully to the preheated oven.
  • Braise for 2ยฝ to 3 hours.
  • Check the roast near the end of the cooking time.
  • Remove it from the oven when the meat is fork-tender and pulls apart easily.
  • Transfer the beef to a cutting board.
  • Cover it loosely with aluminium foil.
  • Let the meat rest for 10 minutes.
  • Check the vegetables for tenderness.
  • Simmer the cooking liquid uncovered on the stovetop when a thicker sauce is preferred.
  • Slice or pull the rested beef into large pieces.
  • Arrange the beef and vegetables on a serving platter.
  • Spoon the cooking sauce over the meat.
  • Serve warm.

Notes & Wine Advice

Serving Suggestions

Serve the beef with the braised carrots, potatoes, onions, and cooking sauce. Crusty bread is useful for absorbing the sauce, while a green salad or steamed green beans add freshness. Horseradish sauce or mustard can be offered separately for a sharper contrast.

Recipe Notes

Dry the beef before searing so it browns instead of steaming. Use a Dutch oven with a tightly fitting lid to retain moisture during the long cooking time. The roast is ready when a fork enters easily and the meat separates without resistance.

Variations

Replace the red wine with additional beef broth for an alcohol-free version. Parsnips, celery, mushrooms, turnips, or sweet potatoes can be added. For a thicker sauce, remove the cooked meat and vegetables and simmer the liquid uncovered until reduced to the preferred consistency.

Storage

Refrigerate leftover beef, vegetables, and sauce in an airtight container for up to three days. Store the meat in some of the cooking liquid to keep it moist. Reheat gently in a covered pan or Dutch oven until thoroughly hot.

Wine Advice

A full-bodied Cabernet Sauvignon matches the rich beef and concentrated cooking sauce. A smooth Merlot is a softer alternative that complements the sweet carrots, onions, and slow-cooked herbs.

Nutrition values

Serving: 1 portion beef with vegetables and sauce | Calories: 650 kcal | koolhydraten: 35 g | Eiwitten: 48 g | Vet: 32 g | Verzadigd vet: 12 g | Natrium: 720 mg | Suiker: 5 g
————————————————————————————————–

About Classic Beef Pot Roast

Classic Beef Pot Roast is a slow-braised dinner made with chuck roast, carrots, potatoes, onions, garlic, and fresh herbs. The beef cooks gently in broth and optional red wine until it becomes tender enough to pull apart with a fork. Meanwhile, the vegetables absorb the savoury cooking liquid and provide a complete meal from a single Dutch oven.

This recipe suits a relaxed Sunday dinner or family gathering because most of the cooking happens unattended in the oven. After the ingredients have been prepared and the beef has been browned, the covered pot needs only occasional checking. The long cooking time transforms an affordable, firm cut of beef into a rich and tender roast.

Why Slow-Braised Beef Roast Works

Slow-braised beef roast depends on low heat, moisture, and sufficient cooking time. Chuck contains connective tissue that remains firm during quick cooking. When braised gently for several hours, that tissue softens and contributes body to the cooking sauce.

The roast may appear cooked before it becomes tender. Internal temperature alone does not indicate whether the connective tissue has broken down sufficiently. Test the meat with a fork near the end of the stated cooking time. If it still resists, cover the pot and continue braising.

Creating a Rich Flavour Base

Pat the chuck roast dry before seasoning it. Moisture on the surface interferes with browning, while dry beef develops a deeper crust in the hot olive oil. Sear every side rather than only the top and bottom because the browned surface provides much of the finished sauceโ€™s savoury character.

After removing the beef, briefly sautรฉ the onions, carrots, potatoes, and garlic in the same pot. Pouring in the broth and wine releases the browned pieces attached to the bottom. Those pieces dissolve into the liquid and strengthen the flavour without requiring a packaged sauce mix.

Using Broth, Wine and Fresh Herbs

Beef broth provides the main braising liquid. Red wine is optional but adds acidity and depth. Cabernet Sauvignon or Merlot works particularly well, but additional broth can replace the wine completely. Use gluten-free broth when preparing the meal for someone following a gluten-free diet.

Fresh thyme and rosemary can withstand the extended oven time. Chop the herbs finely so they distribute through the sauce. Dried herbs may be substituted in smaller quantities because their flavour is more concentrated.

Cooking the Vegetables Properly

Cut the carrots and potatoes into large, similarly sized chunks. Small pieces can become overly soft before the beef is tender. Quartered onions gradually break down and add natural sweetness to the sauce, while the carrots and potatoes remain substantial enough to serve alongside the meat.

If you prefer firmer vegetables, add them after the beef has cooked for approximately 1ยฝ hours. The traditional one-pot method is easier, but adding them later gives you more control over their final texture.

Resting and Serving the Roast

Rest the beef for 10 minutes after removing it from the Dutch oven. This allows its juices to settle and makes slicing easier. Chuck roast may also be pulled into large pieces when it is too tender to cut into neat slices.

For another comforting meal prepared with a rich cooking sauce, try our Creamy Hungarian Chicken Paprikash Stew. Both dishes suit cold-weather family dinners, although the paprika stew has a creamier finish.

Safe Storage and Reheating

Refrigerate cooked beef and vegetables within two hours. Store the meat with some cooking liquid so it remains moist during reheating. Follow current FDA safe food-handling guidance when preparing, cooling, storing, and reheating meat dishes.

With deeply browned beef, tender vegetables, and a herb-scented sauce, Classic Beef Pot Roast turns simple ingredients into a generous one-pot dinner made for sharing.


Rustic Polish Potato Cabbage Rolls

Potato-stuffed cabbage rolls with creamy potato filling, sour cream and fresh parsley

Rustic Polish Potato Cabbage Rolls

Rustic Polish Potato Cabbage Rolls are filled with creamy mashed potatoes, onion, parsley, and sour cream. Baked slowly in vegetable broth, these comforting vegetarian rolls are perfect for winter dinners and festive meals.
Couverts4 servings
estimated costs pp $1.55
Deel op Facebook Print Recipe

Equipment

Ingredients

For the Cabbage Rolls

For Baking

For Serving

Instructions

  • Preheat the oven to 350ยฐF (175ยฐC).
  • Bring a large cooking pot of water to a boil.
  • Remove any damaged outer leaves from the cabbage.
  • Carefully lower the cabbage into the boiling water.
  • Blanch it for 3 to 4 minutes until the outer leaves begin to soften.
  • Remove the cabbage from the water with a slotted spoon.
  • Let it cool until safe to handle.
  • Carefully separate 8 large cabbage leaves.
  • Return the cabbage to the boiling water briefly if the inner leaves are still too firm to remove.
  • Trim the thick central rib from each reserved leaf without cutting completely through it.
  • Place the boiled potatoes in a large mixing bowl.
  • Mash the potatoes until mostly smooth.
  • Add the chopped onion, parsley, sour cream, olive oil, kosher salt, and black pepper.
  • Add the breadcrumbs when a firmer filling is preferred.
  • Mix until the filling is evenly combined.
  • Place one cabbage leaf on a clean work surface.
  • Spoon one-eighth of the potato filling near the bottom centre of the leaf.
  • Fold both sides of the leaf over the filling.
  • Roll the leaf tightly from the bottom upward to enclose the filling.
  • Repeat with the remaining cabbage leaves and potato mixture.
  • Arrange the cabbage rolls seam-side down in a casserole dish.
  • Pour the vegetable broth around and over the rolls.
  • Cover the casserole dish tightly with aluminium foil.
  • Bake for approximately 1 hour until the cabbage is tender and the filling is hot.
  • Carefully remove the aluminium foil.
  • Let the cabbage rolls rest for 5 minutes.
  • Garnish with additional parsley when desired.
  • Serve warm with sour cream.

Notes & Wine Advice

Serving Suggestions

Serve two cabbage rolls per person with sour cream and chopped parsley. Pickled cucumbers, beetroot salad, sauerkraut, or a simple green salad provide a fresh contrast. For a larger winter meal, add roasted root vegetables or a bowl of clear vegetable soup.

Recipe Notes

Choose large, flexible cabbage leaves without deep tears. If a leaf remains too firm to roll, return it to the boiling water for another minute. Trim the thick central rib carefully so the leaf folds easily without creating a hole through which the filling can escape.

Variations

Add grated cheese, sautรฉed mushrooms, caramelised onions, or chopped dill to the potato filling. Replace some of the potato with cooked buckwheat or rice. For a vegan version, use plant-based sour cream. Use certified gluten-free breadcrumbs when preparing the rolls for a gluten-free diet.

Storage

Refrigerate leftover cabbage rolls in a covered container for up to three days. Store them with a little cooking broth to prevent them from drying out. Reheat the rolls gently in a covered casserole dish or microwave until thoroughly hot.

Wine Advice

A lightly oaked Chardonnay complements the creamy potato filling and sour cream. A dry Riesling is a fresher alternative, especially when the rolls are served with pickled vegetables or sauerkraut.

Nutrition values

Calories: 270 kcal | koolhydraten: 45 g | Eiwitten: 6 g | Vet: 8 g | Verzadigd vet: 3 g | Natrium: 610 mg | Suiker: 3 g
————————————————————————————————–

About Potato-Stuffed Cabbage Rolls

Potato-Stuffed Cabbage Rolls are a comforting vegetarian variation on the filled cabbage dishes found throughout Poland and Eastern Europe. Instead of meat and rice, tender cabbage leaves surround a creamy mixture of mashed potatoes, onion, parsley, sour cream, and olive oil. The assembled rolls bake slowly in vegetable broth until the leaves are soft and the savoury filling is thoroughly heated.

This recipe makes eight rolls, providing two per serving. The simple ingredients make it economical, yet the finished casserole is substantial enough for a winter family dinner. Sour cream adds richness, while parsley and black pepper prevent the potato filling from tasting heavy.

Preparing Polish Cabbage Rolls

Polish cabbage rolls are easier to shape when the leaves have been softened without becoming overcooked. Lower the whole cabbage into boiling water for several minutes, then carefully remove the loose outer leaves. If the inner leaves remain firm, return the cabbage to the water briefly and repeat the process.

Reserve eight large leaves with as few tears as possible. The thick rib at the base can make folding difficult, so trim it with a sharp knife. Do not remove the complete rib or cut through the leaf. The goal is to reduce its thickness while maintaining a strong wrapper around the filling.

Making the Potato Filling

Use floury potatoes that mash easily. Drain them thoroughly after boiling because excess water can make the filling loose. Mash the potatoes before adding the remaining ingredients, then combine them with finely chopped onion, parsley, sour cream, olive oil, salt, and pepper.

The onion is added raw in this version and softens as the rolls bake. For a sweeter, milder flavour, sautรฉ it in the olive oil before combining it with the potatoes. Optional breadcrumbs make the mixture firmer and easier to portion. Use certified gluten-free breadcrumbs when dietary requirements apply.

Rolling and Arranging the Leaves

Place the filling near the bottom centre of each cabbage leaf. Fold the sides inward before rolling from the bottom toward the top. This method encloses the filling and creates a compact parcel. Arrange every roll seam-side down so it stays closed during baking.

Fit the rolls reasonably closely together in the casserole dish without crushing them. Their position helps them maintain their shape. Pour the vegetable broth around and over the rolls, then cover the dish tightly with aluminium foil. The trapped steam gently cooks the cabbage and prevents its exposed edges from drying.

Baking the Casserole

Bake the covered rolls at 350ยฐF for approximately one hour. They are ready when the cabbage can be cut easily with a fork and the potato centre is hot. Let the casserole stand briefly after baking so the filling settles and the rolls are easier to lift from the dish.

The flavour is mild, creamy, and rustic. Sour cream and parsley are simple garnishes, while pickled vegetables introduce useful acidity. Beetroot salad, sauerkraut, or cucumber pickles are particularly good choices alongside the soft cabbage and potato.

Variations and Storage

Sautรฉed mushrooms, grated cheese, dill, caramelised onion, or cooked buckwheat can be added to the filling. Plant-based sour cream and vegetable broth make the recipe suitable for a vegan diet. For another warming Eastern European meal, try our Creamy Hungarian Chicken Paprikash Stew.

Refrigerate cooked rolls within two hours and consume them within three days. Reheat them until hot throughout, adding a splash of vegetable broth when necessary. Current FDA safe food-handling guidance provides additional information about cooling, storing, and reheating cooked dishes.

With their tender wrappers and creamy filling, Potato-Stuffed Cabbage Rolls turn inexpensive vegetables into a satisfying Polish-inspired winter casserole.


Creamy Hungarian Chicken Paprikash Stew

Hungarian paprikash stew with tender chicken in a creamy paprika and sour cream sauce

Creamy Hungarian Chicken Paprikash Stew

Creamy Hungarian Chicken Paprikash Stew combines tender chicken thighs with sweet paprika, tomatoes, sour cream, and heavy cream. This rich stovetop stew is ideal for a warming family dinner.
Couverts4 servings
estimated costs pp $3.10
Deel op Facebook Print Recipe

Equipment

Ingredients

Instructions

  • Heat the olive oil in a Dutch oven or large cooking pot over medium heat.
  • Add the chicken thigh pieces.
  • Cook for 5 to 7 minutes until browned on all sides.
  • Transfer the browned chicken to a plate and set aside.
  • Add the diced onion to the same pot.
  • Cook for approximately 3 minutes until softened.
  • Add the minced garlic.
  • Cook for 1 minute until fragrant.
  • Add the sweet Hungarian paprika, smoked paprika, ground cumin, black pepper, and kosher salt.
  • Stir continuously for 1 minute to release the flavour of the spices without burning the paprika.
  • Pour the chicken broth and diced tomatoes into the pot.
  • Scrape the bottom of the pot with a wooden spoon to release the browned pieces.
  • Return the chicken and any accumulated juices to the pot.
  • Increase the heat and bring the stew to a gentle boil.
  • Reduce the heat to low.
  • Cover the pot and simmer for 1 hour.
  • Stir occasionally while the chicken cooks.
  • Check that the chicken is tender and has reached an internal temperature of at least 165ยฐF (74ยฐC).
  • Place the sour cream in a small bowl.
  • Stir several spoonfuls of hot cooking liquid into the sour cream to temper it.
  • Reduce the heat to its lowest setting.
  • Stir the tempered sour cream and heavy cream into the stew.
  • Cook uncovered for another 5 to 10 minutes until the sauce has thickened slightly.
  • Do not allow the stew to boil after adding the sour cream.
  • Taste and adjust the seasoning when necessary.
  • Garnish with freshly chopped parsley.
  • Serve warm.

Notes & Wine Advice

Serving Suggestions

Serve the stew with egg noodles, mashed potatoes, rice, dumplings, or crusty bread to absorb the creamy paprika sauce. Buttered green beans, roasted cabbage, or a cucumber salad provide a fresh contrast. Add a spoonful of sour cream and extra parsley when serving.

Recipe Notes

Use sweet Hungarian paprika as the main seasoning because its flavour defines the stew. Paprika burns easily, so stir it briefly over moderate heat before adding the broth. Temper the sour cream with hot cooking liquid and avoid boiling the sauce afterward to prevent curdling.

Variations

Replace the boneless thighs with bone-in chicken thighs and extend the cooking time when necessary. For a more traditional paprika flavour, omit the cumin and smoked paprika. Mushrooms, sliced bell peppers, or diced carrots can be added for extra vegetables.

Storage

Cool leftovers promptly and refrigerate them in an airtight container for up to three days. Reheat the stew gently over low heat while stirring regularly. Avoid a rapid boil because the sour cream sauce may separate. Add a splash of broth if the refrigerated sauce becomes too thick.

Wine Advice

A medium-bodied Pinot Noir complements the chicken and earthy paprika without overpowering the creamy sauce. For white wine, choose a dry Sauvignon Blanc, whose acidity provides a fresh contrast to the sour cream and heavy cream.

Nutrition values

Calories: 350 kcal | koolhydraten: 12 g | Eiwitten: 30 g | Vet: 22 g | Verzadigd vet: 9 g | Natrium: 1 mg | Suiker: 7 g
————————————————————————————————–

About Hungarian Paprikash Stew

Hungarian Paprikash Stew is a warming chicken dish built around generous quantities of paprika and a creamy sour cream sauce. Boneless chicken thighs remain tender during the long, gentle simmer, while onions, garlic, tomatoes, and chicken broth create a savoury base. Sour cream and heavy cream are added near the end, transforming the cooking liquid into a smooth, rich sauce.

This version is inspired by Hungarian chicken paprikash but prepared with several modern additions, including smoked paprika, cumin, and diced tomatoes. Those ingredients create a deeper, slightly smokier stew than the most traditional versions. Sweet Hungarian paprika remains the main seasoning and should not be replaced entirely with smoked paprika.

How Creamy Chicken Paprikash Gets Its Flavour

Creamy chicken paprikash begins by browning the chicken thighs in olive oil. Browning develops savoury flavour on the surface of the meat and leaves caramelised pieces on the bottom of the pot. After the chicken is removed, the onion and garlic cook in the same oil and absorb some of those flavours.

The spices are added after the onion has softened. Paprika releases its aroma quickly when warmed in oil, but it can become bitter when exposed to high heat for too long. Stir the spices for approximately one minute, then immediately add the broth and tomatoes. Scraping the bottom of the pot incorporates the browned pieces into the sauce.

Choosing the Right Paprika

Sweet Hungarian paprika has a warm, mildly sweet flavour and a vibrant red colour. It forms the backbone of the dish, so fresh, good-quality paprika makes a noticeable difference. A jar that has remained open for several years may still add colour but will contribute far less aroma.

Smoked paprika adds depth but should remain a supporting flavour. This recipe uses one teaspoon alongside two tablespoons of sweet paprika. Ground cumin is another nontraditional addition that contributes warmth. If you want a flavour closer to classic chicken paprikash, simply omit the cumin and smoked paprika.

Cooking the Chicken Until Tender

Chicken thighs are well suited to slow simmering because they contain more fat and connective tissue than chicken breast. They remain moist as the stew cooks and become tender without falling apart immediately. Cut the thighs into similarly sized pieces so they finish cooking at approximately the same time.

Keep the pot at a gentle simmer rather than a vigorous boil. High heat can toughen the outside of the chicken and reduce the liquid too quickly. Stir occasionally and check the bottom of the pot to make sure the sauce is not sticking.

Adding Sour Cream Without Curdling

Sour cream gives the stew its characteristic tang and creamy texture. Adding cold sour cream directly to very hot liquid can cause it to separate. To prevent this, place the sour cream in a bowl and gradually stir in several spoonfuls of hot broth. This gently raises its temperature before it enters the pot.

Reduce the heat before adding the tempered sour cream and heavy cream. Let the stew thicken gently without returning it to a full boil. If the sauce becomes thicker than desired, stir in a small quantity of chicken broth.

Serving and Storing the Stew

Egg noodles are a natural accompaniment, but mashed potatoes, rice, dumplings, or crusty bread also work well. For another satisfying chicken dinner with bright seasoning, try our Lemon-Pepper Chicken Drumsticks.

Cook chicken to an internal temperature of at least 165ยฐF and refrigerate leftovers within two hours. Current FDA safe food-handling guidance provides further advice about preparing, cooling, storing, and reheating poultry dishes.

With tender chicken, warming spices, and a velvety sauce, Hungarian Paprikash Stew is a substantial cold-weather meal that becomes even more flavourful after the ingredients have had time to mingle.


Orange Cinnamon Chicken

Orange cinnamon chicken with honey, ginger, cloves, fresh orange slices, and a glossy citrus sauce

Orange Cinnamon Chicken

Juicy chicken breasts marinated in fresh orange, honey, cinnamon, ginger, and cloves before being pan-seared and finished with a fragrant citrus sauce.
Couverts4 servings
Total time 1 hour 45 minutes
estimated costs pp $3.40
Deel op Facebook Print Recipe

Equipment

Ingredients

Instructions

  • Whisk the orange juice, orange zest, honey, olive oil, cinnamon, ginger, cloves, salt, and black pepper together in a mixing bowl.
  • Add the chicken breasts and turn them until evenly coated with the marinade.
  • Cover the bowl and refrigerate for at least 1 hour.
  • Remove the chicken from the refrigerator 15 minutes before cooking.
  • Heat a large skillet over medium heat.
  • Remove the chicken from the marinade and reserve the remaining marinade.
  • Place the chicken breasts in the hot skillet.
  • Cook for 6โ€“7 minutes on each side until golden brown.
  • Pour the reserved marinade into a small saucepan.
  • Bring the marinade to a full boil for at least 1 minute.
  • Reduce the heat and simmer for 5โ€“7 minutes until the sauce thickens slightly.
  • Check that the thickest part of each chicken breast reaches 74ยฐC (165ยฐF).
  • Remove the chicken from the skillet and let it rest for 5 minutes.
  • Drizzle the cooked orange cinnamon sauce over the chicken before serving.

Notes & Wine Advice

Serving Suggestions

Serve the orange cinnamon chicken with couscous, steamed rice, roasted sweet potatoes, or seasonal vegetables. A crisp dish from our salad recipes provides a fresh contrast to the warm citrus sauce.

Recipe Notes

The reserved marinade has been in contact with raw chicken and must be boiled before it is served as a sauce. Pound very thick chicken breasts to an even thickness so they cook at the same rate. Browse our chicken recipes for more dependable dinner ideas.

Variations

Add chili flakes for gentle heat or replace the honey with maple syrup. Lemon juice can replace part of the orange juice for a sharper sauce. Explore our Spices & Seasoning recipes for more ways to adjust the cinnamon, ginger, and cloves.

Wine Advice

A fresh Pinot Grigio complements the bright orange flavor, while an off-dry Riesling balances the honey and warming spices.

Nutrition values

Serving: 1 chicken breast with sauce | Calories: 285 kcal | koolhydraten: 11 g | Eiwitten: 39 g | Vet: 9 g | Verzadigd vet: 2 g | Natrium: 390 mg | Suiker: 9 g
————————————————————————————————–

About Orange Cinnamon Chicken

Orange cinnamon chicken combines tender chicken breasts with fresh orange, honey, and warming spices. The citrus adds brightness, while cinnamon, ginger, and cloves create a fragrant sauce that feels particularly appropriate during autumn and winter. This balanced combination delivers gentle sweetness without turning the dish into an overly sugary meal.

The chicken first marinates in orange juice and zest so the citrus flavor reaches beyond the surface. After marinating, it is seared in a skillet until golden. The remaining marinade is then safely boiled and reduced into a glossy sauce. This simple method makes the recipe suitable for a family dinner while still producing an attractive dish for guests.

Building a Balanced Citrus Flavor

Fresh orange juice provides acidity and natural sweetness, while orange zest contributes concentrated citrus aroma. Using both ingredients gives the citrus-spiced chicken a fresher and more complete orange flavor than bottled juice alone could provide.

Cinnamon introduces warmth but is measured carefully so it does not overpower the chicken. Ginger adds gentle heat, while a small quantity of cloves creates depth. Honey softens the acidity and helps the sauce coat the meat. Together, these ingredients give orange cinnamon chicken a balanced sweet, savory, and aromatic character.

For more creative poultry meals, browse our chicken recipes. You can also explore our Spices & Seasoning recipes for different ways to combine citrus with warming spices.

Cooking Citrus-Spiced Chicken

Choose chicken breasts of a similar size so they finish cooking at approximately the same time. If the thickest sections are much larger than the thinner ends, gently pound the chicken to an even thickness. This allows the citrus-spiced chicken to cook evenly without drying out.

Marinate the chicken for at least one hour, but avoid leaving it in the citrus mixture for an excessively long period. Acidic orange juice can gradually alter the meatโ€™s texture. Remove the chicken from the refrigerator about 15 minutes before cooking so it is not extremely cold when it reaches the skillet.

Cook the orange cinnamon chicken over medium heat and allow the first side to develop a golden surface before turning it. Moving the chicken too frequently can interrupt browning. Use a meat thermometer to confirm that the thickest section reaches 74ยฐC.

Preparing the Sauce and Serving

The reserved marinade has been in contact with raw poultry and must be cooked before it can be served. Pour it into a saucepan and bring it to a full boil for at least one minute. Reduce the heat and simmer for five to seven minutes until the sauce becomes slightly thicker.

If the sauce reduces too much, add a tablespoon of fresh orange juice or water. It should remain glossy and pourable. Spoon the sauce over the rested chicken immediately before serving so the golden surface remains visible.

Serve orange cinnamon chicken with couscous, steamed rice, roasted sweet potatoes, green beans, or broccoli. A fresh dish from our salad recipes provides a crisp contrast to the warm spices and citrus sauce.

Storing Orange Cinnamon Chicken

Allow leftovers to cool before transferring them to an airtight container. Refrigerate the chicken with its sauce for up to three days. Keeping the sauce with the meat helps prevent the chicken breasts from drying out during storage.

Reheat individual portions gently in a covered skillet or microwave until thoroughly hot. Add a small splash of orange juice or water if the sauce has thickened in the refrigerator. For a different flavor, replace the honey with maple syrup or add chili flakes for gentle heat.

Always keep raw poultry and its marinade separate from cooked food and clean all utensils and surfaces carefully. Follow the FDA safe food-handling guidance when marinating, cooking, storing, and reheating chicken.

Bright citrus, gentle sweetness, and aromatic spices make this orange cinnamon chicken a dependable seasonal dinner with flavor distributed through every part of the dish.


Hearty Millet Vegetable Stew

Hearty Millet Vegetable Stew with millet, carrots, potatoes, zucchini, tomatoes, and fresh parsley served in a rustic bowl.

Hearty Millet Vegetable Stew

Hearty Millet Vegetable Stew is a wholesome vegan stew filled with tender vegetables, protein-rich millet, tomatoes, and fragrant herbs. This comforting one-pot meal is naturally gluten-free and perfect for cool evenings when you’re craving something nourishing and satisfying.
Couverts4 servings
estimated costs pp $2.10
Deel op Facebook Print Recipe

Equipment

Ingredients

Instructions

  • Rinse the millet thoroughly under cold water and drain well.
  • Heat the olive oil in a large pot over medium heat.
  • Add the onion and garlic and cook for 3 to 4 minutes until softened.
  • Stir in the carrots, potatoes, zucchini, and bell pepper and cook for another 5 minutes.
  • Add the millet, diced tomatoes, vegetable broth, thyme, rosemary, salt, and black pepper.
  • Bring the stew to a boil.
  • Reduce the heat, cover, and simmer for 35 to 40 minutes until the millet is tender and the vegetables are cooked through.
  • Taste and adjust the seasoning if needed.
  • Ladle into bowls and garnish with fresh parsley before serving.

Notes & Wine Advice

Recipe Notes

Rinsing the millet before cooking removes any natural bitterness and improves its texture.
Add spinach or kale during the last few minutes of cooking for an extra boost of vegetables.
This stew tastes even better the next day after the flavors have had time to develop.
Serve with crusty whole-grain bread or a simple Greek salad for a complete meal.

Wine Advice

A crisp Sauvignon Blanc pairs beautifully with the fresh vegetables and herbs.
A lightly oaked Chardonnay also complements the earthy millet and comforting flavors.

Nutrition values

Calories: 220 kcal | koolhydraten: 45 g | Eiwitten: 6 g | Vet: 4 g | Verzadigd vet: 0.5 g | Natrium: 340 mg | Suiker: 8 g
————————————————————————————————–
Cuisine; American / Greece
Season: Autumn / Winter
Occasions Family Dinner


About This Recipe

Hearty Millet Vegetable Stew is a wholesome Greek-inspired one-pot meal filled with colorful vegetables, tender millet, tomatoes, and fragrant herbs. Naturally vegan and gluten-free, this nourishing stew delivers hearty comfort while remaining light enough for everyday meals. Millet adds a pleasant, slightly nutty flavor and provides plant-based protein, making this recipe both satisfying and nutritious for the whole family.

Why You’ll Love Hearty Millet Vegetable Stew

This millet vegetable stew is easy to prepare using simple pantry staples and fresh vegetables. The millet absorbs the rich vegetable broth while carrots, potatoes, zucchini, and peppers become wonderfully tender. The combination of thyme and rosemary adds classic Mediterranean flavor, creating a comforting meal that’s perfect for meal prep or cozy family dinners. If you enjoy wholesome comfort food, browse our Stew Recipes, Vegetable Recipes, Comfort Food Recipes, Greek Recipes, and Vegan Recipes.

How To Make Millet Vegetable Stew

Begin by sautรฉing the onion and garlic until fragrant before adding the remaining vegetables. Stir in the millet, tomatoes, herbs, and vegetable broth, then simmer gently until the millet is tender and the vegetables are perfectly cooked. Finish with freshly chopped parsley for a burst of freshness just before serving.

Serving Hearty Millet Vegetable Stew

Serve this millet vegetable stew with warm crusty bread, a fresh green salad, or traditional Greek olives for a complete Mediterranean-inspired meal. It also pairs beautifully with a sprinkle of fresh herbs and a drizzle of extra virgin olive oil.

Storage Tips

Hearty Millet Vegetable Stew keeps well in the refrigerator for up to four days and freezes beautifully for up to three months. As it rests, the flavors continue to develop, making leftovers even more delicious. For additional food safety guidance, visit the FDA Food Safety website.

Rich in vegetables, wholesome grains, and Mediterranean herbs, Hearty Millet Vegetable Stew is a comforting recipe that’s perfect for cool evenings and healthy family meals. Its simple ingredients and satisfying flavor make it a wonderful addition to any weekly menu.


Marinated Chicken and Pork Stew

Spanish chicken pork stew with tender chicken, pork, potatoes, carrots, and tomatoes served in a rustic Dutch oven.

Marinated Chicken and Pork Stew

Marinated Chicken and Pork Stew is a hearty Spanish-inspired comfort meal featuring tender chicken, succulent pork, vegetables, aromatic herbs, and smoked paprika simmered in a rich tomato broth. This satisfying one-pot recipe is perfect for family dinners and cozy evenings.
Couverts4 servings
estimated costs pp $3.95
Deel op Facebook Print Recipe

Equipment

  • Dutch oven or large pot
  • Knife
  • Large bowl
  • Measuring cups
  • plastic wrap
  • Wooden spoon

Ingredients

Instructions

  • In a large bowl, combine the olive oil, garlic, cumin, smoked paprika, thyme, rosemary, salt, and black pepper.
  • Add the chicken and pork and toss until evenly coated.
  • Cover and refrigerate for 2 hours to marinate.
  • Heat a Dutch oven over medium-high heat.
  • Brown the marinated chicken and pork in batches for 5 to 7 minutes, then transfer to a plate.
  • Add the onion and carrots to the same pot and cook for about 5 minutes until softened.
  • Stir in the potatoes, diced tomatoes, white wine, and chicken broth.
  • Return the browned chicken and pork to the pot.
  • Bring to a gentle simmer, cover, and cook for 1ยฝ hours until the meat is tender.
  • Taste and adjust the seasoning before serving.

Notes & Wine Advice

Recipe Notes

Marinating the meat for several hours or overnight creates an even deeper flavor.
Brown the meat in batches to develop a rich caramelized crust without overcrowding the pan.
Add peas or roasted red peppers during the final 10 minutes for extra color and sweetness.
This stew tastes even better the next day, making it ideal for meal prep.

Wine Advice

A fruity Tempranillo pairs beautifully with the smoky paprika and tender meat.
A smooth Garnacha is another excellent Spanish wine that complements this hearty stew.

Nutrition values

Calories: 390 kcal | koolhydraten: 28 g | Eiwitten: 40 g | Vet: 15 g | Verzadigd vet: 4 g | Natrium: 340 mg | Suiker: 7 g
————————————————————————————————–
Course; Chicken / Main Course / Pork / Stew
Cuisine; Spain
Season: Autumn / Winter
Occasions Family Dinner

About This Recipe

Marinated Chicken and Pork Stew is a hearty Spanish-inspired one-pot meal that combines tender chicken, succulent pork, aromatic herbs, smoked paprika, and vegetables in a rich tomato broth. This comforting Spanish chicken pork stew develops incredible depth of flavor thanks to the herb marinade and slow simmering, making it the perfect recipe for cozy family dinners and cooler evenings.

Why You’ll Love Marinated Chicken and Pork Stew

This recipe combines two flavorful meats that complement each other beautifully. The chicken stays juicy while the pork becomes wonderfully tender after slow cooking. Smoked paprika, cumin, rosemary, and thyme create classic Mediterranean flavors, while tomatoes and vegetables add richness and natural sweetness. If you enjoy hearty comfort food, browse our Chicken Recipes, Pork Recipes, Stew Recipes, Spanish Recipes, and Gluten-Free Recipes.

How To Make Spanish Chicken Pork Stew

Marinate the chicken and pork with olive oil, garlic, herbs, and spices before browning them in batches to build flavor. Sautรฉ the vegetables in the same pot, then add the tomatoes, wine, and broth before returning the meat to the pan. Simmer gently until the meat becomes fork-tender and the broth develops into a rich, aromatic stew.

Serving Marinated Chicken and Pork Stew

Serve this Spanish chicken pork stew with crusty artisan bread, mashed potatoes, rice, or roasted vegetables. A simple green salad also provides a fresh contrast to the rich, savory flavors.

Storage Tips

Marinated Chicken and Pork Stew keeps well in the refrigerator for up to four days and freezes beautifully for up to three months. The flavors become even richer after a day, making leftovers especially delicious. For additional food safety guidance, visit the FDA Food Safety website.

With tender meat, colorful vegetables, and aromatic Spanish herbs and spices, this comforting stew is a satisfying meal that’s easy to prepare and perfect for sharing with family and friends throughout the colder months.