
All-Purpose Dry Spice Rub

dry spice rub combines smoked paprika, garlic powder, onion powder, herbs, chili spices, and brown sugar into a versatile seasoning blend packed with smoky savory flavor. This homemade barbecue rub creates rich flavor on meats, vegetables, poultry, and grilled dishes with very little effort.

This all-purpose seasoning recipe remains popular because the spice blend works beautifully for grilling, roasting, smoking, and slow cooking. The balance between smoky paprika, savory herbs, mild sweetness, and gentle heat creates deep flavor without overpowering the food.

Dry spice rub creates smoky barbecue flavor

The popularity of dry spice rub recipes continues to grow because homemade seasoning blends allow better control over flavor, heat, sweetness, and salt levels. Smoked paprika, chili powder, cayenne pepper, and garlic powder combine to create rich barbecue character.

Another reason this barbecue seasoning recipe works so well is the balance between savory spices and mild sweetness. Brown sugar helps caramelize meats beautifully while oregano and thyme add fresh herbal depth throughout the blend.

Homemade barbecue seasoning works on many dishes

This smoky seasoning blend works beautifully on beef, pork, chicken, seafood, roasted vegetables, potatoes, burgers, ribs, and grilled meats. The spices coat food evenly while creating flavorful crust during cooking.

If you enjoy homemade barbecue seasonings, you may also like our Cajun Spice Mix, another flavorful spice blend packed with smoky savory richness.

Texture plays an important role in this recipe. The combination of fine spices and dried herbs creates even coating while allowing the seasoning to stick well to meats and vegetables before cooking.

Storing the spice mixture inside an airtight container also helps preserve the smoky aroma and rich seasoning flavor for several months.

Perfect seasoning blend for grilling and roasting

This dry spice rub recipe works perfectly for barbecue cooking, smoking, roasting, grilling, meal prep, and outdoor cookouts because it adds deep smoky flavor quickly and easily.

The seasoning pairs beautifully with steaks, pork chops, chicken wings, roasted potatoes, grilled vegetables, ribs, burgers, seafood, or oven-roasted meats.

Proper food handling remains important whenever preparing spice blends and seasoning raw meats. Store spices properly in airtight containers and always use clean utensils while seasoning food. For additional food preparation and safety guidance, visit the FDA.

Ultimately, dry spice rub delivers smoky barbecue richness, savory herbal flavor, gentle heat, and versatile homemade seasoning character in an easy recipe perfect for grilling and roasting.
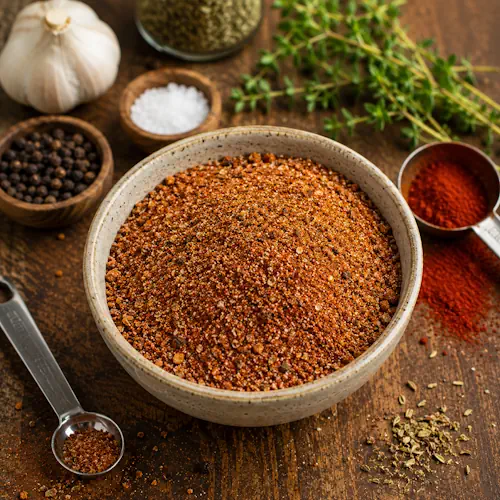
dry spice rub served on a rustic wooden table with smoky barbecue seasoning and herbs

Smoky All-Purpose Dry Spice Rub

Homemade smoky barbecue seasoning blend for meats, vegetables, and grilling recipes.
Couverts4 servings
Total time 5 minutes
estimated costs pp $0.40 per person
Deel op Facebook Print Recipe

Equipment

  • airtight container
  • Measuring spoons
  • Mixing bowl

Ingredients

Instructions

  • Combine all ingredients in a mixing bowl.
  • Mix thoroughly until evenly combined.
  • Transfer the seasoning blend to an airtight container.
  • Store in a cool dry place for up to 6 months.
  • Use the spice rub on meats, poultry, seafood, or vegetables before grilling, roasting, or smoking.

Notes & Wine Advice

Notes

Allowing the seasoning to rest on meats for at least 30 minutes creates deeper barbecue flavor.

Serve Tip

Use this spice rub on ribs, chicken, pork chops, roasted potatoes, burgers, or grilled vegetables.

Variations

Add cumin, chipotle powder, coffee powder, cinnamon, or extra cayenne for deeper smoky richness and heat.

Wine Advice

A bold Shiraz pairs beautifully with the smoky spices and savory barbecue flavors.

Nutrition values

Calories: 10 kcal | koolhydraten: 2 g | Eiwitten: 0 g | Vet: 0 g | Verzadigd vet: 0 g | Natrium: 290 mg | Suiker: 1 g
————————————————————————————————–

Cherry and Chocolate Chunk Bliss Ice Cream

Homemade Irish Cream Liqueur served over ice in a glass with a bottle of creamy Irish whiskey liqueur.

Cherry and Chocolate Chunk Bliss Ice Cream

This homemade version of Cherry Garcia Ice Cream is creamy, loaded with sweet cherries and rich chocolate chunks, and bursting with classic flavors. A perfect frozen treat!
Couverts6 Servings 6 servings
Total time 10 minutes
estimated costs pp $3.50
Deel op Facebook Print Recipe

Equipment

  • Ice cream maker (or freezer-safe container for no-churn method)
  • Mixing bowls
  • spatula
  • Whisk

Ingredients

Instructions

  • In a mixing bowl, whisk together heavy cream, milk, sugar, and vanilla extract until sugar dissolves.
  • Stir in the chopped cherries and chocolate chunks.
  • Churn method: Pour the mixture into an ice cream maker and follow the manufacturer’s instructions.
  • No-churn method: Pour the mixture into a freezer-safe container, cover, and freeze for about 4 hours, stirring every hour to break up ice crystals.
  • Once the ice cream reaches a scoopable consistency, serve and enjoy!

Notes & Wine Advice

Recipe Notes

  • Serving Tip: Serve in a waffle cone or alongside warm brownies for an indulgent dessert.
  • Storage: Store any leftover ice cream in an airtight container in the freezer for up to two weeks. Keep a layer of plastic wrap pressed directly against the surface to prevent ice crystals from forming.
  • Cherry Prep: Ensure the cherries are thoroughly pitted before chopping to avoid any unpleasant surprises while enjoying your frozen treat.

Wine Advice

Pairs well with a sweet dessert wine like Port, or a light Rose, complementing the cherry and chocolate flavors perfectly.

Nutrition values

Calories: 310 kcal | koolhydraten: 35 g | Eiwitten: 4 g | Vet: 18 g | Verzadigd vet: 11 g | Natrium: 0.05 mg | Suiker: 31 g
————————————————————————————————–

There is nothing quite like making your own frozen treats at home, and this cherry and chocolate chunk bliss ice cream is the ultimate crowd-pleaser. Inspired by the famous parlor classic, this recipe combines a rich, smooth dairy base with the natural sweetness of fresh fruit and the deep indulgence of premium dark chocolate. It is a luxurious combination that satisfies your sweet tooth while keeping the ingredients simple, wholesome, and completely customizable to your personal preferences.

Making ice cream from scratch might sound intimidating, but it is incredibly straightforward. Whether you own a traditional electric ice cream machine or prefer a simpler hand-churned method, this cherry and chocolate chunk bliss ice cream delivers an exceptional texture every single time. By focusing on high-quality ingredients, you elevate a simple afternoon project into a gourmet experience that easily rivals any premium brand you can buy at the grocery store.

Perfecting Your Cherry and Chocolate Chunk Bliss Ice Cream

The secret to achieving that perfect scoopable consistency lies in the balance of fats and sugars. Using a combination of heavy cream and whole milk ensures a dense, velvety mouthfeel without feeling overly heavy. When preparing your fresh cherries, a small splash of lemon juice is added to enhance the vibrant fruit flavor, cutting through the richness of the dairy and making the cherry notes truly sing against the dark chocolate pieces.

For the best visual and structural results, it is highly recommended to chop your dark chocolate chunks into varying sizes. Small flakes will melt slightly on your tongue, while larger chunks provide that satisfying, signature crunch. If you are looking for more technical guidance on dairy pasteurization or food safety standards regarding home freezing, you can check out the official guidelines provided by the FDA to ensure your kitchen practices are perfectly aligned with modern safety protocols.

When you are ready to expand your dessert repertoire or want to discover more inspired flavor combinations, be sure to explore the vast collection of sweet and savory guides available on Icecream. Sharing these culinary creations with friends and family is half the fun of cooking from scratch, and having a reliable source for inspiration makes planning your next kitchen venture seamless and exciting.

Once your mixture is fully prepared and chilled, simply transfer it to your freezer container or churning bowl. Within a few hours, you will be rewarded with a spectacular, deep flavor profile that proves why this combination remains an absolute classic. Indulge in a generous scoop of this cherry and chocolate chunk bliss ice cream on a warm afternoon, and enjoy the pure satisfaction of a perfectly crafted homemade dessert.


Homemade Baby Ruth Candy Bars

Baby Ruth Candy Bars with nougat caramel roasted peanuts and milk chocolate on a rustic wooden board.

Homemade Baby Ruth Candy Bars

These Homemade Baby Ruth Candy Bars combine fluffy nougat, creamy caramel, crunchy roasted peanuts, and a rich milk chocolate coating into an irresistible homemade candy treat. They’re perfect for holidays, gift-giving, parties, or satisfying any sweet tooth with a classic candy bar made from scratch.
Couverts16 bars
estimated costs pp $0.75 per bar
Deel op Facebook Print Recipe

Equipment

  • 8×8-inch baking pan
  • Candy thermometer
  • Measuring cups
  • microwave-safe bowl
  • Mixing bowls
  • Parchment paper
  • Saucepan
  • spatula
  • Whisk

Ingredients

For the Nougat Layer

For the Caramel Peanut Layer

For the Chocolate Coating

Instructions

  • Line an 8×8-inch baking pan with parchment paper.
  • In a saucepan, combine the granulated sugar, corn syrup, and water over medium heat.
  • Stir until the sugar dissolves and continue cooking until the syrup reaches 260ยฐF (127ยฐC) on a candy thermometer.
  • Beat the egg white until stiff peaks form.
  • Slowly pour the hot syrup into the egg white while beating continuously.
  • Add the vanilla extract and continue beating until thick and glossy.
  • Spread the nougat evenly into the prepared pan.
  • In a microwave-safe bowl, melt the caramel candies with the heavy cream in 30-second intervals, stirring after each interval until smooth.
  • Fold the roasted peanuts into the caramel mixture.
  • Spread the caramel peanut mixture evenly over the nougat.
  • Refrigerate for about 30 minutes until firm.
  • Cut into 16 bars.
  • Melt the milk chocolate chips with the coconut oil in 30-second microwave intervals, stirring until smooth.
  • Dip each candy bar into the melted chocolate until completely coated.
  • Place the coated bars onto parchment paper.
  • Allow the chocolate to set completely before serving.

Notes & Wine Advice

## Recipe Notes

Recipe Notes

Use fresh roasted peanuts for the best crunch and flavor.
Allow the bars to chill completely before dipping them in chocolate to help them hold their shape.
Store the candy bars in an airtight container in the refrigerator for up to one week.
For cleaner slices, warm your knife under hot water and dry it before cutting.

Wine Advice

A Ruby Port complements the rich caramel, peanuts, and chocolate beautifully.
A sweet dessert wine or a glass of cold milk also pairs wonderfully with these homemade candy bars.

Nutrition values

Calories: 220 kcal | koolhydraten: 30 g | Eiwitten: 4 g | Vet: 10 g | Verzadigd vet: 5 g | Natrium: 0.2 mg | Suiker: 22 g
————————————————————————————————–

About This Recipe

Baby Ruth Candy Bars are a fun homemade version of the classic American candy bar, with soft nougat, creamy caramel, roasted peanuts, and a smooth milk chocolate coating. This recipe gives you the same rich, nutty, chewy bite, but made fresh in your own kitchen.

Why Baby Ruth Candy Bars Work So Well

The base of these candy bars starts with a light nougat layer. It gives the bars their soft texture and balances the sweetness of the caramel. A candy thermometer helps the sugar syrup reach the right stage, so the nougat sets properly without becoming too hard.

The caramel peanut layer adds the classic crunch and chew that makes Baby Ruth Candy Bars so recognizable. Roasted peanuts bring a salty, nutty flavor that keeps the bars from tasting too sweet. The caramel holds everything together and creates that sticky candy-shop texture.

After chilling, the bars are cut and dipped in melted milk chocolate. This final layer gives them their familiar finish and makes them look like proper homemade candy bars. Coconut oil or shortening helps the chocolate melt smoothly and coat each bar evenly.

These homemade candy bars are ideal for holidays, gift boxes, parties, bake sales, movie nights, and dessert trays. You can serve them chilled for a firmer bite or at room temperature for a softer caramel texture.

If you enjoy homemade sweets, browse our Candy Recipes collection for more chocolate, caramel, and sweet treat ideas.

For official information about safe food handling and storing homemade sweets, visit the FDA Food Safety website.

With nougat, caramel, peanuts, and chocolate in every bite, Baby Ruth Candy Bars are a rich homemade treat that feels nostalgic, indulgent, and perfect for anyone who loves classic candy.


Homemade Mall Pretzels

Homemade Mall Pretzels with coarse salt fresh from the oven on a rustic wooden serving board.

Homemade Mall Pretzels

These Homemade Mall Pretzels are soft, chewy, buttery, and beautifully golden with the classic flavor everyone loves. They’re easy to make at home and can be finished with coarse salt for a traditional snack or coated in cinnamon sugar for a sweet treat. Perfect for parties, movie nights, or simply enjoying warm from the oven.
Couverts12 pretzels
Total time 1 hour 28 minutes
estimated costs pp $0.65 per pretzel
Deel op Facebook Print Recipe

Equipment

  • Baking sheets
  • Grease for baking sheets
  • Measuring cups
  • Mixing bowls
  • Pastry brush
  • Shallow bowls
  • Whisk

Ingredients

Instructions

  • Sprinkle the yeast over the warm water in a large mixing bowl and stir until dissolved.
  • Add the brown sugar and salt and stir well.
  • Mix in the bread flour and all-purpose flour.
  • Knead the dough until smooth and elastic.
  • Cover and let the dough rise for at least 30 minutes.
  • Meanwhile, combine the 2 cups of warm water with the baking soda in a shallow bowl and stir until dissolved.
  • Divide the dough into 12 equal portions.
  • Roll each portion into a rope about ยฝ inch thick.
  • Shape each rope into a traditional pretzel.
  • Dip each pretzel into the baking soda solution.
  • Place the pretzels on lightly greased baking sheets.
  • Allow the shaped pretzels to rise again for about 15 minutes.
  • Bake in a preheated 450ยฐF (230ยฐC) oven for approximately 10 minutes or until golden brown.
  • Brush the hot pretzels generously with melted butter.
  • For salted pretzels, sprinkle immediately with coarse salt.
  • For cinnamon sugar pretzels, dip the buttered pretzels into a mixture of cinnamon and sugar until completely coated.
  • Serve warm.

Notes & Wine Advice

## Recipe Notes

Recipe Notes

For the softest pretzels, do not overbake them. Remove them as soon as they become deep golden brown.
Brush the pretzels with melted butter immediately after baking so the toppings stick perfectly.
Try different toppings such as coarse salt, cinnamon sugar, grated Parmesan cheese, garlic butter, or everything bagel seasoning.
These pretzels taste best fresh but can be reheated for a few minutes in the oven.

Wine Advice

A dry Riesling complements both the buttery dough and the salty topping beautifully.
If you prefer beer, a light lager is a classic pairing with warm homemade pretzels.

Nutrition values

Calories: 235 kcal | koolhydraten: 42 g | Eiwitten: 6 g | Vet: 5 g | Verzadigd vet: 2.5 g | Natrium: 0.9 mg | Suiker: 4 g
————————————————————————————————–

About This Recipe

Homemade Mall Pretzels let you recreate the famous warm, soft pretzels from your favorite mall bakery right in your own kitchen. These buttery pretzels have a chewy interior, a beautifully golden crust, and the unmistakable flavor that has made them a favorite snack for generations. Whether you prefer them sprinkled with coarse salt or coated in cinnamon sugar, this recipe delivers authentic bakery-style results with simple pantry ingredients.

Why Homemade Mall Pretzels Are So Popular

The secret to these pretzels is the combination of bread flour and all-purpose flour. Bread flour provides the chewy texture that makes a great pretzel, while all-purpose flour keeps the dough soft and easy to work with. Before baking, each pretzel is dipped into a baking soda solution. This traditional step creates the characteristic golden-brown crust, rich flavor, and glossy appearance that make homemade pretzels so recognizable.

Making Homemade Mall Pretzels is surprisingly simple. After a short kneading and rising time, the dough becomes smooth, elastic, and easy to shape into classic pretzel twists. Even if you’ve never baked pretzels before, this recipe is beginner-friendly and produces reliable results every time.

One of the biggest advantages of this recipe is its versatility. The classic version is brushed with melted butter and finished with coarse salt. If you prefer something sweeter, coat the warm buttered pretzels in cinnamon sugar for a bakery-style treat. Other delicious toppings include garlic butter, grated Parmesan cheese, shredded cheddar, everything bagel seasoning, or a drizzle of icing.

These Homemade Mall Pretzels are perfect for family gatherings, movie nights, parties, game days, picnics, or simply serving warm as an afternoon snack. They pair wonderfully with cheese sauce, honey mustard, spicy mustard, chocolate sauce, or cream cheese dip, making them suitable for both sweet and savory occasions.

If you enjoy baking fresh bread and snacks, you’ll also love exploring our Bread Recipes collection for even more inspiration.

For official information about food safety and baking ingredients, visit the FDA Food Safety website.

Once you bake your first batch, you’ll discover how easy it is to recreate this bakery favorite at home. Soft, buttery, golden, and endlessly customizable, these Homemade Mall Pretzels are guaranteed to become one of your favorite homemade baked treats.


Crispy Golden Fish Batter

Crispy Fish Batter coating golden fried cod fillets served with fries, tartar sauce, and fresh lemon wedges.

Crispy Golden Fish Batter

This Ultimate Crispy Fish Batter creates a light, airy, and golden coating that stays crunchy while keeping the fish tender and flaky inside. Perfect for cod, haddock, pollock, and other white fish fillets.
Couverts4
Total time 25 minutes
estimated costs pp $3.50 per person
Deel op Facebook Print Recipe

Equipment

  • Deep fryer or deep pan
  • Large mixing bowl
  • Measuring cups
  • Paper towels
  • Tongs
  • Whisk

Ingredients

Instructions

  • Whisk together the flour, cornstarch, baking powder, salt, black pepper, garlic powder, and paprika.
  • Add the club soda and beaten egg and whisk until smooth.
  • Heat the vegetable oil to 375ยฐF (190ยฐC).
  • Pat the fish fillets dry.
  • Dip each fillet into the batter until fully coated.
  • Carefully place the fish into the hot oil.
  • Fry for 3 to 4 minutes per side until golden brown and crispy.
  • Drain on paper towels and serve immediately.

Notes & Wine Advice

Recipe Notes

Serve the fish immediately after frying for the best crunch.
Patting the fish dry before dipping it in the batter helps the coating stick better.
Keep the oil at 375ยฐF (190ยฐC) so the batter becomes crisp instead of greasy.
Serve with tartar sauce, lemon wedges, crispy fries, mushy peas, or coleslaw.

Wine Advice

A chilled Chardonnay works well with the golden, crispy coating and mild white fish.
A crisp Sauvignon Blanc is also a good match because its fresh citrus notes balance the fried batter nicely.

Nutrition values

Calories: 385 kcal | koolhydraten: 39 g | Eiwitten: 24 g | Vet: 14 g | Verzadigd vet: 2 g | Natrium: 1.2 mg | Suiker: 1 g
————————————————————————————————–

About This Recipe

Crispy Fish Batter is the kind of recipe that turns simple white fish into a proper homemade fish and chips meal. The batter is light, golden, and crunchy, while the fish inside stays moist and flaky. It works especially well with cod, haddock, or pollock, but you can also use other mild white fish fillets.

Why This Crispy Fish Batter Works

The combination of all-purpose flour and cornstarch gives this batter its crisp texture. Flour provides structure, while cornstarch helps make the coating lighter and less heavy. Baking powder adds extra lift, and cold club soda creates small bubbles in the batter. Those bubbles expand in the hot oil and help form a crisp, airy crust.

The egg gives the batter more body and helps it cling to the fish. Paprika, garlic powder, salt, and black pepper add a mild savoury flavour without overpowering the fish. This makes the recipe useful for a classic fish and chips dinner, but also for a simple seafood meal with salad, fries, or roasted vegetables.

For the best result, the fish should be dry before it goes into the batter. Wet fish can make the coating slide off or turn soft. A quick pat with paper towels is enough. The oil temperature also matters. At 375ยฐF (190ยฐC), the batter seals quickly and becomes golden while the fish cooks gently inside.

This batter is not only useful for fish. You can also use it for shrimp, onion rings, mushrooms, zucchini, cauliflower, or other vegetables. It is a handy basic recipe when you want something crispy without using a store-bought mix.

For more ideas with fish and seafood, visit our Seafood Recipes collection.

For official information about handling and preparing seafood safely, visit the FDA seafood safety guide.

This Crispy Fish Batter is easy to make, quick to fry, and ideal for anyone who wants golden homemade fried fish with a reliable crunch. Once you have used this Crispy Fish Batter, it becomes a simple go-to recipe for fish and chips at home.

Creamy Horseradish Sandwich Sauce

Creamy Horseradish Sauce and homemade horseradish sauce served in a small bowl for sandwiches, burgers, and dipping.

Creamy Horseradish Sandwich Sauce

Creamy Horseradish Sandwich Sauce is a quick homemade condiment with a smooth texture and a bold kick. Combining mayonnaise, prepared horseradish, Dijon mustard, and seasonings, this versatile sauce is perfect for roast beef sandwiches, burgers, wraps, fries, onion rings, and party platters. It takes only minutes to prepare and develops even better flavor after chilling.
Couverts1 cup
Total time 5 minutes
estimated costs pp $2.25
Deel op Facebook Print Recipe

Equipment

  • airtight container
  • Measuring cups
  • Measuring spoons
  • Mixing bowl
  • Whisk or spoon

Ingredients

Instructions

  • Combine the mayonnaise, horseradish, Dijon mustard, white vinegar, sugar, salt, and black pepper in a mixing bowl.
  • Whisk until smooth and fully combined.
  • Taste and adjust the seasoning if desired.
  • Add extra horseradish for a stronger flavor if preferred.
  • Cover the bowl or transfer the sauce to an airtight container.
  • Refrigerate for at least 30 minutes before serving.
  • Serve chilled as a spread, dip, or sandwich condiment.

Notes & Wine Advice

Notes

This sauce tastes best after chilling because the flavors have time to blend together.
Prepared horseradish varies in strength, so adjust the amount to match your preferred heat level.

Serving Suggestions

Spread on roast beef sandwiches, burgers, wraps, or deli sandwiches.
Serve as a dipping sauce with fries, onion rings, roasted potatoes, or vegetables.

Variations

Add extra Dijon mustard for a sharper flavor.
Mix in a little sour cream for a milder and creamier texture.

Wine Advice

A crisp white wine pairs nicely with roast beef dishes served alongside this sauce.
The fresh acidity helps balance the creamy texture and spicy horseradish flavor.

Nutrition values

Calories: 50 kcal | koolhydraten: 0.5 g | Eiwitten: 0 g | Vet: 5 g | Verzadigd vet: 1 g | Natrium: 95 mg | Suiker: 0.2 g
————————————————————————————————–
Cuisine; American
Season: All Seasons

About Creamy Horseradish Sauce

Creamy Horseradish Sauce is a simple homemade condiment that delivers a bold combination of creamy texture and spicy flavor. Made with mayonnaise, prepared horseradish, Dijon mustard, and a few pantry staples, this recipe comes together in minutes while providing a versatile sauce that works with a wide range of meals.

Many people know this style of sauce from classic roast beef sandwiches, where the creamy base balances the sharp bite of horseradish. The result is a condiment that enhances flavor without overwhelming the main ingredients. Because it requires no cooking, it is also one of the easiest homemade sauces to prepare.

Perfect for Sandwiches and Dipping

The sauce works exceptionally well on roast beef sandwiches, burgers, wraps, and deli-style creations. It can also be used as a dip for fries, onion rings, roasted vegetables, and potato wedges. Its smooth texture makes it easy to spread while its bold flavor adds character to simple dishes.

If you enjoy homemade condiments, visit our Sauce Recipes collection for more flavorful ideas.

A good homemade horseradish sauce should provide balance. The mayonnaise softens the sharpness of the horseradish while the Dijon mustard adds depth and complexity. A small amount of vinegar brightens the flavor and helps tie everything together.

Easy Homemade Flavor

One of the advantages of this recipe is its flexibility. You can increase the horseradish for more heat or reduce it for a milder flavor. Some cooks also add sour cream or Greek yogurt to create a lighter variation with a softer finish.

The sauce stores well in the refrigerator, making it useful for meal preparation and entertaining. In fact, many people find that the flavor improves after a few hours of chilling.

For information about safe storage and handling of homemade sauces, visit the FDA Food Safety Resources.

Whether you are preparing sandwiches, serving appetizers, or looking for a versatile condiment, Creamy Horseradish Sauce delivers bold flavor with minimal effort. Its creamy texture and distinctive kick make it a reliable addition to countless meals throughout the year.

Smoky Sweet BBQ Sauce

Smoky Sweet BBQ Sauce in a glass jar ready for grilling, dipping, and barbecue recipes.

Homemade Arbyโ€™s-Style BBQ Sauce

Smoky Sweet BBQ Sauce is a quick homemade barbecue sauce with the perfect balance of sweet, tangy, and smoky flavors. Made with ketchup, brown sugar, apple cider vinegar, and seasonings, this versatile sauce is ideal for grilled meats, burgers, sandwiches, fries, and barbecue favorites.
Couverts16 persons
estimated costs pp $0.20
Deel op Facebook Print Recipe

Equipment

  • Measuring cups
  • Measuring spoons
  • Small saucepan
  • stirring spoon
  • Whisk

Ingredients

Instructions

  • Whisk together the ketchup, apple cider vinegar, and brown sugar in a small saucepan over medium heat.
  • Add the Worcestershire sauce, garlic powder, onion powder, smoked paprika, salt, black pepper, and Tabasco sauce if using.
  • Stir in the water.
  • Bring the mixture to a gentle simmer.
  • Reduce the heat to low.
  • Cook for 8 to 10 minutes, stirring occasionally, until the sauce thickens slightly.
  • Remove from the heat and allow the sauce to cool.
  • Transfer to an airtight container.
  • Store in the refrigerator for up to one week.

Notes & Wine Advice

Notes

This sauce develops even more flavor after a few hours in the refrigerator.
The balance of sweetness and acidity makes it suitable for many barbecue dishes.

Serving Suggestions

Use as a glaze for grilled chicken, pork, ribs, burgers, or sausages.
Serve as a dipping sauce with fries, onion rings, roasted vegetables, or chicken tenders.

Variations

Add extra Tabasco sauce or cayenne pepper for a spicier version.
Use honey instead of brown sugar for a slightly different sweetness profile.

Wine Advice

A bold red wine pairs beautifully with the smoky and sweet flavors of this barbecue sauce.
For barbecue dishes featuring ribs or grilled meats, a fruit-forward red wine creates an excellent combination.

Nutrition values

Calories: 25 kcal | koolhydraten: 6 g | Eiwitten: 0 g | Vet: 0 g | Natrium: 180 mg | Suiker: 5 g
————————————————————————————————–
Cuisine; American
Season: All Seasons / Summer
Diets; Dairy-Free

About Smoky Sweet BBQ Sauce

Smoky Sweet BBQ Sauce is a simple homemade condiment that delivers classic barbecue flavor with very little effort. Combining ketchup, brown sugar, apple cider vinegar, Worcestershire sauce, and a handful of seasonings, this recipe creates a rich sauce that balances sweetness, tanginess, and gentle smokiness. It is a versatile addition to any kitchen and can be used for grilling, dipping, marinating, or glazing.

Barbecue sauce has long been a staple of American cooking. While countless regional variations exist, many popular versions share the same core elements found in this recipe. Sweetness from sugar, acidity from vinegar, savory depth from Worcestershire sauce, and subtle smokiness from paprika work together to create a well-rounded flavor profile.

One of the advantages of making barbecue sauce at home is complete control over the ingredients. You can easily adjust the sweetness, acidity, or spice level to match your personal preferences. A little extra brown sugar creates a sweeter sauce, while additional vinegar adds more tang. For those who enjoy heat, extra Tabasco sauce can provide a pleasant kick.

If you enjoy homemade condiments and grilling recipes, explore our Barbecue Recipes collection for more outdoor cooking inspiration.

Smoky Sweet BBQ Sauce works exceptionally well as a glaze for grilled meats. During cooking, the sugars caramelize and create a flavorful coating on chicken, pork, burgers, and ribs. The sauce also serves as a dipping sauce for fries, roasted vegetables, onion rings, and chicken tenders.

Another reason this recipe is popular is its convenience. The sauce comes together in about fifteen minutes and uses pantry ingredients that many home cooks already have available. Once prepared, it can be stored in the refrigerator and used throughout the week.

Proper storage is important for homemade sauces. The FDA Food Safety Resources provide useful information about safely storing prepared foods and condiments.

Whether you are planning a summer barbecue, preparing burgers for a family dinner, or looking for a versatile homemade condiment, Smoky Sweet BBQ Sauce offers a delicious balance of sweet, smoky, and tangy flavors. Its simple preparation and wide range of uses make it a valuable addition to any recipe collection.

Tangy Smokehouse BBQ Sauce Recipe

Smokehouse BBQ Sauce and homemade BBQ sauce in a glass jar ready for burgers, ribs, chicken, and barbecue recipes.

Tangy Smokehouse BBQ Sauce Recipe

Tangy Smokehouse BBQ Sauce is a quick homemade barbecue sauce with the perfect balance of sweet, tangy, and smoky flavors. Made with ketchup, brown sugar, apple cider vinegar, and savory seasonings, this versatile sauce is perfect for grilled meats, burgers, sandwiches, fries, and barbecue favorites. It takes only minutes to prepare and delivers authentic smokehouse flavor from simple pantry ingredients.
Couverts16
estimated costs pp $3.20
Deel op Facebook Print Recipe

Equipment

  • Measuring cups
  • Measuring spoons
  • Small saucepan
  • stirring spoon
  • Whisk

Ingredients

Instructions

  • Whisk together the ketchup, apple cider vinegar, and brown sugar in a small saucepan over medium heat.
  • Add the Worcestershire sauce, garlic powder, onion powder, smoked paprika, salt, black pepper, and Tabasco sauce if using.
  • Stir in the water.
  • Bring the mixture to a gentle simmer.
  • Reduce the heat to low.
  • Cook for 8 to 10 minutes, stirring occasionally, until the sauce thickens slightly.
  • Remove from the heat and allow the sauce to cool completely.
  • Transfer to an airtight container.
  • Store in the refrigerator for up to one week.

Notes & Wine Advice

Notes

This barbecue sauce develops even deeper flavor after several hours in the refrigerator.
The combination of vinegar, brown sugar, and smoked paprika creates a classic smokehouse-style flavor profile.

Serving Suggestions

Brush the sauce onto grilled chicken, pork chops, ribs, burgers, or sausages during the final minutes of cooking.
Serve it as a dipping sauce for fries, onion rings, roasted vegetables, chicken tenders, or sandwiches.

Variations

Add extra Tabasco sauce, cayenne pepper, or chili flakes for a spicier version.
Replace the brown sugar with honey or maple syrup for a slightly different sweetness and depth of flavor.

Wine Advice

A fruity red wine pairs beautifully with barbecue dishes featuring this sauce.
Its smoky, sweet, and tangy notes work especially well with grilled meats and summer barbecue favorites.

Nutrition values

Calories: 25 kcal | koolhydraten: 6 g | Eiwitten: 0 g | Vet: 0 g | Verzadigd vet: 0 g | Natrium: 180 mg | Suiker: 5 g
————————————————————————————————–
Cuisine; American
Season: All Seasons / Summer
Diets; Dairy-Free

About Smokehouse BBQ Sauce

Smokehouse BBQ Sauce is a homemade condiment that combines sweet, smoky, and tangy flavors in one easy recipe. Made with ketchup, brown sugar, apple cider vinegar, Worcestershire sauce, and spices, this sauce delivers the classic taste people expect from a traditional barbecue sauce.

Many home cooks prefer making a homemade BBQ sauce because it allows complete control over flavor and ingredients. You can easily adjust the sweetness, increase the spice level, or add extra smokiness to suit your personal taste.

Perfect for Grilling and Barbecue

This versatile sauce pairs wonderfully with burgers, ribs, chicken, pork, sausages, and sandwiches. During grilling, it creates a flavorful glaze while adding rich barbecue flavor to the finished dish.

It also works well as a dipping sauce for fries, onion rings, roasted vegetables, and chicken tenders. The balance between sweet and tangy flavors makes it suitable for many different meals.

If you enjoy outdoor cooking, visit our Barbecue Recipes collection for more inspiration.

Homemade BBQ Sauce Made Easy

A quality homemade BBQ sauce does not require complicated ingredients. This recipe uses simple pantry staples that come together in just a few minutes. The result is a flavorful sauce that tastes far better than many store-bought alternatives.

The combination of vinegar, brown sugar, smoked paprika, and Worcestershire sauce creates a rich depth of flavor that complements both grilled foods and everyday meals.

For information about safe storage of homemade sauces and condiments, visit the FDA Food Safety Resources.

Whether you are preparing a family barbecue, grilling burgers on a summer evening, or looking for a versatile condiment, Smokehouse BBQ Sauce delivers dependable flavor with minimal effort. This easy recipe belongs in every barbecue lover’s collection.

Blackened Chicken Power Salad

Blackened Chicken Power Salad with seasoned chicken, mixed greens, cucumber, tomato, and red onion served in a fresh salad bowl.

Blackened Chicken Power Salad

Blackened Chicken Power Salad combines juicy seasoned chicken with crisp salad greens, cucumber, tomato, and red onion for a fresh and satisfying meal. Packed with protein and bold flavor, this healthy salad is ideal for lunch, dinner, meal prep, and warm-weather dining.
Couverts4 persons
estimated costs pp $3.25
Deel op Facebook Print Recipe

Equipment

  • Grill pan, or frying pan
  • Knife
  • Measuring cups
  • Measuring spoons
  • salad bowl
  • Tongs

Ingredients

For the Chicken

For the Salad

Instructions

  • Preheat a grill pan or frying pan over medium-high heat.
  • Rub the chicken breasts with the blackened seasoning.
  • Drizzle the chicken with olive oil.
  • Cook the chicken for 4 to 5 minutes per side until fully cooked and the internal temperature reaches 165ยฐF (75ยฐC).
  • Transfer the chicken to a plate and let it rest for a few minutes.
  • Slice the chicken into strips.
  • Combine the salad greens, tomato, cucumber, and red onion in a large salad bowl.
  • Arrange the sliced chicken over the salad.
  • Drizzle with balsamic vinaigrette if desired.
  • Toss gently and serve immediately.

Notes & Wine Advice

Notes

This salad delivers plenty of flavor without relying on heavy dressings or high-calorie toppings.
Allowing the chicken to rest before slicing helps keep it juicy and tender.

Serving Suggestions

Serve as a complete meal for lunch or dinner.
Add sliced avocado or extra mixed greens for a more substantial salad.

Variations

Replace the chicken with grilled shrimp for a seafood-inspired version.
Add bell peppers, radishes, or cherry tomatoes for extra color and texture.

Wine Advice

A chilled white wine pairs beautifully with the fresh vegetables and lightly spiced chicken.
A crisp and refreshing white wine complements the salad without overpowering its clean flavors.

Nutrition values

Calories: 250 kcal | koolhydraten: 10 g | Eiwitten: 30 g | Vet: 10 g | Verzadigd vet: 2 g | Natrium: 320 mg | Suiker: 5 g
————————————————————————————————–

Blackened Chicken Power Salad Benefits

Blackened Chicken Power Salad is a fresh and satisfying meal that combines lean protein, crisp vegetables, and bold seasoning. The blackened chicken adds a rich, savory flavor while the mixed greens, cucumber, tomato, and red onion provide freshness and texture. This combination creates a balanced meal that works well for lunch or dinner.

Many people choose a Healthy Chicken Salad because it delivers plenty of protein without relying on heavy ingredients. The result is a meal that feels filling while remaining light and nutritious.

Healthy Chicken Salad for Everyday Meals

The blackening technique is known for creating a flavorful crust using herbs and spices. In this recipe, the seasoning transforms simple chicken breasts into a delicious centerpiece for the salad. The vegetables complement the chicken and add color, crunch, and natural freshness.

If you enjoy fresh meal ideas, explore our Salad Recipes collection for more inspiration.

One of the reasons this recipe remains popular is its flexibility. A Healthy Chicken Salad can easily be adapted with seasonal vegetables, avocado, bell peppers, radishes, or additional greens. This makes it a practical choice throughout the year.

Why Choose Blackened Chicken Power Salad

Blackened Chicken Power Salad also works well for meal preparation. The chicken can be cooked in advance and refrigerated, making it easy to assemble fresh portions whenever needed. This convenience makes the recipe especially useful for busy schedules.

Many home cooks appreciate meals that fit multiple dietary preferences. This salad can be suitable for low-carb, keto, gluten-free, dairy-free, and high-protein meal plans when prepared with appropriate ingredients.

Fresh vegetables should always be washed thoroughly before use. The FDA Food Safety Resources provide useful guidance on preparing produce safely.

Whether you need a nutritious lunch, a light dinner, or a protein-rich meal after exercise, Blackened Chicken Power Salad offers fresh ingredients, bold flavor, and satisfying nutrition. This recipe proves that healthy eating can be simple, delicious, and enjoyable.


Applebee’s Lemonade

Applebee's Lemonade served over ice with fresh lemon slices in a chilled glass on a summer day.

Applebee’s Lemonade

Applebee’s Lemonade is a refreshing homemade drink made with fresh lemon juice, cold water, and simple syrup. This easy beverage delivers the perfect balance of sweet and tart flavors, making it an ideal choice for hot summer days, picnics, parties, and family gatherings.
Couverts4
Total time 5 minutes
estimated costs pp $0.85
Deel op Facebook Print Recipe

Equipment

  • Large glass
  • Measuring cups
  • Pitcher or large container
  • stirring spoon

Ingredients

Instructions

  • Combine the fresh lemon juice and cold water in a large pitcher.
  • Add the simple syrup and stir until fully combined.
  • Fill serving glasses with ice cubes.
  • Pour the lemonade over the ice.
  • Stir gently and serve immediately.
  • Garnish with lemon slices or fresh mint if desired.

Notes & Wine Advice

Notes

Freshly squeezed lemon juice delivers the best flavor and aroma.
Adjust the amount of simple syrup to make the lemonade sweeter or more tart.

Serving Suggestions

Serve over plenty of ice with lemon slices and fresh mint.
This drink pairs perfectly with barbecues, picnics, sandwiches, and light summer meals.

Variations

Add fresh strawberries, raspberries, or blueberries for a fruity twist.
Replace part of the water with sparkling water for a refreshing sparkling lemonade.

Wine Advice

A chilled glass of Cava creates a festive variation for adult gatherings.
A crisp white wine also pairs nicely with the bright citrus flavors.

Nutrition values

Calories: 80 kcal | koolhydraten: 22 g | Eiwitten: 0 g | Vet: 0 g | Verzadigd vet: 0 g | Natrium: 5 mg | Suiker: 20 g
————————————————————————————————–
Course; Cold Drinks / Drinks
Cuisine; American
Season: Summer

About Applebee’s Lemonade

Applebee’s Lemonade is a simple yet refreshing beverage that captures the classic flavor of homemade lemonade. Made with fresh lemon juice, cold water, and simple syrup, this drink offers the perfect balance between sweet and tart. It is one of the easiest beverages to prepare and requires only a few basic ingredients that are commonly available in most kitchens.

Lemonade has been a favorite summer drink for generations. Its bright citrus flavor provides a refreshing way to cool down during warm weather, while the simple preparation makes it ideal for family gatherings, picnics, barbecues, and outdoor celebrations. This version delivers a clean and natural lemon flavor that appeals to both children and adults.

One of the reasons this recipe remains popular is its flexibility. Some people prefer a sweeter lemonade and simply add a little extra syrup. Others enjoy a sharper citrus flavor and reduce the sweetness. The recipe can easily be adjusted to match personal taste preferences while maintaining its refreshing character.

If you enjoy refreshing beverages, explore our Beverage Recipes collection for more delicious drink ideas.

Applebee’s Lemonade also works as an excellent base for creative variations. Fresh berries, peaches, watermelon, or mint can be added to create seasonal twists. Sparkling water can transform the drink into a bubbly refreshment that feels extra special during parties and celebrations.

Applebee’s Lemonade is especially popular during summer because it helps keep guests refreshed during outdoor activities. Whether served at a picnic, family barbecue, pool party, or casual gathering, it always provides a welcome burst of citrus flavor.

Proper handling of fresh produce helps ensure food safety when preparing homemade beverages. The FDA Food Safety Resources provide useful information about washing and preparing fresh fruits safely.

Because the recipe contains no dairy products, eggs, or gluten ingredients, it can fit a variety of dietary preferences. The simple ingredient list also makes it easy to adapt for different occasions and serving sizes.

Whether you are serving guests at a summer gathering or simply looking for a refreshing homemade drink, Applebee’s Lemonade delivers bright flavor, easy preparation, and timeless appeal in every glass.