Zucchini Pesto Pasta Salad

Zucchini Pesto Pasta Salad with Fresh Basil

Zucchini Pesto Pasta Salad

Zucchini Pesto Pasta Salad combines tender pasta and lightly blanched zucchini with homemade basil pesto. This colourful vegetarian pasta salad is fresh, flavourful, and ideal for lunch, picnics, or a quick summer dinner.
Couverts4 servings
estimated costs pp $1.45
Deel op Facebook Print Recipe

Equipment

Ingredients

For the Pasta and Zucchini

  • 8 ounces Pasta uncooked
  • 1 medium Zucchini chopped

For the Pesto

Instructions

Prepare the Pesto

  • Place the minced garlic in a food processor.
  • Process briefly until finely chopped.
  • Add the fresh basil leaves.
  • Pulse until the basil is coarsely chopped.
  • Keep the food processor running while slowly adding the olive oil and vegetable broth.
  • Process until the pesto is smooth.
  • Add the grated Parmesan.
  • Pulse several times until evenly combined.
  • Season with kosher salt and black pepper.
  • Set the pesto aside.

Prepare the Pasta and Zucchini

  • Cook the pasta according to the package directions until al dente.
  • Place the chopped zucchini in a strainer.
  • Carefully pour the cooked pasta and hot cooking water over the zucchini to blanch it.
  • Drain the pasta and zucchini thoroughly.
  • Transfer them to a large mixing bowl.

Finish the Pasta Salad

  • Add the prepared pesto to the pasta and zucchini.
  • Stir until the pasta and vegetables are evenly coated.
  • Allow the pasta salad to cool.
  • Cover and refrigerate until ready to serve.
  • Stir thoroughly before serving.

Notes & Wine Advice

Serving Suggestions

Serve the pasta salad chilled or at room temperature with crusty bread, grilled vegetables, or a fresh green salad. It is also suitable for picnics and packed lunches. For a larger summer meal, serve it alongside our Cheesy Zucchini Tomato Bake.

Recipe Notes

Cook the pasta until al dente so it retains a pleasant texture after chilling. Pouring the hot pasta water over the zucchini softens it slightly without making it mushy. Dry the basil thoroughly after washing to prevent the pesto from becoming watery.

Variations

Add cherry tomatoes, mozzarella, toasted pine nuts, olives, peas, spinach, or roasted peppers. Whole-wheat or gluten-free pasta can replace regular pasta. Pecorino Romano provides a sharper alternative to Parmesan, while walnuts can replace traditional pine nuts.

Storage

Refrigerate the pasta salad in an airtight container for up to three days. The pasta will absorb some of the pesto during storage, so stir in a little olive oil before serving. Freezing is not recommended because the zucchini and basil may lose their fresh texture.

Wine Advice

A crisp Sauvignon Blanc complements the fresh basil, garlic, and zucchini. A chilled Pinot Grigio is another refreshing choice for this light summer pasta salad.

Nutrition values

Serving: 1 basil pesto pasta, cold pasta salad, summer pasta recipe, vegetarian pasta salad, zucchini pasta salad, zucchini pesto recipe | Calories: 350 kcal | koolhydraten: 40 g | Eiwitten: 10 g | Vet: 18 g | Verzadigd vet: 4 g | Natrium: 390 mg | Suiker: 3 g
————————————————————————————————–
Season: Summer
Diets; Vegetarian

About Zucchini Pesto Pasta Salad

Zucchini Pesto Pasta Salad is a fresh vegetarian dish combining tender pasta, lightly blanched zucchini, and homemade basil pesto. This summer pesto pasta receives its bright flavour from fresh basil, garlic, olive oil, vegetable broth, and Parmesan. It can be served chilled or at room temperature, making it suitable for lunch, dinner, picnics, and outdoor gatherings.

The preparation is simple and takes advantage of the hot pasta water to cook the zucchini gently. Instead of boiling the vegetable separately, the chopped zucchini is placed in a strainer before the pasta and cooking water are poured over it. This softens the zucchini while helping it retain its colour and a slight bite.

Preparing Zucchini Pesto Pasta Salad

Begin with the pesto so it is ready when the pasta finishes cooking. Place the garlic in a food processor and chop it finely before adding the basil. This prevents large pieces of raw garlic from remaining in the finished sauce.

Wash the basil leaves carefully and dry them thoroughly. Excess water can dilute the pesto and prevent the olive oil from coating the leaves properly. Pulse the basil instead of processing it continuously at first. This helps produce an even texture and prevents the motor from warming the delicate leaves unnecessarily.

Add the olive oil and vegetable broth gradually while the food processor is running. The broth lightens the pesto and reduces the amount of oil required without removing its smooth texture. Add the Parmesan at the end and pulse only until it is incorporated.

Cooking the Pasta and Zucchini

Choose a short pasta shape that holds sauce well, such as penne, fusilli, farfalle, or rotini. Cook it in generously sized pot of water until al dente. Slightly firm pasta works best in a chilled salad because it softens a little as it absorbs the pesto.

Place the chopped zucchini in a heat-resistant strainer before draining the pasta. Carefully pour the pasta and its hot cooking water over the zucchini. The heat blanches the vegetable quickly without requiring another saucepan. Allow both ingredients to drain thoroughly before transferring them to the mixing bowl.

Serving Summer Pesto Pasta

Add the pesto while the pasta is still slightly warm. Warm pasta absorbs flavour more readily than completely chilled pasta, helping the basil and garlic spread evenly throughout the dish. Stir gently to avoid breaking the softened zucchini.

The salad can be served immediately at room temperature or refrigerated for a colder and firmer result. Cherry tomatoes, mozzarella, olives, toasted nuts, peas, or roasted peppers make useful additions. For a larger vegetable meal, pair it with our Cheesy Zucchini Tomato Bake.

Making Useful Substitutions

Whole-wheat pasta adds a nuttier flavour and more texture. Gluten-free pasta can also be used, although cooking times and textures differ between brands. Pecorino Romano creates a sharper pesto, while a vegetarian hard cheese ensures the complete dish remains suitable for vegetarians.

Walnuts, almonds, or pine nuts can be added to the pesto for richness and texture. When fresh basil is limited, replace part of it with baby spinach or parsley. Lemon juice or finely grated lemon zest provides extra brightness without changing the consistency significantly.

Storage and Food Safety

Transfer leftover pasta salad to an airtight container and refrigerate it for up to three days. The pasta will continue absorbing the sauce, so add a small amount of olive oil or vegetable broth before serving. Stir thoroughly to redistribute the pesto.

Keep the salad chilled when transporting it to a picnic or outdoor gathering. Follow current FDA safe food-handling guidance when cooling, storing, and transporting dishes containing cooked pasta and cheese.

Fresh basil, tender zucchini, and savoury Parmesan make Zucchini Pesto Pasta Salad a practical and flavourful choice for warm summer days.


Italian Zucchini Herb Frittata

Italian zucchini herb frittata with Parmesan, basil and parsley

Italian Zucchini Herb Frittata

Italian Zucchini Herb Frittata combines tender zucchini, eggs, Parmesan, garlic, basil, and parsley in one skillet. Serve this easy vegetarian dish for breakfast, brunch, lunch, or a light dinner.
Couverts4 servings
estimated costs pp $1.55
Deel op Facebook Print Recipe

Equipment

Ingredients

Instructions

  • Heat the olive oil in a large skillet over medium heat.
  • Add the chopped onion and minced garlic.
  • Cook for approximately 5 minutes until softened.
  • Add the sliced zucchini.
  • Cook for 10 to 15 minutes until the zucchini is barely tender.
  • Remove the skillet from the heat.
  • Stir in the parsley, basil, kosher salt, and black pepper.
  • Pour the beaten eggs evenly over the zucchini mixture.
  • Return the skillet to medium-low heat.
  • Cover the skillet with a lid.
  • Cook for approximately 15 minutes until the eggs are completely set.
  • Sprinkle the grated Parmesan evenly over the frittata.
  • Cover the skillet again.
  • Cook for another 2 minutes until the cheese has melted.
  • Remove the skillet from the heat.
  • Let the frittata rest for 5 minutes.
  • Cut the frittata into four wedges and serve.

Notes & Wine Advice

Serving Suggestions

Serve the frittata warm with toasted bread, roasted potatoes, a green salad, or sliced tomatoes. It can also be served at room temperature for brunch or a picnic. For a larger summer meal, pair it with our Zucchini Pesto Pasta Salad.

Recipe Notes

Slice the zucchini evenly so it cooks at the same rate. Keep the heat at medium-low after adding the eggs to prevent the bottom from browning before the centre sets. The frittata is ready when no liquid egg remains in the centre.

Variations

Add sliced mushrooms, spinach, cherry tomatoes, roasted peppers, or chopped olives. Mozzarella, cheddar, goat cheese, or feta can replace the Parmesan. Red pepper flakes provide gentle heat, while oregano or chives can replace the basil and parsley.

Storage

Refrigerate leftover frittata in an airtight container for up to three days. Reheat individual wedges gently in a covered skillet or microwave until hot throughout. The frittata can also be served chilled or at room temperature.

Wine Advice

A crisp Pinot Grigio complements the zucchini, fresh herbs, and Parmesan. A bright Sauvignon Blanc is another refreshing choice for brunch or a light summer dinner.

Nutrition values

Serving: 1 wedge | Calories: 280 kcal | koolhydraten: 8 g | Eiwitten: 18 g | Vet: 20 g | Verzadigd vet: 6 g | Natrium: 510 mg | Suiker: 4 g
————————————————————————————————–

About Italian Zucchini Herb Frittata

Italian Zucchini Herb Frittata is a simple one-pan meal made with eggs, tender zucchini, onion, garlic, Parmesan, basil, and parsley. This stovetop zucchini frittata offers a practical way to transform fresh summer vegetables into a satisfying breakfast, brunch, lunch, or light dinner. The eggs provide structure and richness, while the herbs and cheese contribute plenty of savoury flavour.

Unlike an oven-baked frittata, this version cooks entirely on the stovetop. Covering the skillet traps gentle heat around the eggs, allowing the top to set without turning the frittata. Parmesan is added near the end so it melts across the surface without becoming excessively browned.

Preparing Italian Zucchini Herb Frittata

Begin by slicing the zucchini into evenly sized rounds or half-moons. Thin, consistent slices cook more evenly and fit comfortably inside the finished frittata. Very thick pieces may remain firm after the eggs have set, while extremely thin pieces can lose their texture.

Cook the onion and garlic in olive oil until soft and aromatic. Avoid browning the garlic because it can develop a bitter flavour. Add the zucchini and continue cooking until it is barely tender. The vegetable will cook further after the eggs are added, so it should not become completely soft during this first stage.

Remove the skillet from the heat before adding the fresh herbs. This preserves more of their colour and aroma. Season the mixture evenly with salt and black pepper before pouring in the lightly beaten eggs.

Cooking the Stovetop Zucchini Frittata

Return the skillet to medium-low heat after adding the eggs. High heat may brown or burn the base before the centre has time to set. Covering the skillet creates a warm environment that cooks both the bottom and upper surface more evenly.

A heavy skillet with a well-fitting lid gives the most dependable result. A non-stick surface also makes cutting and serving easier. Avoid stirring once the eggs have entered the skillet because the aim is to create one firm, sliceable frittata rather than scrambled eggs.

Check the centre after approximately 15 minutes. It should feel firm and no liquid egg should remain. Sprinkle the Parmesan over the surface, replace the lid, and cook briefly until the cheese melts.

Cheese and Vegetable Variations

Parmesan gives the frittata a salty and slightly nutty finish. Mozzarella produces a softer melted topping, while goat cheese or feta adds tanginess. Cheddar can be used when a stronger and more familiar cheese flavour is preferred.

Mushrooms, spinach, roasted peppers, cherry tomatoes, olives, or cooked potatoes can be added in moderate quantities. Cook vegetables containing a lot of moisture before combining them with the eggs. Excess liquid can prevent the frittata from setting properly.

Serving Ideas

Allow the finished frittata to rest for approximately 5 minutes before cutting it into wedges. Serve it warm with toast, roasted potatoes, fresh tomatoes, or a green salad. It is also enjoyable chilled or at room temperature, making it useful for packed lunches and picnics.

For a larger summer meal, serve it with our Zucchini Pesto Pasta Salad. Fresh fruit, crusty bread, and a simple salad can turn the two dishes into a complete brunch.

Storage and Food Safety

Cool leftovers promptly before transferring them to an airtight container. Refrigerate the frittata for up to three days. Reheat individual wedges gently in a covered skillet or microwave until hot throughout. Avoid repeatedly reheating the complete frittata because eggs can become dry and rubbery.

Follow current FDA safe food-handling guidance when preparing eggs and storing or reheating cooked dishes.

Fresh vegetables, aromatic herbs, and melted Parmesan make Italian Zucchini Herb Frittata a versatile meal for almost any time of day.


Mushroom Zucchini Egg Bake

Mushroom zucchini egg bake topped with melted cheddar cheese

Mushroom Zucchini Egg Bake

Mushroom Zucchini Egg Bake combines tender zucchini, sautรฉed mushrooms, eggs, basil, and melted cheddar. This comforting vegetarian casserole works well for breakfast, brunch, lunch, or a simple family dinner.
Couverts4 servings
estimated costs pp $1.70
Deel op Facebook Print Recipe

Equipment

Ingredients

Instructions

  • Preheat the oven to 325ยฐF (160ยฐC).
  • Melt the butter in a skillet.
  • Sautรฉ the mushrooms and onion until the onion is soft and the mushrooms are tender.
  • While the vegetables are sautรฉing, steam the zucchini until tender and mash it coarsely.
  • In a medium-sized bowl, combine the mashed zucchini and eggs.
  • Add the sautรฉed mushrooms and onions to the zucchini-egg mixture and stir to combine.
  • Season with dried basil, salt, and pepper.
  • Pour the mixture into a greased casserole dish and bake, covered, for about 30 minutes, or until the eggs have set.
  • Uncover the dish and sprinkle the grated cheddar cheese on top.
  • Continue baking until the cheese is melted and bubbly.

Notes & Wine Advice

Serving Suggestions

Serve the casserole warm with toasted bread, roasted potatoes, a green salad, or sliced tomatoes. It is suitable for breakfast, brunch, or a light dinner. For a larger brunch, pair it with our Italian Zucchini Herb Frittata.

Recipe Notes

Drain the steamed zucchini thoroughly before mashing it because excess moisture can prevent the eggs from setting properly. Cook the mushrooms until their released liquid has evaporated. The casserole is ready when the centre feels firm and no liquid egg remains.

Variations

Replace cheddar with Monterey Jack, mozzarella, Parmesan, or goat cheese. Add spinach, roasted peppers, chopped chives, thyme, or red pepper flakes. Broccoli, leek, or cooked potato can replace part of the zucchini.

Storage

Refrigerate leftovers in an airtight container for up to three days. Reheat individual portions in the oven, air fryer, or microwave until hot throughout. The casserole can also be served chilled or at room temperature.

Wine Advice

A light Pinot Noir complements the earthy mushrooms and melted cheddar. A lightly oaked Chardonnay is a suitable white alternative for the rich egg and cheese filling.

Nutrition values

Serving: 1 portion | Calories: 340 kcal | koolhydraten: 15 g | Eiwitten: 18 g | Vet: 24 g | Verzadigd vet: 14 g | Natrium: 590 mg | Suiker: 4 g
————————————————————————————————–

About Mushroom Zucchini Egg Bake

Mushroom Zucchini Egg Bake is a comforting vegetarian casserole made with tender zucchini, sautรฉed mushrooms, onion, eggs, basil, and melted cheddar. This zucchini mushroom casserole has a soft vegetable and egg centre covered with a bubbling layer of cheese. It can be served for breakfast, brunch, lunch, or a relaxed family dinner.

The recipe cooks the vegetables before they are combined with the eggs. This is an essential step because both mushrooms and zucchini contain substantial amounts of moisture. Removing some of that liquid before baking helps the casserole set properly and prevents a watery result.

Preparing Mushroom Zucchini Egg Bake

Peel and cube the zucchini into evenly sized pieces before placing it in the steamer basket. Steam it only until tender enough to mash. Once cooked, leave it to drain thoroughly before crushing it coarsely with a potato masher or fork.

A coarse texture works better than a completely smooth purรฉe. Small pieces of zucchini give the finished casserole more structure and make the vegetable flavour noticeable. If the mashed zucchini still appears watery, press it gently in a strainer before adding the eggs.

Melt the butter in a skillet and cook the mushrooms with the chopped onion. Mushrooms initially absorb fat and then release their own moisture. Continue cooking until they are tender and most of the liquid in the skillet has evaporated. This concentrates their earthy flavour and protects the texture of the casserole.

Assembling the Zucchini Mushroom Casserole

Combine the drained zucchini with the lightly beaten eggs in a mixing bowl. Add the sautรฉed mushroom mixture and season everything with dried basil, salt, and black pepper. Stir until the mushrooms and onion are distributed evenly rather than concentrated in one area.

Transfer the mixture to a greased casserole dish and spread it into an even layer. Covering the dish during the first stage of baking allows the eggs to set gently without drying the surface. Check the centre after approximately 30 minutes. It should be firm and contain no visible liquid egg.

Remove the cover and add the grated cheddar only after the filling has set. Return the dish to the oven briefly so the cheese melts and begins to bubble. Adding it near the end prevents the cheddar from becoming tough or excessively browned.

Cheese and Vegetable Variations

Sharp cheddar provides a strong savoury contrast to the mild zucchini and eggs. Monterey Jack or mozzarella creates a softer and milder topping, while Parmesan adds a saltier finish. Goat cheese can be crumbled into the egg mixture when a tangier flavour is preferred.

Spinach, roasted peppers, leek, broccoli, or cooked potato can replace part of the zucchini. Cook and drain moist vegetables before adding them. Fresh thyme, parsley, chives, or oregano can replace the dried basil, while red pepper flakes provide gentle heat.

Serving the Finished Bake

Allow the casserole to rest for approximately 5 minutes before cutting it. This gives the egg filling time to settle and makes the portions easier to remove cleanly. Serve it with toast, roasted potatoes, sliced tomatoes, fruit, or a green salad.

For a larger brunch selection, pair it with our Italian Zucchini Herb Frittata. Smaller portions can also be served as a vegetable side dish alongside roasted meat or grilled chicken.

Storage and Safe Reheating

Cool leftovers promptly and transfer them to an airtight container. Refrigerate for up to three days. Reheat individual portions until hot throughout, taking care not to overcook them because eggs can become firm and rubbery.

Follow current FDA safe food-handling guidance when preparing eggs and storing or reheating cooked dishes.

Earthy mushrooms, tender zucchini, savoury eggs, and melted cheddar make Mushroom Zucchini Egg Bake a satisfying vegetable casserole for almost any meal.


Lemon Zucchini Pasta Salad

Lemon zucchini pasta salad with yellow squash, tomato, red pepper and dill

Lemon Zucchini Pasta Salad

Lemon Zucchini Pasta Salad combines tender pasta with crisp zucchini, yellow squash, tomato, and red pepper. A fresh lemon-dill dressing makes it ideal for lunch, picnics, potlucks, or summer parties.
Couverts4 servings
estimated costs pp $1.40
Deel op Facebook Print Recipe

Equipment

Ingredients

For the Pasta and Vegetables

For the Lemon-Dill Dressing

Instructions

Prepare the Pasta and Vegetables

  • Cook the pasta according to the package directions until al dente.
  • Drain the pasta in a strainer.
  • Rinse the pasta thoroughly under cold running water.
  • Drain again until no excess water remains.
  • Transfer the cooled pasta to a large mixing bowl.
  • Add 1 teaspoon of olive oil.
  • Stir until the pasta is lightly coated.
  • Add the zucchini, yellow squash, tomato, and red bell pepper.
  • Stir until the vegetables are evenly distributed.

Prepare the Lemon-Dill Dressing

  • Place the remaining olive oil in a medium mixing bowl.
  • Add the minced garlic, lemon juice, dried dill, kosher salt, and black pepper.
  • Whisk until the dressing is evenly combined.

Finish the Pasta Salad

  • Pour the lemon-dill dressing over the pasta and vegetables.
  • Stir until all the ingredients are evenly coated.
  • Cover the bowl.
  • Refrigerate the pasta salad for at least 30 minutes.
  • Stir thoroughly before serving.

Notes & Wine Advice

Serving Suggestions

Serve the pasta salad chilled or at room temperature as a light lunch or summer side dish. It pairs well with grilled vegetables, veggie burgers, fish, or chicken. For a varied picnic menu, serve it alongside our Zucchini Pesto Pasta Salad.

Recipe Notes

Rinse the cooked pasta under cold water to stop the cooking process and remove excess starch. Drain it thoroughly so water does not dilute the dressing. Dice the vegetables into small, similarly sized pieces for an even texture.

Variations

Add cucumber, cherry tomatoes, sweetcorn, olives, chickpeas, red onion, or fresh parsley. Fresh dill can replace dried dill. Gluten-free pasta can be used when needed, while crumbled feta can be added when the salad does not need to remain vegan.

Storage

Refrigerate the pasta salad in an airtight container for up to three days. The pasta will absorb some dressing during storage, so add a little lemon juice or olive oil before serving. Keep the salad properly chilled when transporting it outdoors.

Wine Advice

A crisp Sauvignon Blanc complements the fresh vegetables, dill, and lemon dressing. A chilled Pinot Grigio is another refreshing choice for picnics and summer lunches.

Nutrition values

Serving: 1 bowl | Calories: 300 kcal | koolhydraten: 45 g | Eiwitten: 8 g | Vet: 10 g | Verzadigd vet: 2 g | Natrium: 460 mg | Suiker: 4 g
————————————————————————————————–

About Lemon Zucchini Pasta Salad

Lemon Zucchini Pasta Salad is a colourful summer dish made with pasta, fresh zucchini, yellow squash, tomato, red bell pepper, and a tangy lemon-dill dressing. This summer vegetable pasta is light enough for lunch but substantial enough to serve as a main course. Because it contains no meat, eggs, or dairy products, it is also suitable for vegan and vegetarian guests.

The salad is designed to be served chilled or at room temperature, making it practical for picnics, potlucks, packed lunches, and outdoor parties. Preparing it in advance gives the lemon, garlic, and dill time to flavour the pasta and vegetables.

Preparing Lemon Zucchini Pasta Salad

Choose a short pasta shape such as fusilli, rotini, penne, or farfalle. Shapes with curves, ridges, or hollow centres hold the dressing better than long pasta. Check the packaging when preparing the recipe for vegans because some fresh and speciality pasta varieties contain eggs.

Cook the pasta until al dente so it retains some firmness after chilling. Overcooked pasta can become soft and sticky when mixed with the dressing. Drain it immediately and rinse it under cold running water to stop the cooking process.

Allow the rinsed pasta to drain thoroughly. Water remaining between the pieces can weaken the lemon dressing and leave the salad bland. A teaspoon of olive oil keeps the cooled pasta from sticking while the vegetables and dressing are prepared.

Preparing the Summer Vegetable Pasta

Dice the zucchini, yellow squash, tomato, and red bell pepper into similarly sized pieces. Small pieces distribute evenly throughout the pasta and make the salad easier to eat. The zucchini and yellow squash remain raw, giving the dish a crisp and refreshing texture.

If a softer texture is preferred, blanch the zucchini and squash briefly in boiling water before cooling them immediately. Do not cook them for too long because tender vegetables can become watery after they are mixed with the acidic dressing.

Red bell pepper provides sweetness and colour, but yellow or orange pepper can be used instead. Remove the watery seeds from a very ripe tomato before dicing it to prevent excess liquid from collecting at the bottom of the bowl.

Mixing the Lemon-Dill Dressing

Fresh lemon juice provides the main acidity in the dressing. Combine it with extra-virgin olive oil, garlic, dried dill, salt, and black pepper. Whisk until the oil and lemon juice form a temporary emulsion before pouring it over the pasta.

Dried dill has a concentrated flavour and works well in a dressing that rests before serving. Fresh dill can also be used, but a larger quantity will be needed. Fresh parsley, basil, or chives can be included for additional colour and flavour.

Serving Ideas and Variations

Chill the salad for at least 30 minutes so the flavours have time to combine. Stir it before serving because some dressing will settle at the bottom of the bowl. Serve it as a light lunch or alongside grilled vegetables, veggie burgers, chicken, or fish.

For a varied picnic table, combine it with our Zucchini Pesto Pasta Salad. Chickpeas can be added for more protein, while olives, cucumber, sweetcorn, or red onion provide additional flavour and texture.

Storage and Outdoor Food Safety

Store leftovers in an airtight container in the refrigerator for up to three days. Pasta continues absorbing dressing during storage, so refresh the salad with lemon juice or olive oil before serving.

Keep the salad chilled in a cooler when taking it to a picnic or outdoor gathering. Follow current FDA safe food-handling guidance when cooling, storing, transporting, and serving prepared food.

Crisp vegetables, tender pasta, fragrant dill, and a bright citrus dressing make Lemon Zucchini Pasta Salad a refreshing choice for warm summer days.


Cottage Cheese Zucchini Boats

Cottage cheese zucchini boats topped with melted cheddar and fresh parsley

Cottage Cheese Zucchini Boats

Cottage Cheese Zucchini Boats are filled with sautรฉed vegetables, creamy cottage cheese, buttermilk, herbs, and egg, then topped with bubbling cheddar. Serve them as a vegetarian main course or substantial side dish.
Couverts4
estimated costs pp $3.00
Deel op Facebook Print Recipe

Equipment

Ingredients

For the Zucchini Boats

  • 4 medium Zucchini halved lengthwise
  • 1 teaspoon Unsalted Butter for greasing

For the Vegetable Mixture

For the Cheese Filling

Instructions

  • Prepare the Zucchini Boats

Preheat the oven to 350ยฐF (175ยฐC).

  • Grease a baking dish with 1 teaspoon of butter.
  • Cut the zucchini in half lengthwise.
  • Arrange the zucchini halves cut-side up in the prepared baking dish.
  • Cover the baking dish with aluminium foil.
  • Bake for approximately 15 minutes until the zucchini begins to soften.
  • Remove the baking dish from the oven.
  • Carefully remove the foil.

Prepare the Vegetable Mixture

  • Melt 2 tablespoons of butter in a large skillet over medium heat.
  • Add the chopped onion, minced garlic, and chopped celery.
  • Cook for approximately 8 minutes until the vegetables are tender.
  • Remove the skillet from the heat.
  • Let the vegetable mixture cool for several minutes.

Prepare the Cheese Filling

  • Combine the cottage cheese, buttermilk, beaten egg, parsley, oregano, kosher salt, and black pepper in a medium mixing bowl.
  • Add the sautรฉed vegetable mixture.
  • Stir until all the ingredients are evenly combined.

Fill and Bake the Zucchini

  • Divide the cottage cheese filling evenly among the zucchini halves.
  • Return the baking dish to the oven.
  • Bake uncovered for approximately 15 minutes until the filling is set and lightly golden.
  • Sprinkle the grated cheddar evenly over the filled zucchini.
  • Bake for another 5 minutes until the cheddar is melted and bubbling.
  • Remove the baking dish from the oven.
  • Let the zucchini boats rest for 5 minutes before serving.

Notes & Wine Advice

Serving Suggestions

Serve two zucchini halves per person with a green salad, roasted potatoes, rice, or crusty bread. Smaller portions make a substantial side dish for roasted chicken or baked fish. For a larger vegetarian meal, pair them with our Mushroom Zucchini Egg Bake.

Recipe Notes

Choose similarly sized zucchini so all the halves cook evenly. Precooking them beneath foil makes the vegetables tender before the filling is added. Allow the sautรฉed vegetables to cool slightly so they do not begin cooking the egg while the filling is being mixed.

Variations

Replace cheddar with mozzarella, Monterey Jack, Parmesan, or crumbled feta. Add chopped spinach, mushrooms, roasted peppers, or red pepper flakes. Ricotta can replace the cottage cheese, although the filling will have a smoother and slightly richer texture.

Storage

Refrigerate leftovers in an airtight container for up to three days. Reheat the zucchini boats in the oven or air fryer until hot throughout. The microwave is quicker but produces a softer texture. Freezing is not recommended because zucchini can become watery after thawing.

Wine Advice

A crisp Sauvignon Blanc balances the richness of the cottage cheese, buttermilk, and cheddar. A fresh Pinot Grigio is another suitable choice for the zucchini and herbs.

Nutrition values

Serving: 2 zucchini halves | Calories: 320 kcal | koolhydraten: 15 g | Eiwitten: 20 g | Vet: 20 g | Verzadigd vet: 12 g | Natrium: 680 mg | Suiker: 6 g
————————————————————————————————–

About Cottage Cheese Zucchini Boats

Cottage Cheese Zucchini Boats are a satisfying vegetarian dish filled with sautรฉed onion, garlic, celery, cottage cheese, buttermilk, egg, parsley, and oregano. These cheddar stuffed zucchini receive a golden finish from a final layer of melted cheese. They are substantial enough for a main course but can also accompany roasted meat or fish as a vegetable side dish.

This recipe cooks the zucchini in two stages. The empty halves are first baked beneath foil so they begin softening without drying out. After the creamy filling is added, they return to the oven until the egg has set. Cheddar is sprinkled over the top during the final few minutes, preventing it from becoming tough or overly browned.

Preparing Cottage Cheese Zucchini Boats

Choose four medium zucchini of approximately the same length and thickness. Similar sizes make portioning easier and help every half cook at the same rate. Cut them lengthwise and arrange them cut-side up in a greased baking dish.

Covering the dish with foil traps steam around the zucchini. This softens the vegetables before the filling is added and protects the exposed surfaces from becoming dry. After 15 minutes, the zucchini should be beginning to soften but should still hold its shape.

The recipe does not require hollowing out the zucchini. The filling is spread over the flat cut surfaces, making preparation easier and preventing unnecessary waste. When using very rounded zucchini, remove a thin strip from the underside so the halves remain stable in the dish.

Making the Vegetable Mixture

Cook the onion, garlic, and celery in butter until completely tender. Celery provides texture and a mild savoury flavour, while onion and garlic form the aromatic base. Chop the vegetables finely so they blend easily into the cottage cheese mixture and remain on top of the zucchini.

Let the sautรฉed vegetables cool briefly before combining them with the egg. Adding a very hot mixture could start setting the egg prematurely and create an uneven filling.

Mixing the Cheddar Stuffed Zucchini

Cottage cheese gives the filling body, moisture, and protein. Buttermilk loosens the mixture slightly and contributes a gentle tang. The beaten egg binds everything together as it cooks, while parsley and oregano add freshness and an Italian-inspired herbal note.

Stir the cooled vegetables into the cheese mixture until they are evenly distributed. Divide the filling carefully among the eight zucchini halves. Avoid piling most of it in the centre because an even layer cooks more reliably.

Bake until the filling feels firm and no liquid egg remains. Add the cheddar only after the filling has set, then return the dish to the oven until the cheese melts and bubbles.

Serving Ideas and Variations

Allow the zucchini boats to rest for approximately 5 minutes before serving. This gives the filling time to settle and makes the portions easier to transfer. Serve two halves per person with salad, rice, roasted potatoes, or bread.

For a larger vegetarian dinner, combine them with our Mushroom Zucchini Egg Bake. Spinach, mushrooms, roasted peppers, or chopped chives can be added to the filling. Cook and drain moist vegetables before using them.

Storage and Food Safety

Cool leftovers promptly and refrigerate them in an airtight container for up to three days. Reheat individual portions in the oven or air fryer until hot throughout. Avoid prolonged reheating because the egg filling may become firm and the zucchini can release additional moisture.

Freezing is not recommended because zucchini and cottage cheese may develop a watery texture after thawing. Follow current FDA safe food-handling guidance when preparing eggs and dairy products and when storing or reheating cooked food.

With tender vegetables, creamy filling, fresh herbs, and bubbling cheddar, Cottage Cheese Zucchini Boats provide a comforting meat-free meal without requiring complicated preparation.


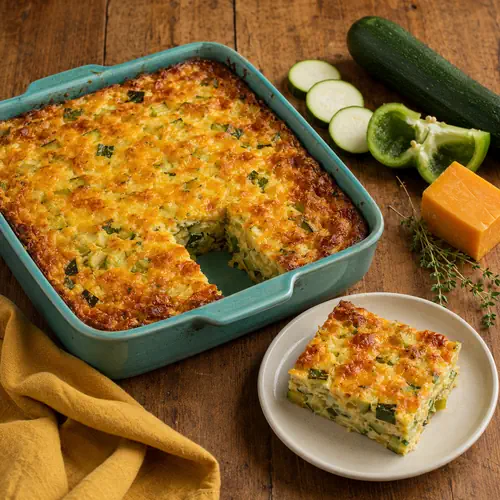
Cheddar Zucchini Egg Casserole

Cheddar zucchini egg casserole with green pepper and golden cheese

Cheddar Zucchini Egg Casserole

Cheddar Zucchini Egg Casserole combines tender zucchini, eggs, sharp cheddar, onion, green pepper, and garlic. This simple vegetarian bake works well as a main course, brunch dish, or substantial vegetable side.
Couverts4 servings
estimated costs pp $1.75
Deel op Facebook Print Recipe

Equipment

Ingredients

For the Zucchini

  • 2 medium Zucchini peeled and cubed
  • 1 teaspoon Unsalted Butter for greasing

For the Egg and Cheese Mixture

Instructions

Prepare the Zucchini

  • Preheat the oven to 350ยฐF (175ยฐC).
  • Grease a baking dish with the butter.
  • Steam the zucchini for approximately 8 minutes until almost tender.
  • Drain the zucchini thoroughly.
  • Let the zucchini cool for approximately 5 minutes.

Prepare the Egg and Cheese Mixture

  • Place the lightly beaten eggs in a medium mixing bowl.
  • Add the milk, baking powder, and flour.
  • Whisk until smooth and no flour lumps remain.
  • Add the grated cheddar, onion, green pepper, garlic, kosher salt, and black pepper.
  • Stir until evenly combined.

Assemble and Bake the Casserole

  • Add the cooled zucchini to the egg and cheese mixture.
  • Fold gently until the zucchini is evenly coated.
  • Pour the mixture into the prepared baking dish.
  • Spread the mixture into an even layer.
  • Bake uncovered for approximately 30 minutes until the surface is golden and the centre is set.
  • Remove the casserole from the oven.
  • Let it rest for 5 minutes before cutting and serving.

Notes & Wine Advice

Serving Suggestions

Serve the casserole warm with a green salad, roasted potatoes, crusty bread, or sliced tomatoes. Smaller portions work well alongside grilled chicken or baked fish. For a vegetarian zucchini meal, pair it with our Cottage Cheese Zucchini Boats.

Recipe Notes

Steam the zucchini only until almost tender because it continues cooking in the oven. Drain it thoroughly and allow it to cool before adding it to the egg mixture. Excess moisture can prevent the centre from setting and make the casserole watery.

Variations

Replace cheddar with Monterey Jack, mozzarella, Gouda, or Parmesan. Add chopped mushrooms, spinach, roasted peppers, sweetcorn, or fresh herbs. Gluten-free all-purpose flour can replace regular flour when preparing a gluten-free version.

Storage

Refrigerate leftovers in an airtight container for up to three days. Reheat individual portions in the oven, air fryer, or microwave until hot throughout. The casserole can also be served chilled or at room temperature.

Wine Advice

A crisp Sauvignon Blanc balances the richness of the cheddar and eggs. A chilled Pinot Grigio is another refreshing choice for the mild zucchini and green pepper.

Nutrition values

Serving: 1 portion | Calories: 350 kcal | koolhydraten: 25 g | Eiwitten: 15 g | Vet: 20 g | Verzadigd vet: 11 g | Natrium: 620 mg | Suiker: 5 g
————————————————————————————————–

About Cheddar Zucchini Egg Casserole

Cheddar Zucchini Egg Casserole is a comforting vegetarian bake made with tender zucchini, eggs, milk, sharp cheddar, onion, green pepper, and garlic. This cheesy zucchini bake has a soft vegetable centre and a lightly golden surface. It is substantial enough for a main course but can also be served in smaller portions as a side dish.

The recipe is particularly useful during summer when garden zucchini is plentiful. Steaming the vegetable before baking ensures it becomes tender without requiring a long oven time. Eggs, flour, and baking powder bind the ingredients together, while cheddar contributes richness and savoury flavour.

Preparing Cheddar Zucchini Egg Casserole

Peel the zucchini and cut it into evenly sized cubes. Similar-sized pieces cook at approximately the same rate and distribute more evenly throughout the casserole. Steam the cubes until almost tender but not completely soft because they will continue cooking in the oven.

Drain the zucchini thoroughly after steaming. Zucchini naturally contains a large amount of water, and excess moisture can make the filling loose. Allow the cubes to cool for approximately 5 minutes so they do not begin setting the eggs when the ingredients are combined.

Grease the baking dish before adding the mixture. This prevents the egg and cheese from sticking around the edges and makes the finished portions easier to remove.

Mixing the Cheesy Zucchini Bake

Whisk the eggs, milk, baking powder, and flour together before adding the vegetables and cheese. Mixing these ingredients first helps eliminate flour lumps and distributes the baking powder throughout the casserole. The small quantity of baking powder gives the egg filling a slightly lighter texture.

Add the grated cheddar, chopped onion, green pepper, garlic, salt, and black pepper. Sharp cheddar provides the strongest flavour, but mild or mature cheese can be selected according to preference. Grating the cheese from a block usually produces smoother melting than packaged grated cheese.

Fold in the cooled zucchini gently to avoid breaking the cubes. Transfer everything to the prepared baking dish and spread the mixture evenly so the centre and edges cook at the same rate.

Checking the Casserole

Bake the casserole uncovered until the surface is golden and the centre feels firm. Insert a clean knife into the middle when you are uncertain. It should come out without liquid egg mixture clinging to it.

Allow the finished bake to rest for approximately 5 minutes before cutting. The filling continues to firm slightly as it rests, producing neater portions. Cutting it immediately may cause the warm centre to spread.

Serving Ideas and Variations

Serve the casserole with a green salad, sliced tomatoes, roasted potatoes, or crusty bread. It also works as a brunch dish alongside fresh fruit. For a larger vegetarian meal, combine it with our Cottage Cheese Zucchini Boats.

Mushrooms, spinach, roasted peppers, sweetcorn, or fresh herbs can be added in moderate quantities. Cook and drain vegetables containing considerable moisture before using them. Monterey Jack, mozzarella, Gouda, or Parmesan can replace some or all of the cheddar.

Storage and Food Safety

Cool leftover casserole promptly and transfer it to an airtight container. Refrigerate it for up to three days. Reheat individual portions in the oven, air fryer, or microwave until hot throughout. Avoid prolonged reheating because eggs can become firm and dry.

Follow current FDA safe food-handling guidance when preparing eggs and dairy products and when cooling, storing, or reheating cooked dishes.

Tender vegetables, sharp cheese, and a savoury egg filling make Cheddar Zucchini Egg Casserole a practical choice for brunch, lunch, or family dinner.


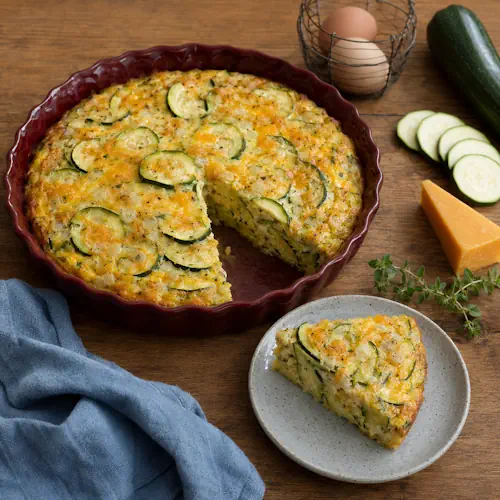
Crustless Zucchini Cheddar Quiche

Crustless zucchini cheddar quiche with onion and oregano

Crustless Zucchini Cheddar Quiche

Crustless Zucchini Cheddar Quiche combines fresh zucchini, eggs, cheddar, onion, garlic, and herbs with biscuit baking mix. This easy vegetarian dish is ideal for brunch, lunch, dinner, or a picnic.
Couverts4 servings
estimated costs pp $2.00
Deel op Facebook Print Recipe

Equipment

Ingredients

Instructions

  • Preheat the oven to 350ยฐF (175ยฐC).
  • Grease an 8-inch square baking dish with the butter.
  • Place the lightly beaten eggs in a large mixing bowl.
  • Add the biscuit baking mix.
  • Whisk until evenly combined and no dry lumps remain.
  • Add the onion, cheddar, garlic, oregano, kosher salt, and black pepper.
  • Stir until evenly combined.
  • Add the sliced zucchini.
  • Fold gently until the zucchini is coated with the egg mixture.
  • Pour the mixture into the prepared baking dish.
  • Spread the zucchini into an even layer.
  • Bake for approximately 45 minutes until the surface is golden and the centre is completely set.
  • Remove the quiche from the oven.
  • Let it rest for 10 minutes before cutting.
  • Cut into four portions and serve warm or at room temperature.

Notes & Wine Advice

Serving Suggestions

Serve the quiche warm or at room temperature with a green salad, sliced tomatoes, roasted potatoes, or fresh fruit. It is also suitable for brunch and picnics. For a larger vegetarian meal, pair it with our Cheddar Zucchini Egg Casserole.

Recipe Notes

Slice the zucchini thinly and evenly so it becomes tender during baking. Biscuit baking mix contains flour, fat, salt, and leavening, so regular flour cannot replace it without additional adjustments. The quiche is ready when the centre feels firm and no liquid egg remains.

Variations

Replace cheddar with Monterey Jack, mozzarella, Gouda, or Parmesan. Add cooked mushrooms, spinach, roasted peppers, sweetcorn, chopped chives, or red pepper flakes. Drain vegetables containing considerable moisture before adding them.

Storage

Refrigerate leftovers in an airtight container for up to three days. Reheat individual portions gently in the oven, air fryer, or microwave. The quiche can also be served chilled or allowed to return to room temperature before serving.

Wine Advice

A crisp Sauvignon Blanc balances the richness of the eggs and cheddar. A fresh Pinot Grigio is another suitable choice for the mild zucchini and oregano.

Nutrition values

Serving: 1 portion | Calories: 250 kcal | koolhydraten: 20 g | Eiwitten: 10 g | Vet: 15 g | Verzadigd vet: 6 g | Natrium: 640 mg | Suiker: 3 g
————————————————————————————————–
Cuisine; North America
Season: Summer
Diets; Vegetarian

About Crustless Zucchini Cheddar Quiche

Crustless Zucchini Cheddar Quiche is an uncomplicated vegetarian dish made with fresh zucchini, eggs, cheddar, onion, garlic, oregano, and biscuit baking mix. This easy zucchini quiche does not require a separate pastry crust. The baking mix gives the filling enough structure to produce neat, satisfying portions while keeping preparation short.

The recipe works well for brunch, lunch, a light family dinner, or a picnic. It can be served warm from the oven, chilled, or at room temperature. That flexibility also makes it useful for meal preparation and entertaining.

Preparing Crustless Zucchini Cheddar Quiche

Cut the zucchini into thin, evenly sized slices before mixing the filling. Thick pieces may remain too firm, while irregular slices can cook unevenly. There is no need to precook the zucchini, but pat it dry when its surface is especially moist.

Zucchini contains a large amount of water. Very large or mature zucchini may have a particularly watery centre, so remove the soft seeds before slicing. This helps the egg filling set properly and prevents excess liquid from collecting in the baking dish.

Grease the dish thoroughly, paying particular attention to the corners and sides. Because this quiche has no pastry crust, the egg and cheese mixture comes into direct contact with the baking dish.

Mixing the Easy Zucchini Quiche

Lightly beat the eggs before adding the biscuit baking mix. Whisk until no visible pockets of dry mix remain. Biscuit baking mix already contains flour, shortening, salt, and leavening, which helps the filling become lightly firm and golden during baking.

Do not replace the baking mix with an equal amount of ordinary flour. Plain flour does not contain the fat and leavening needed to produce the same texture. A homemade biscuit mix can be used when its composition is similar to the packaged version.

Add the onion, cheddar, garlic, oregano, salt, and black pepper before folding in the zucchini. Mixing the seasonings into the egg base first helps distribute them evenly. Fold the zucchini gently so the slices remain intact and become completely coated.

Baking and Checking the Centre

Spread the mixture evenly in the prepared baking dish. Zucchini slices piled in one section can produce uneven cooking and a watery centre. Bake uncovered until the surface is golden and the middle feels firm.

Insert a clean knife into the centre when you are uncertain whether the eggs are set. It should come out without liquid filling. A little melted cheese or moisture from the zucchini is normal, but uncooked egg means the quiche needs several additional minutes.

Allow the finished quiche to rest for 10 minutes. Resting gives the egg filling time to settle and makes cutting cleaner. It also allows moisture from the hot zucchini to redistribute instead of escaping immediately onto the plate.

Serving Ideas and Variations

Serve the quiche with a green salad, sliced tomatoes, roasted potatoes, or fresh fruit. For a larger vegetarian table, combine it with our Cheddar Zucchini Egg Casserole.

Mushrooms, spinach, roasted peppers, sweetcorn, or fresh herbs can be added in moderate quantities. Cook and drain moist vegetables before using them. Monterey Jack, mozzarella, Gouda, or Parmesan can replace some or all of the cheddar.

Storage and Food Safety

Cool leftovers promptly before placing them in an airtight container. Refrigerate for up to three days and reheat only the amount required. Individual portions can be warmed in the oven, air fryer, or microwave until hot throughout.

Keep the quiche properly chilled when transporting it to a picnic. Follow current FDA safe food-handling guidance when preparing eggs and dairy products and when cooling, transporting, storing, or reheating cooked dishes.

With tender zucchini, savoury cheddar, and straightforward preparation, Crustless Zucchini Cheddar Quiche is a versatile recipe for almost any meal.


Balsamic Roasted Asparagus Onions

Balsamic roasted asparagus onions with garlic and fresh thyme

Balsamic Roasted Asparagus Onions

Balsamic Roasted Asparagus Onions combine tender asparagus with sweet pearl onions, garlic, thyme, and tangy balsamic vinegar. This colourful vegan side dish is especially suitable for spring dinners and holiday meals.
Couverts4 servings
estimated costs pp $2.75
Deel op Facebook Print Recipe

Equipment

Ingredients

Instructions

  • Preheat the oven to 400ยฐF (200ยฐC).
  • Place the trimmed asparagus and peeled pearl onions in a large mixing bowl.
  • Drizzle with the olive oil and balsamic vinegar.
  • Sprinkle with the garlic powder, kosher salt, and black pepper.
  • Toss until the vegetables are evenly coated.
  • Spread the asparagus and pearl onions in a single layer on a baking sheet.
  • Roast for 10 minutes.
  • Turn the asparagus and pearl onions.
  • Continue roasting for another 10 minutes until the asparagus is tender and the onions are lightly caramelised.
  • Remove the baking sheet from the oven.
  • Sprinkle the fresh thyme over the vegetables.
  • Let the vegetables rest for 5 minutes.
  • Transfer to a serving dish and serve warm.

Notes & Wine Advice

Serving Suggestions

Serve the roasted vegetables with grilled chicken, baked fish, steak, risotto, pasta, or a vegetarian main course. They also work well as part of a spring holiday meal. For a larger vegetable selection, pair them with our Roasted Butternut Squash.

Recipe Notes

Use asparagus spears of a similar thickness so they roast evenly. Arrange the vegetables in a single layer and avoid overcrowding the baking sheet. Crowded vegetables release steam and will not caramelise properly.

Variations

Replace the pearl onions with shallots or red onion wedges. Add cherry tomatoes, mushrooms, lemon zest, Parmesan, or crushed red pepper. Rosemary or oregano can replace the fresh thyme.

Storage

Refrigerate leftovers in an airtight container for up to three days. Reheat them briefly in the oven or air fryer to refresh the roasted texture. The vegetables can also be chopped and added cold to salads, pasta, or grain bowls.

Wine Advice

A crisp Sauvignon Blanc complements the fresh asparagus and tangy balsamic vinegar. A light Pinot Grigio is another suitable choice for the sweet onions and aromatic thyme.

Nutrition values

Serving: 1 portion | Calories: 100 kcal | koolhydraten: 12 g | Eiwitten: 3 g | Vet: 5 g | Verzadigd vet: 1 g | Natrium: 300 mg | Suiker: 5 g
————————————————————————————————–

About Balsamic Roasted Asparagus Onions

Balsamic Roasted Asparagus Onions combine fresh asparagus with sweet pearl onions, olive oil, balsamic vinegar, garlic, and thyme. This roasted asparagus side dish balances the natural sweetness of caramelised vegetables with the acidity of balsamic vinegar. It is colourful, easy to prepare, and suitable for vegan, vegetarian, gluten-free, and low-carb meals.

Asparagus is at its best during spring, making this recipe a useful choice for seasonal family dinners and holiday menus. The vegetables need only 10 minutes of preparation before roasting together on a single baking sheet.

Preparing Balsamic Roasted Asparagus Onions

Trim the woody ends from the asparagus before cooking. Hold each spear near its base and bend it gently until the tough section snaps away naturally. Alternatively, line up the spears and remove approximately one inch from the bottom with a sharp knife.

Choose asparagus spears of a similar thickness. Thin spears cook more quickly than thick ones and may become soft before the pearl onions are tender. When the asparagus is especially thin, add it to the baking sheet after the onions have roasted for several minutes.

Fresh pearl onions require peeling, which becomes easier after blanching them briefly in boiling water. Trim the root ends, place the onions in hot water for approximately one minute, and cool them immediately. Their skins should then slip away with gentle pressure.

Making the Roasted Asparagus Side Dish

Combine the vegetables with olive oil, balsamic vinegar, garlic powder, salt, and black pepper before transferring them to the baking sheet. Mixing everything in a bowl provides more even coverage than drizzling the seasonings directly over the pan.

Spread the asparagus and onions into a single layer with a little space between the pieces. Proper spacing allows hot air to circulate around the vegetables. When the baking sheet is overcrowded, released moisture becomes trapped and the vegetables steam instead of roasting.

Turn the vegetables halfway through the cooking time. This exposes more of their surface to the hot baking sheet and encourages even browning. The asparagus should be tender but still retain some structure, while the pearl onions should feel soft and develop lightly caramelised edges.

Balancing Balsamic Vinegar and Herbs

Balsamic vinegar becomes sweeter and more concentrated as it roasts. Two tablespoons provide noticeable acidity without overwhelming the mild asparagus. When using an especially thick or sweet balsamic vinegar, reduce the quantity slightly or mix it with a teaspoon of lemon juice.

Fresh thyme is added after roasting so its aroma remains distinct. Rosemary, oregano, parsley, or basil can be used instead. Garlic powder is suitable for high-temperature roasting because it distributes evenly and is less likely to burn than finely minced fresh garlic.

Serving Ideas and Variations

Serve the vegetables with grilled chicken, baked salmon, steak, pasta, risotto, or lentils. For a larger seasonal vegetable selection, combine them with our Roasted Butternut Squash.

Cherry tomatoes, mushrooms, shallots, or red onion wedges can be roasted with the asparagus. Parmesan adds a salty finish when the dish does not need to remain vegan. Lemon zest or crushed red pepper provides a brighter or spicier variation.

Storage and Food Safety

Cool leftovers promptly and place them in an airtight container. Refrigerate for up to three days. Reheat the vegetables briefly in the oven or air fryer rather than cooking them for a long time, which may make the asparagus soft.

Follow current FDA safe food-handling guidance when washing, preparing, cooling, storing, and reheating fresh vegetables.

With caramelised onions, tender asparagus, fragrant thyme, and tangy vinegar, Balsamic Roasted Asparagus Onions make a flavourful spring side dish.


Spiced Red Wine Pears

Spiced red wine pears with cinnamon, star anise and citrus syrup

Spiced Red Wine Pears

Spiced Red Wine Pears are gently poached with cinnamon, cloves, star anise, orange, and lemon. The reduced wine syrup gives this elegant French dessert a rich flavour and festive appearance.
Couverts4 servings
estimated costs pp $4.00
Deel op Facebook Print Recipe

Equipment

Ingredients

For the Pears

For the Spiced Wine Syrup

Instructions

Prepare the Spiced Wine Syrup

  • Pour the Merlot into a large saucepan.
  • Add the granulated sugar, cinnamon stick, cloves, and star anise.
  • Add the orange zest, orange juice, lemon zest, and lemon juice.
  • Bring the mixture to a gentle simmer over medium heat.
  • Stir until the sugar has completely dissolved.

Poach the Pears

  • Add the pear halves to the simmering wine mixture.
  • Reduce the heat to low.
  • Cover the saucepan with a lid.
  • Simmer gently for approximately 30 minutes until the pears are tender but still hold their shape.
  • Turn the pears several times during cooking so they colour evenly.
  • Remove the pears carefully with a slotted spoon.
  • Transfer them to a serving dish.

Reduce the Spiced Wine Syrup

  • Increase the heat beneath the saucepan to medium-high.
  • Simmer the poaching liquid uncovered for approximately 15 minutes until reduced and slightly thickened.
  • Remove the cinnamon stick, cloves, and star anise.
  • Pour the warm reduced syrup over the pears.
  • Let the pears stand for 5 minutes.
  • Serve warm.

Notes & Wine Advice

Serving Suggestions

Serve the pears warm with vanilla ice cream, whipped cream, crรจme fraรฎche, mascarpone, or Greek yogurt. For a dairy-free presentation, add coconut yogurt or vegan vanilla ice cream. Crushed amaretti biscuits or toasted almonds provide extra texture.

Recipe Notes

Choose ripe but firm pears that will soften without falling apart. Keep the poaching liquid at a gentle simmer rather than a vigorous boil. Turn the pears regularly so every surface absorbs the wine and develops an even colour.

Variations

Replace Merlot with Cabernet Sauvignon or Zinfandel. Add fresh ginger, vanilla, cardamom, or strips of orange peel. Apples can replace the pears, although their cooking time may differ. For a sweeter syrup, stir in a tablespoon of honey after reducing.

Storage

Cool the pears in their syrup before transferring them to an airtight container. Refrigerate for up to four days. The colour and flavour become deeper during storage. Reheat gently in a saucepan or serve chilled.

Wine Advice

Serve the pears with the same Merlot used for poaching. A late-harvest Gewรผrztraminer is a sweeter alternative that complements the citrus, cinnamon, cloves, and star anise.

Nutrition values

Serving: 2 pear halves with syrup | Calories: 320 kcal | koolhydraten: 50 g | Eiwitten: 2 g | Vet: 1 g | Verzadigd vet: 0 g | Natrium: 15 mg | Suiker: 40 g
————————————————————————————————–

About Spiced Red Wine Pears

Spiced Red Wine Pears are an elegant French dessert made by gently poaching fresh pears in Merlot with sugar, cinnamon, cloves, star anise, orange, and lemon. These mulled wine poached pears become tender and deeply coloured while retaining their shape. Reducing the fragrant cooking liquid creates a glossy syrup for serving.

This warm fruit dessert is particularly suitable for Christmas, New Yearโ€™s Eve, Valentineโ€™s Day, and winter dinner parties. Most of the preparation can be completed in advance, leaving only gentle reheating and plating before dessert is served.

Preparing Spiced Red Wine Pears

Select pears that are ripe but still firm. Completely soft pears may break apart before they have absorbed enough flavour and colour. Bosc, Anjou, or Conference pears are suitable because their dense flesh holds its shape well during poaching.

Peel the pears carefully while leaving as much of their natural shape intact as possible. Cut them lengthwise and remove the cores. Halving the fruit shortens the cooking time and provides a flat surface that looks attractive on the serving plate.

Lemon juice helps slow discolouration while the remaining ingredients are prepared. It also balances the sweetness of the sugar and ripe fruit. Orange juice and zest provide a warmer citrus flavour that works particularly well with the red wine and spices.

Making Mulled Wine Poached Pears

Combine the Merlot with sugar, cinnamon, cloves, star anise, orange, and lemon. Warm the mixture gradually and stir until the sugar has dissolved. Avoid boiling it vigorously because rapid evaporation can reduce the liquid before the pears have finished cooking.

Add the pear halves and lower the heat. The liquid should move gently around the fruit without bubbling aggressively. Turn the pears several times during poaching because the fruit may not remain completely submerged. Regular turning produces a more even burgundy colour.

Test the thickest part of a pear with the point of a knife after approximately 30 minutes. The knife should enter easily, but the fruit should still feel firm enough to lift without breaking.

Reducing the Wine Syrup

Remove the cooked pears before reducing the liquid. Leaving them in the saucepan could make them too soft. Increase the heat and simmer the wine mixture until its volume decreases and the texture becomes lightly syrupy.

The syrup will continue thickening as it cools, so it does not need to resemble caramel while still hot. Remove the whole spices before serving. Their flavour becomes increasingly strong and can overpower the fruit when they remain in the finished sauce.

Serving This Winter Dessert

Serve the pears warm with vanilla ice cream, whipped cream, mascarpone, or crรจme fraรฎche. The contrast between warm fruit and cold ice cream works especially well. For a dairy-free dessert, use coconut yogurt or vegan vanilla ice cream.

Crushed amaretti biscuits, toasted almonds, or chopped hazelnuts add crunch. For a larger dessert selection, serve smaller portions alongside our Chocolate White Chocolate Banana Bread.

Storage and Food Safety

Cool the pears in their syrup so they continue absorbing colour and flavour. Transfer everything to a covered container and refrigerate for up to four days. The dessert can be reheated gently over low heat or served chilled.

Although some alcohol evaporates during cooking, the finished dessert may still contain alcohol and is therefore unsuitable for anyone who must avoid it completely. Follow current FDA safe food-handling guidance when cooling, storing, and reheating prepared fruit dishes.

Fragrant spices, citrus, tender fruit, and glossy wine syrup make Spiced Red Wine Pears a memorable dessert for festive winter meals.


Pistachio Pine Nut Pesto


Pistachio pine nut pesto with fresh basil and garlic

Pistachio Pine Nut Pesto

Pistachio Pine Nut Pesto combines buttery pistachios, rich pine nuts, fresh basil, garlic, and extra-virgin olive oil. This versatile Italian sauce is delicious with pasta, bread, roasted vegetables, sandwiches, or grilled meat.
Couverts4 servings
estimated costs pp $2.75
Deel op Facebook Print Recipe

Equipment

Ingredients

Instructions

  • Place the pistachios and pine nuts in a food processor.
  • Add the fresh basil leaves and garlic.
  • Pulse until the nuts and basil are finely chopped.
  • Keep the food processor running while slowly adding the olive oil.
  • Process until the pesto reaches a smooth but slightly textured consistency.
  • Scrape down the sides of the food processor when necessary.
  • Season with the kosher salt and black pepper.
  • Process briefly until evenly combined.
  • Transfer the pesto to a small saucepan when serving it warm.
  • Warm gently over low heat for approximately 3 minutes.
  • Do not boil or fry the pesto.
  • Serve with pasta, bread, roasted vegetables, sandwiches, or grilled meat.

Notes & Wine Advice

Serving Suggestions

Toss the pesto with warm pasta, spread it over toasted bread, or spoon it onto roasted vegetables. It also works as a sandwich spread, salad dressing, pizza topping, or sauce for grilled chicken and fish. Stir in a little pasta water when using it with pasta.

Recipe Notes

Add the olive oil gradually so you can control the consistency. Roasted salted pistachios already contain seasoning, so taste the pesto before adding more salt. Warm it only over low heat because excessive heat can darken the basil and create a bitter flavour.

Variations

Add lemon juice, lemon zest, red pepper flakes, parsley, or nutritional yeast. Parmesan or Pecorino Romano can be included when the pesto does not need to remain vegan. Replace the pine nuts with walnuts, almonds, or additional pistachios.

Storage

Transfer the pesto to an airtight container and cover the surface with a thin layer of olive oil. Refrigerate for up to four days. Freeze small portions in an ice cube tray before transferring them to a freezer-safe container for up to three months.

Wine Advice

A crisp Pinot Grigio balances the rich nuts and olive oil while complementing the fresh basil. A lightly oaked Chardonnay is another suitable choice for this full-flavoured pesto.

Nutrition values

Calories: 260 kcal | koolhydraten: 6 g | Eiwitten: 5 g | Vet: 26 g | Verzadigd vet: 3 g | Natrium: 190 mg | Suiker: 1 g
————————————————————————————————–

About Pistachio Pine Nut Pesto

Pistachio Pine Nut Pesto is a rich Italian sauce made with roasted pistachios, raw pine nuts, fresh basil, garlic, and extra-virgin olive oil. This Italian nut pesto has the familiar herbal character of traditional pesto but receives additional sweetness and buttery depth from pistachios. It contains no cheese, making it naturally dairy-free and vegan.

The recipe takes only a few minutes to prepare in a food processor. It can be served at room temperature, gently warmed, or stirred directly into hot pasta. Its thick texture also makes it useful as a spread, dip, dressing base, or topping for vegetables and grilled foods.

Preparing Pistachio Pine Nut Pesto

Begin by placing the pistachios and pine nuts in the food processor. Pulse them before adding the olive oil so the nuts break into evenly sized pieces. Processing everything continuously from the beginning can turn the nuts into a heavy paste before the basil is properly chopped.

Add the fresh basil and peeled garlic after the nuts have been broken down. Basil leaves should be washed and dried thoroughly. Excess water can weaken the flavour, shorten the pestoโ€™s storage life, and prevent the olive oil from coating the ingredients properly.

Pour the olive oil into the food processor gradually. This gives you better control over the final texture. Stop when the pesto is smooth enough to spread but still retains some texture from the nuts.

Building the Italian Nut Pesto

Pistachios have a buttery, slightly sweet flavour that makes this sauce richer than a traditional basil pesto. Roasted salted pistachios also contribute seasoning, so only a modest quantity of additional salt is needed. Taste the mixture before making final adjustments.

Pine nuts create a creamy consistency and provide the familiar flavour associated with classic pesto. Because they contain plenty of natural oil, they help bind the sauce without requiring an excessive amount of olive oil.

Extra-virgin olive oil contributes fruitiness and carries the flavours of the basil and garlic. Choose an oil with a balanced flavour rather than an intensely bitter variety, which could overpower the pistachios.

Serving the Pesto

When serving the sauce with pasta, reserve some cooking water before draining. Stir a few spoonfuls of warm pasta water into the pesto to loosen it, then toss it with the pasta away from direct heat. This produces a smooth coating without frying the basil.

The pesto can also be spread over toasted sourdough, sandwiches, wraps, or pizza. Spoon it onto roasted vegetables, grilled chicken, fish, or baked potatoes. It also complements our Zucchini Pesto Pasta Salad when used as an alternative pesto dressing.

Variations and Dietary Options

Lemon juice or zest adds brightness and helps balance the rich nuts. Red pepper flakes provide gentle heat, while parsley creates a milder herbal flavour. Nutritional yeast contributes a cheese-like savouriness without introducing dairy.

Parmesan or Pecorino Romano can be added when a traditional cheese flavour is preferred. Walnuts, almonds, or cashews can replace the pine nuts, although each substitution changes the texture and flavour.

Storage and Allergy Advice

Place leftover pesto in a clean airtight container and smooth the surface. Add a thin layer of olive oil to reduce contact with air and slow discolouration. Refrigerate for up to four days or freeze small portions for up to three months.

This recipe contains both pistachios and pine nuts and is unsuitable for anyone with relevant nut allergies. Avoid cross-contamination when preparing it for a group. Follow current FDA safe food-handling guidance when washing fresh herbs and storing homemade sauces.

With buttery nuts, fragrant basil, and fresh garlic, Pistachio Pine Nut Pesto adds bold Italian flavour to pasta, bread, vegetables, and everyday meals.