Cilantro Pepita Green Sauce

Cilantro pepita green sauce with toasted pumpkin seeds and garlic

Cilantro Pepita Green Sauce

Cilantro Pepita Green Sauce combines fresh cilantro, pumpkin seeds, garlic, paprika, cayenne, and olive oil. This vibrant Mexican sauce is ideal for tacos, rice bowls, pasta, vegetables, sandwiches, or vegan aioli.
Couverts1 servings
estimated costs pp $1.10 per serving
Deel op Facebook Print Recipe

Equipment

Ingredients

Instructions

  • Place the fresh cilantro in a food processor.
  • Add the toasted pepitas, minced garlic, paprika, and cayenne pepper.
  • Pulse until the cilantro and pepitas are finely chopped.
  • Keep the food processor running while slowly adding the olive oil.
  • Blend until the sauce is smooth but retains a slight texture.
  • Stop and scrape down the sides of the food processor when necessary.
  • Add the kosher salt and black pepper.
  • Blend briefly until evenly combined.
  • Taste and adjust the seasoning when necessary.
  • Transfer the sauce to a serving bowl or airtight jar.
  • Serve immediately or refrigerate until needed.

Notes & Wine Advice

Serving Suggestions

Spoon the sauce over tacos, burritos, grilled vegetables, rice bowls, beans, pasta, or roasted potatoes. Use it as a sandwich spread or thin it with lime juice for a salad dressing. Mixing it with vegan mayonnaise creates a creamy cilantro aioli.

Recipe Notes

Use cilantro leaves and tender upper stems because both contain plenty of flavour. Add the olive oil gradually to control the consistency. Toasted pepitas provide a deeper nutty flavour, but they should be completely cool before blending.

Variations

Add fresh lime juice, jalapeรฑo, avocado, cumin, or green onion. Reduce the cayenne for a milder sauce or add a serrano chile for more heat. Water or lime juice can be blended into the sauce when a thinner consistency is preferred.

Storage

Transfer the sauce to an airtight jar and cover its surface with a thin layer of olive oil. Refrigerate for up to five days. The sauce can also be frozen in small portions for up to three months. Stir thoroughly after thawing.

Wine Advice

A crisp Sauvignon Blanc complements the fresh cilantro and provides enough acidity to balance the olive oil and pepitas. A dry Riesling works well when additional chile is included.

Nutrition values

Serving: 3 tablespoons | Calories: 220 kcal | koolhydraten: 5 g | Eiwitten: 6 g | Vet: 21 g | Verzadigd vet: 3 g | Natrium: 300 mg | Suiker: 1 g
————————————————————————————————–

About Cilantro Pepita Green Sauce

Cilantro Pepita Green Sauce is a vibrant Mexican-inspired condiment made with fresh cilantro, toasted pumpkin seeds, garlic, paprika, cayenne, and extra-virgin olive oil. This Mexican green sauce has a creamy texture and rich nutty flavour without requiring cheese, cream, or other dairy ingredients. It is naturally vegan and suitable for many everyday meals.

The sauce takes only a few minutes to prepare in a food processor. It can be spooned over tacos and rice bowls, tossed with pasta, spread inside sandwiches, or served as a dip for bread and vegetables. Its concentrated flavour means a small serving is usually enough to transform a simple dish.

Preparing Cilantro Pepita Green Sauce

Rinse the cilantro carefully and dry it thoroughly before measuring. Water clinging to the leaves can dilute the sauce and shorten its refrigerated storage life. Tender cilantro stems can be included because they contain plenty of flavour and blend easily.

Check the pepitas before placing them in the food processor. Toasted pumpkin seeds provide more depth and a stronger nutty aroma than raw seeds. When toasting them at home, place them in a dry skillet over medium heat and stir regularly until fragrant. Let them cool completely before blending.

Add the cilantro, pepitas, garlic, paprika, and cayenne to the food processor first. Pulsing these ingredients before adding the oil helps the seeds break down evenly and prevents the mixture from immediately becoming too heavy.

Creating the Mexican Green Sauce

Pour in the olive oil slowly while the food processor is running. Adding it gradually makes it easier to control the texture. The finished sauce should be smooth enough to spoon or spread while retaining a little texture from the pepitas.

Stop the machine and scrape down the sides when pieces of cilantro or garlic remain above the blades. Blend only until the ingredients are evenly combined. Excessive processing can warm the herbs and make their fresh flavour less pronounced.

Paprika adds warm sweetness, while cayenne provides gentle heat. The sauce should taste lively rather than aggressively spicy. More cayenne, jalapeรฑo, or serrano chile can be added for a hotter version.

Serving and Adapting the Sauce

Use the sauce as a topping for tacos, grilled vegetables, beans, baked potatoes, rice bowls, or roasted sweet potatoes. Stir it into cooked pasta or use it as a dairy-free alternative to traditional basil pesto. For another nutty sauce, try our Pistachio Pine Nut Pesto.

Mixing the sauce with vegan mayonnaise creates a quick cilantro-pepita aioli. Lime juice or water produces a thinner dressing for salads and grain bowls. Avocado makes the sauce creamier, although it also shortens the storage life because it begins browning after preparation.

Flavour Variations

Fresh lime juice adds acidity and reinforces the Mexican character. Ground cumin contributes earthiness, while green onion gives the sauce a mild onion flavour. Jalapeรฑo provides moderate heat and fresh green flavour; serrano chile creates a noticeably hotter result.

When cilantro tastes too strong, replace part of it with fresh parsley. Additional pepitas produce a thicker spread, while more olive oil creates a pourable sauce. Always taste before adding more salt because roasted pepitas may already be salted.

Storage and Food Safety

Transfer leftover sauce to a clean airtight jar. Smooth the surface and cover it with a thin layer of olive oil to reduce contact with air. Refrigerate for up to five days or freeze small portions for up to three months.

Thaw frozen portions in the refrigerator and stir thoroughly before serving. Follow current FDA safe food-handling guidance when washing fresh herbs and preparing, storing, or serving homemade sauces.

Fresh herbs, toasted seeds, warm spices, and garlic make Cilantro Pepita Green Sauce a versatile condiment for tacos, vegetables, grains, pasta, and sandwiches.
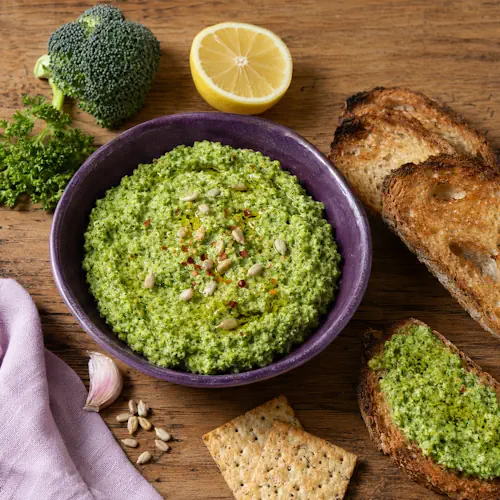

Broccoli Sunflower Seed Pesto

Broccoli sunflower seed pesto with parsley, lemon and garlic

Broccoli Sunflower Seed Pesto

Broccoli Sunflower Seed Pesto combines tender broccoli, roasted sunflower seeds, parsley, lemon, garlic, and chile. This creamy vegan spread is ideal for pasta, sandwiches, crackers, vegetables, or dipping.
Couverts4 servings
estimated costs pp $1.20
Deel op Facebook Print Recipe

Equipment

Ingredients

Instructions

  • Place the broccoli florets in a steamer basket.
  • Steam for approximately 8 minutes until completely tender.
  • Remove the broccoli from the steamer.
  • Allow it to cool for several minutes.
  • Place the sunflower seeds in a food processor.
  • Process until finely ground.
  • Add the steamed broccoli and fresh parsley.
  • Add the lemon juice, olive oil, sesame oil, garlic, crushed red pepper, and sea salt.
  • Process until smooth.
  • Stop and scrape down the sides of the food processor when necessary.
  • Taste and adjust the seasoning when needed.
  • Transfer the pesto to a serving bowl or airtight container.
  • Serve warm, at room temperature, or chilled.

Notes & Wine Advice

Serving Suggestions

Stir the pesto into warm pasta with a splash of reserved pasta water. Spread it over toasted bread, crackers, wraps, or sandwiches, or serve it as a dip for raw vegetables. It can also accompany roasted potatoes, grilled vegetables, chicken, or fish.

Recipe Notes

Steam the broccoli until completely tender so it blends smoothly. Allow it to drain and cool briefly before processing. Roasted salted sunflower seeds already contain seasoning, so taste the finished pesto before adding extra salt.

Variations

Replace parsley with basil, spinach, or rocket. Pumpkin seeds can replace the sunflower seeds, while lemon zest adds stronger citrus flavour. Reduce the crushed red pepper for a milder spread or add nutritional yeast for a cheese-like savouriness.

Storage

Transfer the pesto to an airtight container and cover the surface with a thin layer of olive oil. Refrigerate for up to four days. Freeze individual portions for up to three months and thaw them in the refrigerator before stirring thoroughly.

Wine Advice

A crisp Sauvignon Blanc complements the broccoli, parsley, and lemon. A light Pinot Grigio balances the toasted seeds, sesame oil, garlic, and chile.

Nutrition values

Calories: 180 kcal | koolhydraten: 7 g | Eiwitten: 4 g | Vet: 15 g | Verzadigd vet: 2 g | Natrium: 520 mg | Suiker: 1 g
————————————————————————————————–

About Broccoli Sunflower Seed Pesto

Broccoli Sunflower Seed Pesto is a creamy vegan sauce made with steamed broccoli, roasted sunflower seeds, parsley, lemon juice, olive oil, sesame oil, garlic, and crushed red pepper. This vegan broccoli spread provides a colourful alternative to traditional basil pesto and contains no cheese, dairy products, or pine nuts.

The finished pesto works as a pasta sauce, sandwich spread, dip, or topping for roasted vegetables. It can be served warm, chilled, or at room temperature, making it suitable for lunches, family dinners, packed meals, and party food.

Preparing Broccoli Sunflower Seed Pesto

Cut the broccoli into similarly sized florets before placing it in the steamer basket. Evenly sized pieces soften at approximately the same rate. The stalk can also be used after removing its tough outer layer and cutting the tender centre into small pieces.

Steam the broccoli until completely tender. Broccoli intended for a side dish often retains some bite, but a softer texture is preferable for pesto because it blends more smoothly. Drain it carefully and allow excess steam to escape before adding it to the food processor.

Placing very hot broccoli directly into a closed food processor can trap steam and introduce unnecessary moisture. Let it cool for several minutes while preparing the remaining ingredients.

Making the Vegan Broccoli Spread

Process the sunflower seeds before adding the wet ingredients. Grinding them separately helps create an even texture and prevents large seed pieces from remaining in the finished sauce. Stop processing once they resemble coarse crumbs rather than continuing until they become seed butter.

Add the broccoli, parsley, lemon juice, olive oil, sesame oil, garlic, crushed red pepper, and salt. Process until the mixture reaches the desired consistency. Stop occasionally to scrape ingredients from the sides and move them towards the blades.

For a rustic spread, leave some visible texture. When using the pesto as a smooth pasta sauce, process it for longer and add a tablespoon of water or vegetable broth if necessary.

Balancing the Flavours

Sunflower seeds provide richness and a slightly nutty flavour without using traditional pine nuts. Toasted sesame oil is powerful, so two tablespoons give the pesto a distinctive roasted character. Replace part of it with olive oil when a milder flavour is preferred.

Lemon juice balances the oils and brightens the broccoli and parsley. Garlic adds savouriness, while crushed red pepper supplies gentle heat. Reduce the pepper for a mild family-friendly version or add more when preparing a spicier sauce.

Roasted salted sunflower seeds already contribute sodium. Taste the sauce before adding additional salt, particularly when it will be served with salty crackers or bread.

Serving Ideas and Variations

Stir the pesto into warm pasta with a little reserved cooking water. The starchy water loosens the sauce and helps it coat the pasta evenly. Spread it over toasted bread, sandwiches, wraps, or crackers, or use it as a dip for carrots, cucumber, and sweet pepper.

For another dairy-free sauce, serve it alongside our Cilantro Pepita Green Sauce. Basil, spinach, or rocket can replace part of the parsley. Nutritional yeast adds savoury flavour without introducing dairy.

Storage and Allergy Information

Place leftover pesto in a clean airtight container and smooth its surface. A thin layer of olive oil helps limit contact with air and slows discolouration. Refrigerate for up to four days or freeze small portions for up to three months.

This recipe contains sunflower seeds and sesame oil. Sesame is a recognised allergen, so label the sauce clearly when serving it to guests. Follow current FDA safe food-handling guidance when washing vegetables and herbs and storing homemade sauces.

Tender broccoli, toasted seeds, fresh herbs, lemon, and garlic make Broccoli Sunflower Seed Pesto a versatile sauce for pasta, bread, vegetables, and everyday meals.


Kale Basil Pesto Spread

Kale basil pesto spread made with fresh parsley, garlic, basil and extra-virgin olive oil

Kale Basil Pesto Spread

Kale Basil Pesto Spread combines fresh kale, basil, parsley, garlic, and extra-virgin olive oil in a vibrant dairy-free sauce. It is perfect for pasta, sandwiches, roasted vegetables, or dipping bread.
Couverts4 portions
estimated costs pp $1.50
Deel op Facebook Print Recipe

Equipment

  • Food processor
  • Measuring spoons
  • Silicone spatula
  • Storage Container, Airtight

Ingredients

Instructions

  • Wash the kale, basil, and parsley thoroughly.
  • Dry the leaves completely.
  • Place half of the kale in a food processor.
  • Process until finely chopped.
  • Transfer the chopped kale to a clean bowl.
  • Process the remaining kale until finely chopped.
  • Return all the chopped kale to the food processor.
  • Add the basil, parsley, garlic, sea salt, and black pepper.
  • Process until the herbs are finely chopped.
  • Keep the food processor running.
  • Slowly pour in the olive oil.
  • Process until a thick and evenly blended pesto forms.
  • Stop the food processor and scrape down the sides with a silicone spatula.
  • Process again until the desired consistency is reached.
  • Transfer the pesto to an airtight container.
  • Serve immediately or refrigerate until needed.

Notes & Wine Advice

Serving Suggestions

Toss the pesto through warm pasta, spread it over sandwiches, or spoon it onto roasted vegetables. It can also be served as a dip with crusty bread, crackers, cucumber, carrots, or bell pepper strips.

Recipe Notes

Dry the kale and herbs thoroughly after washing because excess water can make the pesto thin and reduce its storage life. Process the kale in batches so the food processor can chop it evenly without becoming overloaded.

Variations

Add fresh lemon juice for acidity or nutritional yeast for a savoury, cheese-like flavour. Roasted garlic creates a milder result. For a creamier version, blend in one ripe avocado shortly before serving.

Storage

Transfer the pesto to an airtight container and smooth the surface. Cover it with a thin layer of olive oil to reduce contact with air and preserve its green colour. Refrigerate it for up to five days or freeze individual portions for up to three months.

Wine Advice

A crisp Pinot Grigio balances the earthy kale and sharp garlic. A fresh Sauvignon Blanc also pairs well with the basil, parsley, and green vegetable flavours.

Nutrition values

Serving: 1 cup | Calories: 285 kcal | koolhydraten: 17 g | Eiwitten: 8 g | Vet: 24 g | Verzadigd vet: 3 g | Natrium: 118 mg | Suiker: 3 g
————————————————————————————————–

About Kale Basil Pesto Spread

Kale Basil Pesto Spread transforms fresh kale, basil, parsley, garlic, and olive oil into a versatile green sauce. This dairy-free kale pesto contains no cheese or nuts, making it suitable for vegan, dairy-free, egg-free, and nut-free meals while retaining the fresh herbal character associated with traditional pesto.

The kale provides an earthy vegetable base and gives the spread its substantial texture. Basil supplies the familiar pesto aroma, while curly parsley adds freshness and prevents the kale from dominating. Garlic contributes sharpness, and extra-virgin olive oil binds everything into a rich, spoonable mixture.

Kale Basil Pesto Spread

Fresh kale requires slightly more preparation than tender basil leaves. Remove every thick stem because these fibrous pieces do not break down as smoothly in a food processor. Tear the leaves into smaller sections, wash them carefully, and dry them thoroughly.

Process the kale in two batches to avoid overloading the food processor. Trying to chop all the leaves at once can produce uneven results, with some pieces becoming paste while others remain too large. Return all the chopped kale to the processor before adding the remaining herbs and seasonings.

Building a Smooth Green Sauce

Basil and parsley should be fresh, bright, and free from darkened leaves. Add them after the kale has already been chopped because their softer texture requires less processing. Grated garlic distributes more evenly than roughly chopped cloves and prevents large raw pieces from remaining in the finished spread.

Pour the olive oil through the feed opening while the food processor is running. Adding it gradually helps the herbs and vegetables form a cohesive paste. Stop occasionally to scrape the mixture from the sides and check its consistency.

Dairy-Free Kale Pesto

This dairy-free kale pesto differs from traditional versions because it contains neither Parmesan nor nuts. Kale gives it enough body to remain thick and spreadable, while olive oil supplies richness. The result is particularly useful when cooking for people with several dietary restrictions.

The pesto has a bold garlic flavour because the recipe uses raw cloves. Roast or gently cook the garlic first when a softer and sweeter flavour is preferred. Nutritional yeast can provide additional savoury depth without introducing dairy ingredients.

Serving Ideas and Variations

Stir the pesto through freshly cooked pasta with a small amount of reserved pasta water. It also works as a sandwich spread, pizza topping, vegetable dip, or finishing sauce for soup. Spoon it over roasted potatoes, grilled vegetables, beans, or tofu for extra colour and flavour.

Lemon juice makes the sauce brighter and slightly thinner. Avocado creates a creamier texture but reduces storage time, so add it only to the amount you plan to serve immediately. Chilli flakes, capers, or sun-dried tomatoes can introduce stronger savoury notes.

For another vegetable-based spread with a different texture, try our Broccoli Sunflower Seed Pesto. That version includes sunflower seeds, while this kale pesto remains completely nut- and seed-free.

Storage and Colour

Fresh pesto naturally darkens when exposed to air. Transfer it to a small airtight container, smooth the surface, and cover it with a thin layer of olive oil. This barrier slows oxidation and helps retain the bright green appearance.

Refrigerate the pesto for up to five days. It can also be divided among small freezer containers or an ice cube tray and frozen for up to three months. Thaw only the required quantity in the refrigerator.

Safe Preparation

Wash all leafy vegetables and herbs under clean running water before processing them. Dry them well and use clean equipment and storage containers. Follow current FDA safe food-handling guidance when washing fresh produce and refrigerating prepared sauces.

Kale Basil Pesto Spread offers a bold, practical, and allergy-conscious way to add fresh green flavour to pasta, bread, sandwiches, and vegetables.


Hawaiian Chili Pepper Water

Hawaiian chili pepper water made with rice vinegar, garlic, brown sugar and sambal chilli

Hawaiian Chili Pepper Water

Hawaiian Chili Pepper Water is a tangy condiment made with rice vinegar, brown sugar, garlic, and sambal chilli. Use this spicy sauce with rice, tofu, grilled vegetables, noodles, or roasted meats.
Couverts4 servings
estimated costs pp $0.80
Deel op Facebook Print Recipe

Equipment

  • Jar, Airtight
  • Measuring cups
  • Measuring spoons

Ingredients

Instructions

  • Pour the rice vinegar into an airtight jar.
  • Add the dark brown sugar, minced garlic, and sambal chilli powder.
  • Secure the lid tightly.
  • Shake vigorously until the brown sugar has completely dissolved.
  • Open the jar carefully.
  • Taste the chilli water and adjust the seasoning when necessary.
  • Use immediately for a sharp and spicy flavour.
  • For a deeper flavour, refrigerate for at least 1 hour before serving.
  • Shake thoroughly before each use.
  • Store covered in the refrigerator.

Notes & Wine Advice

Serving Suggestions

Drizzle the chilli water over tofu, rice bowls, noodles, roasted vegetables, grilled meat, fish, or sautรฉed mushrooms. It can also be served as a dipping sauce or used in small amounts as a spicy marinade.

Recipe Notes

The sauce can be used immediately, but refrigerating it for at least one hour allows the garlic and chilli to infuse the vinegar. Shake the jar before every use because the garlic, sugar, and chilli naturally settle at the bottom.

Variations

Add sliced fresh chillies for stronger heat or grated ginger for a warmer flavour. Coconut sugar can replace the brown sugar. Add a small amount of lime juice for extra freshness or dilute the sauce with water when a milder result is preferred.

Allergen Advice

Check the labels on the rice vinegar and sambal chilli powder when preparing the sauce for someone with food allergies or coeliac disease. Some seasoning blends may contain gluten, soy, or traces of other allergens.

Wine Advice

A crisp Sauvignon Blanc balances the sharp vinegar and chilli heat. A lightly sweet Riesling provides a softer contrast when the sauce accompanies particularly spicy food.

Nutrition values

Calories: 125 kcal | koolhydraten: 29 g | Eiwitten: 1 g | Vet: 0 g | Verzadigd vet: 0 g | Natrium: 15 mg | Suiker: 27 g
————————————————————————————————–

About Hawaiian Chili Pepper Water

Hawaiian Chili Pepper Water is a sharp and spicy condiment made with rice vinegar, brown sugar, garlic, and sambal chilli. This Hawaiian chilli sauce adds acidity, sweetness, and heat to tofu, rice, noodles, vegetables, grilled meats, and many other savoury dishes.

Chilli pepper water has a long tradition in Hawaii, where different cultural influences have helped shape local food. Recipes vary considerably between families and cooks. Some are based mainly on water, salt, and local chillies, while others include vinegar, garlic, sugar, ginger, or additional seasonings.

Hawaiian Chili Pepper Water

This quick version uses rice vinegar as its base, producing a pronounced tang without requiring cooking. Brown sugar softens the acidity and chilli heat, while minced garlic contributes a savoury flavour. Sambal chilli powder gives the sauce its red colour and spicy finish.

The quantities make four generous portions. Because the sauce is concentrated, most dishes need only a small drizzle. The remaining condiment can be refrigerated and used over several meals rather than served all at once.

Balancing Heat and Acidity

The balance between vinegar, sugar, and chilli determines the character of the finished sauce. Rice vinegar is generally milder than distilled white vinegar, but two cups still produce a distinctly acidic condiment. The brown sugar rounds off that sharpness without turning it into a sweet dipping sauce.

Sambal chilli powder can vary in heat between brands. Begin by mixing the stated amount into the vinegar and taste the sauce carefully. If it is too hot, dilute it with additional rice vinegar or a small amount of water. More chilli can be added when a stronger result is wanted.

Hawaiian Chilli Sauce

This Hawaiian chilli sauce can be used immediately, although its flavour improves after resting. During refrigeration, the vinegar absorbs flavour from the garlic and chilli. One hour provides a noticeable difference, while an overnight infusion creates a stronger and more integrated result.

The solids naturally settle at the bottom of the jar. Shake it thoroughly before measuring or serving so the garlic, sugar, and chilli are redistributed. Always ensure that the lid is firmly secured before shaking.

Ways to Use the Sauce

Spoon the condiment over steamed rice, fried tofu, noodles, roasted vegetables, or sautรฉed mushrooms. Its acidity cuts through rich and fried foods, making it useful with grilled pork, chicken, oily fish, or coconut-based dishes.

The sauce can also be used as a marinade, but its strong acidity means proteins should not be left in it for excessive periods. When using it as a salad dressing, combine a small amount with olive or sesame oil to soften the vinegar.

For a spicy plant-based meal, serve it alongside our Szechuan Tofu Stir-Fry. Add the chilli water at the table so each person can control the additional heat and acidity.

Easy Variations

Fresh red or green chillies can replace part of the dried sambal. Sliced ginger adds warmth, while lime juice contributes a brighter citrus flavour. Coconut sugar creates a darker, more caramel-like sweetness than brown sugar.

For a milder condiment, reduce the chilli and replace part of the vinegar with water. The diluted version will not keep as long, so prepare only the amount needed and store it carefully in the refrigerator.

Storage and Food Safety

Store the sauce in a clean airtight jar in the refrigerator. Use a clean spoon whenever removing a portion and discard it if it develops an unusual smell, visible mould, bubbling, or another sign of spoilage.

Fresh garlic stored in liquid requires careful refrigeration. Follow current FDA safe food-handling guidance when preparing and storing homemade sauces. For the safest and freshest result, use the condiment within one week.

Hawaiian Chili Pepper Water proves that a small collection of ingredients can create a powerful condiment for adding immediate heat, sweetness, and acidity.


Green Tomato Sauce

green chile sauce combines roasted green chiles, tomatillos, olive oil, parsley, garlic, and warm spices into a bold chimichurri-style condiment packed with smoky fresh flavor. The roasted peppers add depth and gentle heat while the tomatillos create bright tangy richness throughout the sauce.

This vibrant roasted chile chimichurri recipe remains popular because it works beautifully as a marinade, barbecue topping, dipping sauce, or finishing condiment for grilled meats and vegetables. Fresh herbs and roasted peppers create bold flavor with very little preparation.

Roasted peppers create smoky depth and richness

The popularity of green chile sauce continues to grow because roasting the peppers first helps develop deeper smoky sweetness while softening the natural heat. Tomatillos also add refreshing acidity that balances the richness of the olive oil perfectly.

Another reason this roasted chile chimichurri recipe works so well is the balance between fresh herbs, smoky peppers, garlic, and warming spices. Red pepper flakes, cumin, paprika, and oregano create layered flavor throughout the sauce.

Fresh herbs and tangy tomatillos balance the heat

The combination of parsley and tomatillos gives this green chile sauce its fresh vibrant character. Olive oil creates silky texture while garlic and spices build savory depth that pairs beautifully with grilled foods.

If you enjoy flavorful barbecue sauces and condiments, you may also like our Classic Tangy-Sweet Barbecue Sauce, another rich homemade sauce recipe packed with bold barbecue flavor.

Texture plays an important role in this roasted chile chimichurri recipe. Blending the ingredients creates a smooth slightly thick sauce that coats grilled meats and vegetables beautifully while still retaining fresh herb character.

The sauce also stores very well inside the refrigerator, making it perfect for preparing ahead before grilling, barbecues, or outdoor dinners. The flavors continue blending and deepening after resting.

Perfect sauce for grilled foods and barbecue dishes

This green chile sauce works perfectly with grilled steak, chicken, pork, seafood, roasted vegetables, tacos, tamales, sandwiches, and barbecue dishes because the smoky fresh flavor complements rich grilled foods beautifully.

The roasted chile chimichurri also works wonderfully as a marinade, salad dressing, dipping sauce, or finishing drizzle spooned over freshly grilled meats and vegetables before serving.

Proper food handling remains important whenever preparing homemade sauces and fresh ingredients. Store sauces properly refrigerated and always use clean utensils while serving. For additional food preparation and safety guidance, visit the FDA.

Ultimately, green chile sauce delivers smoky roasted pepper flavor, bright herbal freshness, tangy tomatillo richness, and bold chimichurri-style character in a versatile sauce perfect for barbecue cooking and grilled meals.

roasted chile chimichurri and green chile sauce served on a rustic wooden table with fresh herbs

Roasted Green Chile Chimichurri Sauce

Fresh chimichurri-style sauce with roasted green chiles, tomatillos, herbs, and smoky flavor.
Couverts4 servings
Total time 40 minutes
estimated costs pp $2.10 per person
Deel op Facebook Print Recipe

Equipment

  • Baking sheet
  • blender or food processor
  • Measuring cups
  • Measuring spoons

Ingredients

Instructions

  • Preheat the oven to 350ยฐF.
  • Place the green chiles onto a baking sheet.
  • Roast for 30 minutes until softened.
  • Remove the chiles from the oven and allow them to cool.
  • Remove the stems and seeds from the peppers.
  • Add the roasted chiles, tomatillos, olive oil, parsley, garlic, red pepper flakes, oregano, paprika, cumin, salt, and black pepper to a blender.
  • Blend until smooth.
  • Serve immediately or refrigerate in an airtight container for up to one week.

Notes & Wine Advice

Notes

Roasting the green chiles first creates deeper smoky flavor and softer texture throughout the sauce.

Serve Tip

Serve this sauce with grilled vegetables, steak, chicken, seafood, tacos, or roasted meats.

Variations

Add cilantro, lime juice, jalapeรฑos, smoked paprika, or extra garlic for deeper smoky freshness and spice.

Wine Advice

A crisp Sauvignon Blanc pairs beautifully with the fresh herbs and smoky roasted chile flavor.

Nutrition values

Calories: 120 kcal | koolhydraten: 6 g | Eiwitten: 2 g | Vet: 10 g | Verzadigd vet: 1 g | Natrium: 180 mg | Suiker: 2 g
————————————————————————————————–

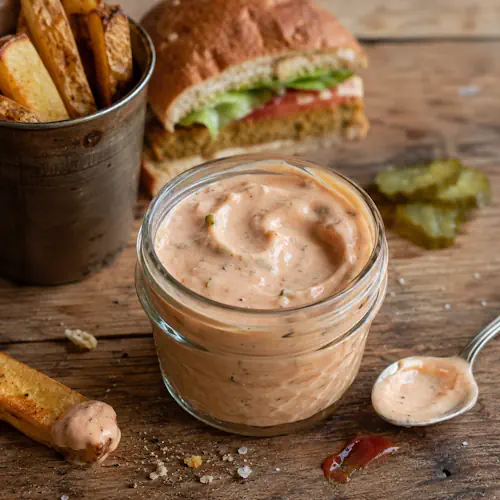
Creamy Burger Fry Sauce

Creamy burger fry sauce made with vegan mayonnaise, ketchup and pickle relish

Creamy Burger Fry Sauce

Creamy Burger Fry Sauce combines vegan mayonnaise, ketchup, and sweet pickle relish into a smooth, tangy, and slightly sweet condiment. Use it on burgers and sandwiches or serve it as a dip for fries and roasted vegetables.
Couverts4 servings
estimated costs pp $0.65
Deel op Facebook Print Recipe

Equipment

  • airtight container
  • Measuring cups
  • Measuring spoons
  • Mixing bowl
  • Whisk

Ingredients

For the Sauce

Instructions

Mix the Sauce

  • Place the vegan mayonnaise in a mixing bowl.
  • Add the ketchup and sweet pickle relish.
  • Add the kosher salt and black pepper.
  • Whisk until completely smooth and evenly combined.
  • Taste and adjust the seasoning when necessary.

Chill and Store

  • Transfer the sauce to an airtight container.
  • Refrigerate for at least 30 minutes before serving for the best flavour.
  • Stir the Creamy Burger Fry Sauce before use.
  • Store it in the refrigerator for up to one week.

Notes & Wine Advice

Serving Suggestions

Use the sauce on burgers, sandwiches, wraps, or toasted rolls. It also works as a dip for French fries, potato wedges, roasted vegetables, onion rings, chicken fingers, or plant-based snacks.

Recipe Notes

Choose vegan mayonnaise that is clearly labelled gluten-free, egg-free, and soy-free when those dietary requirements apply. Drain very wet relish briefly to prevent the finished sauce from becoming thin.

Variations

Add smoked paprika for a barbecue flavour, Sriracha or cayenne pepper for heat, or fresh dill and chives for a herbal version. Dijon mustard or lemon juice can be added when a sharper sauce is preferred.

Storage

Store the sauce in a clean airtight container in the refrigerator and consume it within one week. Always use a clean spoon when removing a portion. Freezing is not recommended because vegan mayonnaise may separate after thawing.

Wine Advice

A crisp Sauvignon Blanc cuts through the creamy texture and balances the sweet pickle relish. A light rosรฉ also pairs well when the sauce is served with burgers or grilled vegetables.

Nutrition values

Serving: 1 serving | Calories: 120 kcal | koolhydraten: 5 g | Eiwitten: 1 g | Vet: 11 g | Verzadigd vet: 1 g | Natrium: 390 mg | Suiker: 3 g
————————————————————————————————–

About Creamy Burger Fry Sauce

Creamy Burger Fry Sauce combines vegan mayonnaise, ketchup, and sweet pickle relish into a smooth American-style condiment. The mayonnaise supplies richness, ketchup adds tomato sweetness and acidity, and pickle relish provides a tangy finish. It takes only five minutes to mix and requires no cooking.

This homemade sauce is suitable for far more than burgers and fries. Use it as a sandwich spread, vegetable dip, salad dressing, or topping for grain bowls. Preparing it at home also makes it easy to adjust the sweetness, acidity, seasoning, and consistency.

Choosing Vegan Mayonnaise

Vegan mayonnaise creates the creamy base without eggs or dairy ingredients. Choose a soy-free product when the sauce must also suit a soy-free diet. Check the label carefully because recipes vary between brands and may contain soy, mustard, pea protein, or other allergens.

A thick mayonnaise produces a sauce that clings well to burgers and fries. If the finished mixture is too thick for drizzling over salads, stir in one teaspoon of water or lemon juice at a time until it reaches the desired consistency.

Balancing Ketchup and Relish

Ketchup contributes sweetness, acidity, colour, and tomato flavour. Sweet pickle relish provides small pieces of pickle and a sharper contrast to the creamy mayonnaise. Drain very watery relish briefly so it does not make the sauce runny.

The proportions create a mild and family-friendly sauce. For a stronger pickle flavour, add one extra teaspoon of relish. A teaspoon of Dijon mustard or pickle juice can be added when a tangier result is preferred.

Mixing and Chilling

Whisk the ingredients until the colour is completely even and no streaks of mayonnaise remain. Taste before adding more salt because ketchup, relish, and vegan mayonnaise already contain sodium.

The sauce can be used immediately, but chilling it for 30 minutes improves the flavour. This short resting period allows the sweet, tangy, and savoury elements to blend. Stir it again immediately before serving.

Serving Ideas

Spread Creamy Burger Fry Sauce over veggie burgers, beef burgers, chicken sandwiches, wraps, and toasted rolls. Serve it as a dip with our Sesame Cumin Potato Wedges or crispy onion rings.

The sauce also works with roasted cauliflower, grilled zucchini, sweet potato fries, chicken fingers, tofu bites, and fried seafood. Add a spoonful to a rice bowl or thin it slightly for use as a creamy salad dressing.

Easy Flavour Variations

Add smoked paprika for a barbecue-style sauce. Sriracha, cayenne pepper, chilli powder, or hot sauce creates a spicy version. Fresh dill, parsley, or chives adds a lighter herbal flavour.

For a sharper burger sauce, mix in Dijon mustard or finely chopped pickles. A little garlic powder or onion powder increases the savoury character. For another American-style condiment, try our Comeback Dipping Sauce.

Dietary Considerations

The sauce can be dairy-free, egg-free, gluten-free, soy-free, vegan, and vegetarian, but this depends on the products selected. Check the labels on the mayonnaise, ketchup, and relish whenever preparing it for someone with an allergy or intolerance.

Some vegan mayonnaise contains soy, while certain relishes or ketchups may contain flavourings that require checking. Using clearly labelled products is more reliable than assuming every brand has the same formulation.

Storage and Food Safety

Transfer the finished sauce to a clean airtight container and refrigerate it promptly. Consume it within one week or follow the shorter storage instruction given on the mayonnaise packaging. Always remove portions with a clean spoon.

Do not return sauce that has been used for dipping to the storage container. Follow current FDA safe food-handling guidance when preparing and refrigerating homemade condiments. Freezing is not recommended because mayonnaise-based sauces can separate after thawing.

Quick to prepare and easy to customise, Creamy Burger Fry Sauce adds a tangy homemade finish to burgers, sandwiches, fries, vegetables, and snacks.


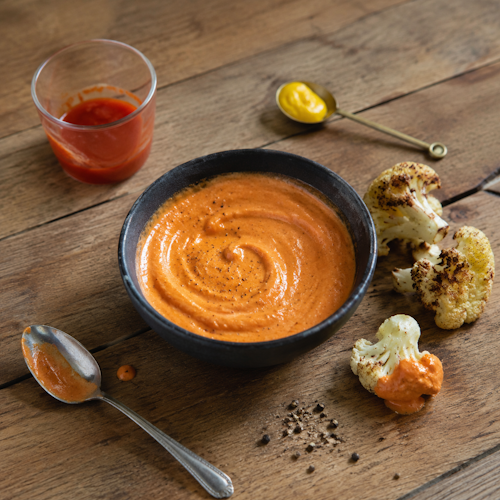
Spicy Vegan Buffalo Sauce

Spicy vegan Buffalo sauce served as a creamy dipping sauce

Spicy Vegan Buffalo Sauce

A creamy, fiery vegan Buffalo sauce made with sriracha, yellow mustard, and melted nondairy butter. Perfect for dipping, spreading, or glazing plant-based snacks.
Couverts4 servings
estimated costs pp $1.10
Deel op Facebook Print Recipe

Equipment

  • airtight container
  • Measuring cups
  • Measuring spoons
  • Mixing bowl
  • Whisk

Ingredients

Instructions

  • For the Buffalo Sauce
  • Add the vegan mayonnaise, sriracha chili sauce, yellow mustard, melted nondairy butter, and ground black pepper to a mixing bowl.
  • Whisk until completely smooth and evenly combined.
  • Taste and adjust the heat if desired.
  • Transfer the Buffalo sauce to an airtight container.
  • Refrigerate until ready to serve.
  • Serve chilled or at room temperature as a dip, spread, or glaze for plant-based dishes.
  • Store covered in the refrigerator for up to 2 weeks.

Notes & Wine Advice

Serving Suggestions

Serve this spicy vegan Buffalo sauce with plant-based nuggets, cauliflower bites, veggie burgers, fries, roasted potatoes, or grilled vegetables. It also makes a flavorful spread for sandwiches and wraps.

Recipe Notes

For a completely gluten-free sauce, check that the sriracha, mustard, vegan mayonnaise, and nondairy butter are certified gluten-free. The sauce becomes slightly thicker after chilling.

Variations

Add extra sriracha or cayenne pepper for more heat. For a milder sauce, use slightly less sriracha. A splash of lemon juice or apple cider vinegar adds extra acidity and freshness.

Storage

Store the sauce in a clean airtight container in the refrigerator for up to two weeks, or follow the shortest storage recommendation of the individual ingredients used.

Wine Advice

An off-dry Riesling balances the spicy sriracha with gentle sweetness and fresh acidity. A chilled Sauvignon Blanc is a good drier alternative.

Nutrition values

Serving: 1 serving | Calories: 440 kcal | koolhydraten: 5 g | Eiwitten: 1 g | Vet: 45 g | Verzadigd vet: 8 g | Natrium: 850 mg | Suiker: 2 g
————————————————————————————————–

This spicy vegan Buffalo sauce combines creamy vegan mayonnaise with fiery sriracha, tangy yellow mustard, and melted nondairy butter. The result is a rich, smooth sauce with plenty of heat and enough acidity to keep it fresh and lively. It takes only five minutes to prepare and requires no cooking, making it particularly useful when you want to add instant flavour to snacks, vegetables, sandwiches, or plant-based meals.

Unlike traditional Buffalo sauce, which is normally based heavily on butter and hot pepper sauce, this version uses vegan mayonnaise to create a thicker and creamier consistency. That makes it suitable not only for coating food but also for dipping and spreading. If you enjoy versatile homemade condiments, explore our other sauce recipes for more ways to add flavour without complicated preparation.

A Creamy Sauce with Serious Heat

Sriracha provides the main heat in this sauce while adding garlic, chilli, and subtle sweetness. Yellow mustard cuts through the richness of the mayonnaise and gives the mixture a pleasantly sharp finish. Nondairy butter rounds everything out and provides some of the familiar richness associated with classic Buffalo-style sauces.

The ground black pepper might seem like a small addition, but it gives the sauce another layer of warmth without dramatically increasing the chilli heat. Whisking everything thoroughly creates a smooth consistency that works especially well as a dip. For more creamy dipping ideas, browse the dips collection.

Ways to Serve It

This vegan sriracha sauce is particularly good with crispy foods. Serve it alongside cauliflower bites, plant-based nuggets, potato wedges, onion rings, fries, or grilled vegetables. It also makes an excellent topping for veggie burgers and wraps. A small spoonful can transform a simple grain bowl or roasted vegetable plate.

For a particularly satisfying combination, serve it alongside our Sesame Cumin Potato Wedges. The crisp potatoes provide a neutral base for the creamy chilli heat. You can also compare it with our Creamy Burger Fry Sauce when serving a selection of milder and hotter dips at a barbecue or party.

Adjusting the Flavour

The heat level is easy to customize. Add a little extra sriracha or cayenne pepper when you want something hotter. For a gentler sauce, reduce the sriracha slightly while keeping the other ingredients unchanged. Lemon juice or apple cider vinegar adds brightness if you prefer a sharper Buffalo flavour.

The spicy vegan Buffalo sauce will become slightly firmer after refrigeration. Give it a quick stir before serving if it has been stored for several hours. If you want a thinner consistency for drizzling, stir in a very small amount of water or lemon juice until it reaches the texture you need.

Storage and Food Safety

Keep the finished sauce in a clean, airtight container in the refrigerator. Because different brands of vegan mayonnaise and nondairy butter have different storage recommendations, always follow the shortest applicable storage period stated on their packaging. Avoid leaving the sauce at room temperature for extended periods during parties or outdoor meals.

Use clean utensils whenever taking sauce from the container, especially if you plan to store the remainder. For additional information about safely preparing and storing foods, consult the FDA safe food-handling guidance.

With its combination of creamy texture, chilli heat, and tangy mustard, this spicy vegan Buffalo sauce is an easy condiment worth keeping in your recipe collection. Five minutes of preparation gives you a versatile sauce for everything from casual snacks and fries to burgers, wraps, vegetables, and party food.


Orange Chipotle Barbecue Sauce

chipotle barbecue sauce combines smoky chipotle heat, sweet orange juice, rich tomato sauce, brown sugar, and grape jelly into a bold homemade barbecue sauce packed with sweet smoky flavor. The orange juice brightens the sauce beautifully while the chipotle powder adds warming smoky depth.

This homemade sauce recipe remains popular because it balances sweetness, smokiness, tangy tomato richness, and gentle spice in one smooth glossy barbecue sauce. The surprising addition of grape jelly also helps create rich texture and subtle fruity sweetness.

Smoky chipotle flavor balances sweet citrus richness

The popularity of chipotle barbecue sauce continues to grow because chipotle peppers create deep smoky flavor while orange juice adds refreshing citrus brightness. Brown sugar and grape jelly also help soften the heat while creating glossy texture.

Another reason this barbecue sauce recipe works so well is the balance between sweet tomato richness and smoky spice. Tomato paste thickens the sauce while garlic and onions build savory depth throughout.

Orange juice and grape jelly create smooth texture

The combination of orange juice and grape jelly gives this smoky orange barbecue sauce its signature sweet tangy flavor. Simmering the sauce slowly also helps blend the ingredients into a smooth rich consistency perfect for brushing over grilled foods.

If you enjoy bold homemade barbecue sauces, you may also like our Dr Pepper Barbecue Sauce, another sweet smoky barbecue sauce packed with deep caramelized flavor.

Texture plays an important role in this recipe. Slow simmering thickens the sauce naturally while allowing the smoky chipotle flavor and citrus sweetness to blend together smoothly.

The sauce also stores very well inside the refrigerator, making it ideal for preparing ahead before cookouts, grilling nights, or backyard barbecue dinners. The flavor continues developing after resting.

Perfect sauce for barbecue meats and grilled vegetables

This chipotle barbecue sauce works perfectly with grilled chicken, ribs, pulled pork, burgers, roasted vegetables, tofu, sandwiches, tacos, and barbecue platters because the smoky sweet flavor complements rich grilled foods beautifully.

The smoky orange barbecue sauce also works wonderfully as a dipping sauce, glaze, marinade, or finishing sauce brushed over meats during the final minutes of grilling.

Proper food handling remains important whenever preparing homemade sauces and fresh ingredients. Store sauces properly refrigerated and always use clean utensils while serving. For additional food preparation and safety guidance, visit the FDA.

Ultimately, chipotle barbecue sauce delivers smoky spice, citrus sweetness, rich tomato flavor, and glossy homemade barbecue character in a versatile sauce perfect for grilling and barbecue meals.

chipotle barbecue sauce and smoky orange barbecue sauce served on a rustic wooden table with fresh herbs and grilled barbecue food

Orange Chipotle Barbecue Sauce

Sweet smoky barbecue sauce with orange juice, chipotle spice, and rich tomato flavor.
Couverts4 servings
Total time 25 minutes
estimated costs pp $1.45 per person
Deel op Facebook Print Recipe

Equipment

  • Dutch oven or stockpot
  • Measuring cups
  • Measuring spoons
  • Wooden spoon

Ingredients

Instructions

  • Heat the olive oil in a stockpot or Dutch oven over medium-high heat.
  • Add the onion and garlic.
  • Cook until softened and lightly browned.
  • Stir in tomato sauce, tomato paste, orange juice, brown sugar, grape jelly, and chipotle powder.
  • Mix thoroughly until combined.
  • Bring the sauce to a gentle simmer.
  • Cover and reduce the heat to medium-low.
  • Cook for 20 minutes while stirring occasionally.
  • Remove from the heat and serve immediately or refrigerate for later use.

Notes & Wine Advice

Notes

Grape jelly helps create glossy texture while balancing the smoky chipotle heat beautifully.

Serve Tip

Serve this sauce with grilled vegetables, chicken, tofu, burgers, ribs, or barbecue sandwiches.

Variations

Add bourbon, smoked paprika, lime juice, garlic powder, or extra chipotle for deeper smoky flavor and spice.

Wine Advice

A crisp Chardonnay pairs beautifully with the smoky sweetness and citrus flavor of this sauce.

Nutrition values

Calories: 80 kcal | koolhydraten: 20 g | Eiwitten: 1 g | Vet: 2 g | Verzadigd vet: 0 g | Natrium: 320 mg | Suiker: 18 g
————————————————————————————————–

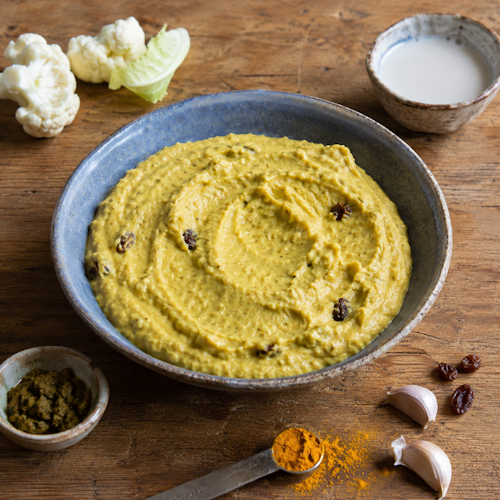
Creamy Curry Cauliflower Purรฉe

Curry cauliflower purรฉe served as a creamy vegan side dish

Creamy Curry Cauliflower Purรฉe

A smooth and creamy cauliflower purรฉe with green curry, turmeric, peanut butter, and a touch of sweetness from raisins. Perfect as a flavorful side dish or stirred into rice, quinoa, soups, and stews.
Couverts4 servings
estimated costs pp $1.25
Deel op Facebook Print Recipe

Equipment

  • Blender or immersion blender
  • large saucepan
  • Measuring cups
  • Measuring spoons

Ingredients

Instructions

  • Place the cauliflower florets in a large saucepan and cover with water.
  • Bring the water to a boil and cook the cauliflower for about 10 minutes until tender.
  • Drain the cauliflower thoroughly.
  • Place the cooked cauliflower, almond milk, green curry paste, turmeric, tamari, peanut butter, raisins, garlic, and sea salt in a blender.
  • Blend until completely smooth and creamy.
  • Return to the saucepan briefly if the purรฉe needs reheating.
  • Serve hot as a side dish or stir into rice, quinoa, soups, or stews.

Notes & Wine Advice

Serving Suggestions

Serve the cauliflower purรฉe alongside tofu, seitan, roasted vegetables, or a plant-based curry. It can also be spooned over brown rice or quinoa or stirred into soups and stews for extra creaminess.

Recipe Notes

Drain the cauliflower thoroughly before blending to prevent a watery purรฉe. Check that the green curry paste and tamari are certified gluten-free when preparing the dish for someone following a strict gluten-free diet.

Variations

For a spicier purรฉe, add a little more green curry paste. A squeeze of fresh lime juice adds acidity and freshness, while fresh cilantro can be added just before serving. Smooth peanut butter can replace crunchy peanut butter when an especially silky texture is preferred.

Storage

Store leftover cauliflower purรฉe in an airtight container in the refrigerator for up to three days. Reheat gently in a saucepan, adding a small splash of almond milk if the purรฉe becomes too thick.

Wine Advice

A crisp Sauvignon Blanc works well with the green curry and creamy cauliflower. A slightly aromatic Riesling is another good choice when you prefer a softer contrast to the curry spices.

Nutrition values

Serving: 1 serving | Calories: 150 kcal | koolhydraten: 19 g | Eiwitten: 5 g | Vet: 7 g | Verzadigd vet: 1 g | Natrium: 720 mg | Suiker: 8 g
————————————————————————————————–

This curry cauliflower purรฉe transforms simple cauliflower into a creamy, warmly spiced side dish with plenty of character. Green curry paste and turmeric provide aromatic heat, while peanut butter adds richness and raisins contribute a subtle sweetness. Almond milk keeps the texture smooth without adding dairy, making this an easy plant-based accompaniment for everyday meals.

The recipe is also surprisingly versatile. Serve the purรฉe instead of mashed potatoes, spoon it underneath roasted vegetables, or combine it with grains to create a more substantial meal. If you enjoy aromatic dishes built around warming spices, browse our Curry recipes for more inspiration.

Creating a Smooth and Creamy Texture

The most important step is cooking the cauliflower until completely tender. Undercooked florets produce a grainier purรฉe and are more difficult to blend smoothly. After cooking, drain the cauliflower thoroughly because excess water can make the finished dish thin and dilute the curry flavour.

Unsweetened almond milk adds moisture gradually without making the mixture heavy. Peanut butter supplies extra body and a mild nutty flavour that works naturally with green curry. The raisins may seem unusual, but their sweetness provides contrast to the savoury tamari and spicy curry paste.

Building the Curry Flavour

Green curry paste provides several flavours in a single ingredient, while turmeric contributes an earthy note and warm colour. Garlic adds another savoury layer, and tamari supplies saltiness and umami. Together, these ingredients turn mild cauliflower into a much more distinctive side dish.

If you prefer stronger heat, increase the green curry paste gradually. For a brighter finish, add fresh lime juice after blending. Chopped cilantro can also be scattered over the finished curry cauliflower purรฉe immediately before serving.

What to Serve with It

This green curry cauliflower works particularly well with tofu, roasted vegetables, seitan, or other plant-based proteins. For a simple bowl meal, spoon it alongside brown rice or quinoa and add crisp vegetables for contrasting texture. Visit our Rice recipes when you want more ideas for turning it into a complete meal.

The purรฉe can also become an ingredient rather than simply a side dish. Stir a few spoonfuls into vegetable soup to create a thicker, creamier consistency without using dairy cream. It is equally useful for enriching a stew or adding flavour to cooked grains. More warming combinations can be found among our Soup recipes and Stew recipes.

Easy Variations

The basic method is flexible. Smooth peanut butter creates a silkier consistency than crunchy peanut butter. Fresh ginger can be blended with the garlic for additional warmth, while lime zest introduces a fragrant citrus note. If you like a thinner purรฉe, add almond milk a tablespoon at a time until the preferred consistency is reached.

You can also use the purรฉe as a base for roasted cauliflower, chickpeas, sautรฉed greens, or grilled vegetables. This makes it useful for creating different meals from one simple preparation rather than serving exactly the same side dish each time.

Storage and Food Safety

Allow leftovers to cool before transferring them to a clean airtight container. Refrigerate promptly and use within three days. Reheat the purรฉe gently in a saucepan, stirring regularly and adding a splash of almond milk when necessary. For current information on safe preparation, cooling, and storage, consult the FDA safe food-handling guidance.

Creamy, aromatic, and easy to adapt, this curry cauliflower purรฉe offers an interesting alternative to traditional vegetable mash while remaining simple enough for an everyday family dinner.


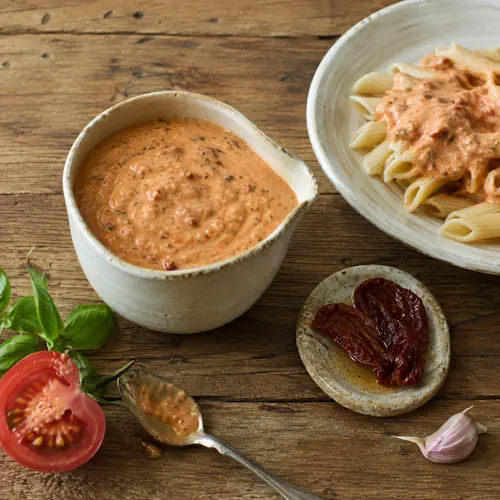
Creamy Sun-Dried Tomato Sauce

Sun-dried tomato sauce with basil and silken tofu

Creamy Sun-Dried Tomato Sauce

A smooth and creamy vegan tomato sauce made with silken tofu, sun-dried tomatoes, fresh basil, and almond butter. Perfect for pasta, rice, roasted vegetables, baked potatoes, sandwiches, and wraps.
Couverts4 servings
estimated costs pp $1.60
Deel op Facebook Print Recipe

Equipment

  • Food processor
  • Measuring cups
  • Measuring spoons
  • Saucepan

Ingredients

Instructions

  • Place the tofu, sun-dried tomatoes, basil, olive oil, white balsamic vinegar, almond butter, diced tomatoes, black pepper, garlic, and white miso in a food processor.
  • Process until completely smooth and creamy.
  • Transfer the sauce to a saucepan.
  • Heat gently over medium heat for about 5 minutes, stirring occasionally, until heated through.
  • Serve warm over pasta, rice, vegetables, or baked potatoes.

Notes & Wine Advice

Serving Suggestions

Serve this creamy sauce over pasta, rice, steamed or roasted vegetables, and baked potatoes. It also works well as a creamy spread for sandwiches and wraps or as a flavorful sauce for grain bowls.

Recipe Notes

Drain the tofu and tomatoes thoroughly to prevent the sauce from becoming watery. The silken tofu gives the sauce its creamy consistency without dairy. When following a strict gluten-free diet, check that the white miso and other packaged ingredients are certified gluten-free.

Variations

Add red pepper flakes for a spicy version or extra fresh basil for a stronger herbal flavour. A little lemon juice can provide additional freshness, while nutritional yeast adds a more savoury flavour without using dairy cheese.

Storage

Allow the sauce to cool before transferring it to an airtight container. Refrigerate for up to three days. Reheat gently in a saucepan while stirring regularly, adding a small splash of water if the sauce becomes too thick.

Wine Advice

A crisp Pinot Grigio complements the acidity of the tomatoes and freshness of the basil. For a red wine, a light Chianti pairs particularly well with the rich tomato flavour.

Nutrition values

Serving: 1 serving | Calories: 220 kcal | koolhydraten: 15 g | Eiwitten: 8 g | Vet: 16 g | Verzadigd vet: 2 g | Natrium: 500 mg | Suiker: 7 g
————————————————————————————————–

This sun-dried tomato sauce combines silken tofu, sun-dried tomatoes, fresh basil, almond butter, and miso into a remarkably creamy plant-based sauce. It has the richness you expect from a cream sauce without using dairy, while tomatoes and white balsamic vinegar provide enough acidity to keep the flavour fresh and balanced.

One of its biggest advantages is versatility. The sauce works with pasta and rice but can just as easily be spooned over vegetables or baked potatoes. It is also thick enough to use as a sandwich or wrap spread. For more easy homemade options, explore our Sauce recipes.

Why Silken Tofu Works So Well

Firm silken tofu creates the creamy foundation without requiring cream or cheese. Once processed, it becomes exceptionally smooth and absorbs the stronger flavours of the tomatoes, garlic, basil, and miso. It also contributes plant-based protein, making the finished sauce more substantial than a basic tomato dressing.

White miso brings savoury umami, while almond butter provides additional richness and a subtle nutty flavour. Together they help soften the acidity of the tomatoes without making the sauce overly sweet.

Building Rich Tomato Flavour

Using both sun-dried and canned tomatoes creates more depth than relying on either ingredient alone. Sun-dried tomatoes provide concentrated sweetness and an intense tomato flavour, while diced tomatoes add moisture and freshness. Fresh basil gives the mixture its recognisable Italian character.

The white balsamic vinegar adds brightness without dramatically changing the colour of the sauce. Garlic and black pepper provide a savoury finish, while extra-virgin olive oil helps create a smooth mouthfeel. The resulting sun-dried tomato sauce has enough flavour to transform even very simple ingredients.

Serving It with Pasta and Vegetables

Toss the warm sauce through spaghetti, penne, fusilli, or another favourite pasta shape. If the consistency is too thick, add a spoonful of pasta cooking water before serving. Visit our Pasta recipes for more ideas that work with creamy and tomato-based sauces.

It is equally useful with roasted cauliflower, broccoli, zucchini, mushrooms, or peppers. Spoon it over a baked potato for a quick lunch or combine it with rice and roasted vegetables for an easy plant-based bowl. More possibilities can be found in our Vegetable recipes.

Easy Ways to Change the Sauce

Red pepper flakes or fresh chilli provide extra heat. Lemon juice makes the sauce brighter, while nutritional yeast adds another savoury note. For a stronger herb flavour, increase the fresh basil or add parsley. You can also use the cold sauce as a dip or spread rather than heating it.

Because almond butter is an important part of the creamy texture, this recipe contains nuts. It also contains soy from both the tofu and miso, so it is not suitable for people following soy-free or nut-free diets.

Storage and Food Safety

Transfer leftover sauce to a clean airtight container once it has cooled and refrigerate promptly. Use it within three days. Reheat only the amount you need in a saucepan over gentle heat, stirring regularly. A small splash of water can restore the original consistency if the refrigerated sauce has thickened.

For current recommendations about preparing, cooling, and storing foods safely, consult the FDA safe food-handling guidance.

Whether served with pasta, vegetables, rice, or potatoes, this sun-dried tomato sauce provides a quick way to add creamy texture, plant-based protein, and concentrated tomato flavour to an everyday meal.