Creamy Thai Peanut Sauce

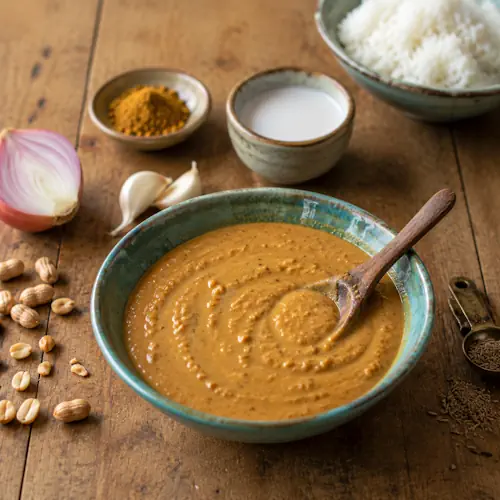
Thai peanut sauce with coconut milk and curry spices

Creamy Thai Peanut Sauce

A rich and creamy Thai-inspired peanut sauce with coconut milk, curry spices, tamari, and agave. Perfect for noodles, rice bowls, vegetables, tofu, or as a flavorful dipping sauce.
Couverts4 servings
estimated costs pp $1.35
Deel op Facebook Print Recipe

Equipment

  • Measuring cups
  • Measuring spoons
  • medium saucepan
  • Whisk
  • Wooden spoon

Ingredients

Instructions

  • Heat the peanut oil in a medium saucepan over medium heat.
  • Add the shallot and garlic and sautรฉ until fragrant, about 2 minutes.
  • Reduce the heat and stir in the ginger, curry powder, cumin, and dried cilantro.
  • Cook for another minute, stirring continuously.
  • Whisk the arrowroot powder with 1/4 cup of the coconut milk in a small bowl until completely dissolved.
  • Add the arrowroot mixture, remaining coconut milk, peanut butter, tamari, agave nectar, and vegetable broth to the saucepan.
  • Whisk until smooth and bring the sauce gently to a boil.
  • Reduce the heat to medium-low and cook for about 10 minutes, whisking occasionally, until thick and creamy.
  • Remove from the heat and serve warm.

Notes & Wine Advice

Serving Suggestions

Serve this creamy peanut sauce over noodles, steamed rice, stir-fried vegetables, tofu, or roasted vegetables. It is also excellent as a dipping sauce for spring rolls, vegetable skewers, or crispy snacks.

Recipe Notes

Mix the arrowroot powder thoroughly with a small amount of cold coconut milk before adding it to the saucepan. This prevents lumps and helps the sauce thicken evenly. Use certified gluten-free tamari, curry powder, and vegetable broth when preparing the sauce for a strict gluten-free diet.

Variations

Add fresh lime juice for extra acidity or chilli flakes for additional heat. Smooth natural peanut butter can be used when you prefer a completely silky sauce. For a thinner consistency, stir in a small amount of vegetable broth before serving.

Storage

Allow leftover sauce to cool before transferring it to an airtight container. Refrigerate for up to four days. Reheat gently in a saucepan and add a splash of vegetable broth or coconut milk if the sauce has thickened during storage.

Wine Advice

A lightly aromatic Riesling works particularly well with the curry spices, coconut, and peanut flavours. A crisp Pinot Grigio is a refreshing drier alternative.

Nutrition values

Serving: 1 serving | Calories: 250 kcal | koolhydraten: 20 g | Eiwitten: 8 g | Vet: 18 g | Verzadigd vet: 6 g | Natrium: 510 mg | Suiker: 10 g
————————————————————————————————–

This Thai peanut sauce combines creamy peanut butter, coconut milk, curry spices, tamari, and agave into a rich sauce with an appealing balance of savoury, sweet, and aromatic flavours. It works equally well as a dipping sauce, noodle sauce, or finishing drizzle for vegetables, rice bowls, and tofu.

The combination of peanut and coconut gives the sauce plenty of body, while ginger, cumin, curry powder, garlic, and cilantro provide warmth and complexity. Despite its rich flavour, preparation is straightforward and the entire sauce is ready in less than twenty minutes. Explore our Sauce recipes for more easy homemade condiments and finishing sauces.

Getting the Creamy Texture Right

Natural peanut butter provides the main richness, while light coconut milk loosens the peanut butter and creates a smooth consistency. Arrowroot powder thickens the mixture without requiring wheat flour. Mixing the arrowroot with cold coconut milk before adding it to the saucepan is important because adding the powder directly to hot liquid can create lumps.

Once combined, gentle cooking allows the sauce to thicken naturally. Keep whisking occasionally while it simmers. The finished consistency should be thick enough for dipping but still fluid enough to drizzle over rice or noodles.

Sweet, Savoury and Spicy Flavours

Tamari supplies saltiness and umami, while agave nectar provides enough sweetness to balance the curry spices. Ginger and garlic add warmth, cumin contributes earthiness, and dried cilantro rounds out the aromatic profile.

If you prefer more heat, chilli flakes, cayenne, or fresh chilli can easily be added. Fresh lime juice is another useful addition because its acidity cuts through the richness of the peanut butter and coconut milk. These small adjustments allow you to make the coconut peanut sauce either mild and creamy or considerably more assertive.

Serving Thai Peanut Sauce

One of the easiest ways to use this sauce is with noodles. Toss warm noodles with the sauce and add steamed broccoli, carrots, peppers, or zucchini for a fast meal. Browse our Noodels recipes for more combinations using noodles and flavourful sauces.

It is also delicious spooned over steamed jasmine rice or brown rice with crispy tofu and vegetables. Our Rice recipes provide more inspiration for creating complete bowls around simple sauces and toppings.

For appetizers, serve the sauce in a small bowl alongside spring rolls, vegetable skewers, or crispy tofu. Its thick consistency makes it particularly suitable for dipping, so it also fits naturally among our Dips recipes.

Adjusting and Storing the Sauce

The consistency is easy to adjust after cooking. If it becomes too thick, whisk in vegetable broth or coconut milk one tablespoon at a time. For a thicker dipping sauce, simply simmer it slightly longer. Smooth peanut butter can replace crunchy peanut butter when you want an especially silky finish.

Cool leftovers before transferring them to a clean airtight container. Store refrigerated for up to four days. Peanut-based sauces usually become thicker when chilled, so add a splash of broth or coconut milk while reheating. Warm slowly over low heat and stir regularly.

For general recommendations about preparing, cooling, and storing food safely, consult the FDA safe food-handling guidance.

Whether you serve it with noodles, rice, vegetables, tofu, or spring rolls, this Thai peanut sauce is an easy way to add creamy texture, warming spices, and rich peanut flavour to everyday meals.

Crispy Garden Vegetable Fritters

Vegetable Fritters served golden and crispy with a creamy dipping sauce on a rustic wooden table.

Crispy Garden Vegetable Fritters

Crispy vegetable fritters packed with zucchini, potato, carrots, and green peas in a lightly spiced dairy-free batter. Golden outside and tender inside, they make an easy snack, side dish, or light lunch.
Couverts4 servings
Total time 25 minutes
estimated costs pp $2.15
Deel op Facebook Print Recipe

Equipment

  • Frying pan
  • grater
  • Measuring cups
  • Mixing bowl
  • Paper towels
  • spatula
  • Wooden spoon

Ingredients

Instructions

  • Squeeze as much moisture as possible from the grated zucchini and potatoes. Place the zucchini, potatoes, carrots, peas, flour, non-dairy yogurt, 60 ml canola oil, non-dairy milk, paprika, cayenne pepper, salt, and black pepper in a large mixing bowl. Stir until a thick, evenly combined batter forms.
  • Heat approximately 6 mm of canola oil in a frying pan over medium-high heat. Divide the batter into 8 equal portions. Spoon several portions into the hot oil and gently flatten them into fritters without overcrowding the pan.
  • Fry for 5 to 7 minutes until the undersides are crisp and golden brown. Carefully turn the fritters and cook for another 5 to 7 minutes until golden, crisp, and cooked through. Repeat with the remaining batter as necessary.
  • Transfer the cooked fritters to paper towels to drain excess oil. Serve immediately while hot and crisp.

Notes & Wine Advice

Recipe Notes

Squeeze as much moisture as possible from the grated zucchini and potatoes before mixing the batter. This helps create beautifully crispy fritters.
Cook the fritters in small batches so the oil stays hot and each fritter browns evenly.
Serve with dairy-free yogurt, garlic aioli, sweet chili sauce, or your favorite dipping sauce.
Leftover fritters become crispy again after a few minutes in the oven or air fryer.

Wine Advice

A crisp Sauvignon Blanc complements the fresh vegetables and subtle spices perfectly.
A dry Rosรฉ is another refreshing pairing for these golden fritters.

Nutrition values

Calories: 250 kcal | koolhydraten: 35 g | Eiwitten: 6 g | Vet: 10 g | Verzadigd vet: 1 g | Natrium: 190 mg | Suiker: 4 g
————————————————————————————————–

About This Recipe

Vegetable Fritters are crispy, golden patties filled with grated zucchini, potatoes, carrots, and peas, all brought together in a lightly seasoned dairy-free batter. This easy recipe creates a wonderfully crisp exterior while keeping the inside tender and full of fresh vegetable flavor. Whether you’re looking for a satisfying snack, a light lunch, or a flavorful side dish, these vegetable fritters fit almost any occasion. Because they’re completely dairy-free and vegan, they’re also a great option for serving guests with different dietary preferences.

Why You’ll Love Vegetable Fritters

These fritters are made with everyday ingredients that transform into something surprisingly delicious. The zucchini keeps the fritters moist, while the potatoes create a hearty texture and the carrots add natural sweetness. Meanwhile, peas provide little bursts of freshness, and the paprika with cayenne pepper adds gentle warmth without overwhelming the vegetables. Since everything comes together in one bowl, preparation is quick and cleanup stays simple. If you enjoy recipes like this, be sure to explore our Vegetable Recipes, Fried Food Recipes, Snack Recipes, Side Dish Recipes, and Vegan Recipes.

How To Make Vegan Fritters

First, combine all the vegetables with the flour, yogurt, milk, oil, and seasonings until a thick batter forms. Next, heat a shallow layer of oil in a frying pan before spooning portions of the mixture into the hot oil. Then cook each fritter until both sides turn beautifully golden and crispy. Finally, drain them briefly on paper towels before serving. For even better results, avoid overcrowding the pan and cook the fritters in batches so each one browns evenly.

Serving Vegetable Fritters

Serve these vegetable fritters with dairy-free yogurt, garlic aioli, sweet chili sauce, or a fresh herb dip. They also pair perfectly with crisp salads, grilled vegetables, soups, or roasted tomatoes. For a more substantial meal, serve them alongside roasted mushrooms or a colorful grain salad.

Storage Tips

Store leftover fritters in an airtight container in the refrigerator for up to three days. Reheat them in an oven or air fryer to restore their crispy texture. Although they can be reheated in a microwave, the exterior will become softer. For additional food safety guidance, visit the FDA Food Safety website.

These crispy Vegetable Fritters prove that simple vegetables can become a satisfying meal with very little effort. Their crunchy exterior, tender center, and fresh flavors make them a recipe you’ll happily prepare for family dinners, weekend lunches, and healthy snacks throughout the year.


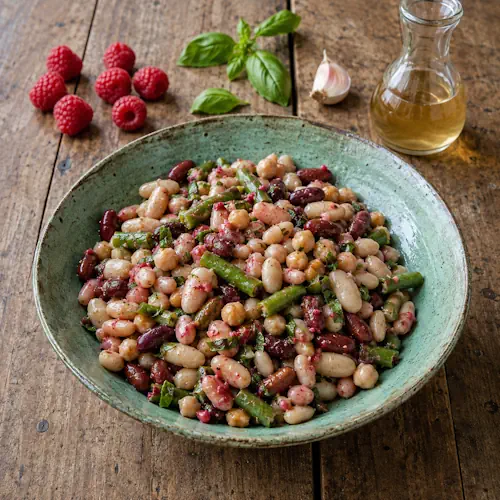
Raspberry Five-Bean Salad

Raspberry five-bean salad with fresh pink raspberry dressing

Raspberry Five-Bean Salad

A colorful chilled five-bean salad tossed with a fresh raspberry, basil, garlic, and apple cider vinegar dressing. A refreshing vegan no-cook side dish for summer barbecues, picnics, and outdoor meals.
Couverts4 servings
estimated costs pp $2.00
Deel op Facebook Print Recipe

Equipment

Ingredients

Instructions

  • Place the butter beans, cannellini beans, garbanzo beans, kidney beans, and green beans in a colander.
  • Rinse thoroughly under cold water and allow the beans to drain.
  • Transfer the drained beans to a large mixing bowl.
  • Place the raspberries, canola oil, apple cider vinegar, garlic, basil, salt, and black pepper in a blender.
  • Blend until smooth, frothy, and bright pink.
  • Pour the raspberry dressing over the beans.
  • Toss gently until all the beans are evenly coated.
  • Serve chilled or at room temperature.

Notes & Wine Advice

Serving Suggestions

Serve this chilled bean salad alongside grilled vegetables, veggie burgers, roasted vegetables, or other barbecue dishes. It also works well as a substantial picnic salad or a colourful addition to a summer buffet.

Recipe Notes

Rinse all canned beans thoroughly and allow them to drain well before adding the dressing. Excess liquid can dilute the raspberry flavour. Toss gently so the softer butter and cannellini beans remain intact.

Variations

Add chopped cucumber, red onion, bell pepper, or fresh spinach for additional colour and texture. Fresh mint can replace the basil for an even fresher summer flavour. A small amount of Dijon mustard can be blended into the raspberry dressing for extra sharpness.

Storage

Store the salad in an airtight container in the refrigerator for up to three days. Stir gently before serving because some of the raspberry dressing may settle at the bottom of the container.

Wine Advice

A lightly sweet Moscato complements the fresh raspberry flavour and balances the acidity of the apple cider vinegar. A fruity Riesling is another refreshing choice for warm-weather meals.

Nutrition values

Serving: 1 gr | Calories: 560 kcal | koolhydraten: 70 g | Eiwitten: 20 g | Vet: 28 g | Verzadigd vet: 2 g | Natrium: 700 mg | Suiker: 8 g
————————————————————————————————–

This raspberry five-bean salad combines butter beans, cannellini beans, garbanzo beans, kidney beans, and green beans with a fresh pink raspberry dressing. Apple cider vinegar provides acidity, while basil and garlic give the fruity sauce a savoury edge. The result is a colourful no-cook salad that’s ideal for warm summer days.

Using canned beans makes preparation particularly quick because there is no soaking or cooking required. Simply rinse, drain, and combine them before making the dressing. For more easy recipes built around beans, explore our Beans recipes.

Why Five Different Beans?

Combining several varieties gives this salad more texture than a standard single-bean dish. Butter beans are large and creamy, cannellini beans are mild and tender, kidney beans have a firmer texture, and garbanzo beans provide a slightly nutty bite. Green beans add colour and a completely different shape.

Rinsing canned beans thoroughly removes excess canning liquid and helps the raspberry dressing remain fresh and bright. Let the beans drain well before transferring them to the mixing bowl.

A Fresh Raspberry Dressing

Fresh raspberries provide sweetness, acidity, and the distinctive pink colour. Blending them with canola oil and apple cider vinegar creates a smooth vinaigrette-style sauce that coats the beans evenly.

Fresh basil adds an aromatic herbal note, while garlic prevents the dressing from tasting overly fruity. Salt and black pepper bring the sweet and savoury components together. Blend until the mixture looks smooth and slightly frothy.

Serving Raspberry Five-Bean Salad

This summer bean salad works particularly well at barbecues, picnics, outdoor lunches, and summer parties. Serve it alongside grilled vegetables, veggie burgers, roasted vegetables, or other cold salads.

Because the beans provide plenty of substance, the salad can also become a light lunch rather than simply a side dish. Add cucumber, leafy greens, tomatoes, or sliced bell pepper for more vegetables. Browse our Salad recipes for additional warm-weather combinations.

For parties, divide the salad into small individual bowls or cups and serve it chilled. More informal sharing ideas can be found among our Snack recipes.

Easy Ways to Change the Recipe

Fresh mint can replace basil when you want an even brighter summer flavour. Dijon mustard adds extra sharpness and helps emulsify the dressing, while fresh lemon juice provides additional acidity.

Chopped red onion, cucumber, celery, or bell pepper adds crunch. If fresh raspberries are unavailable, frozen raspberries can also be used after thawing and draining them thoroughly.

The dressing can also be prepared separately and used on other salads. Its combination of raspberry, vinegar, basil, and garlic works particularly well with leafy greens and roasted vegetables.

Storage and Food Safety

Store the finished salad in a clean airtight container in the refrigerator and use within three days. Stir gently before serving because some dressing may collect at the bottom. Keep the salad chilled when serving it outdoors for extended periods.

For current recommendations about preparing, storing, and serving food safely, consult the FDA safe food-handling guidance.

Colourful, filling, and ready without any cooking, this raspberry five-bean salad is an unusual but refreshing way to serve beans at picnics, barbecues, summer parties, and outdoor meals.


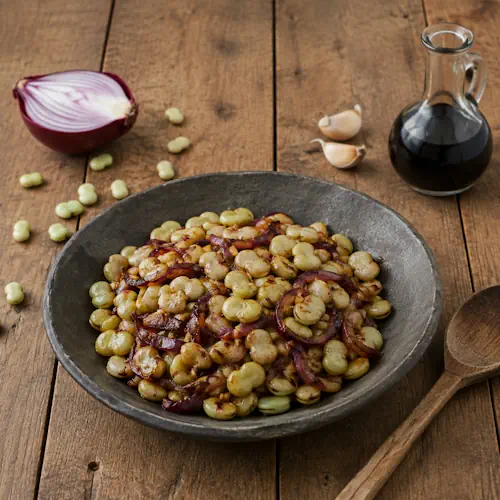
Balsamic Roasted Lima Beans

Balsamic roasted lima beans with red onion and garlic

Balsamic Roasted Lima Beans

Tender oven-roasted lima beans with red onion, garlic, olive oil, and balsamic vinegar. A simple plant-based side dish with savory, slightly sweet flavors that’s perfect for summer meals and barbecues.
Couverts4 servings
estimated costs pp $1.25
Deel op Facebook Print Recipe

Equipment

  • aluminum foil
  • Baking sheet
  • Mixing bowl

Ingredients

Instructions

  • Preheat the oven to 350ยฐF (180ยฐC).
  • Line a baking sheet with aluminum foil.
  • Place the red onion, garlic, balsamic vinegar, olive oil, lima beans, salt, and black pepper in a mixing bowl.
  • Toss until the beans and onion are evenly coated.
  • Spread the mixture in a single even layer over the prepared baking sheet.
  • Roast for 25 minutes until the lima beans are tender and the onion is beginning to brown.
  • Remove from the oven and serve warm.

Notes & Wine Advice

Serving Suggestions

Serve these roasted lima beans alongside grilled vegetables, veggie burgers, fresh salad, roasted potatoes, or your favourite barbecue dishes. They can also be served at room temperature as part of a summer buffet.

Recipe Notes

Thaw the frozen lima beans before roasting and pat them dry if they contain excess moisture. Spreading everything in a single layer helps the beans roast evenly while allowing the red onion to soften and caramelize around the edges.

Variations

Add dried oregano, thyme, smoked paprika, or chilli flakes for additional flavour. Cherry tomatoes or diced bell pepper can be roasted with the beans, while fresh parsley or basil makes a colourful finishing garnish.

Storage

Allow leftovers to cool before transferring them to an airtight container. Refrigerate for up to three days. Reheat in a hot oven or skillet, or serve the beans cold or at room temperature as part of a salad.

Wine Advice

A chilled Sauvignon Blanc has enough fresh acidity to complement the balsamic vinegar while balancing the richness of the lima beans and olive oil. A crisp Pinot Grigio is another suitable choice.

Nutrition values

Serving: 1 serving | Calories: 190 kcal | koolhydraten: 35 g | Eiwitten: 8 g | Vet: 6 g | Verzadigd vet: 1 g | Natrium: 250 mg | Suiker: 5 g
————————————————————————————————–

These balsamic roasted lima beans combine tender beans with red onion, garlic, extra-virgin olive oil, and balsamic vinegar. Roasting concentrates the flavours while allowing the onion to soften and caramelize around the edges. The result is a simple plant-based side dish with a pleasant combination of savoury, sweet, and tangy flavours.

Frozen lima beans make this recipe particularly convenient because there is no soaking or lengthy cooking involved. Once thawed, they can go directly into the seasoned mixture before roasting. For more easy ways to prepare vegetables, explore our Vegetable recipes.

Why Lima Beans Work Well for Roasting

Lima beans have a naturally creamy interior and mild flavour. Oven roasting gives their exterior slightly more texture while keeping the centre tender. Their subtle flavour also means they readily absorb the garlic, olive oil, balsamic vinegar, salt, and pepper.

Drying the thawed beans before seasoning is useful. Excess water creates steam in the oven and can prevent the beans and onions from developing lightly browned edges. After drying, toss everything thoroughly so each bean receives a thin coating of olive oil and balsamic vinegar.

The Sweet and Tangy Balsamic Flavour

Balsamic vinegar brings acidity as well as natural sweetness. During roasting, some of its moisture evaporates and the flavour becomes more concentrated. Red onion complements this sweetness, while garlic provides the stronger savoury note needed to balance the dish.

Extra-virgin olive oil helps everything roast evenly and gives the finished oven-roasted lima beans a richer mouthfeel. Salt and black pepper are deliberately kept simple so the flavour of the beans and balsamic mixture remains prominent.

Serving Balsamic Roasted Lima Beans

Serve the beans warm alongside veggie burgers, grilled vegetables, roasted potatoes, or a fresh green salad. They work especially well at summer barbecues and outdoor meals because they can accompany a wide variety of main dishes.

For a larger meal, combine them with several dishes from our Side Dish recipes. Potato dishes, salads, roasted vegetables, and fresh breads all work naturally alongside the beans.

The beans can also be served at room temperature. Add fresh parsley, basil, or arugula after roasting and they quickly become the base for a simple bean salad. This makes the recipe useful for picnics, buffets, and relaxed summer gatherings.

Simple Ways to Change the Recipe

Fresh or dried thyme and oregano work particularly well with balsamic vinegar. Smoked paprika creates a deeper flavour, while chilli flakes provide heat. Cherry tomatoes or diced bell peppers can be added to the baking sheet when you want additional colour and vegetables.

A small squeeze of lemon juice after roasting creates a fresher finish. For additional crunch, toasted seeds can be scattered over the beans immediately before serving. More oven-cooked meal ideas can be found in our Oven recipes.

Storage and Reheating

Allow leftover beans to cool before transferring them to a clean airtight container. Refrigerate promptly and use within three days. Reheat them in a hot oven or skillet, or serve them chilled as part of a salad.

For current recommendations about safely preparing, cooling, storing, and reheating foods, consult the FDA safe food-handling guidance.

Easy to prepare, colourful, and versatile enough for both everyday dinners and outdoor meals, these balsamic roasted lima beans offer a tasty way to turn simple beans into a satisfying summer side dish.


Spicy Chorizo Cornbread Stuffing

Chorizo cornbread stuffing with vegan chorizo and dried cranberries

Spicy Chorizo Cornbread Stuffing

A bold holiday stuffing made with crumbly cornbread, smoky vegan chorizo, sweet cranberries, onion, and cayenne. A spicy-sweet side for Christmas and Thanksgiving.
Couverts4 servings
estimated costs pp $2.45
Deel op Facebook Print Recipe

Equipment

  • Baking Dish, 9-inch square
  • Knife
  • Mixing Bowl, Large
  • oven

Ingredients

Instructions

  • Preheat the oven to 400ยฐF (200ยฐC).
  • Lightly grease a 9-inch square baking dish.
  • Crumble the cornbread into a large mixing bowl.
  • Add the dried cranberries, crumbled soy chorizo, diced onion, and cayenne pepper.
  • Mix thoroughly until the ingredients are evenly distributed.
  • Pour in the vegetable broth and gently toss until the cornbread mixture is evenly moistened.
  • Season with salt and black pepper.
  • Transfer the stuffing to the prepared baking dish and spread it into an even layer.
  • Bake uncovered for 30 minutes, until the top is golden brown and lightly crisp.
  • Remove from the oven and let rest for 5 minutes before serving.

Notes & Wine Advice

Serving Suggestions

Serve this stuffing alongside roasted root vegetables, green beans, vegan gravy, and tangy cranberry sauce. It is particularly suited to Christmas, Thanksgiving, or another festive family dinner.

Recipe Notes

Use completely cooled cornbread so it crumbles cleanly and absorbs the vegetable broth without becoming mushy. Add the broth gradually if the cornbread is already moist. The mixture should be evenly damp but not wet.

Variations

Reduce the cayenne for a milder stuffing or add diced jalapeรฑo for more heat. Chopped celery, fresh sage, parsley, or toasted pecans can also be added. Choose a vegan, soy-free chorizo alternative when a soy-free version is required.

Storage

Store cooled leftovers in an airtight container in the refrigerator for up to three days. Reheat in a covered baking dish, removing the cover during the final few minutes to restore the crisp topping.

Wine Advice

A fruity Zinfandel complements the smoky chorizo, spicy cayenne, and sweet cranberries. A medium-bodied Pinot Noir is a lighter alternative for a festive meal.

Nutrition values

Serving: 1 serving | Calories: 310 kcal | koolhydraten: 40 g | Eiwitten: 10 g | Vet: 12 g | Verzadigd vet: 3 g | Natrium: 850 mg | Suiker: 8 g
————————————————————————————————–

Chorizo cornbread stuffing combines smoky vegan chorizo, crumbly cornbread, sweet cranberries, onion, and cayenne in one bold holiday side dish. It offers the comforting texture of traditional stuffing with extra heat and a welcome sweet-savoury contrast. This makes it especially suitable for Christmas, Thanksgiving, or another festive family dinner.

The cornbread forms a hearty base that absorbs the vegetable broth and flavours from the other ingredients. Vegan chorizo introduces smoky spices and a substantial texture, while dried cranberries add small bursts of sweetness. Cayenne brings warmth without requiring a long list of additional seasonings.

Chorizo Cornbread Stuffing for the Holidays

Traditional stuffing is usually mild and herbaceous, but this variation has a more pronounced character. The chorizo seasons the surrounding cornbread as it bakes, while the onion softens and contributes savoury sweetness. Cranberries provide the fruity element often expected in an autumn holiday meal.

Serve it as part of a larger selection from the Side Dish recipes collection. It works particularly well beside roasted vegetables, green beans, plant-based roasts, cranberry sauce, and gravy.

Getting the Texture Right

Cooled or day-old cornbread is ideal because it crumbles easily and absorbs liquid without immediately becoming mushy. Fresh, very moist cornbread may require slightly less broth. Add the liquid gradually and check the texture before transferring the mixture to the baking dish.

The stuffing should feel evenly moistened but should not contain pools of liquid. Baking it uncovered allows the top to become golden and lightly crisp while the centre remains soft. Spreading the mixture in an even layer helps it cook consistently from edge to edge.

If you enjoy easy oven dishes with contrasting textures, browse the Casserole recipes for more family-meal inspiration.

Balancing Heat and Sweetness

The level of heat depends partly on the vegan chorizo, as some varieties are considerably spicier than others. Taste the chorizo before adding the full amount of cayenne. For a milder result, reduce the cayenne or omit it entirely. For more heat, add chopped jalapeรฑo or a pinch of chilli flakes.

The dried cranberries balance the spices without turning the stuffing into a sweet dish. Their chewy texture also contrasts with the crumbly cornbread. Chopped celery can add freshness and crunch, while sage, parsley, or thyme introduces a more traditional holiday flavour.

Serving and Preparing Ahead

This spicy cranberry stuffing can be assembled several hours before baking. Cover the prepared dish and refrigerate it, then allow it to lose some of its chill while the oven preheats. It may need a few additional minutes of baking when placed in the oven directly from the refrigerator.

For more warming dishes suited to colder months, explore the Comfort Food recipes collection. This stuffing can be served as a substantial side or paired with vegetables and gravy to create a simple plant-based meal.

Refrigerate leftovers promptly in a covered container and reheat them until thoroughly hot. General information about safely storing and reheating prepared foods is available in the FDA safe food handling guidelines.

Smoky, spicy, sweet, and crisp around the edges, chorizo cornbread stuffing gives a familiar holiday favourite a distinctive plant-based twist without making the preparation complicated.


Citrus Spiced Carrot Coins

Citrus Spiced Carrot Coins cooked with fresh orange juice, garlic, and warm spices in a rustic serving bowl.

Citrus Spiced Carrot Coins

Citrus Spiced Carrot Coins are tender carrot slices gently simmered in fresh orange juice with warm spices, garlic, and coconut oil. This colorful side dish is naturally gluten-free, full of vibrant flavor, and perfect alongside roasted meats or vegetarian meals.
Couverts4 servings
estimated costs pp $1.35 per person
Deel op Facebook Print Recipe

Equipment

  • grater
  • large saucepan
  • Mandolin (optional)

Ingredients

Instructions

  • Heat the coconut oil in a large saucepan over medium heat.
  • Add the garlic, cumin seeds, coriander, ginger, curry powder, and salt.
  • Cook for 2 minutes until fragrant.
  • Stir in the carrot coins.
  • Cook for another 2 minutes.
  • Pour in the fresh orange juice.
  • Bring the mixture to a gentle boil.
  • Reduce the heat slightly.
  • Partially cover the pan.
  • Cook for 10 to 15 minutes, stirring occasionally, until the carrots are tender and the liquid has reduced.
  • Serve warm.

Notes & Wine Advice

Recipe Notes

Slice the carrots evenly so they cook at the same rate.
Freshly squeezed orange juice provides the brightest citrus flavor.
Adjust the curry powder to make the dish milder or more aromatic.
Serve alongside roasted chicken, grilled fish, or a hearty vegetarian entrรฉe.

Wine Advice

A crisp Sauvignon Blanc complements the citrus and warm spices beautifully.
A dry Riesling also pairs wonderfully with the sweet carrots and fragrant seasonings.

Nutrition values

Calories: 160 kcal | koolhydraten: 35 g | Eiwitten: 2 g | Vet: 5 g | Verzadigd vet: 4 g | Natrium: 780 mg | Suiker: 15 g
————————————————————————————————–

About This Recipe

Citrus Spiced Carrot Coins are a colorful vegetable side dish that transforms simple carrots into something truly special. Fresh orange juice, coconut oil, garlic, cumin, coriander, ginger, and curry powder combine to create a beautiful balance of sweetness, warmth, and gentle spice. The carrots become perfectly tender while absorbing the bright citrus flavors, making this recipe an excellent choice for everyday dinners as well as festive holiday meals.

Why You’ll Love Citrus Spiced Carrot Coins

This orange glazed carrots recipe is easy to prepare using everyday ingredients while delivering vibrant flavor and beautiful presentation. Fresh orange juice naturally sweetens the carrots, while the blend of spices adds warmth without overwhelming the vegetables. If you enjoy colorful vegetable dishes, browse our Vegetable Recipes, Side Dish Recipes, Gluten-Free Recipes, Healthy Eating Recipes, and International Recipes.

Preparing Orange Glazed Carrots

Heat the coconut oil before gently cooking the garlic and spices until fragrant. Add the sliced carrots and coat them well before pouring in the fresh orange juice. Simmer everything until the carrots become tender and the cooking liquid reduces into a naturally glossy glaze. Citrus Spiced Carrot Coins develop their best flavor when served immediately while still warm.

Serving Citrus Spiced Carrot Coins

Citrus Spiced Carrot Coins pair beautifully with roasted chicken, grilled fish, baked tofu, roast lamb, or hearty grain dishes. They also make an excellent addition to holiday dinners and healthy family meals. Finish with chopped fresh parsley or cilantro for extra color and freshness before serving.

Storage Tips

Store leftover orange glazed carrots in an airtight container in the refrigerator for up to three days. Reheat gently in a saucepan over low heat until warmed through, adding a splash of orange juice if needed to refresh the glaze. For additional food storage recommendations, visit the FDA Food Safety website.

This recipe turns everyday carrots into a flavorful side dish with bright citrus notes and warming spices. It is easy enough for weeknight meals while being elegant enough for special occasions throughout the autumn season.


Curried Apple & Brussels Sprout Skillet

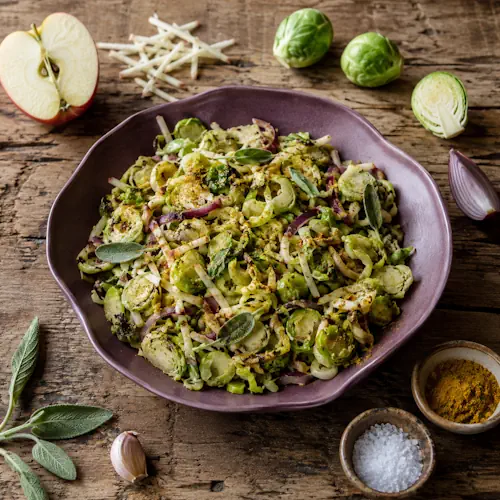
Curried apple Brussels sprouts with shredded tart apples, red onion and sage

Curried Apple & Brussels Sprout Skillet

Tender shredded Brussels sprouts with tart apples, red onion, garlic, sage and warm curry spices. This quick vegan skillet combines sweet, savory and gently spiced flavors in an easy vegetable side dish.
Couverts4 servings
estimated costs pp $1.35
Deel op Facebook Print Recipe

Equipment

Ingredients

Instructions

  • Melt the nondairy butter in a large saucepan over medium heat.
  • Add the garlic, sage, curry powder and sea salt and cook for 1 minute, stirring continuously.
  • Add the shredded apples and red onion and cook for 2 minutes.
  • Add the Brussels sprouts and cook for 4 to 5 minutes, stirring regularly, until tender while still retaining some texture.
  • Taste and adjust the seasoning with black pepper or crushed chilli flakes if desired.
  • Serve immediately.

Notes & Wine Advice

Serving Suggestions

Serve these curried Brussels sprouts alongside roasted chickpeas, baked tofu, seitan or a plant-based roast. They also pair well with brown rice, quinoa or roasted potatoes. For more vegetable side dishes, browse our Vegetable Recipes and Side Dish Recipes.

Recipe Notes

Slice the Brussels sprouts thinly so they become tender during the short cooking time while retaining some texture. Tart apples work especially well because their acidity balances the richness of the nondairy butter and the warmth of the curry powder. Avoid overcooking the sprouts, as they can become soft and develop a stronger cabbage flavor.

Variations

Add dried cranberries for extra sweetness or toasted pumpkin seeds for additional crunch. Crushed chilli flakes can be added for more heat. For a heartier meal, serve the sprouts over brown rice or quinoa with roasted chickpeas or tofu.

Storage

Store leftovers in an airtight container in the refrigerator for up to 3 days. Reheat briefly in a saucepan over medium heat until hot. Freezing is not recommended because both the apples and Brussels sprouts can become watery and lose their texture after thawing.

Wine Advice

A gently off-dry Riesling is a good match for the tart apple and aromatic curry spices. Its freshness balances the nondairy butter while a touch of sweetness softens the curry. A lightly oaked Chardonnay is a fuller alternative that works particularly well with the sage and buttery flavors.

Nutrition values

Serving: 170 g | Calories: 230 kcal | koolhydraten: 29 g | Eiwitten: 5 g | Vet: 11 g | Verzadigd vet: 3 g | Natrium: 670 mg | Suiker: 15 g
————————————————————————————————–

Curried apple Brussels sprouts combine tender shredded sprouts with tart apples, red onion and warm aromatic seasonings. Curry powder contributes gentle heat, while dried sage adds an earthy note that suits both apples and brassicas. Nondairy butter brings the ingredients together and gives this quick vegetable side dish a comforting finish.

The recipe takes only about 18 minutes from start to finish. Thinly slicing the sprouts allows them to cook quickly without boiling or roasting. This method also distributes the apples, onion and seasonings evenly through every serving.

Preparing the Brussels Sprouts

Choose firm, bright green sprouts without yellow leaves or soft spots. Trim the dry ends and remove any damaged outer leaves. A food processor fitted with a slicing blade handles the preparation quickly, although a sharp knife also works.

Keep the slices relatively even so they cook at the same speed. Thick pieces may remain hard while very fine shreds can soften too quickly. The finished sprouts should feel tender but still retain a little bite.

If you enjoy roasted versions, try Garlic and Mustard Roasted Brussels Sprouts. That recipe offers a firmer texture and a tangy mustard glaze.

Curried Apple Brussels Sprouts

Tart apples provide the best contrast to the buttery vegetables. Fuji apples have a balanced sweet-tart character, but Granny Smith, Braeburn or Pink Lady apples also work well. Coarsely shred them shortly before cooking to limit browning.

The apples need only two minutes of cooking before you add the sprouts. This short cooking time softens them slightly without turning them into applesauce. Red onion contributes mild sharpness and provides extra color.

Use mild curry powder when serving the dish to children or guests who prefer gentle seasoning. A medium blend creates a warmer result. Curry powders vary considerably in salt, heat and composition, so taste the dish before adding extra seasoning.

Creating a Balanced Flavor

Garlic and sage support the curry without overwhelming the vegetables. Cook these seasonings briefly in the melted nondairy butter to release their aromas. Stir continuously because grated garlic can burn quickly.

The original recipe uses one teaspoon of coarse sea salt. That amount contributes approximately 575 milligrams of sodium per serving before accounting for the nondairy butter. Reduce it to half a teaspoon when you prefer a less salty side dish.

This spiced apple sprout sautรฉ pairs well with baked tofu, seitan or roasted chickpeas. It also complements the Veggie Tofu Bake or a simple lentil loaf. Serve it with roasted potatoes or quinoa when you want a more substantial meal.

Dietary Considerations

The core ingredients contain no dairy, eggs or animal products when you choose vegan butter. However, nondairy butter may contain soy, nuts or other allergens. Curry powder can also include fillers or undergo processing on shared equipment.

Check every package before applying gluten-free, nut-free or other allergy-related classifications. A plant-based label alone does not guarantee that a product suits someone with a severe food allergy. Choose certified products whenever cross-contamination presents a concern.

The recipe contains approximately 25 grams of carbohydrates and 13 grams of naturally occurring and added sugars per serving. Those values make the original diabetic classification too uncertain to apply without considering an individual meal plan.

Serving and Storage

Serve the vegetables straight from the pan for the best texture. They make a colorful addition to holiday dinners but remain quick enough for an ordinary weekday meal. The dish also fits naturally beside Roasted Autumn Harvest Vegetables.

Refrigerate leftovers within two hours and store them in an airtight container for up to three days. Reheat them briefly in a saucepan rather than cooking them for an extended period. The FDA provides further guidance through its safe food-handling information.

The contrast between tart fruit, earthy sage and warming curry gives curried apple Brussels sprouts more character than a conventional cabbage side dish. Careful slicing and brief cooking preserve their texture while creating a fast, colorful accompaniment for meals throughout the year.


Zesty Ginger Lime Grilled Tofu

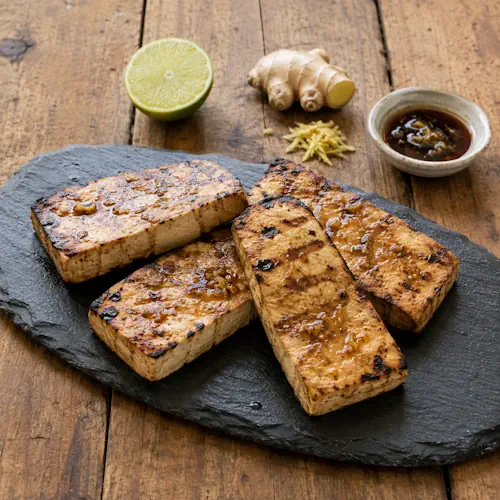
Grilled Ginger Lime Tofu Steaks

Zesty Ginger Lime Grilled Tofu

Juicy tofu steaks marinated with fresh lime, ginger, extra-virgin olive oil and tamari, then grilled until golden with lightly charred edges. A fresh, protein-rich vegan main course for summer grilling.
Couverts4 servings
estimated costs pp $2.50
Deel op Facebook Print Recipe

Equipment

Ingredients

Instructions

  • Whisk the lime juice, olive oil, grated ginger and tamari together until well combined.
  • Arrange the tofu steaks in a shallow dish and pour the marinade over them, turning each steak to coat both sides.
  • Cover and refrigerate for at least 1 hour.
  • Preheat the grill to medium-high heat.
  • Remove the tofu from the marinade and reserve the remaining marinade.
  • Place the tofu steaks on the hot grill and cook for 5 to 7 minutes until golden and lightly charred.
  • Turn the tofu steaks and grill for another 5 to 7 minutes.
  • Brush with a little reserved marinade during the final minutes of grilling.
  • Remove from the grill and serve immediately.

Notes & Wine Advice

Serving Suggestions

Serve the tofu with grilled vegetables, brown rice, quinoa or a fresh salad. It is also delicious sliced into wraps or grain bowls. For more ideas, browse our Vegetable Recipes and Barbecue Recipes.

Recipe Notes

Press the tofu thoroughly before marinating so it absorbs more of the ginger-lime mixture. Extra-firm tofu works best because it remains firm enough to turn on the grill. Allow at least 1 hour for marinating for the best flavor.

Variations

Add crushed chilli flakes or finely chopped fresh chilli for extra heat. Garlic adds a stronger savoury note, while a little maple syrup creates a sweeter glaze. Fresh cilantro can be scattered over the grilled tofu immediately before serving.

Storage

Store leftover grilled tofu in an airtight container in the refrigerator for up to 3 days. Reheat it briefly in a frying pan or on the grill. The tofu can also be served cold in salads, wraps and grain bowls.

Wine Advice

A crisp Sauvignon Blanc pairs beautifully with the fresh lime and ginger. Its lively acidity complements the citrus marinade without overpowering the tofu. A dry Riesling is another refreshing choice, particularly for a summer barbecue.

Nutrition values

Serving: 125 gr | Calories: 225 kcal | koolhydraten: 6 g | Eiwitten: 14 g | Vet: 18 g | Verzadigd vet: 3 g | Natrium: 530 mg | Suiker: 2 g
————————————————————————————————–

About Zesty Ginger Lime Grilled Tofu

Zesty Ginger Lime Grilled Tofu turns a simple block of extra-firm tofu into a fresh and flavorful grilled main course. Lime juice provides bright acidity, fresh ginger adds warmth and tamari supplies the savory umami character that tofu absorbs particularly well.

Why Pressing the Tofu Matters

Extra-firm tofu still contains considerable moisture. Pressing removes some of this water and allows the marinade to penetrate more effectively. It also creates a firmer texture that is easier to handle on the grill. Browse our Vegetable Recipes for more plant-based inspiration.

Building the Ginger Lime Marinade

Fresh lime juice supplies acidity, ginger adds aromatic warmth and tamari provides savory depth. Extra-virgin olive oil helps distribute the flavors and promotes browning. Discover more ideas in our Marinade Recipes.

Getting Tofu Right on the Grill

Use a properly preheated grill and allow the tofu to develop a golden surface before turning it. This reduces sticking and creates attractive grill marks. For more outdoor cooking inspiration, browse our Barbecue Recipes.

Serving Your Grilled Tofu

Serve the tofu with grilled vegetables, quinoa, brown rice or a crisp summer salad. It also works well sliced into wraps and grain bowls. Find suitable accompaniments in our Side Dish Recipes.

Storing and Using Leftovers

Store leftover tofu in an airtight container in the refrigerator for up to three days. Reheat briefly in a frying pan or on the grill, or enjoy it cold in salads and wraps. The lime, ginger and tamari flavors remain pleasantly noticeable after chilling.

Veggie Chow Mein โ€“ A Colorful Stir-Fried Noodle Delight

Veggie Chow Mein โ€“ A Colorful Stir-Fried Noodle Delight

This Veggie Chow Mein is a vibrant, veggie-packed stir-fry with tofu and cashews. A satisfying and healthier alternative to takeout, full of flavor and texture, perfect for any day of the week!
Couverts8
Deel op Facebook Print Recipe

Equipment

  • Wok or large frying pan
  • Knife and cutting board
  • Strainer for noodles
  • Measuring cups

Ingredients

Instructions

  • Cook the chow mein noodles according to package instructions.
  • Drain and set aside, covering to keep warm.
  • Heat the sesame oil in a wok or large frying pan over high heat.
  • Add the broccoli, carrots, cashews, and grated ginger to the pan and stir-fry for 5 to 7 minutes.
  • Add the peanut oil to the wok, then cut the tofu into small cubes and add to the pan.
  • Cook for an additional 5 minutes, tossing frequently.
  • Stir in the soy sauce or tamari and sesame seeds.
  • If needed, rinse the noodles under water to remove any stickiness.
  • Add the noodles to the wok, tossing everything to coat evenly.
  • Cook for an additional 5 minutes, stirring continuously.
  • Serve the veggie chow mein hot as a main dish or side dish.

Notes & Wine Advice

Serving Tip:
Top with extra sesame seeds, spring onions, or chili flakes for additional flavor. This dish pairs perfectly with steamed edamame or a side of fresh vegetables.
Wine Advice:
A light and fruity white wine like Pinot Grigio or Sauvignon Blanc would complement the fresh, savory flavors of this veggie stir-fry.

Nutrition values

Calories: 320 kcal | koolhydraten: 45 g | Eiwitten: 15 g | Vet: 15 g | Suiker: 6 g
————————————————————————————————–

Crispy Pineapple-Glazed Tofu

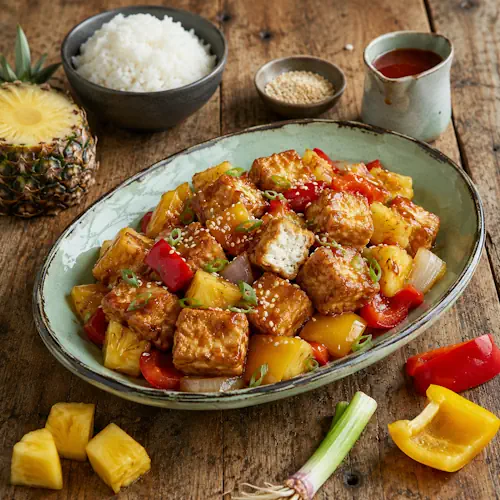
Crispy pineapple tofu with bell peppers, onion and glossy sweet-and-sour sauce

Crispy Pineapple-Glazed Tofu

Golden, crispy tofu coated in a glossy sweet-and-sour pineapple sauce with bell peppers, onion, ginger and garlic. Serve this colorful plant-based dish with rice or noodles for a complete meal.
Couverts4 servings
Total time 1 hour
estimated costs pp $2.75
Deel op Facebook Print Recipe

Equipment

Ingredients

For the Crispy Tofu

For the Vegetables

For Serving

Instructions

For the Crispy Tofu

  • Pat the pressed tofu completely dry.
  • Cut the tofu into bite-size cubes.
  • Combine the cornstarch, salt and black pepper in a mixing bowl.
  • Add the tofu cubes.
  • Toss gently until evenly coated.
  • Heat 2 tablespoons of vegetable oil in a large frying pan or wok over medium-high heat.
  • Arrange the tofu in a single layer.
  • Cook for 8 to 10 minutes.
  • Turn the cubes regularly until crisp and golden on all sides.
  • Transfer the tofu to a plate.

For the Pineapple Glaze

  • Whisk the pineapple juice, rice vinegar, soy sauce, brown sugar, ketchup, cornstarch and sesame oil in a bowl.
  • Continue whisking until no cornstarch lumps remain.
  • Set the glaze aside.

For the Vegetables

  • Add the remaining tablespoon of vegetable oil to the pan.
  • Add the red bell pepper, green bell pepper and red onion.
  • Stir-fry for 4 to 5 minutes until lightly browned but still crisp.
  • Add the garlic, ginger and optional red pepper flakes.
  • Stir-fry for 30 seconds.
  • Add the pineapple chunks.
  • Cook for 1 minute.

To Finish

  • Whisk the prepared glaze once more.
  • Pour it into the pan.
  • Bring the mixture to a gentle simmer.
  • Cook for 2 to 3 minutes until thick and glossy.
  • Return the crispy tofu to the pan.
  • Fold gently until every piece is coated.
  • Cook for 1 more minute.
  • Remove the pan from the heat.
  • Garnish with spring onions and optional sesame seeds.
  • Serve immediately.

Notes & Wine Advice

Serving Suggestions

Serve the tofu immediately with steamed jasmine rice, brown rice or noodles. Add steamed broccoli or sugar snap peas when you want more vegetables.

Recipe Notes

Pressing and thoroughly drying the tofu helps the cornstarch coating become crisp. Keep the tofu pieces in one layer while frying. Cook them in two batches if your pan cannot hold them comfortably.

Dietary Information

The recipe is naturally dairy-free, egg-free, lactose-free, vegan and vegetarian. To make it reliably gluten-free and wheat-free, use certified gluten-free tamari instead of regular soy sauce and check the labels on the ketchup, cornstarch and other packaged ingredients. Check every product for cross-contamination warnings when allergies apply. The optional sesame seeds and sesame oil mean the recipe is not sesame-free.

Nutrition Information

The nutritional estimate includes the tofu, vegetables, pineapple, glaze and all cooking oil but excludes rice or noodles. Values vary according to the tofu, soy sauce, ketchup and pineapple products used. Although the dish contains fruit and vegetables, the brown sugar, ketchup and pineapple juice make it unsuitable for classification as low-sugar.

Variations

Add broccoli, carrots or sugar snap peas to the vegetable mixture. Replace some of the pineapple juice with orange juice for a more citrus-forward glaze. Reduce the brown sugar to 2 tablespoons for a less sweet sauce.

Storage

Refrigerate leftovers in an airtight container for up to 3 days. Reheat them thoroughly in a frying pan. The tofu will soften during storage because it absorbs moisture from the glaze. Freezing is not recommended because it changes the texture of the vegetables and sauce.

Wine Advice

An off-dry Riesling balances the vinegar and gentle chilli heat while complementing the pineapple. A fruity Pinot Grigio also works well with the sweet-and-sour glaze. Explore suitable wines at Renรฉโ€™s Wijnbeleving.

Nutrition values

Serving: 350 g | Calories: 445 kcal | koolhydraten: 49 g | Eiwitten: 22 g | Vet: 20 g | Verzadigd vet: 3 g | Natrium: 790 mg | Suiker: 27 g
————————————————————————————————–

Crispy pineapple tofu combines golden tofu cubes with colorful vegetables and a glossy sweet-and-sour sauce. Pineapple juice, rice vinegar, soy sauce, brown sugar and ketchup create a lively balance of sweetness, acidity and savory depth. Fresh ginger and garlic add warmth, while pineapple chunks reinforce the fruity character of the glaze.

This recipe makes four satisfying portions and works well as a plant-based main course. Serve it with steamed rice or noodles to catch the extra sauce. The tofu provides protein, while red and green bell peppers add color, texture and freshness.

Getting the Tofu Crisp

Extra-firm tofu produces the most dependable result because it contains less moisture than softer varieties. Press it for about 20 minutes, then pat every surface dry. Removing moisture helps the cornstarch adhere and prevents excessive splattering when the tofu enters the hot oil.

Coat the cubes shortly before frying. Arrange them in one layer and leave some room between the pieces. Crowding lowers the pan temperature and traps steam, which produces soft tofu instead of a crisp exterior. Use two batches if necessary.

Turn the cubes regularly rather than stirring aggressively. This approach protects their shape and browns several sides. Transfer the cooked tofu to a plate while preparing the vegetables and sauce. Return it only during the final minute so the coating retains some crunch.

Crispy Pineapple Tofu

The sauce thickens quickly because pineapple juice and cornstarch react as the mixture reaches a simmer. Whisk the glaze again immediately before pouring it into the pan because cornstarch settles at the bottom of the bowl.

Rice vinegar keeps the sauce bright, while brown sugar softens its sharpness. Ketchup contributes color, sweetness and mild tomato flavor. Reduced-sodium soy sauce adds salt and umami without dominating the pineapple. Use certified gluten-free tamari when you need a gluten-free and wheat-free meal.

For another savory plant-based dish, try Moo Goo Gai Pan. Its mushrooms, bamboo shoots and water chestnuts also work well with rice. The Green Falafel with Tahini Sauce offers another protein-rich meat-free option.

Balancing the Vegetables and Sauce

Cook the peppers and onion only until lightly browned and still crisp. Their firm texture contrasts with the tender tofu and juicy pineapple. Add the garlic and ginger near the end of stir-frying because both can burn quickly over high heat.

The pineapple chunks need only a minute in the pan. Longer cooking can make them soft and release too much liquid. Add crushed red pepper flakes when you want a gentle kick, or leave them out for a mild family meal.

This sweet-and-sour tofu adapts easily to different vegetables. Broccoli, carrots, courgette and sugar snap peas all suit the sauce. Keep the total vegetable quantity reasonably close to the original amount so the glaze coats everything evenly.

Serving Ideas and Portions

Divide the recipe into four portions and add approximately 150 grams of cooked rice per person for a complete meal. Keep in mind that rice or noodles will increase the nutritional values shown in the recipe card.

Garnish with spring onions for freshness. Sesame seeds add a mild nutty flavor, but they remain optional. For a larger Asian-inspired meal, serve smaller portions beside Cannellini, Tempeh and Couscous Bake or a simple cucumber salad.

Storage and Food Safety

Refrigerate leftovers within two hours and store them in an airtight container for up to three days. Reheat the tofu and vegetables in a frying pan until thoroughly hot. The coating will soften as it absorbs the glaze, but pan reheating restores more texture than a microwave.

Use clean utensils and surfaces throughout preparation. Check packaged products carefully when allergies or dietary restrictions apply. The FDA provides practical guidance through its safe food-handling information.

The finished dish contains soy and sesame oil, so it does not suit soy-free or sesame-free diets. Regular soy sauce usually contains wheat. Choose certified tamari and verify every packaged ingredient before describing the meal as gluten-free.

With its crisp coating, colorful vegetables and glossy fruit-based sauce, crispy pineapple tofu delivers plenty of contrast without requiring complicated techniques. Careful drying, uncrowded frying and brief final glazing produce the best combination of crunch, tenderness and bold sweet-and-sour flavor.