Let’s Chalk It Up to Chocolate Bars

Let’s Chalk It Up to Chocolate Bars

An annual reminder for those who invite me to haunted houses: Don’t. But I’m always down to consume colossal amounts of Halloween chocolate, especially if it’s coated or filled with nuts, seeds, dried fruit, or even quinoa. Dark chocolate provides antioxidants. And you know what else it provides? A vessel for peppermint to make bark. As someone who is essentially a self-described elf from the North Pole, this is always a welcome and refreshing topping to accompany Mariah’s “All I Want for Christmas Is You.” Except all I really want for Christmas is definitely more peppermint bark.
Couverts16 bars
Deel op Facebook Print Recipe

Ingredients

Instructions

  • For the crispy quinoa: Preheat the oven to 350ºF.
  • Line an 8-inch-square baking dish with parchment paper.
  • Grease a baking sheet with nonstick spray.
  • Toss the cooked quinoa with the coconut oil and spread it evenly over the prepared baking sheet.
  • Bake for 20 to 25 minutes, stirring halfway through, until golden and crispy.
  • Remove from the oven and let cool completely.
  • In a food processor, combine the dates, walnuts, cashews, pumpkin seeds, and coconut flakes.
  • Process until finely ground.
  • Add the cacao nibs, cashew butter, hemp seeds, wheat germ, and goji berries and process until combined.
  • Add the crispy quinoa and pulse to mix.
  • Press the date mixture over the bottom of the prepared baking dish in an even layer, using the bottom of a measuring cup to press it down firmly.
  • Pour the melted chocolate over the top and spread it into an even layer.
  • Sprinkle with flaky sea salt.
  • Transfer the baking dish to the refrigerator to chill for at least 4 hours.
  • Remove from the fridge and cut into 16 bars.
  • Store in an airtight container, separated by waxed paper, in the freezer for up to 3 months.

Notes & Wine Advice

LITERALLY CAN’T EVEN
It’s important to use Medjool dates for this recipe. They are softer in texture, so they break up easily and have a rich, caramel-like taste.
Feel free to switch up the garnish. Use broken-up peppermint sticks for the holidays. Decorate with sprinkles or add crushed-up candies.
THE MORE YOU GLOW
Cacao nibs are naturally low in sugar and are a good source of fiber, protein, and healthy fats.
Yes, hemp seeds are from the same species as cannabis (marijuana), but they have many health properties. They are rich in healthy fats, protein, and minerals, but contain only trace amounts of THC (you won’t get high). The flavor is mildly nutty.
Wheat germ is part of the wheat kernel and a good source of vegetable protein, fiber, and healthy fats. It’s also high in vitamin E.
Goji berries contain all nine essential amino acids. They are high in fiber, iron, vitamin A, zinc, vitamin C, and antioxidants.
————————————————————————————————–
Course; Chocolate

Picture-Perfect Pumpkin Pie

Picture-Perfect Pumpkin Pie

There is a depressing episode of Full House where they are trying to honor their dead mom during Thanksgiving by cooking family traditions. Stephanie drops the “Picture-Perfect Pumpkin Pie” and ruins everything, as she always does. Now, every Thanksgiving, it’s become a Skladany tradition for my sister and me to call the pumpkin pie “picture perfect” and pretend we’re about to drop it. This either makes us clever and hilarious or utterly insensitive (likely the latter). Regardless, you’ll want to not drop this Picture-Perfect Pumpkin Pie, sweetened with maple syrup, which absolutely deserves a spot on this year’s holiday dinner table. Or, if you’re anything like my dad, a spot under a mountain of whipped cream that rivals the height of Kilimanjaro.
Deel op Facebook Print Recipe

Ingredients

FOR THE PIE CRUST

FOR THE PUMPKIN FILLING

Instructions

  • First make the piecrust: In a food processor, combine the flour, salt, and sugar.
  • Pulse to combine.
  • Add the butter and pulse until the butter is broken down into pea-size pieces.
  • Slowly drizzle in the water while pulsing until the dough just comes together.
  • On a clean work surface, gather the dough together and form it into a disk.
  • Wrap the dough in plastic wrap and refrigerate for at least 30 minutes.
  • Preheat the oven to 375ºF.
  • Place the dough on a lightly floured work surface and roll it out into a 14-inch round.
  • Transfer the dough to a 9-inch deep-dish pie plate, allowing the excess dough to hang off the edges.
  • Trim the overhanging dough to 1 inch.
  • Fold the dough under itself and crimp the edges.
  • Chill in the fridge for 15 minutes.
  • Line the dough with parchment paper and fill with pie weights or dried beans.
  • Bake for 20 minutes.
  • Remove the parchment and the weights or beans and bake for 15 minutes longer, until golden in color.
  • Remove the crust from the oven and let cool completely before adding the filling.
  • Raise the oven temperature to 400°F.
  • Make the pumpkin filling: Line a baking sheet with foil.
  • Drizzle the pumpkin with the olive oil and then place it cut-side down on the prepared baking sheet.
  • Bake until tender, 35 minutes.
  • Let cool.
  • Reduce the oven temperature to 350ºF.
  • Scoop the flesh of the pumpkin into a food processor (You should have about 2 cups).
  • Add the eggs, cream, maple syrup, cinnamon, ginger, nutmeg, and salt.
  • Pulse to combine.
  • Pour the filling into the cooled pie crust and smooth the top.
  • Bake until the center is firm, 60 to 70 minutes.
  • Let cool completely.
  • Serve with whipped cream.

Notes & Wine Advice

Don’t have time to roast off your own pumpkin? You can always use store-bought pumpkin puree. Just make sure it is pure pumpkin without any additional flavorings.
To amp up the fall feel, use a small leaf-shaped cookie cutter to cut out little leaves with the scraps of your dough. Add the leaves to the crust, pressing to adhere, and bake for a fall-decorated pie!
————————————————————————————————–
Course; Pie

Flourless Chocolate-Nutella Mug Cake: It’s a Lifestyle

Flourless Chocolate-Nutella Mug Cake: It’s a Lifestyle

Summer is when our body goals magically align with our dessert preferences: light as a feather. And nothing is lighter and more satisfying than a flourless chocolate mug cake. This is for the gal who needs a sweet indulgence and needs it fast. She doesn’t have time to slave in the kitchen and bake an entire cake, nor does she go against the Bible’s advice to “lead us not into temptation” by eating beyond a single serving. She’s also a huge fan of Nutella—like everyone on earth—so she finds a way to sneak it in and feels really good about it. Aim high and be the Flourless Chocolate-Nutella Mug Cake girl. You won’t regret it.
Deel op Facebook Print Recipe

Ingredients

Instructions

  • In a small bowl, whisk together the Nutella, egg, maple syrup, cocoa powder, vanilla, and salt.
  • Pour into a large (about 12-ounce) microwave-safe mug.
  • Microwave for 1 minute to 1 minute 30 seconds.
  • The cake will expand in the microwave and come up over the top of the mug.
  • Let cool for 5 minutes before eating.
  • Dust with confectioners’ sugar and enjoy straight out of the mug!

Notes & Wine Advice

For a fudgier cake, simply microwave for less time.
————————————————————————————————–
Course; Cake / Chocolate

Single AF Cheesecake, aka the Cheesecake that Stands Alone

Single AF Cheesecake, aka the Cheesecake that Stands Alone

When I had my first SJP sighting, I felt it was God’s way of saying, “You can now leave New York.” And while I’m tempted to move every single day of my life because of the subway, constant garbage smell, and influx of tourists who stroll way too casually on the sidewalk, I would certainly miss the cheesecake. Cheesecake is supreme, especially this sexy version topped with chocolate-covered strawberries, because one dessert, like one man, is never fulfilling. This is also another fab option for Valentine’s Day if you’ve decided to write men off forever and replace them with empty calories and that creepy one-armed boyfriend pillow that keeps popping up in my Facebook ads. (They know me so well.)
Couverts8
Deel op Facebook Print Recipe

Ingredients

Instructions

  • First make the crust: Preheat the oven to 325ºF.
  • Brush a 9-inch springform pan with some of the melted butter.
  • Put the remaining butter in a large bowl and toss with the graham cracker crumbs, sugar, and salt.
  • Press the graham cracker mixture into the springform pan in an even layer.
  • Bake until golden brown, about 15 minutes.
  • Remove from the oven and let cool completely.
  • Wrap the bottom and sides of the pan with foil and place in a roasting pan.
  • Set aside.
  • Meanwhile, make the filling: In the bowl of a stand mixer fitted with the paddle attachment, combine the cream cheese, sugar, and salt and beat until light and fluffy.
  • Add the sour cream and the eggs, one at a time, beating well after each addition.
  • Add the vanilla and lemon zest and mix until just incorporated.
  • Pour the filling into the prepared crust.
  • Transfer the roasting pan to the oven and pour boiling water into the roasting pan so that it comes about halfway up the side of the springform pan.
  • Bake for 1 hour to 1 hour 10 minutes, until the cheesecake is set but the center still has a jiggle to it.
  • Turn off the oven and crack open the oven door.
  • Leave the cheesecake inside, allowing the residual heat of the oven to finish cooking the cake, about 30 minutes.
  • Remove the cheesecake from the oven and let cool to room temperature, about 3 hours.
  • Wrap the cheesecake in plastic and chill in the refrigerator overnight.
  • Make the chocolate-covered strawberries: Line a baking sheet with parchment paper.
  • Place the semisweet chocolate and white chocolate in two separate medium glass bowls.
  • Heat two medium saucepots with 2 inches of water over medium heat and place the glass bowls over the pots.
  • Heat, stirring occasionally, until all the chocolate has melted.
  • If you find the chocolate is a little thick, you can drizzle in 1 tablespoon of canola oil at a time, mixing well after each addition, to loosen it.
  • Turn off the heat but leave the bowls over the saucepots.
  • Pat dry the strawberries and, one at a time, dip the strawberries in the semisweet chocolate and place them on the prepared baking sheet.
  • Dip a fork in the white chocolate and drizzle it over the chocolate-covered strawberries.
  • Put aside until the chocolate is set, about 1 hour.
  • Remove the cheesecake from the refrigerator and take off the springform ring.
  • Transfer to a serving plate.
  • Garnish with the chocolate-covered strawberries.
  • Slice and serve.

Notes & Wine Advice

LITERALLY CAN’T EVEN
Feel free to switch up the crust. You can use chocolate wafer cookies, vanilla wafer cookies, or gingersnap cookies—just make sure you have 1½ cups of crumbs.
JUST THE TIPS
Store your cheesecake in the refrigerator, covered in plastic wrap, for up to 5 days.
————————————————————————————————–
Course; Cake / Cheese

All-Amurrican Apple Pie

All-Amurrican Apple Pie

Aside from football, keg parties, and seeing a woman fall off a Razor scooter last week on Fifth Avenue, there is nothing more American than apple pie. And because we all venture into the burbs’ apple orchards every fall to collect social media content and bushels of apples that we have absolutely no idea what to do with, here’s an all-Amurrican classic, piled high with your kindergarten teacher’s fruit of choice. Don’t skimp on the cinnamon, though. We could all use some extra spice in our lives. Just ask Sue Johanson (who’s actually Canadian, but I digress).
Couverts8
Deel op Facebook Print Recipe

Ingredients

FOR THE WHITE CHEDDAR PIE DOUGH

FOR THE APPLE FILLING

Instructions

  • First make the white cheddar pie dough: In a food processor, combine the flour and salt and give it a quick pulse.
  • Add the butter and pulse until the butter reaches pea-size pieces.
  • Slowly add the water while pulsing.
  • Add the cheese and pulse to combine.
  • Divide the dough in half, form each half into a disk, and wrap with plastic wrap.
  • Chill in the refrigerator for at least 2 hours.
  • Meanwhile, make the apple filling: In a large bowl, combine the apples, light brown sugar, cinnamon, nutmeg, lemon zest, lemon juice, vanilla, and salt.
  • Mix to combine and allow to sit for 15 minutes.
  • Stir in the cornstarch.
  • Preheat the oven to 425ºF.
  • Grease a 9-inch pie dish with nonstick spray.
  • Roll out one dough disk on a lightly floured surface to an approximately 12-inch circle and transfer the dough to the prepared pie dish, allowing the excess to hang over the sides.
  • Add the filling, discarding any excess juices in the bowl.
  • Dot with the butter cubes.
  • Roll out the remaining disk of dough to a 12-inch round.
  • Cut ten 1-inch-wide strips.
  • To make a lattice top, lay strips of dough over the pie, leaving 1-inch gaps between each strip.
  • Fold over alternating strips and place a new strip perpendicular to the ones on the pie.
  • Unfold the strips and repeat, alternating the strips you fold back, until you have covered the pie and finished the lattice.
  • Trim the excess dough from the ends of the strips hanging off the side of the pie and fold the ends of the strips under the bottom crust all around the pie.
  • Crimp the crust.
  • Brush the dough with the egg white and sprinkle with the sanding sugar.
  • Bake for 20 minutes.
  • Reduce the oven temperature to 350ºF and bake for another 45 minutes, tenting the pie with foil partway through if the crust is browning too quickly.
  • Remove from the oven and allow to cool for at least 3 hours before slicing.
  • Serve with vanilla ice cream.

Notes & Wine Advice

White cheddar in the crust might sound strange to you, but the combination of cheddar cheese and apple gives this pie an unexpected pop. Even noncrust lovers will scarf this down!
Leftover pie can be stored at room temperature for up to 3 days.
————————————————————————————————–
Course; Fruit / Pie
Cuisine; American

Hot Mess Peach-Blueberry Cobbler

Hot Mess Peach-Blueberry Cobbler

I once fell in love with a stripper at my best friend Katie’s bachelorette party in Miami. On the outside, he was just about the prettiest thing I’d ever seen, but on the inside, he was probably just a hot mess, much like a berry cobbler. To be clear, I am definitely stereotyping here (strippers can pivot to become rocket scientists or Cardi B), and I too am a human mess who can clean up on the outside, but this is the metaphor I’m working with, so roll with it, top it with drool-worthy cornmeal drop biscuit topping, and enjoy.
Couverts6
Deel op Facebook Print Recipe

Ingredients

FOR THE PEACH-BLUEBERRY FILLING

FOR THE CORNMEAL DROP BISCUIT TOPPING

Instructions

  • Preheat the oven to 375ºF.
  • First, make the peach-blueberry filling: Bring a medium pot of water to a boil over high heat.
  • Fill a large bowl with ice and water, leaving a few inches of room on the top.
  • Add the peaches to the boiling water a few at a time and cook for 30 seconds, until the skins peel off easily.
  • Drop the peaches in the ice water to cool.
  • Repeat with the remaining peaches.
  • Remove from the ice bath and peel away the skins.
  • Slice the peaches into ½-inch-thick wedges and discard the pits.
  • Put the wedges in a large bowl.
  • Add the lemon zest, lemon juice, granulated sugar, and cornstarch.
  • Mix to combine.
  • Add the blueberries and mix to combine.
  • Pour into a 2-quart baking dish.
  • Set aside.
  • Next make the cornmeal drop biscuit topping: In a large bowl, whisk together the flour, cornmeal, light brown sugar, baking powder, and salt.
  • Add the butter and use your hands to incorporate it into the flour until the butter is in pea-size pieces.
  • Add the buttermilk and stir until the batter is well combined.
  • Using an ice cream scoop, dollop the batter on top of the peach-blueberry filling, leaving space in between the dollops, as they will expand in the oven.
  • Brush the tops of the biscuits with buttermilk and sprinkle with sanding sugar.
  • Bake for 1 hour to 1 hour 10 minutes, until the filling is bubbling and the biscuits are golden brown and cooked through.
  • Tent with foil after 45 minutes if the biscuits are browning quickly.
  • Remove from the oven and let cool for 10 minutes.
  • Serve warm, with vanilla ice cream, if desired.

Notes & Wine Advice

If peaches aren’t in season when you are making this cobbler, you can use frozen peaches. Just make sure to thaw the peaches and drain their excess liquid.
————————————————————————————————–
Course; Fruit / Soup

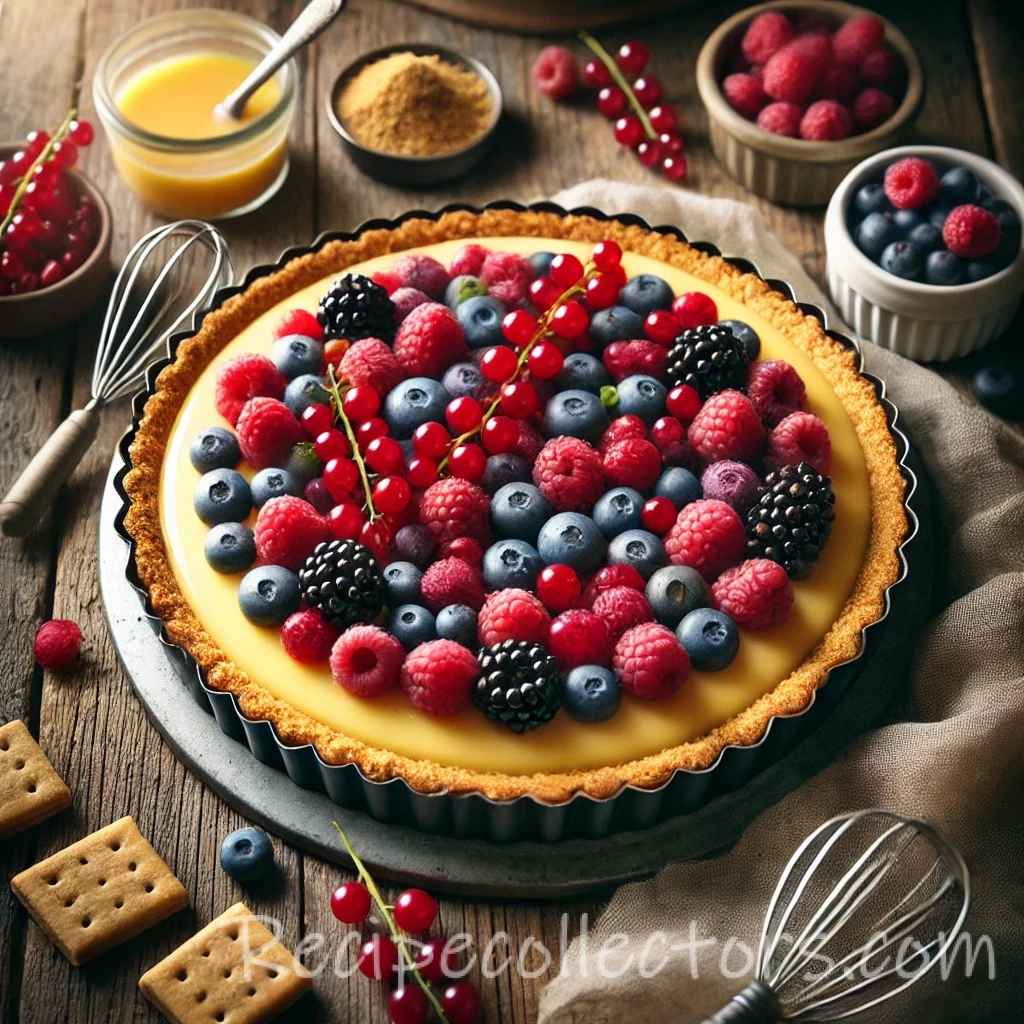
Berries and Cream Dream Tart

Berries and Cream Dream Tart

A colorful fruit tart with creamy custard and a crunchy graham cracker crust.
Couverts8
(includes chilling time) 4 hours
Deel op Facebook Print Recipe

Equipment

  • 9-inch tart pan
  • Food processor
  • Medium saucepot
  • Fine-mesh sieve
  • Offset spatula

Ingredients

For the Crust

For the Custard Filling

Instructions

Make the Crust

  • Preheat the oven to 350°F and coat a 9-inch tart pan with nonstick spray.
  • In a food processor, combine graham crackers, sugar, cinnamon, and salt.
  • Pulse until finely ground.
  • Add melted butter and egg white; pulse until crumbs hold together when pressed.
  • Press the crust mixture evenly into the tart pan using the bottom of a measuring cup.
  • Bake for 10 minutes, or until the crust begins to brown.
  • Cool completely.

Make the Custard Filling

  • In a medium saucepot, whisk together sugar, cornstarch, and salt.
  • Add milk and egg yolks, whisking until smooth.
  • Cook over medium heat, whisking occasionally, until the mixture boils.
  • Continue cooking until thickened, about 2 minutes.
  • Remove from heat and stir in butter and vanilla bean paste.
  • Strain through a fine-mesh sieve to remove clumps.
  • Cover with plastic wrap touching the surface and cool completely.
  • Once cool, whisk in the yogurt until smooth.

Assemble the Tart

  • Pour custard into the prepared crust, smoothing with an offset spatula.
  • Chill in the refrigerator for at least 3 hours or up to 1 day.
  • Arrange mixed berries on top before serving.
  • Keep chilled until ready to slice and enjoy.

Notes & Wine Advice

  • This tart could also serve as breakfast! Who’s stopping you?
  • For a silky custard, don’t forget to strain the mixture when you take it off the stovetop.
  • You want to remove any egg that may have accidentally cooked, leaving clumps in your custard.
Wine Advice
Pair with a sparkling Moscato or a light dessert wine for a refreshing finish.

Nutrition values

Calories: 280 kcal | koolhydraten: 34 g | Eiwitten: 5 g | Vet: 12 g | Suiker: 20 g
————————————————————————————————–
Course; Dessert / Fruit / Tarts
Cuisine; French
Diets; Vegetarian

Beatrice’s Banana Pudding

Beatrice’s Banana Pudding

My friend Joe and I have named my food baby Beatrice, who tends to rear her ugly head when dishes such as banana pudding are presented to me after I already want to vom post–large dinner. It may seem damn near impossible to take another bite, but, like clockwork, Beatrice reminds me that I’m eating for two and I somehow make room before retreating to my apartment for a night of stretchy pants and extreme “evening” sickness, aka not-cute stomach issues. To keep Beatrice’s demands at bay, banana pudding has become a staple in my diet. It’s ridiculously easy to make, and quells any potential fits of rage from the monster that lives inside me. I’m also not sure when she plans to be born, so banana pudding is here to stay for the foreseeable future.
Couverts4
Deel op Facebook Print Recipe

Ingredients

Instructions

  • Preheat the oven to 450ºF.
  • Line a baking sheet with parchment paper.
  • Place the 2 halved bananas on the prepared baking sheet, skin-side down.
  • Sprinkle with the 1 tablespoon of the granulated sugar and flip over so the skin side is up.
  • Poke a few holes in each banana skin with a paring knife.
  • Roast until caramelized, about 15 minutes.
  • Remove from the oven and let cool.
  • Discard the skins, put the caramelized bananas in a large bowl, and mash until smooth.
  • Set aside.
  • In a medium saucepan, whisk together the remaining ⅔ cup granulated sugar, the cornstarch, and the salt.
  • Add the milk and egg yolks and whisk until there are no lumps.
  • Place over medium heat and bring to a boil, stirring occasionally.
  • Reduce the heat to maintain a simmer and whisk until the mixture has thickened to the consistency of pudding, about 2 minutes.
  • Remove from the heat, add the vanilla bean paste and butter, and stir until blended.
  • Strain through a fine-mesh sieve into the bowl with the caramelized bananas.
  • Stir to combine.
  • Make the whipped cream: In the bowl of a stand mixer fitted with the whisk attachment, whisk the cream, confectioners’ sugar, and vanilla on medium-high speed until soft peaks form.
  • Set aside.
  • Place a layer of 5 vanilla wafers, breaking them up if necessary, at the bottom of each of four (12-ounce) stemless wineglasses and pressed around the sides.
  • Top with a third of the caramelized banana pudding.
  • Next place a layer of sliced bananas on top of the pudding and pressed around the sides of the glasses.
  • Top with another layer of pudding.
  • Continue with one more layer of wafers, this time 6 per glass, and finish with a layer of pudding.
  • Cover with plastic wrap and transfer to the refrigerator to chill for at least 2 hours before serving.
  • Top with the whipped cream and decorate with additional vanilla wafers.
  • Serve.

Notes & Wine Advice

Caramelizing the bananas and adding them to the pudding enriches the banana flavor throughout.
If you would rather, you can make one large banana pudding instead of individual servings.
————————————————————————————————–
Course; Dessert / Fruit