Jalapeรฑo Popper Bites

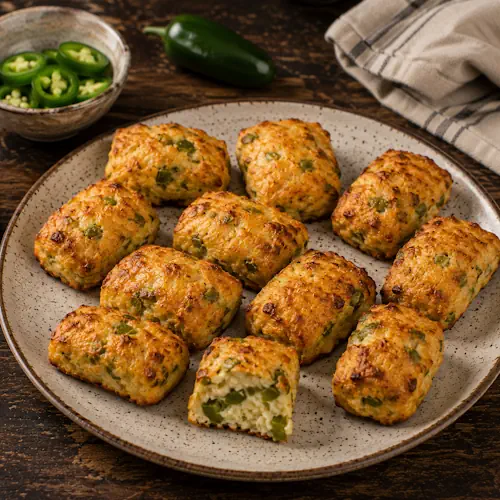
Golden air-fried jalapeรฑo popper bites made with cauliflower, Cheddar and cream cheese, with fresh jalapeรฑo pieces, served on a rustic dark wooden table.

Jalapeรฑo Popper Bites

Crispy, cheesy jalapeรฑo popper bites made with cauliflower, Cheddar, cream cheese and almond flour. These spicy little air-fried bites are low in carbohydrates and make an easy warm appetizer or snack.
Couverts4
Total time 30 minutes
estimated costs pp $1.40
Deel op Facebook Print Recipe

Equipment

  • baking paper
  • Bowl, medium
  • Serving plate

Ingredients

Instructions

  • Preheat the air fryer to 190ยฐC for 3 minutes.
  • Combine the cauliflower, jalapeรฑos, egg, Cheddar cheese, cream cheese, brown onion, almond flour, salt and garlic powder in a medium bowl.
  • Form the mixture into 12 rectangular mounds, using approximately 1 tablespoon for each bite.
  • Cut a piece of baking paper to fit the bottom of the air fryer basket.
  • Arrange six bites on the baking paper in the basket.
  • Air fry for 9 minutes.
  • Transfer the cooked bites to a serving plate and repeat with the remaining six.
  • Allow the bites to rest for 5 minutes before serving warm.

Notes & Wine Advice

Serving Suggestions

Serve the Jalapeรฑo Popper Bites warm after their 5-minute resting time. They are ideal as an Appetizer, Amuse or Snack. Serve them on their own or with a cool dipping sauce to contrast with the jalapeรฑos.

Recipe Notes

Seed the jalapeรฑos before mincing them for a more moderate level of heat. Make the 12 portions approximately equal in size so they cook evenly in the Airfryer.
Allow the bites to rest for the full 5 minutes after cooking. The melted cheese firms slightly during this time, helping the bites hold together when served.

Variations

For a hotter version, leave some of the jalapeรฑo seeds in the mixture. Extra Cheddar can provide a stronger Cheese flavour. Keep the almond flour when following the original low-carbohydrate recipe.

Storage Advice

Allow leftovers to cool before placing them in an airtight container. Refrigerate for up to 3 days. Reheat the bites in the air fryer until thoroughly hot so the exterior becomes crisp again.

Wine Advice

A fresh Sauvignon Blanc works well with the jalapeรฑo heat and creamy cheese. A dry Riesling is another suitable choice because its freshness balances the spicy peppers and rich Cheddar.

Nutrition values

Serving: 75 gr | Calories: 180 kcal | koolhydraten: 8 g | Eiwitten: 8 g | Vet: 14 g | Verzadigd vet: 5 g | Natrium: 440 mg | Suiker: 2 g
————————————————————————————————–

About Jalapeรฑo Popper Bites

Jalapeรฑo Popper Bites combine the familiar flavours of jalapeรฑo peppers, Cheddar and cream cheese with cauliflower and almond flour to create a compact low-carbohydrate snack. Instead of potatoes or a breadcrumb coating, riced cauliflower provides the vegetable base. Cooking the bites in the Airfryer gives the exterior a lightly crisp finish while the cheese keeps the centre rich and tender.

Using Cauliflower Instead of Potatoes

Riced cauliflower provides bulk without making the bites heavy. Its mild flavour allows the jalapeรฑo and cheese to remain the dominant flavours, while its texture helps create a substantial bite without using potatoes.

Cauliflower also makes these bites another useful way to include more Vegetables in a familiar snack-style recipe. Use finely riced cauliflower so it distributes evenly through the mixture.

The Jalapeรฑo Popper Flavours

Jalapeรฑos provide the characteristic pepper flavour and heat. Removing the seeds gives a more moderate result, although the exact heat still varies between individual peppers. Finely mincing them ensures that the flavour is distributed throughout all 12 bites.

Cheddar and cream cheese provide the rich, creamy element associated with jalapeรฑo poppers. Garlic powder and grated onion add savoury background flavour without overwhelming the peppers.

Why Almond Flour Is Used

Almond flour helps absorb moisture and bind the cauliflower mixture while keeping the recipe suitable for the Low Carb category. Together with the egg and melted cheese, it helps the individual portions hold their shape.

Because almond flour is made from nuts, these bites are not suitable for a nut-free diet. Anyone preparing them for a person with an allergy should also check the labels of the cheeses and other packaged ingredients.

Shaping the Bites

Divide the mixture into 12 approximately equal portions. Keeping the pieces similar in size helps them cook consistently. The original recipe shapes them into small rectangular mounds rather than balls.

Baking paper prevents the soft mixture from sticking to the air fryer basket during cooking. Cook only six at a time so there is enough room around the bites for the hot air to circulate.

Cooking in Batches

Each batch cooks for approximately 9 minutes at 190ยฐC. The cheese melts during cooking and helps bind the cauliflower, egg and almond flour together. The exterior should become lightly crisp while the centre remains moist.

After removing the bites from the air fryer, leave them undisturbed for 5 minutes. This short resting period allows the cheese to settle and gives the bites a firmer structure.

Serving as an Appetizer

These bites are particularly suited to an Appetizer platter because each portion can be eaten easily without cutlery. They also work as a warm Snack or small party bite.

For a Birthday or Party, serve them alongside several milder snacks so guests can choose how much spicy food they want.

Keeping the Recipe Low Carb

The combination of cauliflower and almond flour replaces higher-carbohydrate ingredients commonly used in fried or breaded snacks. This gives the bites their place among Low Carb recipes while retaining the creamy cheese and jalapeรฑo flavours.

When adding a dipping sauce, check its ingredients if maintaining a low-carbohydrate meal is important, since some prepared sauces can contain significant amounts of added sugar.

Storage and Reheating

Refrigerate leftover bites in an airtight container for up to 3 days. The exterior will soften during refrigeration, but reheating them in the air fryer can restore some of the original texture.

Reheat only the amount needed and serve once thoroughly hot. A microwave can also warm the bites, although it will produce a noticeably softer result.

Food Safety

The mixture contains raw egg and dairy products, so keep the ingredients refrigerated until preparation and cook the bites promptly after mixing. Refrigerate leftovers after they have cooled and reheat them thoroughly before serving. For current guidance about handling eggs and other foods safely, consult the U.S. Food and Drug Administration food-safety information.

Jalapeรฑo Popper Bites combine spicy peppers, creamy Cheese and cauliflower in a small air-fried snack. Their combination of crisp edges, melted cheese and jalapeรฑo heat makes them useful for everything from a simple snack to a platter of warm party appetisers.
Chicken Enchilada Dip

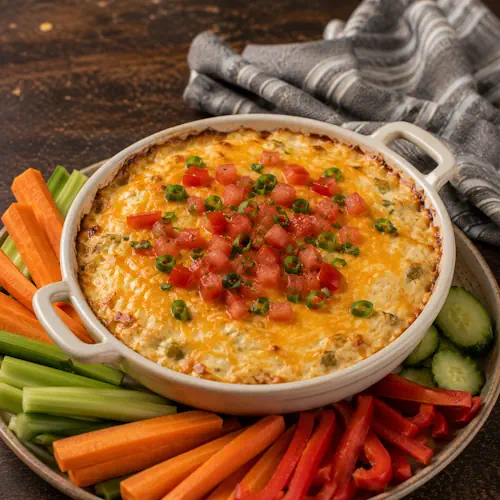
Creamy air-fried chicken enchilada dip topped with melted Cheddar, diced tomatoes and jalapeรฑo, served with fresh vegetable sticks on a rustic dark wooden table.

Chicken Enchilada Dip

A hot and creamy chicken enchilada dip with Cheddar cheese, green chillies, jalapeรฑo and fresh tomato. Cooked in the air fryer until bubbling and gooey, it is ideal for serving with fresh vegetable sticks as an appetizer, snack or party dip.
Couverts4
Total time 25 minutes
estimated costs pp $2.25
Deel op Facebook Print Recipe

Equipment

  • Baking dish, 15 cm oven-safe
  • Bowl, large
  • spoon

Ingredients

Instructions

  • Preheat the air fryer to 200ยฐC for 3 minutes.
  • Mix the cream cheese, mayonnaise and sour cream in a large bowl until smooth.
  • Add the chicken, onion, green chillies, jalapeรฑo and ยฝ cup of the Cheddar cheese and mix well.
  • Spoon the mixture into an ungreased 15 cm oven-safe baking dish.
  • Sprinkle the remaining Cheddar cheese evenly over the top.
  • Place the baking dish in the air fryer basket and cook for 10 minutes.
  • Remove from the air fryer, garnish with the diced tomatoes and serve warm.

Notes & Wine Advice

Serving Suggestions

Serve Chicken Enchilada Dip warm with carrot sticks, celery stalks, bell pepper strips or other fresh Vegetables. It also works well as an Appetizer or warm party dip. Garnish with fresh coriander or parsley just before serving.

Recipe Notes

Use softened cream cheese so it blends smoothly with the mayonnaise and sour cream. The chicken should already be fully cooked before it is added to the dip. Seed the jalapeรฑo for moderate heat or leave some seeds in if you prefer a spicier result.

Variations

Extra jalapeรฑo or green chillies can be added for more heat. Fresh coriander makes a particularly good garnish and strengthens the Mexican flavours. Serve with vegetable sticks to keep the dish suitable for a Low Carb meal.

Storage Advice

Transfer leftovers to an airtight container and refrigerate for up to 3 days. Reheat only the amount required until thoroughly hot. The dip can be reheated in the Airfryer or microwave.

Wine Advice

A fresh Sauvignon Blanc works well with the jalapeรฑo, green chillies and creamy cheese. A dry Riesling is another suitable choice, particularly if you make the dip a little hotter.

Nutrition values

Serving: 10 gr | Calories: 525 kcal | koolhydraten: 9 g | Eiwitten: 25 g | Vet: 44 g | Verzadigd vet: 22 g | Natrium: 940 mg | Suiker: 5 g
————————————————————————————————–

About Chicken Enchilada Dip

Chicken Enchilada Dip combines cooked chicken, cream cheese, sour cream, mayonnaise, chillies and plenty of melted Cheddar in one warm, creamy dish. Inspired by the flavours associated with Mexican cooking, it turns familiar enchilada-style ingredients into a scoopable Appetizer that can be prepared quickly in the air fryer.

A Creamy Base

Cream cheese forms the foundation of the dip, with mayonnaise and sour cream making it softer and easier to scoop. Allowing the cream cheese to reach room temperature before mixing helps produce a smoother base without firm lumps.

Cheddar is added in two stages. Half is mixed through the filling so there is melted Cheese throughout, while the remainder is scattered over the surface to create the bubbling cheesy topping.

Adding the Chicken

The recipe uses chicken breast that has already been fully cooked and chopped. This makes the dip useful for leftover Chicken, provided it has been stored correctly and is still suitable for reheating.

Chopping the chicken fairly small makes the finished dip easier to scoop with vegetable sticks and distributes the meat evenly through the creamy mixture.

Green Chillies and Jalapeรฑo

Canned green chillies, including their juice, provide flavour and moisture. Fresh jalapeรฑo adds another layer of chilli flavour and allows the heat to be adjusted easily.

Removing the jalapeรฑo seeds produces a milder result. For a hotter dip, some seeds can be retained or additional jalapeรฑo can be added. The tomato garnish provides a fresh contrast to the rich filling.

Cooking the Dip in the Air Fryer

A 15 cm oven-safe baking dish keeps the dip compact enough to fit inside the Airfryer. Once assembled, it needs approximately 10 minutes at 200ยฐC to become thoroughly hot and melt the Cheddar topping.

Make sure the baking dish is suitable for the high temperature of an air fryer. The finished dip should be hot throughout with completely melted cheese on top.

Serving Without Tortilla Chips

Carrot sticks, celery stalks, cucumber and bell pepper strips are excellent for scooping up the dip. Using fresh vegetables instead of tortilla chips keeps the serving combination lower in carbohydrates while adding crunch and freshness.

This also makes it easy to add more Vegetables to the platter. Arrange several different vegetables around the warm baking dish so everyone can choose their favourite.

Perfect for Sharing

The combination of melted cheese, chicken and chilli makes this particularly suitable for sharing at a Party or Birthday. Place the warm baking dish in the centre of a platter surrounded by the vegetables used for dipping.

Because of its Mexican-inspired flavours, Chicken Enchilada Dip also fits naturally into a Cinco de Mayo menu alongside other Mexican appetisers and small dishes.

Keeping It Low Carb

The dip itself contains relatively little carbohydrate, making it suitable for the Low Carb category. What you serve alongside it can make a substantial difference, so fresh vegetable sticks are preferable to bread or tortilla chips when keeping carbohydrates low.

When dietary requirements matter, check the labels of mayonnaise, sour cream, canned chillies and other packaged ingredients because formulations can vary between brands.

Storage and Reheating

Leftover dip should be refrigerated promptly in a covered container and used within 3 days. Reheat only the portion required and make sure the chicken and creamy mixture become thoroughly hot before serving again.

The air fryer can be used for reheating if the dip is transferred to a suitable oven-safe dish. A microwave is another practical option for smaller portions.

Food Safety

This recipe contains cooked poultry and several dairy ingredients, so careful temperature control is important. Keep the ingredients refrigerated before preparation and refrigerate leftovers promptly after serving. For current guidance about handling and storing chicken and other foods safely, consult the U.S. Food and Drug Administration food-safety information.

Chicken Enchilada Dip brings together creamy cheese, tender Poultry, green chillies and jalapeรฑo in an easy sharing dish. Served bubbling hot with crisp vegetables, it provides plenty of classic enchilada-style flavour without needing tortillas or chips.

Pimiento Cheese Jalapeรฑo Poppers

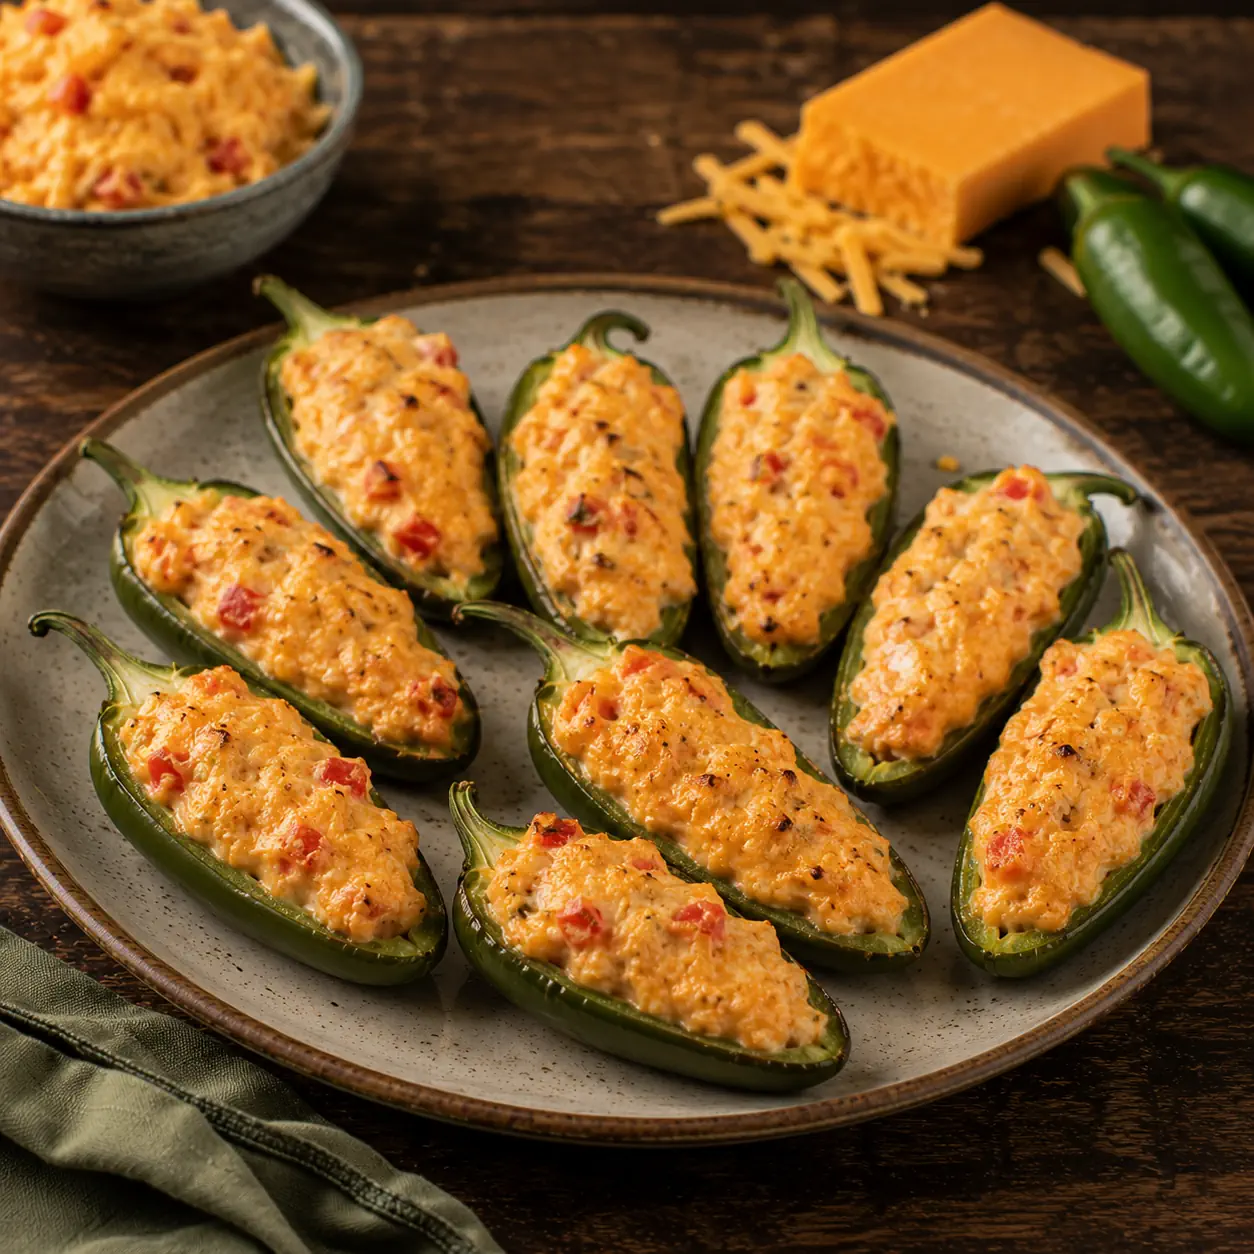
Air-fried jalapeรฑo halves filled with creamy pimiento Cheddar cheese, lightly browned and served warm on a rustic ceramic plate on a dark wooden table.

Pimiento Cheese Jalapeรฑo Poppers

Spicy jalapeรฑo halves filled with rich homemade pimiento cheese and cooked in the air fryer until hot and creamy. These easy low-carb poppers make a tasty appetizer, snack or party bite.
Couverts4 servings
Total time 16 minutes
estimated costs pp $1.20
Deel op Facebook Print Recipe

Equipment

  • Bowl, medium
  • Knife
  • Serving plate, large
  • spoon

Ingredients

Instructions

  • Preheat the air fryer to 180ยฐC for 3 minutes.
  • Press the pimiento cheese evenly into the jalapeรฑo halves.
  • Arrange the stuffed jalapeรฑos in the ungreased air fryer basket.
  • Air fry for 8 minutes, until the peppers are tender and the cheese is hot.
  • Transfer to a large serving plate and serve warm.

Notes & Wine Advice

Serving Suggestions

Serve the poppers warm as an Appetizer, Amuse or Snack. They are particularly good as part of a platter of small bites for a Party or Birthday.

Recipe Notes

Removing the seeds from the jalapeรฑos reduces much of their heat while retaining their characteristic flavour. Wear gloves when preparing hot peppers if your skin is sensitive, and avoid touching your eyes while handling them.

How to Make Pimiento Cheese

To make the pimiento cheese, combine 450 g finely shredded Cheddar cheese with one 110 g jar of pimientos including the juice, ยฝ cup mayonnaise, ยผ teaspoon salt and ยผ teaspoon freshly ground black pepper. Mix thoroughly, cover and refrigerate until needed.

Variations

For hotter poppers, finely chop some of the jalapeรฑo seeds and mix them into the pimiento cheese before filling the peppers. The same pimiento Cheese can also be served as a spread or dip.

Storage Advice

Store leftover cooked poppers in an airtight container in the refrigerator for up to 3 days. Reheat them briefly in the Airfryer until thoroughly hot before serving.

Wine Advice

A fresh Sauvignon Blanc provides a crisp contrast to the rich cheese and spicy jalapeรฑos. A dry Riesling is another good choice, particularly if you make the poppers hotter.

Nutrition values

Serving: 95 gr | Calories: 205 kcal | koolhydraten: 5 g | Eiwitten: 9 g | Vet: 17 g | Verzadigd vet: 8 g | Natrium: 410 mg | Suiker: 3 g
————————————————————————————————–

About Pimiento Cheese Jalapeรฑo Poppers

Pimiento Cheese Jalapeรฑo Poppers combine two popular American flavours in one compact appetizer. Pimiento cheese is a classic spread associated particularly with cooking in the southern United States, while jalapeรฑo poppers bring fresh chilli heat and a convenient finger-food format. Cooking them in the Airfryer heats the filling quickly while softening the peppers.

What Is Pimiento Cheese?

Pimiento cheese is traditionally made from Cheddar cheese, pimientos and mayonnaise, usually with simple seasoning. The result is a creamy, savoury cheese spread that can be used in sandwiches, served with crackers or used as a filling.

For this recipe, its creamy consistency makes it particularly suitable for stuffing jalapeรฑos. As the peppers cook, the filling becomes hot and soft while remaining contained inside the pepper halves.

Preparing the Jalapeรฑos

Cut each jalapeรฑo lengthwise to produce two small boats. Removing the seeds and inner membranes reduces the heat considerably, although jalapeรฑos naturally vary in spiciness.

If you enjoy hotter food, some of the seeds can be finely chopped and mixed into the filling. Handle the peppers carefully and wash your hands and utensils thoroughly after preparation.

Making Homemade Pimiento Cheese

The pimiento cheese in the original recipe can easily be prepared at home. Combine finely shredded Cheddar with pimientos and their juice, mayonnaise, salt and freshly ground black pepper. Refrigerate the mixture until required.

The recipe for the spread makes considerably more than the ยฝ cup required for these poppers. The remaining mixture can be used as a Cheese spread, sandwich filling or dip.

Cooking in the Air Fryer

Once filled, arrange the jalapeรฑo halves directly in the ungreased air fryer basket. They need approximately 8 minutes at 180ยฐC. The peppers should soften while retaining enough structure to hold the melted filling.

Avoid overcrowding the basket. Air needs to circulate around the peppers for even cooking, so cook them in batches if your air fryer is small.

Serving the Poppers

Serve the poppers warm, shortly after cooking. Their small size makes them particularly suitable as an Appetizer or Amuse.

They can also be included on a larger platter with fresh Vegetables, dips and other small snacks. A cool dip can provide a pleasant contrast when the jalapeรฑos are particularly spicy.

Party and Birthday Food

These small stuffed peppers are easy to pick up and eat, making them useful for a Party or Birthday. Prepare the peppers and filling beforehand, then air fry them close to serving time.

Because individual jalapeรฑos vary in heat, it can be useful to offer some milder snacks alongside them when serving a group.

A Low-Carb Appetizer

The combination of jalapeรฑo peppers and pimiento cheese contains relatively little carbohydrate and fits well within the Low Carb category. Unlike many traditional party snacks, these poppers do not require breadcrumbs, pastry or another starchy coating.

If dietary requirements are important, check the labels of the mayonnaise, cheese and jarred pimientos because ingredients can vary between brands.

Storage and Reheating

Leftover poppers can be refrigerated in an airtight container for up to 3 days. The peppers will soften somewhat during storage, but reheating them in the air fryer provides a better texture than microwaving.

Reheat only the quantity needed and make sure the cheese filling is thoroughly hot before serving.

Food Safety

Keep the pimiento cheese refrigerated before use and promptly refrigerate leftover cooked poppers. When preparing homemade pimiento cheese, keep the Cheddar and mayonnaise properly chilled. For current guidance on safe food preparation and refrigerated storage, consult the U.S. Food and Drug Administration food-safety information.

Pimiento Cheese Jalapeรฑo Poppers bring together creamy Cheddar, pimientos and spicy peppers in an easy air-fried Snack. With only a few ingredients and a short cooking time, they are particularly convenient when you want a warm, cheesy appetizer without breading or pastry.

Barbecue Turnip Chips

Barbecue turnip chips are a crispy, flavorful alternative to traditional potato chips. This barbecue turnip chips recipe uses thinly sliced turnips, seasoned with smoky spices, and cooked in the air fryer for a perfectly crunchy result. Itโ€™s a lighter snack that still delivers bold barbecue flavor.

The key to great barbecue turnip chips is slicing the turnips evenly and very thin. This ensures they cook at the same rate and develop that satisfying crisp texture. The combination of smoked paprika, garlic, and chili powder gives the chips a deep, smoky taste without needing heavy sauces.

If you are building a complete barbecue spread, these chips pair perfectly with BBQ chicken recipes. They add a crunchy, low-carb option that balances richer grilled dishes and heavier sides.

When using an air fryer, itโ€™s important to monitor cooking closely. Thin slices can brown quickly and may burn if left too long. Always keep an eye on the chips during the final minutes. For general food safety and preparation tips, visit the FDA.

Why barbecue turnip chips are a smart snack choice

Barbecue turnip chips stand out because they offer a healthier and lighter alternative to traditional chips. Turnips are naturally lower in carbohydrates, making them suitable for low-carb diets without sacrificing texture.

The air fryer plays a big role in this recipe. It allows the chips to become crispy with minimal oil, creating a snack that feels indulgent but is actually quite balanced. The hot circulating air ensures even cooking and helps develop golden edges.

The seasoning mix is simple but effective. Smoked paprika provides depth, while chili powder and cayenne add a subtle kick. Garlic and onion powder round out the flavor and give the chips a classic barbecue profile.

Another advantage is how quick and easy the recipe is. Once sliced, the chips cook in batches and require minimal preparation. This makes them perfect for snacks, party food, or as a side dish alongside grilled meals.

You can also customize the seasoning depending on your taste. Add more spice, reduce the salt, or experiment with herbs to create your own variation.

Because they are served fresh and crispy, barbecue turnip chips are best enjoyed immediately after cooking. Their crunchy texture and bold flavor make them a great addition to any barbecue menu.

With their crisp bite, smoky seasoning, and simple preparation, barbecue turnip chips are a delicious and practical choice for anyone looking for a lighter snack option.

barbecue turnip chips in a bowl on a rustic wooden table

Barbecue Turnip Chips

Crispy low-carb chips made from turnips with smoky barbecue seasoning.
Couverts2 servings
estimated costs pp $1.10 per serving
Deel op Facebook Print Recipe

Equipment

Ingredients

Instructions

  • Preheat the air fryer to 200ยฐC for 3 minutes.
  • Mix paprika, chili powder, garlic powder, onion powder, cayenne, erythritol, and half the salt in a bowl.
  • Toss turnip slices with olive oil and remaining salt.
  • Place half the slices in the air fryer basket and cook for 6 minutes.
  • Shake the basket and cook another 6 minutes.
  • Remove and repeat with remaining slices.
  • Toss chips with seasoning mix.
  • Let rest for 15 minutes before serving.

Notes & Wine Advice

Notes

Slice the turnips evenly for consistent cooking. Keep a close eye during the last minutes to prevent burning. Serve immediately for the best crisp texture.

Variations

Add extra chili powder for more heat. Use herbs like thyme or rosemary for a different flavor. Sprinkle with parmesan after cooking for a richer version.

Wine Advice

These chips pair nicely with a fresh Sauvignon Blanc or a light Rosรฉ. These wines balance the smoky and slightly spicy flavors.

Nutrition values

Calories: 120 kcal | koolhydraten: 8 g | Eiwitten: 2 g | Vet: 8 g | Verzadigd vet: 1 g | Natrium: 420 mg | Suiker: 2 g
————————————————————————————————–

California Roll Devilled Eggs with Crab

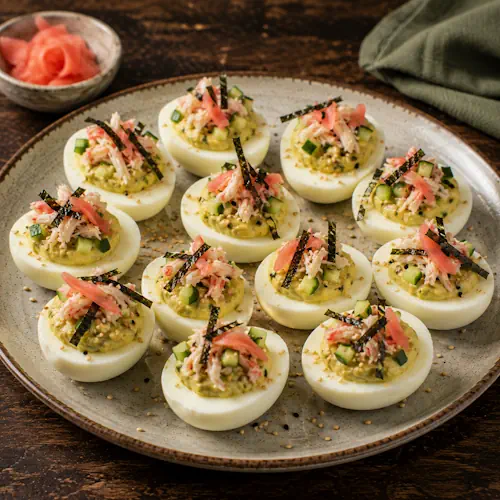
Devilled egg halves filled with creamy avocado and wasabi yolk mixture, topped with crabmeat, cucumber, sliced nori, pickled ginger and toasted sesame seeds, served on a rustic ceramic plate.

California Roll Devilled Eggs with Crab

Creamy devilled eggs inspired by the flavours of a California sushi roll, filled with avocado, cucumber, wasabi and coconut aminos, then topped with crabmeat, nori, pickled ginger and toasted sesame seeds.
Couverts4
Total time 30 minutes
estimated costs pp $2.25
Deel op Facebook Print Recipe

Equipment

  • Bowl, medium
  • Fork
  • Plate, large
  • Silicone muffin cups

Ingredients

Instructions

  • Preheat the air fryer to 120ยฐC for 3 minutes.
  • Place the eggs in silicone muffin cups to prevent them from moving around and cracking during cooking.
  • Place the silicone cups in the air fryer basket and cook the eggs for 15 minutes.
  • Combine the ice cubes and water in a medium bowl.
  • Immediately transfer the cooked eggs to the ice-water bath and leave for 5 minutes.
  • Carefully peel the eggs and cut them in half lengthwise.
  • Remove the yolks and place them in a medium bowl. Arrange the egg-white halves on a large plate.
  • Mash the egg yolks with the mayonnaise, coconut aminos, avocado and wasabi powder until smooth.
  • Fold in the diced cucumber.
  • Spoon the filling evenly into the egg-white halves.
  • Top with the crabmeat, sliced nori and pickled ginger.
  • Sprinkle with toasted sesame seeds and serve.

Notes & Wine Advice

Serving Suggestions

Serve these eggs chilled or at cool room temperature as an Appetizer, Amuse or small Snack. Arrange them on a platter and add the crabmeat, nori, ginger and sesame seeds shortly before serving.

Recipe Notes

Placing the eggs in silicone muffin cups keeps them from rolling around inside the Airfryer. Transfer them directly to the ice-water bath after cooking. This stops the cooking process and cools them quickly for peeling.

Variations

Adjust the wasabi powder according to how much heat you prefer. You can also vary the amount of avocado or cucumber while keeping the filling firm enough to remain inside the egg whites. For the best presentation, add the Seafood and garnishes after filling the eggs.

Storage Advice

Keep the prepared devilled eggs covered in the refrigerator and use within 2 days. Because they contain cooked eggs, mayonnaise and crabmeat, do not leave them at room temperature for extended periods. Add the nori shortly before serving so it retains its texture.

Wine Advice

A crisp Sauvignon Blanc works particularly well with the crab, cucumber, avocado and wasabi. A dry Riesling is another good choice, especially if you increase the wasabi.

Nutrition values

Serving: 105 gr | Calories: 155 kcal | koolhydraten: 4 g | Eiwitten: 10 g | Vet: 11 g | Verzadigd vet: 2.5 g | Natrium: 2601 mg | Suiker: 1 g
————————————————————————————————–

About California Roll Devilled Eggs with Crab

California Roll Devilled Eggs with Crab combine the familiar format of classic Eggs with ingredients associated with a California sushi roll. Instead of a traditional mustard-based devilled egg filling, the cooked yolks are blended with avocado, mayonnaise, coconut aminos and wasabi before being finished with cucumber, crabmeat, nori, pickled ginger and sesame seeds.

California Roll Inspiration

The California roll is known for combining mild seafood flavours with ingredients such as avocado and cucumber. This recipe takes those recognisable flavours and uses them without requiring sushi rice or the technique needed to roll sushi.

Crabmeat, avocado, cucumber, nori, ginger and wasabi create the connection with Japanese-inspired flavours, while the devilled egg format gives the recipe its distinctive American character.

Cooking Eggs in the Air Fryer

The eggs are cooked directly in the Airfryer rather than being boiled in water. Silicone muffin cups keep them stable while hot air circulates around them.

After 15 minutes at 120ยฐC, the eggs are immediately transferred to an ice-water bath. The sudden cooling stops residual heat from continuing to cook the yolks and also makes the eggs cool enough to handle and peel.

Making the Creamy Filling

Once the eggs are peeled and halved, the yolks are mashed with mayonnaise, avocado, coconut aminos and wasabi powder. Avocado contributes additional creaminess while the wasabi provides the characteristic sharp flavour associated with sushi.

Diced cucumber is folded through after the yolk mixture is smooth. This preserves some of its fresh texture and provides a pleasant contrast with the creamy filling.

Adding the Crab and Garnishes

Lump crabmeat turns these devilled eggs into a small Seafood appetizer. Check the crab carefully and discard any pieces of shell before adding it to the eggs.

Nori, pickled ginger and toasted sesame seeds complete the sushi-inspired presentation. Add these ingredients shortly before serving, particularly the nori, which can soften when exposed to moisture.

Serving as an Appetizer

Each egg produces two individual portions, giving eight filled halves from the four eggs. Their small size makes them particularly suitable as an Appetizer or Amuse.

Arrange the eggs on a serving platter with the garnishes visible on top. They can be served alongside other small seafood dishes or included in a larger selection of party food.

Perfect for Entertaining

These colourful devilled eggs are well suited to a Party, Birthday or Easter gathering. Most of the preparation can be completed ahead, leaving only the final garnishing until shortly before serving.

Keep the eggs refrigerated while waiting to serve them. A chilled serving platter is useful when they need to remain out for a short period during a buffet or gathering.

A Low-Carb Option

Unlike traditional sushi, this recipe contains no rice. Eggs, crab, avocado and cucumber form the foundation instead, making these devilled eggs suitable for the Low Carb category.

When preparing the recipe for specific dietary requirements, check packaged ingredients such as mayonnaise, coconut aminos, pickled ginger and wasabi powder because formulations can differ between manufacturers.

Storage Advice

Prepared devilled eggs are best eaten fresh but can be stored covered in the refrigerator for up to 2 days. Keep them properly chilled because both the egg filling and crabmeat are perishable.

If preparing them ahead, consider adding the crabmeat, nori, pickled ginger and sesame seeds shortly before serving. This keeps the presentation fresher and prevents the nori from becoming soft.

Food Safety

This recipe combines cooked eggs with crabmeat and mayonnaise, so careful refrigeration is particularly important. Keep the ingredients chilled during preparation and return finished eggs to the refrigerator until serving. For current guidance on handling eggs and seafood safely, consult the U.S. Food and Drug Administration food-safety information.

California Roll Devilled Eggs with Crab provide the flavours of a sushi-inspired Seafood bite in an easy-to-serve devilled egg. Creamy avocado, fresh cucumber, crab, wasabi, nori and pickled ginger make each small portion distinctly different from a traditional devilled egg.

Greek Olive Devilled Eggs

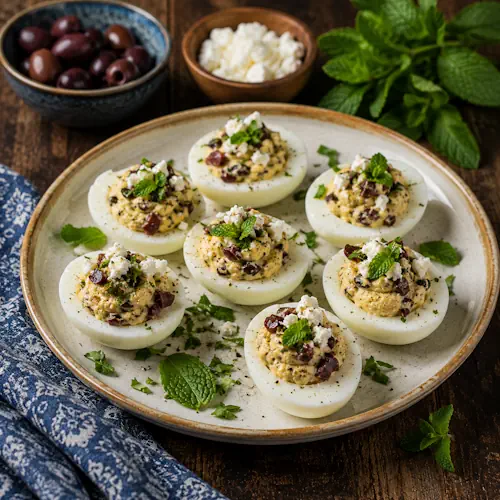
Greek devilled eggs filled with creamy yogurt, Kalamata olives and goat cheese, garnished with fresh mint on a rustic wooden table.

Greek Olive Devilled Eggs

Creamy devilled eggs filled with Greek yoghurt, Kalamata olives and goat cheese, then finished with fresh mint. The air fryer cooks the eggs gently before they are chilled, filled and served.
Couverts4
Total time 33 minutes
estimated costs pp $1.15
Deel op Facebook Print Recipe

Equipment

  • medium bowl
  • Silicone muffin cups
  • Large Plate
  • Fork
  • Knife
  • spoon

Ingredients

Instructions

  • Preheat the air fryer to 120ยฐC for 3 minutes. Place the eggs in silicone muffin cups and arrange them in the air fryer basket. Cook for 15 minutes. Meanwhile, combine the ice cubes and water in a medium bowl. Transfer the cooked eggs immediately to the ice bath and leave for 5 minutes. Peel the eggs carefully and cut them in half lengthwise. Remove the yolks and place them in a separate bowl. Arrange the egg white halves on a plate. Mash the yolks with the Greek yoghurt, Kalamata olives, goat cheese, salt and black pepper until well combined. Spoon the filling into the egg white halves. Garnish with fresh mint and serve.

Notes & Wine Advice

Recipe Notes

Cool the eggs immediately in ice water after air frying. This stops the cooking process and makes them easier to peel. Finely chop the Kalamata olives so they distribute evenly through the yolk filling. For the smoothest filling, mash the egg yolks thoroughly before mixing in the yoghurt, olives and goat cheese.
The eggs can also be cut crosswise instead of lengthwise. This creates smaller, deeper cavities for the filling and gives each bite a slightly different balance of egg white and filling.

Nutrition values

Serving: 62 gr | Calories: 105 kcal | koolhydraten: 2 g | Eiwitten: 8 g | Vet: 7 g | Verzadigd vet: 3 g | Natrium: 250 mg | Suiker: 1 g
————————————————————————————————–

About Greek Olive Devilled Eggs

Greek Olive Devilled Eggs give the familiar devilled egg a Mediterranean twist with creamy Greek yoghurt, salty Kalamata olives, tangy goat cheese and fresh mint. Instead of boiling the eggs in water, this recipe uses the Airfryer, making it an easy addition to a collection of simple air fryer recipes.

The combination works particularly well because the rich egg yolks are balanced by the freshness of yoghurt and mint. Kalamata olives provide a savoury, slightly fruity flavour, while goat cheese adds creaminess and a gentle tang. The result is more distinctive than a traditional mayonnaise-based devilled egg without becoming complicated.

Cooking Eggs in the Air Fryer

Cooking whole eggs in an air fryer is surprisingly straightforward. Silicone muffin cups keep the eggs from rolling around the basket while they cook. At 120ยฐC, the eggs cook gently for about 15 minutes before being transferred directly to an ice bath.

The cold water is an important part of the method. It quickly stops the residual heat from continuing to cook the yolks and also helps with peeling. Air fryers vary in temperature accuracy and airflow, so the exact cooking time may need a small adjustment for a particular appliance.

A Mediterranean Filling

Traditional devilled eggs often rely on mayonnaise and mustard. Here, Greek yoghurt creates a lighter, pleasantly tangy base. The chopped Kalamata olives add saltiness, which is complemented by the creamy goat cheese.

Fresh mint is added at the end rather than mixed heavily into the filling. This keeps its flavour bright and gives the finished eggs a fresh aroma. These ingredients make the recipe a natural fit alongside other Eggs, Appetizer and Fingerfood recipes.

Serving Greek Devilled Eggs

These eggs are particularly useful when you need a small cold dish that can be prepared ahead. Serve them as an appetizer, snack or part of a larger selection of finger food. They also work nicely for Brunch, Easter, picnics and party platters.

For a Greek-inspired spread, combine them with olives, tomatoes, cucumber, pita bread and other small Mediterranean dishes. Because each egg half is already an individual portion, they are easy to serve without extra cutlery.

Preparing Them Ahead

The eggs can be cooked and peeled ahead of time and kept refrigerated until needed. For the freshest appearance, prepare the filling and assemble the eggs closer to serving time. Keep them chilled because both cooked eggs and dairy products are perishable.

When preparing eggs for parties or picnics, safe refrigeration is especially important. For current guidance on storing and serving cooked eggs safely, consult the U.S. Food and Drug Administration egg safety guidance.

Simple Variations

The basic filling is easy to adjust. Add a little extra yoghurt for a softer texture or increase the goat cheese for a richer filling. A small amount of lemon zest can add freshness without introducing much additional liquid. Fresh dill or parsley can replace the mint when you prefer a different herb.

However you vary them, the combination of eggs, Kalamata olives, yoghurt and goat cheese keeps these devilled eggs firmly Mediterranean in character. They are compact, colourful and practical for everything from a relaxed weekend snack to a festive appetizer platter.

Crispy Herbed Air Fryer Pumpkin Seeds

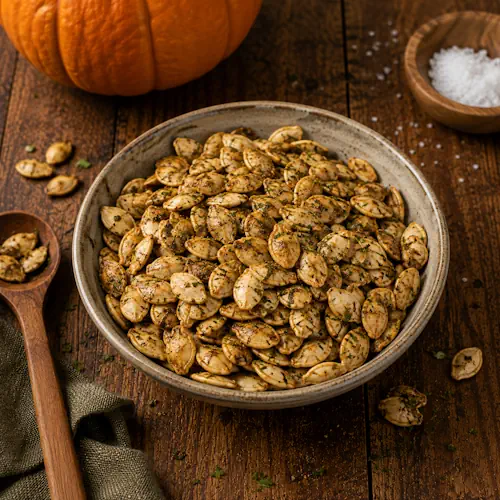
Crispy seasoned roasted pumpkin seeds in a rustic ceramic bowl on a dark wooden table with fresh pumpkin and herbs.

Crispy Herbed Air Fryer Pumpkin Seeds

Crispy pumpkin seeds roasted in the air fryer with butter, garlic, onion, dill, parsley, chives, mustard, celery seed, and black pepper. A savoury autumn snack with plenty of crunch and a fragrant herb coating.
Couverts4
estimated costs pp $0.85
Deel op Facebook Print Recipe

Equipment

  • medium mixing bowl
  • Measuring spoons
  • serving bowl
  • spatula

Ingredients

Instructions

  • Preheat the air fryer to 160ยฐC for 3 minutes.
  • Place the pumpkin seeds in a medium mixing bowl. Add the melted butter and ยฝ teaspoon salt, then toss until evenly coated.
  • Spread the pumpkin seeds evenly in the air fryer basket. Air fry for 7 minutes.
  • Stir and turn the seeds with a spatula. Continue air frying for another 6 minutes, or until lightly golden and crisp.
  • Transfer the hot pumpkin seeds to a serving bowl. Add the remaining salt, onion powder, parsley, garlic powder, dill, chives, dry mustard, celery seed, and black pepper. Toss thoroughly until evenly seasoned.
  • Allow to cool slightly before serving. The pumpkin seeds will become even crisper as they cool.

Notes & Wine Advice

Serving Suggestions

Serve the pumpkin seeds warm or completely cooled as a crunchy snack. They are also delicious scattered over soups, salads and roasted vegetables. For more easy snack ideas, browse our Snack recipes or Fingerfood recipes.

Recipe Notes

Remove most of the pumpkin pulp and dry the seeds thoroughly before adding the butter. A small amount of pumpkin flesh is harmless, but too much moisture prevents the seeds from becoming properly crisp. Stir the seeds halfway through air frying so they roast evenly.

Variations

Add smoked paprika or chilli powder for a spicier version. For a simpler flavour, use only butter and salt. You can also experiment with different combinations from our Spices & Seasoning recipes.

Storage

Allow the roasted pumpkin seeds to cool completely before storing them in an airtight container. Keep them in a cool, dry place for up to one week. Do not seal them while warm because trapped condensation can make the seeds soft.

Wine Advice

A crisp Sauvignon Blanc works well when these savoury pumpkin seeds are served with drinks. Its fresh acidity balances the butter, garlic and herbs. Explore suitable wines at Renรฉโ€™s Wijnbeleving.

Nutrition values

Serving: 69 gr | Calories: 3895 kcal | koolhydraten: 8 g | Eiwitten: 20 g | Vet: 32 g | Verzadigd vet: 7 g | Natrium: 600 mg | Suiker: 1 g
————————————————————————————————–

About Crispy Herbed Air Fryer Pumpkin Seeds

Crispy Herbed Air Fryer Pumpkin Seeds turn the seeds from a fresh pumpkin into a crunchy homemade snack instead of letting them go to waste. A little melted butter helps the seeds roast and gives them richness, while garlic, onion, dill, parsley, chives, mustard, celery seed and black pepper create a savoury herb coating.

This recipe is particularly useful during autumn, when pumpkins are widely available. After preparing a pumpkin for soup, baking or carving, save the seeds and transform them into an easy snack. For more seasonal inspiration, browse our Autumn recipes.

Preparing Fresh Pumpkin Seeds

Fresh pumpkin seeds usually come out of the pumpkin surrounded by strands of flesh. Separate the seeds from the larger pieces and rinse them when necessary. A few small pieces of pumpkin flesh are not a problem, but removing most of the pulp makes roasting easier and gives the finished seeds a cleaner texture.

Drying the seeds thoroughly is more important than making them perfectly clean. Water on the surface must evaporate before roasting can begin. Pat the seeds dry before adding the melted butter and salt. This helps them become crisp rather than simply steaming in the air fryer.

Saving the seeds is especially useful when preparing pumpkins for Halloween. Instead of throwing away everything removed during carving, the seeds can become a completely separate snack.

Why the Air Fryer Works So Well

The Airfryer circulates hot air rapidly around the pumpkin seeds. This removes moisture and roasts their surfaces without requiring a large amount of additional fat. A temperature of 160ยฐC gives the seeds enough time to dry and crisp without browning them too aggressively.

Turning the seeds after the first seven minutes helps them roast more evenly. Seeds near the sides of the basket may brown faster than those in the centre, so stirring redistributes them and exposes different surfaces to the hot circulating air.

The seeds may still seem slightly soft immediately after cooking. Allow them to cool for a few minutes before judging their final texture because they continue to become crisper as they cool.

Creating the Savoury Herb Seasoning

The seasoning is added in two stages. Melted butter and half of the salt coat the seeds before roasting. The butter helps the seeds brown while also providing a surface to which the seasonings can adhere.

After roasting, the remaining salt is combined with onion powder, parsley, garlic powder, dill, chives, mustard, celery seed and freshly ground black pepper. Adding these ingredients after cooking helps preserve more of their aroma and reduces the chance of delicate dried herbs becoming overly toasted.

You can easily change the flavour by adding smoked paprika, cayenne or chilli powder. Our Spices & Seasoning recipes provide more ideas for creating your own combinations.

Serving Roasted Pumpkin Seeds

These pumpkin seeds are easiest to enjoy simply by the handful. Serve them as a Snack, add them to a party platter or put out a bowl during a Movie night.

They are also useful as a crunchy topping. Scatter them over creamy pumpkin soup, salads or roasted vegetables. They can add texture to grain bowls and other vegetable dishes without requiring additional preparation.

Storage and Food Safety

Allow the pumpkin seeds to cool completely before transferring them to an airtight container. Closing warm seeds in a container traps steam and creates condensation, which can quickly make them soft. Store the cooled seeds in a dry place and use them within about one week for the best flavour and texture.

Fresh produce should always be handled and stored hygienically. For additional information about safe food preparation and storage, consult the U.S. Food and Drug Administration food safety guidance.

With very little preparation, Crispy Herbed Air Fryer Pumpkin Seeds transform an often-discarded ingredient into a crunchy, well-seasoned snack. They are simple enough for everyday snacking but particularly useful during pumpkin season, autumn gatherings and Halloween.

Pecan Cheesecake Coffee Cake

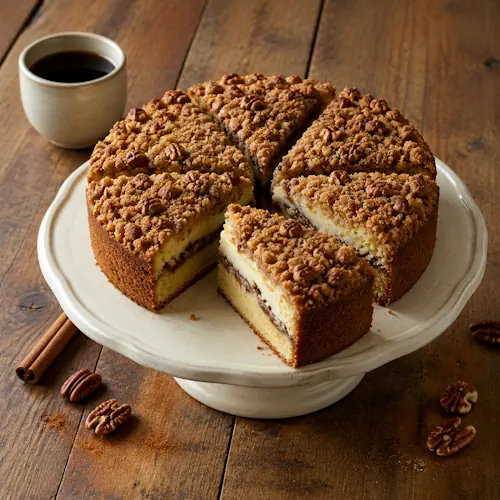
Layered pecan streusel coffee cake with cheesecake and cinnamon filling, served with black coffee.

Pecan Cheesecake Coffee Cake

Pecan Cheesecake Coffee Cake is a rich layered air fryer cake with almond flour cake, a warm cinnamon layer, creamy cheesecake, and crunchy pecan streusel. Espresso, vanilla, and cinnamon add plenty of flavor, making it a delicious treat with coffee or tea.
Couverts4
Total time 3 hours 5 minutes
estimated costs pp $1.85
Deel op Facebook Print Recipe

Equipment

  • Pecan Cheesecake Coffee Cake is a rich layered air fryer cake with almond flour cake, a warm cinnamon layer, creamy cheesecake, and crunchy pecan streusel. Espresso, vanilla, and cinnamon add plenty of flavor, making it a delicious treat with coffee or tea.

Ingredients

For the Cinnamon Layer

For the Cheesecake Layer

For the Pecan Streusel

Instructions

  • Combine all the cake ingredients in a medium bowl and mix until smooth.
  • Spread the cake batter evenly in a greased 18 cm springform pan.
  • Combine the butter, erythritol, cinnamon, and cassava flour for the cinnamon layer in a small bowl.
  • Spread the cinnamon mixture evenly over the cake batter.
  • Combine the cream cheese, erythritol, vanilla, and egg in a medium bowl until smooth.
  • Spread the cheesecake mixture carefully over the cinnamon layer.
  • Combine the pecans, cinnamon, vanilla, erythritol, and melted butter for the streusel in a small bowl.
  • Scatter the pecan streusel in small crumbles over the cheesecake layer.
  • Preheat the air fryer to 150ยฐC for 3 minutes.
  • Cover the springform pan with aluminium foil.
  • Place the pan in the air fryer basket and air fry for 10 minutes.
  • Remove the aluminium foil and continue cooking for another 5 minutes.
  • Remove the cake from the air fryer and allow it to cool uncovered for 30 minutes.
  • Cover and refrigerate for at least 2 hours, or overnight, until completely chilled and set.
  • Slice and serve.

Notes & Wine Advice

Recipe Notes

Use room-temperature cream cheese for the cheesecake layer. This makes it easier to create a smooth filling without lumps.
Spread each layer carefully so the cake, cinnamon filling, cheesecake, and pecan streusel remain distinct.
Cover the springform pan during the first part of cooking to prevent the pecan topping from browning too quickly. Remove the foil for the final 5 minutes.
Allow the cake to cool for 30 minutes before refrigerating it for at least 2 hours. The chilling time is necessary for the cheesecake layer to set properly.

Wine Advice

A glass of Banyuls pairs well with the pecans, cinnamon, coffee, and creamy cheesecake. Its rich character makes it particularly suitable when serving the cake as a dessert.

Nutrition values

Serving: 1 gr | Calories: 520 kcal | koolhydraten: 22 g | Eiwitten: 11 g | Vet: 48 g | Verzadigd vet: 20 g | Natrium: 290 mg | Suiker: 4 g
————————————————————————————————–

About This Recipe

Pecan Cheesecake Coffee Cake combines four delicious layers in one rich air fryer cake. A soft almond flour base is topped with a buttery cinnamon layer, creamy cheesecake, and crunchy pecan streusel. Espresso powder, vanilla, and cinnamon add warmth and depth, making this cake particularly enjoyable with coffee or tea.

A Rich Layered Coffee Cake

This air fryer coffee cake is more elaborate than a traditional single-layer cake, but each component is straightforward to prepare. The almond flour base provides a soft, nutty foundation, while the cinnamon layer adds sweetness and spice. For more baking inspiration, explore our Cake Recipes, Nut Recipes, Brunch Recipes, and Airfryer Recipes.

Creamy Cheesecake and Pecan Streusel

The cheesecake layer creates a creamy contrast to the cake underneath. Room-temperature cream cheese mixes more smoothly with the egg, vanilla, and sweetener, helping create an even filling. On top, pecans are combined with cinnamon, vanilla, butter, and erythritol to form a crumbly streusel that becomes lightly toasted during cooking.

Baking the Cake in the Air Fryer

Prepare the cake in a springform pan 18 cm that fits comfortably inside your air fryer basket. Covering the pan with aluminium foil during the first part of cooking protects the topping from browning too quickly. Removing the foil for the final few minutes allows the pecan streusel to develop additional color and texture.

Cooling and Serving

Cooling is an essential part of this recipe. Allow the cake to rest at room temperature before transferring it to the refrigerator. Chilling gives the cheesecake layer enough time to become firm and makes the cake easier to slice. Serve the air fryer coffee cake chilled or allow individual slices to come closer to room temperature before serving.

With cinnamon, espresso, creamy cheesecake, and crunchy pecans, Pecan Cheesecake Coffee Cake makes a satisfying choice for brunch, High Tea, dessert, or a special weekend treat. A small slice is plenty rich and pairs beautifully with freshly brewed coffee or tea.


Cinnamon Almond Breakfast Bread

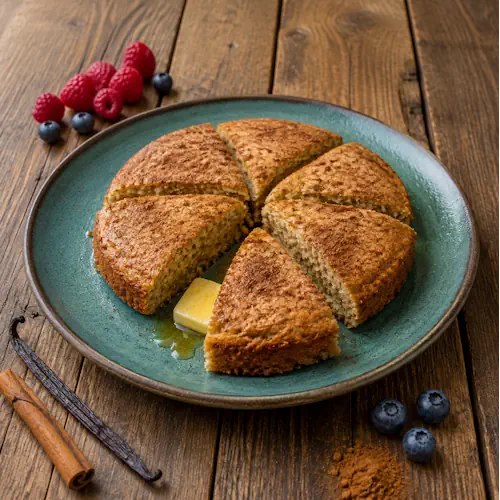
Warm cinnamon breakfast bread with melted butter, berries and vanilla on a rustic wooden table.

Cinnamon Almond Breakfast Bread

Cinnamon Almond Breakfast Bread is a soft, lightly sweet air fryer bread made with almond flour, cinnamon, vanilla, and erythritol. Serve it warm with butter, sugar-free syrup, or fresh berries for an easy low-carb breakfast.
Couverts4
Total time 20 minutes
estimated costs pp $0.85
Deel op Facebook Print Recipe

Equipment

Instructions

  • Preheat the air fryer to 150ยฐC for 3 minutes.
  • Combine the almond flour, erythritol, baking powder, and salt in a medium bowl.
  • Combine the melted butter, egg, gelatin, vanilla extract, and cinnamon in a small bowl.
  • Pour the egg mixture into the almond flour mixture.
  • Stir until the batter is smooth and evenly combined.
  • Spoon the batter into an ungreased pizza pan and spread it evenly.
  • Place the pan in the air fryer basket.
  • Air fry for 10 minutes until the bread is set and lightly golden.
  • Remove the pan from the air fryer.
  • Allow the bread to rest for 5 minutes.
  • Slice and serve warm.

Notes & Wine Advice

Recipe Notes

Use finely ground almond flour rather than coarse almond meal for a softer and more even texture.
Mix the wet and dry ingredients just until the batter is smooth. There is no need to beat the mixture extensively.
Allow the bread to rest for 5 minutes after air frying. This gives the centre time to set before slicing.
Serve warm with butter, sugar-free syrup, or fresh berries. It also works well alongside Greek yogurt for breakfast or brunch.

Wine Advice

Wine isn’t necessary with a breakfast bread, but when serving it for brunch, a glass of Cava is a good match. Its freshness provides a pleasant contrast to the almond, butter, vanilla, and cinnamon.

Nutrition values

Serving: 1 gr | Calories: 165 kcal | koolhydraten: 7 g | Eiwitten: 6 g | Vet: 14 g | Verzadigd vet: 4 g | Natrium: 145 mg | Suiker: 1 g
————————————————————————————————–

About This Recipe

Cinnamon Almond Breakfast Bread is a soft, lightly sweet air fryer bread made with almond flour, cinnamon, vanilla, and erythritol. It offers a simple alternative to traditional breakfast breads and pancakes while keeping the ingredient list compact. Serve it warm with butter, sugar-free syrup, fresh berries, or a combination of your favorite toppings.

An Easy Low Carb Breakfast Bread

This air fryer breakfast bread uses finely ground almond flour instead of wheat flour. Almond flour gives the bread a tender texture and mild nutty flavor that works especially well with cinnamon and vanilla. For more morning inspiration, explore our Breakfast Recipes, Brunch Recipes, Bread Recipes, and Airfryer Recipes.

Why Almond Flour Works So Well

Finely ground almond flour provides richness and structure without using conventional flour. The egg helps bind the batter, while a small amount of gelatin supports the texture. Baking powder gives the mixture some lift, and melted butter keeps the finished bread moist. Using powdered erythritol distributes the sweetness more evenly throughout the batter.

Cinnamon and Vanilla Flavor

Cinnamon brings gentle warmth to the bread, while vanilla rounds out the nutty flavor of the almonds. Because the recipe is only lightly sweet, you can easily adjust the finished dish through the toppings. Fresh berries add brightness, butter provides extra richness, and sugar-free syrup creates a breakfast reminiscent of pancakes without changing the basic recipe.

Serving Your Air Fryer Breakfast Bread

Allow the bread to rest briefly after cooking before slicing. This helps the centre finish setting and makes cleaner portions. Serve the air fryer breakfast bread while still warm for the best texture. It works equally well as a quick weekday breakfast or as part of a larger weekend brunch with yogurt, berries, and other breakfast dishes.

With warm cinnamon, fragrant vanilla, and the richness of almond flour, Cinnamon Almond Breakfast Bread is an easy way to make a satisfying breakfast in the air fryer. Its simple preparation and short cooking time also make it useful when you want homemade bread without turning on the oven.


Vanilla Nut Crunch

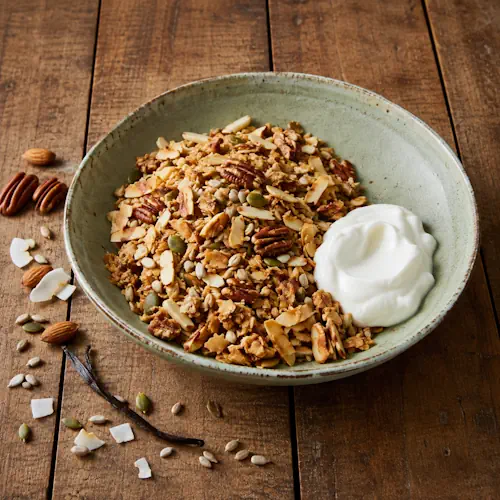
Homemade vanilla nut granola with yogurt, pecans, almonds, seeds and coconut flakes on a rustic wooden table.

Vanilla Nut Crunch

Vanilla Nut Crunch is a crisp air fryer granola made with almonds, pecans, sunflower seeds, pumpkin seeds, coconut, and vanilla. This grain-free, low-carb breakfast can be served with milk, sprinkled over Greek yogurt, or enjoyed on its own as a crunchy snack.
Couverts4
Total time 21 minutes
estimated costs pp $1.75
Deel op Facebook Print Recipe

Equipment

  • airtight container
  • medium bowl
  • Round 4-cup oven-safe baking dish
  • spoon

Instructions

  • Preheat the air fryer to 150ยฐC for 3 minutes.
  • Combine the almonds, pecans, sunflower seeds, pumpkin seeds, coconut flakes, erythritol, coconut flour, almond flour, vanilla, melted butter, almond butter, and salt in a medium bowl.
  • Mix thoroughly until all ingredients are evenly coated.
  • Spoon the mixture into an ungreased round 4-cup oven-safe baking dish.
  • Place the baking dish in the air fryer basket.
  • Air fry for 3 minutes.
  • Stir the granola thoroughly.
  • Air fry for another 3 minutes until lightly toasted and fragrant.
  • Transfer the granola to an airtight container.
  • Allow it to cool uncovered for 10 minutes.
  • Cover and store at room temperature until ready to serve.

Notes & Wine Advice

Recipe Notes

Stir the granola halfway through cooking so the nuts, seeds, and coconut toast evenly without becoming too dark.
Allow the mixture to cool completely before covering the container. The granola becomes noticeably crunchier as it cools.
Serve with your favorite milk, sprinkle over Greek yogurt with fresh berries, or enjoy it dry as a crunchy snack.
Store the completely cooled granola in an airtight container at room temperature to help preserve its crisp texture.

Wine Advice

If serving this granola as part of a brunch, a fresh Chardonnay complements the toasted almonds, pecans, coconut, and gentle vanilla flavor.

Nutrition values

Serving: 1 gr | Calories: 395 kcal | koolhydraten: 17 g | Eiwitten: 11 g | Vet: 36 g | Verzadigd vet: 10 g | Natrium: 105 mg | Suiker: 3 g
————————————————————————————————–

About This Recipe

Vanilla Nut Crunch is a crisp, grain-free air fryer granola made with almonds, pecans, sunflower seeds, pumpkin seeds, coconut, and vanilla. Instead of oats, this recipe relies on nuts and seeds for its satisfying crunch. Almond butter and melted butter help bring everything together, while erythritol provides sweetness without regular sugar. Enjoy it for breakfast, brunch, or as an easy snack.

A Crunchy Grain-Free Granola

This low carb granola combines several textures in every spoonful. Almonds and pecans provide a rich nutty bite, sunflower and pumpkin seeds add extra crunch, and coconut flakes become lightly toasted in the air fryer. Vanilla gives the mixture a gentle sweetness and aroma. For more ideas, explore our Breakfast Recipes, Brunch Recipes, Nut Recipes, and Snack Recipes.

Why Nuts and Seeds Work So Well

Using a mixture of nuts and seeds creates more variety than relying on a single ingredient. Pecans bring a buttery character, almonds provide firmness, and the two types of seeds contribute a slightly different crunch. Coconut flour and almond flour help bind the smaller ingredients, while almond butter adds richness and encourages the mixture to form small clusters.

Getting the Best Air Fryer Crunch

The granola needs only a short cooking time, so keep an eye on it while it toasts. Stir after the first three minutes to expose different surfaces to the circulating heat. Once cooking is complete, allow the mixture to cool uncovered for at least 10 minutes. This cooling period is essential because the granola becomes noticeably crisper as its temperature drops.

Serving Low Carb Granola

Serve the low carb granola with unsweetened almond milk or another favorite milk for breakfast. It also makes a crunchy topping for Greek yogurt and fresh berries. For something simpler, enjoy a small portion on its own as a nut and seed snack. Once completely cool, keep it in an airtight container at room temperature to maintain its texture.

With toasted nuts, crisp seeds, coconut, and fragrant vanilla, Vanilla Nut Crunch offers a versatile alternative to traditional oat-based granola. For additional information about food and nutrition, visit the U.S. Food and Drug Administration.