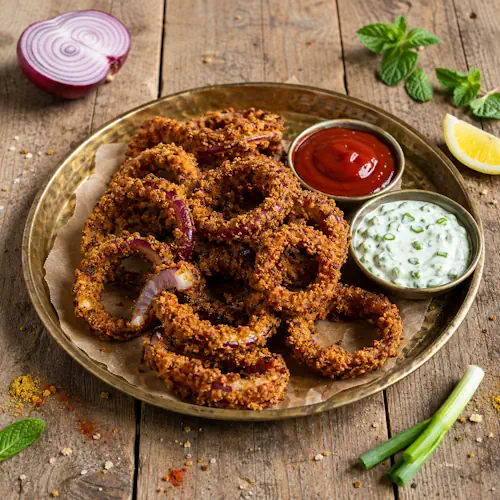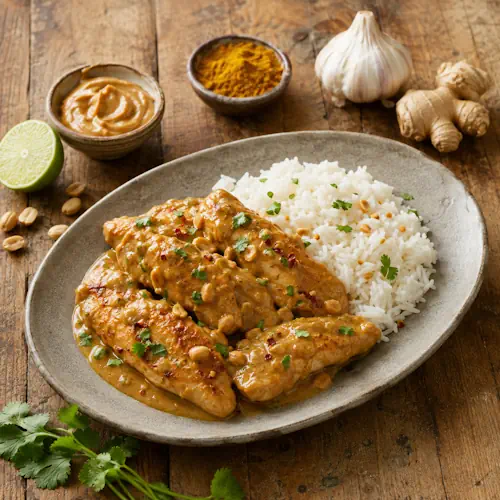
Crispy Chile-Brined Calamari

Crispy chile-brined calamari with fried cherry peppers, lemon wedges and rosemary garlic mayonnaise

Crispy Chile-Brined Calamari

Crispy Chile-Brined Calamari is marinated in spicy pickled pepper brine, coated with lemon-seasoned flour, and cooked in the air fryer. Rosemary garlic mayonnaise makes a creamy dipping sauce.
Couverts4 servings
Preparation 20 minutes
Preparation time:16 minutes
Brining Time 20 minutes
estimated costs pp $4.25
Deel op Facebook Print Recipe

Equipment

Ingredients

For the Calamari

  • 4 cups All-Purpose Flour
  • 1 teaspoon Black Pepper freshly ground
  • 1 pound Calamari Bodies and Tentacles bodies cut into ยฝ-inch rings
  • 6 large Eggs lightly beaten
  • 2 jars Hot Pickled Cherry Peppers 8 ounces each
  • 1 teaspoon Kosher Salt
  • 1 tablespoon Lemon Zest
  • Cooking Spray

For the Rosemary Garlic Mayonnaise

  • 1 teaspoon Black Pepper freshly ground
  • 2 cloves Garlic minced
  • 2 tablespoons Fresh Lemon Juice
  • 1 teaspoon Kosher Salt
  • 1 cup Mayonnaise
  • 2 teaspoons Fresh Rosemary finely chopped

For Serving

  • 2 Lemons cut into wedges

Instructions

  • Drain the pickled cherry pepper brine into a large mixing bowl.
  • Tear the cherry peppers into bite-sized strips.
  • Add the pepper strips and calamari to the brine.
  • Stir gently until everything is submerged and evenly combined.
  • Cover the bowl and refrigerate for 20 minutes.
  • Grate 1 tablespoon lemon zest into a second large mixing bowl.
  • Add the all-purpose flour, kosher salt, and freshly ground black pepper.
  • Whisk until evenly combined.
  • Place the beaten eggs in a separate bowl.
  • Drain the calamari and pepper strips thoroughly.
  • Dip several calamari pieces and pepper strips into the beaten egg.
  • Allow the excess egg to drip away.
  • Transfer them to the seasoned flour.
  • Toss until completely coated.
  • Repeat with the remaining calamari and peppers.
  • Arrange the coated pieces in a single layer.
  • Spray them generously on all sides with cooking spray.
  • Preheat the air fryer to 400ยฐF (204ยฐC).
  • Place half of the calamari and peppers in the air fryer basket.
  • Keep the pieces in a single layer without overcrowding.
  • Air fry for 8 minutes.
  • Shake the basket halfway through cooking.
  • Check that the coating is golden and the calamari is opaque and cooked through.
  • Transfer the first batch to a serving platter.
  • Repeat with the remaining calamari and peppers.
  • Combine the mayonnaise, rosemary, garlic, lemon juice, kosher salt, and black pepper in a small mixing bowl.
  • Whisk until the dipping sauce is smooth.
  • Arrange the lemon wedges around the calamari.
  • Serve immediately with the rosemary garlic mayonnaise.

Notes & Wine Advice

Serving Suggestions

Serve the calamari immediately with rosemary garlic mayonnaise and fresh lemon wedges. Add crusty bread, olives, a tomato salad, or a simple green salad for a larger appetiser spread. Small forks or cocktail picks make the calamari and pepper strips easier to share.

Recipe Notes

Drain the calamari thoroughly before dipping it in the egg. Excess brine can make the coating heavy and uneven. Cook in two batches so hot air can circulate around every piece. Calamari cooks quickly and can become rubbery when left in the air fryer too long.

Variations

Use sweet pickled cherry peppers for a milder version. Add garlic powder, smoked paprika, cayenne, or dried oregano to the flour. Replace the rosemary mayonnaise with lemon aioli, tartar sauce, or a spicy tomato dip.

Storage

The calamari is best served immediately. Refrigerate leftovers in an airtight container for up to two days and store the mayonnaise separately. Reheat the calamari in the air fryer at 375ยฐF until hot and crisp. Avoid microwave reheating because it softens the coating.

Wine Advice

A chilled Pinot Grigio complements the lemon, peppers, and delicate calamari with fresh acidity. A crisp Sauvignon Blanc is another suitable choice, especially when the hot cherry peppers provide considerable heat.

Nutrition values

Calories: 440 kcal | Carbohydrates: 44 g | Protein: 23 g | Fat: 20 g | Saturated Fat: 4 g | Sodium: 850 mg | Sugar: 3 g
————————————————————————————————–

About Crispy Chile-Brined Calamari

Crispy Chile-Brined Calamari combines tender squid with hot pickled cherry peppers, a lemon-seasoned flour coating, and rosemary garlic mayonnaise. A short rest in pepper brine adds acidity, salt, and heat before the calamari is breaded. The air fryer then creates a golden exterior without submerging the seafood in oil.

This recipe has been adjusted to provide four appetiser portions. One pound of calamari cooks in two batches, which prevents overcrowding and helps the coating become evenly crisp. The fried pepper strips add colour and a sharp flavour that cuts through the rich mayonnaise dip.

Why Air Fryer Fried Calamari Works

Air fryer fried calamari needs a dry, evenly applied coating and enough room around each piece. Rapidly circulating heat browns the flour while the cooking spray supplies the small quantity of fat needed for a fried appearance. Overlapping pieces trap moisture and produce soft patches.

Cooking in two batches takes slightly longer but gives a much better result. Arrange the rings, tentacles, and pepper strips in one layer. Shake the basket halfway through so pieces touching the base can brown on another side.

Using Pickled Pepper Brine

Pickled cherry pepper brine acts as a quick marinade. It seasons the calamari and introduces tangy heat without requiring a long list of spices. Twenty minutes is enough for the surface to absorb flavour while maintaining the seafoodโ€™s texture.

Hot cherry peppers create a noticeable spicy finish. Their strips are breaded and cooked with the squid, producing sweet, acidic, and spicy bites throughout the platter. Sweet pickled peppers can be used when serving guests who prefer less heat.

Preparing the Coating

Fresh lemon zest is mixed directly into the flour. Its aromatic oils distribute through the coating and support the lemon wedges served at the table. Salt and black pepper provide straightforward seasoning without competing with the pepper brine.

Drain the seafood before breading. Dip it first in beaten egg and then toss it thoroughly in the seasoned flour. Shake away loose flour because thick deposits can remain pale and powdery during air frying. Apply cooking spray to every side of the coated pieces.

Cooking Calamari Correctly

Calamari becomes tender when cooked very quickly or braised for a long time. The middle ground can produce a rubbery texture. At 400ยฐF, the rings and tentacles need approximately eight minutes to become opaque while the coating browns.

Check the first batch at the end of the stated cooking time. Smaller rings may finish sooner, while large tentacles can require another minute. Avoid extending the cooking time only to achieve darker breading because the seafood can become tough.

Making the Rosemary Garlic Mayonnaise

The dipping sauce combines mayonnaise with fresh rosemary, garlic, lemon juice, salt, and pepper. Chop the rosemary very finely so its firm leaves do not dominate individual bites. Allowing the sauce to stand while the calamari cooks gives the garlic and rosemary time to flavour the mayonnaise.

For another crispy seafood appetiser prepared without deep-frying, try our Crispy Coconut Shrimp. Both recipes benefit from single-layer air frying and immediate serving.

Storage and Seafood Safety

Keep raw calamari refrigerated until preparation and prevent its juices from touching ready-to-eat ingredients. Cook it until opaque and refrigerate leftovers within two hours. Consult current FDA safe food-handling guidance for information about preparing and storing seafood.

With spicy pepper brine, crisp lemon coating, and aromatic dipping sauce, Crispy Chile-Brined Calamari makes a distinctive air fryer appetiser for parties or weekend drinks.


Lemon Herb Blooming Onion

Lemon herb blooming onion filled with golden Parmesan breadcrumbs, garlic and fresh parsley

Lemon Herb Blooming Onion

Lemon Herb Blooming Onion is filled with a savoury mixture of panko, Parmesan, parsley, garlic, mustard, and lemon. The air fryer makes the onions tender with a crisp golden topping.
Couverts4 servings
Preparation 15 minutes
Preparation time:15 minutes
estimated costs pp $1.40
Deel op Facebook Print Recipe

Equipment

Ingredients

  • ยฝ teaspoon Black Pepper freshly ground
  • 2 cloves Garlic minced
  • 2 tablespoons Fresh Lemon Juice
  • 2 tablespoons Fresh Parsley chopped
  • 6 tablespoons Mayonnaise
  • 2 tablespoons Olive Oil
  • 2 large Yellow Onions 14 ounces each
  • ยพ cup Panko Breadcrumbs
  • ยฝ cup Parmesan Cheese grated
  • ยฝ teaspoon Kosher Salt
  • 4 teaspoons Whole-Grain Dijon Mustard

Instructions

  • Place the first onion on a cutting board.
  • Trim the top from the onion.
  • Remove the dry outer skin.
  • Keep the root end intact.
  • Turn the onion upside down with the root facing upward.
  • Use a paring knife to cut vertical slits halfway through the onion at ยฝ-inch intervals.
  • Avoid cutting through the root because it holds the onion together.
  • Repeat the cutting process with the second onion.
  • Turn the onions right side up.
  • Gently separate the sections until they open like flower petals.
  • Drizzle the cut surfaces with the olive oil.
  • Season the onions evenly with kosher salt and freshly ground black pepper.
  • Preheat the air fryer to 350ยฐF (177ยฐC).
  • Place the onions petal-side up in the air fryer basket.
  • Cook for 10 minutes.
  • Combine the panko breadcrumbs, Parmesan cheese, mayonnaise, lemon juice, parsley, mustard, and garlic in a medium mixing bowl.
  • Stir until a smooth and evenly combined paste forms.
  • Carefully remove the onions from the air fryer.
  • Use a small spoon to distribute the breadcrumb paste between the onion petals.
  • Spread the remaining filling over the tops of the onions.
  • Return the stuffed onions to the air fryer.
  • Increase the temperature to 375ยฐF (190ยฐC).
  • Cook for approximately 5 minutes.
  • Check that the centres are tender and the breadcrumb filling is golden brown.
  • Cook for another 2 minutes when the centres remain firm.
  • Carefully transfer the onions to serving plates.
  • Cut each onion in half.
  • Serve immediately.

Notes & Wine Advice

Serving Suggestions

Serve half a stuffed onion per person as an appetiser, vegetarian main course, or substantial side dish. A crisp green salad, roasted potatoes, grilled vegetables, or crusty bread can complete the meal. For sharing, place the onions in the centre of the table and separate the petals with a small knife.

Recipe Notes

Keep the root end completely intact because it holds the onion petals together. Cut only halfway through the onion and leave a solid section around the root. Large onions may require several additional minutes before their centres become tender.

Variations

Replace Parmesan with mature cheddar, Pecorino, or a vegetarian hard cheese. Add chopped basil, thyme, oregano, chilli flakes, or finely chopped olives to the filling. Regular Dijon mustard can replace the whole-grain version when you prefer a smoother texture.

Storage

Refrigerate leftovers in an airtight container for up to two days. Reheat them in the air fryer at 350ยฐF until hot and crisp. Microwave reheating is possible, but it will soften the breadcrumb topping and onion petals.

Wine Advice

A fresh Sauvignon Blanc complements the lemon, parsley, and mustard while balancing the mayonnaise and Parmesan. A lightly oaked Chardonnay is a rounder choice for the rich breadcrumb filling.

Nutrition values

Calories: 350 kcal | Carbohydrates: 32 g | Protein: 8 g | Fat: 22 g | Saturated Fat: 6 g | Sodium: 590 mg | Sugar: 7 g
————————————————————————————————–

About Lemon Herb Blooming Onion

Lemon Herb Blooming Onion transforms two large yellow onions into a shareable air fryer dish filled with panko, Parmesan, parsley, garlic, mustard, mayonnaise, and fresh lemon juice. The onions soften and open into petals, while the breadcrumb mixture develops a crisp, golden surface. Each onion is cut in half after cooking to provide four generous portions.

The recipe combines elements of a deep-fried blooming onion with the savoury filling associated with stuffed vegetables. It needs no flour coating, egg wash, or pan of frying oil. Instead, a small amount of olive oil helps the exposed onion surfaces soften and brown in the circulating heat.

Preparing the Stuffed Air Fryer Onion

A stuffed air fryer onion begins with careful cutting. Trim the top and remove the dry outer skin, but leave the root untouched. The root acts as an anchor and prevents the petals from separating completely during preparation and cooking.

Turn the onion upside down before making vertical cuts at regular intervals. Each slit should travel only halfway through the onion. When the onion is turned upright, gently encourage the sections to open. Avoid pulling firmly because the raw inner layers can tear away from the root.

Softening the Onion First

The onions cook for 10 minutes before the filling is added. This first stage gives the dense centres time to soften and creates more room between the petals. Adding the breadcrumb mixture at the beginning could cause it to become too dark before the onion is tender.

Drizzle olive oil over the cut surfaces and season them before placing the onions in the basket. Keep them upright with the petals facing upward. When they lean or tip over, the filling can slide out during the second cooking stage.

Making the Breadcrumb Filling

Panko breadcrumbs provide a lighter texture than fine dried breadcrumbs. Parmesan adds saltiness and helps the topping brown, while mayonnaise binds the dry ingredients into a spreadable paste. Lemon juice, parsley, mustard, and garlic prevent the rich mixture from tasting heavy.

Stir the ingredients until no dry pockets of panko remain. The mixture should hold together when pressed with a spoon. If it seems unusually loose, allow it to stand for several minutes so the breadcrumbs can absorb some moisture.

Stuffing the Onion Petals

Remove the partially cooked onions carefully because both the basket and onions will be hot. Use a small spoon to place the filling between the opened layers. Distribute it throughout the onion rather than concentrating everything on top.

Increase the air fryer temperature to 375ยฐF for the final five minutes. The higher heat browns the exposed breadcrumbs while the centre finishes cooking. Very large or tightly layered onions may need two additional minutes.

Serving Ideas and Variations

Serve the onions as a vegetarian main course with salad and potatoes or use them as a side dish. They also make an unusual addition to a shared appetiser table alongside our Crispy Coconut Shrimp.

Fresh thyme, basil, oregano, or chilli flakes can be added to the filling. Choose a vegetarian alternative to Parmesan when required because traditional Parmesan is produced using animal rennet.

Storage and Food Safety

Refrigerate leftovers within two hours and reheat them until hot throughout. The air fryer restores the topping more effectively than a microwave. Follow current FDA safe food-handling guidance when preparing, cooling, storing, and reheating cooked dishes.

With tender onion petals and a crisp savoury filling, Lemon Herb Blooming Onion delivers an impressive vegetarian dish without the work and excess oil of deep-frying.


Crispy Coconut Shrimp with Spicy Yogurt Dip

Crispy coconut shrimp served with cucumber, serrano chile and coconut yogurt dip

Crispy Coconut Shrimp with Spicy Yogurt Dip

Crispy Coconut Shrimp with Spicy Yogurt Dip are marinated in coconut milk and lime, then coated with panko and shredded coconut. The air-fried shrimp are served with a cooling cucumber, coconut yogurt, and serrano dip.
Couverts4 servings
Preparation 20 minutes
Preparation time:4 minutes
Marinating Time 10 minutes
estimated costs pp $2.75
Deel op Facebook Print Recipe

Equipment

  • Baking sheet
  • Box grater
  • Medium Mixing Bowls, 2
  • Serving platter
  • Small mixing bowl
  • wire cooling rack

Ingredients

For the Coconut Shrimp

  • ยฝ cup Panko Breadcrumbs
  • Black Pepper freshly ground to taste
  • ยฝ pound Medium Shrimp peeled and deveined with tails intact
  • 1 cup Coconut Milk canned
  • Cooking Spray
  • ยฝ teaspoon Kosher Salt plus more to taste
  • 1 medium Lime zest finely grated
  • ยฝ cup Shredded Coconut unsweetened

For the Spicy Yogurt Dip

  • Black Pepper freshly ground to taste
  • 1 cup Coconut Yogurt or Dairy Yogurt
  • 1 small Cucumber halved and seeded
  • Kosher Salt to taste
  • 1 Serrano Chile seeded and minced

Instructions

  • Combine the shrimp, coconut milk, lime zest, and ยฝ teaspoon kosher salt in a medium mixing bowl.
  • Let the shrimp marinate for 10 minutes.
  • Combine the panko breadcrumbs and shredded coconut in a second medium mixing bowl.
  • Season the breadcrumb mixture with kosher salt and freshly ground black pepper.
  • Place a wire cooling rack over a baking sheet.
  • Remove a few shrimp at a time from the coconut milk marinade.
  • Allow the excess marinade to drip back into the bowl.
  • Place the shrimp in the breadcrumb mixture.
  • Toss gently until every shrimp is completely coated.
  • Transfer the coated shrimp to the prepared wire cooling rack.
  • Repeat until all the shrimp are coated.
  • Spray both sides of the shrimp evenly with cooking spray.
  • Preheat the air fryer to 400ยฐF (204ยฐC).
  • Arrange the shrimp in a single layer in the air fryer basket.
  • Cook in batches when necessary to avoid overcrowding.
  • Air fry for approximately 4 minutes.
  • Check that the coating is golden brown and the shrimp are opaque and cooked through.
  • Transfer the cooked shrimp to a serving platter.
  • Season lightly with additional kosher salt.
  • Grate the seeded cucumber into a small mixing bowl.
  • Add the coconut yogurt and minced serrano chile.
  • Stir until evenly combined.
  • Season the dip with kosher salt and freshly ground black pepper.
  • Serve the warm coconut shrimp immediately with the spicy yogurt dip.

Plain Breaded Shrimp Variation

  • Omit the coconut milk, lime zest, and shredded coconut.
  • Place 1 cup all-purpose flour, 4 lightly beaten eggs, and 1 cup panko breadcrumbs in three separate shallow bowls.
  • Season the flour, eggs, and breadcrumbs with kosher salt and freshly ground black pepper.
  • Coat each shrimp in flour.
  • Dip the floured shrimp in the beaten egg.
  • Coat the shrimp thoroughly with the panko breadcrumbs.
  • Place the breaded shrimp on the wire cooling rack.
  • Spray them evenly with cooking spray.
  • Air fry as directed until golden brown and cooked through.

Notes & Wine Advice

Serving Suggestions

Serve the shrimp immediately with the cucumber and serrano yogurt dip. Lime wedges, mango salsa, pineapple salsa, or a crisp cabbage salad make suitable accompaniments. For a complete meal, add coconut rice, steamed jasmine rice, or a fresh green salad.

Recipe Notes

Pat very wet shrimp lightly before placing them in the crumb mixture, but leave enough coconut marinade on the surface for the coating to stick. Arrange the shrimp in one layer and cook in batches when necessary. Overcrowding prevents the coating from becoming evenly crisp.

Variations

Replace the serrano chile with jalapeรฑo for gentler heat or omit it completely. Add cayenne, smoked paprika, or garlic powder to the coating. Dairy yogurt can replace coconut yogurt. For plain breaded shrimp, use flour, beaten egg, and panko without the coconut ingredients.

Storage

Refrigerate leftover shrimp and yogurt dip separately in airtight containers for up to two days. Reheat the shrimp in the air fryer at 375ยฐF until hot and crisp. Keep the dip chilled and do not reheat it. The coating is best when the shrimp are freshly cooked.

Wine Advice

A chilled Sauvignon Blanc complements the lime, cucumber, and serrano chile with fresh acidity. An aromatic Gewรผrztraminer is a fuller choice that works particularly well with the sweet coconut coating and spicy dip.

Nutrition values

Serving: 4 shrimp with dip | Calories: 260 kcal | Carbohydrates: 21 g | Protein: 14 g | Fat: 15 g | Saturated Fat: 11 g | Sodium: 470 mg | Sugar: 5 g
————————————————————————————————–

About Crispy Coconut Shrimp

Crispy Coconut Shrimp combine tender seafood with a golden coating of panko breadcrumbs and unsweetened shredded coconut. Before breading, the shrimp are briefly marinated in coconut milk, lime zest, and salt. This adds flavour and gives the dry coating something to cling to. A cucumber and serrano yogurt dip provides a cooling yet spicy contrast.

The recipe makes four appetiser portions and cooks in only a few minutes once the shrimp have been prepared. Air frying avoids the pan of hot oil normally associated with coconut shrimp, while cooking spray helps the crumbs brown. The result is crisp on the outside, juicy inside, and much less messy to prepare.

Building Three Layers of Coconut Flavour

Coconut appears in three forms. Canned coconut milk flavours the marinade, shredded coconut becomes part of the crisp coating, and coconut yogurt forms the base of the dip. Each version contributes something different without requiring an excessively sweet sauce.

Unsweetened shredded coconut is the best choice for the breading. Sweetened coconut can brown too quickly at the high air fryer temperature and may make the appetiser taste more like dessert. Mixing the coconut with panko creates a lighter, crunchier coating than coconut alone could provide.

Preparing the Shrimp

Use peeled and deveined medium shrimp while leaving the tails attached. The tails provide a convenient handle for dipping and make the finished platter easier to serve as finger food. Check the cleaned shrimp carefully and remove any remaining shell fragments before placing them in the marinade.

Ten minutes is sufficient for the coconut milk, lime zest, and salt to flavour the seafood. A longer marinating time is unnecessary. When transferring the shrimp to the crumb mixture, allow excessive liquid to drain away. Too much marinade can make the breading heavy and prevent it from crisping.

Getting an Even Golden Coating

Set a wire cooling rack over a baking sheet before breading. The rack keeps the coating from sticking to a flat plate and allows the shrimp to be sprayed on all sides. Apply a light, even layer of cooking spray rather than saturating the crumbs.

Arrange the shrimp in a single layer in the basket. Their sides should not overlap because circulating air needs to reach the complete surface. Medium shrimp cook quickly at 400ยฐF, so begin checking after four minutes. The coating should be golden, and the flesh should be opaque and firm without becoming rubbery.

Making the Spicy Coconut Dip

The dip combines grated cucumber, coconut yogurt, and minced serrano chile. Seeding the cucumber limits excess water, while removing the chile seeds controls some of its heat. Serrano peppers can still be quite spicy, so use less when preparing the recipe for guests who prefer mild food.

Dairy yogurt can replace coconut yogurt, although the coconut flavour will be less pronounced. If the grated cucumber releases considerable moisture, squeeze it gently before mixing. Season the dip only after combining the ingredients so you can judge how much salt and pepper it needs.

Serving and Safe Storage

Serve the shrimp while the coating is still hot and crisp. Lime wedges, fruit salsa, cabbage salad, or coconut rice can accompany them. For a larger party platter with contrasting flavours, add our Spicy Dry-Rubbed Chicken Wings.

Shrimp should be cooked until the flesh is opaque and pearly rather than translucent. Refrigerate leftovers within two hours and store the dip separately. Consult current FDA safe food-handling guidance for information about handling, cooking, and storing seafood.

With its crunchy panko-coconut coating and fresh, spicy dip, Crispy Coconut Shrimp with Spicy Yogurt Dip makes an attractive air fryer appetiser without the inconvenience of deep-frying.


Lemon-Pepper Chicken Drumsticks

Lemon-pepper chicken drumsticks with crisp golden skin, fresh lemon zest and lemon wedges

Lemon-Pepper Chicken Drumsticks

Lemon-Pepper Chicken Drumsticks are seasoned with coarse black pepper, garlic, and baking powder before being air-fried until crisp. Fresh lemon zest and wedges give the rich dark meat a bright, fresh finish.
Couverts4 servings
Preparation 10 minutes
Preparation time:30 minutes
Refrigeration Time 1 hour
estimated costs pp $2.40
Deel op Facebook Print Recipe

Equipment

  • Fine grater
  • Large Plate
  • Serving platter
  • Small mixing bowl
  • Tongs

Ingredients

  • 4 teaspoons Black Pepper freshly ground and coarse
  • 2 teaspoons Baking Powder
  • 8 Chicken Drumsticks approximately 4 ounces each
  • 1 teaspoon Garlic Powder
  • Kosher Salt to taste
  • 2 medium Lemons

Instructions

  • Combine the coarse black pepper, baking powder, and garlic powder in a small mixing bowl.
  • Arrange the chicken drumsticks on a large plate.
  • Sprinkle the seasoning mixture evenly over the drumsticks.
  • Turn the drumsticks until every side is thoroughly coated.
  • Place the drumsticks uncovered in the refrigerator.
  • Refrigerate for at least 1 hour or up to overnight.
  • Remove the drumsticks from the refrigerator.
  • Season them evenly with kosher salt.
  • Preheat the air fryer to 375ยฐF (190ยฐC).
  • Arrange the drumsticks bone-end up in the air fryer basket.
  • Lean them carefully against the basket wall and one another without packing them too tightly.
  • Cook the drumsticks in batches when necessary to maintain sufficient airflow.
  • Air fry for approximately 30 minutes.
  • Turn the drumsticks halfway through cooking if required by your air fryer model.
  • Check that the skin is crisp and golden brown.
  • Confirm that the thickest part of each drumstick has reached an internal temperature of at least 165ยฐF (74ยฐC).
  • Transfer the cooked drumsticks to a serving platter.
  • Finely grate the zest of the lemons over the drumsticks while they are still hot.
  • Cut the zested lemons into wedges.
  • Serve the drumsticks warm with the lemon wedges.

Notes & Wine Advice

Serving Suggestions

Serve two drumsticks per person with lemon wedges. Roasted potatoes, coleslaw, corn on the cob, steamed vegetables, rice, or a crisp green salad all work well alongside the chicken. For a casual meal, place the drumsticks on a platter and let everyone help themselves.

Recipe Notes

Use baking powder rather than baking soda because they are not interchangeable in this recipe. Refrigerating the coated drumsticks uncovered helps dry the skin. Do not overcrowd the air fryer basket, and cook the chicken in batches when eight drumsticks will not fit comfortably.

Variations

Add smoked paprika, onion powder, dried thyme, or a small amount of cayenne to the seasoning. For a stronger citrus flavour, combine lemon zest with melted butter and brush it over the cooked chicken. Lime zest can replace the lemon for a sharper finish.

Storage

Refrigerate leftover drumsticks in an airtight container for up to three days. Reheat them in the air fryer at 375ยฐF until hot throughout and crisp on the outside. Reheat only the amount needed and avoid repeatedly warming the complete batch.

Wine Advice

A fresh Sauvignon Blanc complements the lemon zest and pepper while cutting through the richness of the dark meat. A lightly oaked Chardonnay is a rounder choice when serving the chicken with potatoes or creamy coleslaw.

Nutrition values

Serving: 2 chicken drumsticks | Calories: 340 kcal | Carbohydrates: 3 g | Protein: 38 g | Fat: 20 g | Saturated Fat: 5 g | Sodium: 430 mg | Sugar: 1 g
————————————————————————————————–

About Lemon-Pepper Chicken Drumsticks

Lemon-Pepper Chicken Drumsticks combine juicy dark meat with crisp seasoned skin and a bright citrus finish. Coarse black pepper and garlic powder create the savoury dry coating, while baking powder supports browning and crispness in the air fryer. Fresh lemon zest is grated over the chicken immediately after cooking, releasing its aromatic oils onto the hot surface.

This recipe has been adjusted to provide four servings, with two drumsticks per person. It works as an informal family dinner, a game-day dish, or part of an outdoor meal. Because drumsticks have a natural handle, they are also easy to serve from a shared platter without needing knives.

Why Crispy Air Fryer Drumsticks Work

Crispy air fryer drumsticks benefit from two simple techniques: an uncovered rest in the refrigerator and a light coating of baking powder. Refrigeration allows moisture to evaporate from the skin. A drier surface browns more effectively and is less likely to steam during cooking.

Baking powder changes the skinโ€™s surface and helps it blister under the circulating heat. It should be mixed thoroughly with the black pepper and garlic powder so no concentrated patches remain. Baking soda must not be substituted because it is much stronger and can leave an unpleasant flavour.

Seasoning the Chicken

Coarsely ground black pepper gives the drumsticks a more noticeable pepper flavour and texture than finely ground pepper. Garlic powder distributes evenly without adding moisture. Salt is added after refrigeration, just before cooking, so the chicken is properly seasoned without drawing out unnecessary liquid during the resting period.

Turn each drumstick several times when applying the dry mixture. The coating should reach every side, including the skin around the narrow bone end. Leave the seasoned chicken uncovered on a plate in the refrigerator for at least one hour. An overnight rest produces even drier skin and can improve the final crispness.

Arranging the Air Fryer Basket

Position the drumsticks bone-end up and lean them against the basket wall or one another. This arrangement exposes more skin to the moving hot air. However, the chicken should not be wedged tightly together. If eight pieces cannot fit with some room between them, cook two batches.

Air fry at 375ยฐF for approximately 30 minutes. Cooking times vary depending on the size of the drumsticks and the power of the appliance. Some air fryers circulate heat evenly without turning, while others produce better results when the chicken is rotated halfway through.

Adding Fresh Lemon Flavour

The zest is added after cooking rather than mixed into the dry rub. Fresh zest can lose some of its fragrance during prolonged exposure to heat. Grating it directly over the hot chicken releases its oils while preserving a fresh citrus aroma.

Use only the coloured outer surface of each lemon. The white pith underneath is bitter and should remain on the fruit. After zesting, cut the lemons into wedges so diners can add fresh juice according to taste. The acidity balances the richness of the dark meat and seasoned skin.

Serving and Safe Storage

Serve the drumsticks with potatoes, rice, coleslaw, corn, or a green salad. For a larger air fryer platter, combine them with our Spicy Dry-Rubbed Chicken Wings. The two recipes use a similar crisping technique but offer different seasoning and heat levels.

Always test the thickest part of a drumstick without touching the bone. Chicken must reach at least 165ยฐF internally before serving. Consult current FDA safe food-handling guidance for advice about handling, cooking, refrigerating, and reheating poultry.

Refrigerate leftovers promptly and reheat them in the air fryer to refresh the skin. With its peppery coating and fragrant citrus finish, Lemon-Pepper Chicken Drumsticks turn an affordable chicken cut into a crisp and satisfying meal.


Spicy Dry-Rubbed Chicken Wings

Spicy dry-rubbed chicken wings served with blue cheese dressing, celery and carrot sticks

Spicy Rubbed Chicken Wings

Spicy Dry-Rubbed Chicken Wings are coated with cayenne, garlic, and baking powder before being cooked until crisp in the air fryer. Melted butter adds richness without covering the crunchy skin in a heavy sauce.
Couverts4 servings
Preparation 10 minutes
Preparation time:3 hours 20 minutes
Refrigeration Time 1 hour
estimated costs pp $2.25
Deel op Facebook Print Recipe

Equipment

  • Large mixing bowl
  • Large Plate
  • Serving platter
  • Tongs

Ingredients

For the Chicken Wings

  • 1 teaspoon Baking Powder
  • ยผ teaspoon Garlic Powder
  • 1ยผ pounds Chicken Wings separated into wingettes and drumettes
  • 1 teaspoon Cayenne Pepper
  • Black Pepper freshly ground to taste
  • Kosher Salt to taste
  • 1 tablespoon Unsalted Butter melted

For Serving

  • Blue Cheese Dressing
  • Carrot Sticks
  • Celery Sticks

Instructions

  • Arrange the chicken wings in a single layer on a large plate.
  • Sprinkle the baking powder, cayenne pepper, and garlic powder evenly over the wings.
  • Toss the wings thoroughly with your hands until the skin is evenly coated with the dry mixture.
  • Place the wings uncovered in the refrigerator.
  • Chill for at least 1 hour or up to overnight.
  • Remove the wings from the refrigerator.
  • Season them with kosher salt and freshly ground black pepper.
  • Preheat the air fryer to 400ยฐF (204ยฐC).
  • Arrange the wings upright around the wall of the air fryer basket, allowing them to support one another without being packed too tightly.
  • Air fry for approximately 20 minutes.
  • Check that the skin is crisp and golden brown.
  • Confirm that the thickest part of the chicken has reached an internal temperature of 165ยฐF (74ยฐC).
  • Transfer the hot wings to a large mixing bowl.
  • Pour the melted butter over the wings.
  • Toss until the wings are evenly coated.
  • Arrange the wings on a serving platter.
  • Serve warm with blue cheese dressing, celery sticks, and carrot sticks.

Classic Buffalo Wings Variation

  • Omit the cayenne pepper from the dry seasoning.
  • Cook the wings with the baking powder, garlic powder, salt, and black pepper as directed.
  • Combine ยฝ cup mild hot sauce with 4 tablespoons melted unsalted butter.
  • Toss the cooked wings with the Buffalo sauce until evenly coated.
  • Serve immediately.

Plain Crispy Wings Variation

  • Omit the cayenne pepper, garlic powder, and melted butter.
  • Coat the wings with the baking powder and season them with salt and black pepper.
  • Air fry as directed.
  • Serve plain or with your preferred dipping sauce.

Notes & Wine Advice

Serving Suggestions

Serve the wings immediately with blue cheese dressing, celery sticks, and carrot sticks. They work well as a game-day snack, party appetiser, or informal dinner. Add potato wedges, coleslaw, corn on the cob, or a crisp green salad when serving them as a complete meal.

Recipe Notes

Use baking powder rather than baking soda, as the two products are not interchangeable here. Leaving the coated wings uncovered in the refrigerator dries the skin and improves crispness. Do not overcrowd the basket, and cook in batches when your air fryer is small.

Variations

For Buffalo wings, omit the cayenne and toss the cooked wings with mild hot sauce and melted butter. For plain wings, omit the cayenne, garlic powder, and finishing butter. Smoked paprika, onion powder, or ground cumin can be added to create a different dry rub.

Storage

Refrigerate leftover wings in an airtight container for up to three days. Reheat them at 375ยฐF until hot and crisp. Avoid reheating them in a covered container because trapped steam will soften the skin. Do not leave cooked chicken at room temperature for more than two hours.

Wine Advice

An off-dry Riesling helps soften the heat from the cayenne while refreshing the palate. An aromatic Gewรผrztraminer is another suitable choice, especially when the wings are served with creamy blue cheese dressing.

Nutrition values

Serving: 5 ounces chicken wings | Calories: 330 kcal | Carbohydrates: 2 g | Protein: 27 g | Fat: 24 g | Saturated Fat: 8 g | Sodium: 480 mg | Sugar: 1 g
————————————————————————————————–

About Spicy Dry-Rubbed Chicken Wings

Spicy Dry-Rubbed Chicken Wings deliver the crisp skin and juicy interior associated with fried wings without submerging the chicken in oil. Baking powder helps dry and roughen the surface, while cayenne pepper and garlic powder create a direct, slow-building heat. A small amount of melted butter is added after cooking, giving the wings richness without hiding their crisp texture beneath a heavy sauce.

The recipe works particularly well in an air fryer because rapidly circulating hot air reaches the exposed skin from several directions. Arranging the wingettes and drumettes upright around the basket improves airflow and allows more pieces to cook evenly. The result is suitable for game day, movie night, parties, or a relaxed weekend meal.

Why Crispy Air Fryer Wings Work

Crispy air fryer wings begin with an unusually effective ingredient: baking powder. It changes the surface of the chicken skin and helps it brown and blister during cooking. The powder must be distributed in a thin, even layer. Heavy patches can leave an unpleasant taste, so toss the wings thoroughly before refrigerating them.

The uncovered refrigeration period is equally useful. As the wings rest, moisture evaporates from their surface and the seasonings adhere more firmly. One hour produces good results, but leaving them refrigerated overnight creates even drier skin. Keep the raw chicken on a plate or tray that cannot leak onto other refrigerated foods.

Building the Dry Rub

Cayenne pepper provides concentrated heat without adding moisture. Garlic powder adds savoury depth, while salt and freshly ground black pepper complete the seasoning just before cooking. This straightforward mixture allows the flavour of the chicken to remain noticeable and avoids the soft skin that can result from adding a wet sauce too early.

The stated amount of cayenne creates a distinct spicy finish. Reduce it by half for gentler heat or replace part of it with smoked paprika. Onion powder, cumin, or a small amount of dried oregano can also be added. Keep the overall coating light so the wings crisp rather than becoming dusty.

Cooking the Wings Safely

Preheat the air fryer to 400ยฐF before adding the chicken. Arrange the pieces so air can move around them, using the basket wall for support. If they cannot fit without heavy crowding, cook them in batches. Overcrowding traps steam and prevents the skin from developing an even golden finish.

The wings usually need approximately 20 minutes, although size and air fryer performance can affect the cooking time. Check the thickest piece with a food thermometer. Poultry must reach an internal temperature of 165ยฐF before serving. More detailed information is available in the current FDA safe food-handling guidance.

Buffalo and Plain Variations

For classic Buffalo flavour, omit the cayenne from the initial coating. After cooking, toss the crisp wings with mild hot sauce and melted butter. Add the sauce only when ready to serve because the skin begins to soften after it becomes wet.

Plain wings are even simpler. Keep the baking powder, salt, and pepper but omit the cayenne, garlic powder, and finishing butter. This produces a neutral base for barbecue sauce, honey mustard, garlic butter, or another preferred dip.

Serving and Reheating

Blue cheese dressing provides a cooling contrast to the cayenne. Celery and carrot sticks add freshness and crunch. Potato wedges, coleslaw, or our Air Fryer Buttermilk Biscuits can turn the wings into a more substantial meal.

Refrigerate leftovers promptly and reheat them in the air fryer rather than the microwave. Circulating heat refreshes the exterior, while microwave reheating tends to soften the skin. With the baking powder method, sufficient airflow, and a hot air fryer, Spicy Dry-Rubbed Chicken Wings achieve impressive crispness without deep-frying.


Giant Butter Pecan Rolls

Giant butter pecan roll covered with cinnamon cream cheese glaze and chopped pecans

Giant Butter Pecan Rolls

Giant Butter Pecan Rolls combine fluffy pizza dough with melted butter, dark brown sugar, pecans, and golden syrup. These oversized air fryer cinnamon rolls are finished with a smooth cinnamon cream cheese glaze.
Couverts4 servings
Preparation 20 minutes
Preparation time:50 minutes
Cooling and Setting Time 20 minutes
estimated costs pp $1.70
Deel op Facebook Print Recipe

Equipment

  • Aluminium Foil
  • Chefโ€™s Knife or Pizza Cutter
  • medium mixing bowl
  • Parchment paper
  • Rolling Pin
  • Silicone Pastry Brush
  • Whisk
  • Work surface

Ingredients

For the Butter Pecan Rolls

  • All-Purpose Flour for dusting
  • ยฝ cup Dark Brown Sugar firmly packed
  • ยฝ teaspoon Kosher Salt
  • 2 tablespoons Lyleโ€™s Golden Syrup maple syrup or dark agave syrup
  • ยฝ cup Pecans chopped
  • 16 ounces Pizza Dough store-bought
  • 4 tablespoons Unsalted Butter melted

For the Cinnamon Cream Cheese Glaze

  • ยผ teaspoon Ground Cinnamon
  • 2 ounces Cream Cheese at room temperature
  • 2 tablespoons Milk
  • 1 cup Powdered Sugar

Instructions

  • Divide the pizza dough into two equal portions.
  • Place one portion on a lightly floured work surface.
  • Use a rolling pin to form the dough into a rough 12 ร— 8-inch rectangle.
  • Brush the dough evenly with half of the melted butter.
  • Sprinkle half of the dark brown sugar, pecans, and kosher salt over the dough.
  • Drizzle half of the golden syrup evenly over the filling.
  • Cut the rectangle lengthwise into 8 equal strips with a pizza cutter or chefโ€™s knife.
  • Roll the first strip into a tight spiral resembling a snail shell.
  • Place the spiral at the end of the next strip and continue rolling.
  • Repeat until all 8 strips form one giant spiral.
  • Prepare the second portion of dough with the remaining butter, sugar, pecans, salt, and syrup in the same way.
  • Cut two pieces of parchment paper to fit the bottom of the air fryer basket.
  • Cut two rounds of aluminium foil large enough to cover the tops of the rolls.
  • Preheat the air fryer to 325ยฐF (163ยฐC).
  • Place the first roll on one piece of parchment paper in the air fryer basket.
  • Cover the roll loosely with one aluminium foil round.
  • Air fry for 15 minutes.
  • Remove the aluminium foil from the top.
  • Continue air frying for approximately 10 minutes until golden brown and cooked through in the centre.
  • Meanwhile, whisk the powdered sugar, softened cream cheese, milk, and cinnamon together until smooth.
  • Let the cooked roll cool in the basket for 10 minutes.
  • Lift it carefully from the basket using the parchment paper.
  • Transfer the roll to a serving plate.
  • Repeat the cooking process with the second roll.
  • Pour half of the cinnamon cream cheese glaze over each warm roll.
  • Let the glazed rolls stand for at least 10 minutes.
  • Cut each roll into two wedges and serve.

Notes & Wine Advice

Serving Suggestions

Serve the rolls warm with coffee, tea, or freshly squeezed orange juice. For a complete brunch, add scrambled eggs, crisp bacon, or fresh fruit. Each roll can be cut into two generous wedges or several smaller pieces when it forms part of a larger breakfast buffet.

Recipe Notes

Roll each strip firmly enough to maintain the spiral but avoid stretching the dough. Covering the roll during the first stage of cooking prevents the top from becoming too dark before the centre is baked. Check the middle carefully because the outer layers cook more quickly.

Variations

Replace the pecans with walnuts or hazelnuts. Maple syrup adds a familiar breakfast flavour, while dark agave provides a milder sweetness. Raisins, chopped apple, or miniature chocolate chips can be added in small quantities. Orange zest also works well in the cream cheese glaze.

Storage

Store leftover rolls in an airtight container in the refrigerator for up to three days because the glaze contains cream cheese. Reheat individual portions briefly in the microwave or air fryer. If using the air fryer, cover the glazed surface loosely with foil to prevent excessive browning.

Wine Advice

A gently sparkling Moscato dโ€™Asti balances the brown sugar, cinnamon, and cream cheese with light acidity. For a richer dessert presentation, choose a small glass of Banyuls to complement the toasted pecans and caramel flavours.

Nutrition values

Calories: 690 kcal | Carbohydrates: 105 g | Protein: 10 g | Fat: 27 g | Saturated Fat: 11 g | Sodium: 850 mg | Sugar: 55 g
————————————————————————————————–

About Giant Butter Pecan Rolls

Giant Butter Pecan Rolls transform ready-made pizza dough into two oversized breakfast pastries filled with melted butter, dark brown sugar, chopped pecans, and golden syrup. Each spiral is cooked in the air fryer until fluffy and golden, then covered with a smooth cinnamon cream cheese glaze. The recipe provides four generous portions and brings the familiar flavour of a cinnamon roll together with the caramel and nutty character of butter pecan.

Using pizza dough removes the need to mix, knead, and proof a traditional enriched dough. This makes the recipe considerably more approachable when you want a freshly baked brunch treat without beginning several hours in advance. The dough remains soft enough to roll and shape but sturdy enough to support the layered filling.

How the Air Fryer Cinnamon Roll Cooks Evenly

An air fryer cinnamon roll of this size needs two cooking stages. During the first 15 minutes, a round of aluminium foil shields the surface from direct circulating heat. This gives the inner layers time to expand and cook before the exposed top becomes too brown. After removing the foil, another 10 minutes develops the golden finish.

The exact cooking time can differ between air fryer models. Check the centre rather than judging the roll only by its surface. The middle should appear fully baked and should not contain any raw or gummy dough. When necessary, cover the top again and continue cooking for a few additional minutes.

Creating the Giant Spiral

Roll each portion of pizza dough into a rectangle measuring approximately 12 ร— 8 inches. Brush it with melted butter before adding the brown sugar, pecans, salt, and syrup. Spreading the ingredients evenly ensures that every layer contains both sweetness and crunch.

Cut the filled rectangle lengthwise into eight equal strips. Roll the first strip into a small spiral, then place it at the end of the second strip and continue rolling. Repeating this process gradually builds one large coil. Avoid pulling the strips too tightly because the dough needs room to expand while cooking.

This recipe makes two separate rolls because doubling the dough into one enormous spiral would make the centre difficult to cook in a standard air fryer. Cooking them separately provides better airflow and more reliable results. Each finished roll supplies two substantial servings.

Making the Cinnamon Cream Glaze

The glaze combines powdered sugar, softened cream cheese, milk, and ground cinnamon. Room-temperature cream cheese blends more easily and reduces the chance of small lumps. Whisk the ingredients until the mixture becomes smooth and pourable. Add a few drops of milk if it is too thick or more powdered sugar if it becomes runny.

Let each Giant Butter Pecan Roll cool for 10 minutes before adding the glaze. The pastry should remain warm enough for the topping to spread, but it should not be so hot that the glaze immediately melts and disappears between the layers. A further 10-minute rest allows the surface to set before cutting.

Serving Ideas and Variations

Serve the rolls with coffee, tea, fresh fruit, eggs, or bacon. Smaller wedges work well on a brunch buffet, while half a roll makes a particularly generous individual portion. For another quick autumn-style air fryer treat, serve them alongside our Apple Cider Doughnut Holes.

The filling can be adapted with walnuts, hazelnuts, chopped apple, raisins, or miniature chocolate chips. Maple syrup strengthens the breakfast character, while Lyleโ€™s Golden Syrup provides a buttery caramel flavour. A little orange zest in the glaze adds freshness and balances the richness.

Storage and Safe Reheating

Because the glaze contains cream cheese and milk, refrigerate leftovers in an airtight container within two hours. They can be stored for up to three days. Reheat only the required portion and keep the remainder chilled. Cover the glazed surface loosely when reheating in the air fryer so it does not become overly dark.

Follow current FDA safe food-handling guidance when storing foods containing dairy ingredients. With its layered butter-pecan filling and cinnamon glaze, the Giant Butter Pecan Roll offers the impact of a bakery centrepiece without requiring homemade yeast dough.


Air Fryer Apple Cider Doughnut Holes

Apple cider doughnut holes with a smooth applesauce glaze and freshly grated nutmeg

Air Fryer Apple Cider Doughnut Holes

Air Fryer Apple Cider Doughnut Holes are light, fluffy mini doughnuts flavoured with apple cider, buttermilk, and nutmeg. A simple applesauce glaze gives these quick homemade treats plenty of autumn flavour.
Couverts4 servings
Preparation 10 minutes
Preparation time:6 minutes
Cooling and Glaze Setting Time 20 minutes
estimated costs pp $0.85
Deel op Facebook Print Recipe

Equipment

  • Ice Cream Scoop, 1-Ounce
  • medium mixing bowl
  • Silicone Pastry Brush
  • Small mixing bowl
  • Silicone spatula
  • wire cooling rack
  • Whisk

Ingredients

For the Doughnut Holes

  • 1ยฝ cups All-Purpose Flour
  • 2 tablespoons Apple Cider hard or nonalcoholic and chilled
  • 2 teaspoons Baking Powder
  • 1 teaspoon Baking Soda
  • ยผ cup plus 2 tablespoons Buttermilk chilled
  • 1 large Egg lightly beaten
  • 2 tablespoons Granulated Sugar
  • ยฝ teaspoon Kosher Salt
  • 1 pinch Nutmeg freshly grated
  • Vegetable Oil for brushing

For the Applesauce Glaze

  • 2 tablespoons Applesauce unsweetened
  • 1 pinch Kosher Salt
  • ยฝ cup Powdered Sugar
  • ยผ teaspoon Vanilla Extract

Instructions

  • Whisk the all-purpose flour, granulated sugar, baking powder, baking soda, kosher salt, and nutmeg together in a medium mixing bowl.
  • Add the chilled buttermilk, apple cider, and beaten egg.
  • Stir gently with a silicone spatula until the dough just comes together.
  • Do not continue mixing once no dry patches of flour remain.
  • Preheat the air fryer to 350ยฐF (177ยฐC).
  • Use a 1-ounce ice cream scoop or 2 tablespoons to divide the dough into 10 equal portions.
  • Drop the portions into the air fryer basket, leaving space between them for airflow.
  • Lightly brush the tops with vegetable oil.
  • Air fry at 350ยฐF (177ยฐC) for approximately 6 minutes.
  • Check that the doughnut holes are golden brown, fluffy, and cooked through in the centre.
  • Transfer them to a wire cooling rack.
  • Let the doughnut holes cool completely before glazing.
  • Place the powdered sugar, unsweetened applesauce, vanilla extract, and kosher salt in a small mixing bowl.
  • Stir until the glaze is completely smooth.
  • Dip the top of each cooled doughnut hole into the applesauce glaze.
  • Return the glazed doughnut holes to the wire cooling rack.
  • Let them stand until the glaze has set.
  • Serve at room temperature.
  • For warm doughnut holes, prepare the glaze while they cook and serve it separately as a dipping sauce.

Notes & Wine Advice

Serving Suggestions

Serve the doughnut holes with coffee, tea, hot chocolate, or warm apple cider. They make an easy autumn breakfast, brunch treat, or afternoon snack. For the best texture, serve them on the day they are prepared, after the applesauce glaze has had time to set.

Recipe Notes

Keep the buttermilk and apple cider chilled until needed. Mix the dough only until it comes together because overmixing can make the doughnut holes firm. Leave enough space between the portions in the basket so the circulating hot air can cook them evenly.

Variations

Add ground cinnamon, allspice, ginger, or an extra pinch of nutmeg to the flour mixture. For a cinnamon-sugar coating, brush the warm doughnut holes lightly with melted butter and roll them in cinnamon sugar instead of adding glaze. Pear purรฉe can replace the applesauce.

Storage

Store cooled doughnut holes in an airtight container at room temperature for up to two days. Keep glazed pieces in a single layer so they do not stick together. Refresh unglazed doughnut holes briefly in the air fryer before serving, then add fresh glaze.

Wine Advice

A lightly sparkling Moscato dโ€™Asti complements the apple, vanilla, and nutmeg without overpowering the delicate doughnuts. For a drier pairing, choose an aromatic Riesling with fresh apple notes and lively acidity.

Nutrition values

Calories: 280 kcal | Carbohydrates: 55 g | Protein: 6 g | Fat: 4 g | Saturated Fat: 1 g | Sodium: 650 mg | Sugar: 21 g
————————————————————————————————–

About Apple Cider Doughnut Holes

Apple Cider Doughnut Holes bring the familiar flavour of autumn doughnuts to the kitchen without deep-frying or preparing a complicated yeast dough. Apple cider, buttermilk, and freshly grated nutmeg flavour the soft dough, while a quick applesauce glaze reinforces the apple character. The air fryer cooks the ten miniature doughnuts in approximately six minutes, making this a practical recipe for breakfast, brunch, or an afternoon treat.

Traditional apple cider doughnuts are often fried and coated with cinnamon sugar. This version uses baking powder and baking soda for lift and needs only a light brushing of vegetable oil. The finished doughnut holes are golden on the outside and light inside, but they avoid the quantity of oil associated with deep-frying.

Why Air Fryer Mini Doughnuts Work

Air fryer mini doughnuts cook quickly because their small size allows the circulating heat to reach the centre in only a few minutes. Leaving space between the portions is essential. If the dough touches or the basket is overcrowded, the hot air cannot circulate properly and the doughnuts may cook unevenly.

The combination of baking powder and baking soda creates a light texture. Baking soda reacts with the acidity in the buttermilk and apple cider, while baking powder supplies additional lift during cooking. The dough should be mixed only until it comes together. Continued stirring develops gluten and can turn a light doughnut into a dense one.

Choosing the Apple Cider

Both nonalcoholic and hard apple cider can be used in this recipe. Nonalcoholic cider provides a direct, family-friendly apple flavour. Hard cider may add a slightly more complex fermented note, although only a small amount is required. Whichever type you choose, use cider rather than clear apple juice for a fuller autumn character.

Keep the cider and buttermilk chilled until they are added to the dry ingredients. Cold liquid helps control the consistency of the soft dough and prevents it from becoming overly sticky during portioning. A 1-ounce ice cream scoop is the easiest way to create ten reasonably even pieces. Two tablespoons can be used when a scoop is unavailable.

Making the Applesauce Glaze

The glaze needs only powdered sugar, unsweetened applesauce, vanilla, and a pinch of salt. Applesauce supplies both liquid and flavour, eliminating the need for milk or water. Stir the ingredients until no lumps of powdered sugar remain. If the glaze seems too thick for dipping, add a very small amount of applesauce. If it becomes too thin, mix in additional powdered sugar.

Let the Apple Cider Doughnut Holes cool completely before dipping their tops into the glaze. Applying it while they are hot causes the sugar mixture to melt and run off. If you prefer to eat the doughnuts warm, prepare the glaze while they cook and serve it separately as a dipping sauce.

Serving and Flavour Variations

These mini doughnuts pair naturally with coffee, tea, hot chocolate, or warm apple cider. Ground cinnamon, ginger, or allspice can be added when you want a stronger spice profile. Another option is to skip the glaze and roll the warm doughnuts in cinnamon sugar after brushing them lightly with melted butter.

For another rich homemade air fryer bake, try our Chocolate White Chocolate Banana Bread. The chocolate loaf and apple doughnuts can be served together as part of an informal breakfast or autumn brunch.

Storage and Food Safety

The doughnut holes have their best texture on the day they are made. Once completely cool, they can be kept in an airtight container at room temperature for up to two days. Store glazed pieces in a single layer or separate the layers with baking paper to prevent sticking.

Reheat only unglazed doughnut holes in the air fryer because the sugar glaze can melt and make a mess in the basket. Add fresh glaze after reheating. Follow current FDA safe food-handling guidance when working with eggs and buttermilk and when storing homemade baked goods.

With their quick cooking time, gentle apple flavour, and simple glaze, Apple Cider Doughnut Holes offer an easy way to enjoy freshly made miniature doughnuts throughout autumn.


Chocolate White Chocolate Banana Bread

Chocolate white chocolate banana bread with chopped walnuts and creamy white chocolate pieces

Chocolate White Chocolate Banana Bread

Chocolate White Chocolate Banana Bread is a rich air fryer bake made with cocoa powder, ripe bananas, crunchy walnuts, and creamy white chocolate. It is delicious for breakfast, with coffee, or warmed and served with ice cream.
Couverts4 servings
Preparation 15 minutes
Preparation time:30 minutes
Cooling Time 40 minutes
estimated costs pp $1.35
Deel op Facebook Print Recipe

Equipment

  • Mixing Bowls, 3 Medium
  • Round Air Fryer Baking Pan, 7-Inch
  • Silicone spatula
  • wire cooling rack
  • Whisk

Ingredients

  • 6 tablespoons plus 2 teaspoons All-Purpose Flour divided
  • ยผ teaspoon Baking Soda
  • 1ยฝ ripe Bananas
  • 3 tablespoons Buttermilk or Plain Yogurt not Greek
  • ยผ cup Dutch-Process Cocoa Powder
  • 1 large Egg
  • ยฝ teaspoon Kosher Salt
  • ยฝ cup Granulated Sugar
  • ยฝ teaspoon Vanilla Extract
  • ยผ cup Vegetable Oil
  • 6 tablespoons Walnuts chopped
  • 6 tablespoons White Chocolate chopped

Instructions

  • Whisk 6 tablespoons of the all-purpose flour with the cocoa powder, kosher salt, and baking soda in a medium mixing bowl.
  • Mash the bananas in a second medium mixing bowl until very smooth.
  • Add the granulated sugar, vegetable oil, buttermilk, vanilla extract, and egg to the mashed bananas.
  • Whisk the wet ingredients until smooth and evenly combined.
  • Pour the wet mixture over the dry ingredients.
  • Whisk gently until just combined, without overmixing the batter.
  • Place the walnuts and white chocolate in a third medium mixing bowl.
  • Add the remaining 2 teaspoons of all-purpose flour and toss until everything is evenly coated.
  • Add the coated walnuts and white chocolate to the batter.
  • Fold gently with a silicone spatula until evenly distributed.
  • Transfer the batter to a greased 7-inch round air fryer baking pan.
  • Smooth the surface with the silicone spatula.
  • Place the baking pan in the air fryer.
  • Air fry at 310ยฐF (154ยฐC) for approximately 30 minutes.
  • Insert a toothpick into the centre. The banana bread is ready when the toothpick comes out clean or with a few moist crumbs.
  • Carefully remove the baking pan from the air fryer.
  • Place the pan on a wire cooling rack and let the bread cool for 10 minutes.
  • Remove the banana bread from the pan.
  • Let it cool completely on the wire cooling rack.
  • Cut the banana bread into four wedges and serve.

Notes & Wine Advice

Serving Suggestions

Serve the banana bread at room temperature with coffee or tea. For dessert, warm each wedge briefly and add vanilla ice cream, whipped cream, or sliced banana. It also makes a rich addition to a brunch table alongside our Air Fryer Buttermilk Biscuits.

Recipe Notes

Use very ripe bananas with plenty of brown spots for the strongest flavour and best sweetness. Do not overmix the batter after combining the wet and dry ingredients. Coating the walnuts and white chocolate with flour helps prevent them from sinking to the bottom.

Variations

Replace the walnuts with pecans, hazelnuts, or almonds. Dark or milk chocolate can replace the white chocolate. Add a pinch of cinnamon, espresso powder, or orange zest for a different flavour. Plain yogurt can replace the buttermilk, but avoid thick Greek yogurt.

Storage

Store the cooled banana bread in an airtight container at room temperature for up to two days or refrigerate it for up to five days. Individual wedges can be frozen for up to two months. Thaw them before reheating briefly in the air fryer or microwave.

Wine Advice

A small glass of Banyuls works well with the cocoa, banana, and white chocolate. A lightly sparkling Moscato dโ€™Asti is a fresher choice when serving the bread with fruit or whipped cream.

Nutrition values

Serving: 1 wedge | Calories: 475 kcal | Carbohydrates: 58 g | Protein: 7 g | Fat: 26 g | Saturated Fat: 7 g | Sodium: 260 mg | Sugar: 38 g
————————————————————————————————–

About Chocolate White Chocolate Banana Bread

Chocolate White Chocolate Banana Bread gives traditional banana bread a richer character by combining ripe bananas with Dutch-process cocoa, white chocolate, and chopped walnuts. The cocoa creates a deep chocolate flavour, while the white chocolate adds creamy pockets of sweetness. Walnuts provide crunch and balance the soft, moist texture of the bread. Because it cooks in the air fryer, this small bake is ready more quickly than a conventional full-size loaf.

The recipe makes four generous wedges and works equally well for breakfast, brunch, an afternoon snack, or dessert. It is especially useful when only one or two ripe bananas remain and switching on a large oven feels unnecessary. A compact round pan allows the batter to cook evenly inside the air fryer basket.

Why Air Fryer Chocolate Banana Bread Works

Air fryer chocolate banana bread benefits from the applianceโ€™s compact cooking chamber and circulating heat. The batter is spread in a shallow 7-inch pan rather than a deep loaf pan. This shorter distance to the centre helps the bread bake through without requiring a high temperature.

Cooking at 310ยฐF allows the centre to set before the top becomes too dark. Cocoa makes visual browning difficult to judge, so checking with a toothpick is more reliable than relying on colour. Insert the toothpick into the thickest central section. A few moist crumbs are acceptable, but wet batter means the bread needs additional cooking time.

Preparing a Moist Chocolate Batter

Ripe bananas supply moisture, sweetness, and much of the breadโ€™s familiar flavour. Bananas with yellow skins covered in brown spots are ideal because they are soft and easy to mash. Mash them thoroughly before adding the sugar, oil, buttermilk, vanilla, and egg. A smooth wet mixture produces a more even crumb.

Dutch-process cocoa has a dark colour and mellow chocolate flavour. It is whisked with the flour, salt, and baking soda so the leavening agent is distributed throughout the batter. Once the wet and dry mixtures meet, whisk only until no dry patches remain. Excessive mixing can develop the flourโ€™s gluten and make Chocolate White Chocolate Banana Bread firm instead of tender.

Keeping the Chocolate and Walnuts Evenly Distributed

Chopped white chocolate and walnuts are heavier than the surrounding batter and may sink during cooking. Tossing them with the reserved flour gives their surfaces a light coating that helps them remain suspended. Fold them into the batter gently and make sure they are distributed throughout the bowl before transferring everything to the baking pan.

Use chopped white chocolate rather than very large pieces. Smaller pieces distribute their sweetness more evenly and are less likely to collect at the bottom. The walnuts should also be chopped into similar-sized pieces. Pecans, almonds, or hazelnuts can be used when walnuts are unavailable.

Cooling and Serving

Allow the bread to rest in the pan for 10 minutes after cooking. This gives the soft crumb time to firm and makes removal easier. Transfer it to a wire rack afterward so air can circulate underneath. Cutting the bread while it is still very hot may cause the centre to compress or crumble.

Serve air fryer chocolate banana bread plain or with butter, fresh berries, or sliced banana. For dessert, warm a wedge briefly and serve it with vanilla ice cream. A larger brunch spread can also include our Air Fryer Buttermilk Biscuits.

Storage and Food Safety

Let the banana bread cool completely before placing it in an airtight container. Store it at room temperature for up to two days or refrigerate it for up to five days. To freeze it, wrap the individual wedges and place them in a freezer-safe container for up to two months.

Thaw frozen portions in the refrigerator or at room temperature before reheating. Follow current FDA safe food-handling guidance when working with eggs and dairy ingredients and when cooling and storing baked goods.

Chocolate White Chocolate Banana Bread combines a moist banana crumb with rich cocoa, creamy chocolate, and crunchy walnuts. Its compact size and straightforward air fryer method make it a practical choice whenever you want homemade banana bread without baking a full-size loaf.


Air Fryer Buttermilk Biscuits

Air fryer buttermilk biscuits with golden tops and soft fluffy centres

Air Fryer Buttermilk Biscuits

Air Fryer Buttermilk Biscuits are golden, fluffy, and tender with rich buttery layers. These Southern-style biscuits cook in small batches and are ready in less than 30 minutes per batch.
Couverts4 servings
Preparation 10 minutes
Preparation time:36 minutes
estimated costs pp $0.85
Deel op Facebook Print Recipe

Equipment

  • Round Biscuit Cutter, 2-Inch
  • Large mixing bowl
  • Measuring cups
  • Measuring spoons
  • Silicone spatula
  • Whisk

Ingredients

  • 2ยฝ cups All-Purpose Flour
  • 1 tablespoon Baking Powder
  • ยฝ teaspoon Baking Soda
  • 1 cup Buttermilk chilled
  • 1 teaspoon Kosher Salt
  • 1 teaspoon Granulated Sugar
  • 8 tablespoons Unsalted Butter chilled and cut into small cubes

Instructions

  • Whisk the all-purpose flour, baking powder, baking soda, kosher salt, and granulated sugar together in a large mixing bowl.
  • Add the chilled butter cubes to the flour mixture.
  • Work the butter into the flour with your fingertips until pea-sized pieces remain.
  • Pour the chilled buttermilk over the flour mixture.
  • Mix gently with a silicone spatula until the dough is just combined.
  • Transfer the dough to a lightly floured work surface.
  • Pat the dough into a disk approximately ยฝ inch thick.
  • Cut out 16 biscuits with a 2-inch round biscuit cutter.
  • Gather and gently reshape the scraps when necessary.
  • Preheat the air fryer to 325ยฐF (163ยฐC).
  • Arrange 8 biscuits in a single layer in the air fryer basket with their edges just touching.
  • Air fry for approximately 18 minutes until golden brown and fluffy.
  • Transfer the cooked biscuits to a serving basket.
  • Repeat with the remaining biscuits.
  • Serve the biscuits warm.

Notes & Wine Advice

Serving Suggestions

Serve the biscuits warm with butter, honey, fruit preserves, or sausage gravy. They also work well alongside fried chicken, soup, stew, or scrambled eggs. For a generous brunch, pair them with our Caramel Apple Raisin Strata.

Recipe Notes

Keep the butter and buttermilk thoroughly chilled until needed. Mix the dough only until it holds together because overmixing can make the biscuits dense. Press the cutter straight down without twisting so the edges can rise evenly.

Variations

Add grated cheddar, chopped chives, cracked black pepper, or dried herbs to the flour mixture. Brush the warm biscuits with melted butter for a softer and richer top. Smaller biscuits will cook more quickly, so check them several minutes earlier.

Freezing Instructions

Freeze unbaked biscuits in a single layer before transferring them to an airtight container. Store them for up to one month. Cook from frozen and add several minutes to the air-frying time. Cooked biscuits can also be frozen and reheated briefly in the air fryer.

Wine Advice

A lightly oaked Chardonnay complements the buttery flavour and tender crumb. When serving the biscuits with a sweet brunch, choose a gently sparkling Moscato dโ€™Asti.

Nutrition values

Serving: 4 biscuit | Calories: 515 kcal | Carbohydrates: 80 g | Protein: 12 g | Fat: 18 g | Saturated Fat: 11 g | Sodium: 1180 mg | Sugar: 4 g
————————————————————————————————–

About Air Fryer Buttermilk Biscuits

Air Fryer Buttermilk Biscuits deliver the tender crumb, buttery flavour, and golden surface associated with traditional Southern baking. Instead of heating a full-size oven, this recipe uses circulating hot air to bake a small batch efficiently. The finished biscuits are compact enough to serve like dinner rolls but still have the soft interior and crisp edges expected from a homemade biscuit.

The recipe makes 16 small biscuits, which provides four biscuits per serving when divided among four people. They are suitable for breakfast, brunch, or as a side dish with a savoury dinner. Because the biscuits cook in two batches, every piece receives enough airflow to rise and brown properly.

Why Southern Air Fryer Biscuits Work

Cold ingredients are essential to the texture of Southern air fryer biscuits. Small pieces of chilled butter remain suspended throughout the dough. As the biscuits cook, the butter melts and releases steam, creating light pockets inside the crumb. Chilled buttermilk helps keep the butter firm during mixing and supplies acidity that reacts with the baking soda.

Baking powder provides additional lift, while a small amount of sugar supports browning without making the biscuits noticeably sweet. Kosher salt balances the richness of the butter and enhances the mild tang of the buttermilk. Each ingredient has a clear purpose, so accurate measuring produces the most dependable result.

Mixing and Shaping the Dough

Work the butter into the dry ingredients with your fingertips until pea-sized pieces remain. The mixture should not become completely smooth. Visible pieces of butter are desirable because they help create a flaky texture. Add the buttermilk and mix gently with a silicone spatula only until the dough comes together.

Transfer the dough to a lightly floured surface and pat it into a disk approximately ยฝ inch thick. Avoid pressing too firmly or repeatedly kneading the dough. Cut the Air Fryer Buttermilk Biscuits by pushing the cutter straight downward. Twisting the cutter can seal the edges and restrict the rise.

Getting an Even Golden Finish

Arrange the biscuits in a single layer with their edges just touching. This provides light support as they rise while still allowing hot air to circulate around them. Do not stack the dough or crowd the basket. Cooking eight biscuits at a time gives more consistent results than trying to fit the entire batch into a standard air fryer.

Air fryer models differ in power and basket design, so begin checking near the end of the stated cooking time. The biscuits should be golden on the surface and baked through in the centre. If the tops brown too quickly, reduce the temperature slightly for the second batch.

Serving and Storage

Serve Southern air fryer biscuits while they are still warm. Butter, honey, jam, and fruit preserves are simple choices for breakfast. For a savoury meal, pair them with eggs, sausage gravy, soup, chilli, fried chicken, or slow-cooked meat. They also complement our Caramel Apple Raisin Strata on a larger brunch table.

Store cooled biscuits in an airtight container for up to two days or freeze them for up to one month. Reheat them briefly in the air fryer to refresh the surface without drying the centre. Unbaked biscuits can also be frozen individually and cooked directly from frozen with a slightly longer cooking time.

Follow current FDA safe food-handling guidance when storing biscuits and handling dairy ingredients. With cold butter, gentle mixing, and enough space in the basket, Air Fryer Buttermilk Biscuits provide reliable homemade results without switching on the oven.


Tomato Corn Frittata

Tomato corn frittata with melted cheese and creamy avocado basil dressing

Tomato Corn Frittata

Tomato Corn Frittata is a colourful air fryer breakfast filled with cherry tomatoes, sweet corn, dill, and melted Monterey Jack cheese. A creamy avocado basil dressing adds a fresh finish to this easy summer meal.
Couverts4 servings
Preparation 15 minutes
Preparation time:20 minutes
Draining and Resting Time 15 minutes
Total time 50 minutes
estimated costs pp $2.40
Deel op Facebook Print Recipe

Equipment

Ingredients

For the Frittata

  • ยพ cup Cherry Tomatoes halved
  • ยพ cup Corn Kernels fresh or thawed
  • โ…“ cup plus 1 tablespoon Whole Milk
  • 1ยฝ tablespoons Fresh Dill finely chopped
  • 10 large Eggs lightly beaten
  • ยพ cup Monterey Jack Cheese grated
  • Kosher Salt to taste
  • Black Pepper freshly ground

For the Avocado Dressing

  • 1ยฝ medium Avocados pitted and peeled
  • 3 tablespoons Fresh Lime Juice
  • โ…“ cup plus 1 tablespoon Olive Oil
  • 12 leaves Fresh Basil finely chopped
  • 2 medium Green Onions finely chopped
  • Kosher Salt to taste

Instructions

  • Place the halved cherry tomatoes in a colander and sprinkle them lightly with kosher salt.
  • Let the tomatoes drain for 10 minutes to remove excess moisture.
  • Preheat the air fryer to 300ยฐF (150ยฐC).
  • Transfer the drained tomatoes to a medium mixing bowl.
  • Add the corn, milk, dill, and beaten eggs.
  • Season the mixture with salt and black pepper and whisk until combined.
  • Pour the egg mixture into a greased 8-inch round air fryer pan.
  • Place the pan carefully in the air fryer basket.
  • Air fry at 300ยฐF (150ยฐC) for 15 minutes.
  • Sprinkle the Monterey Jack cheese evenly over the frittata.
  • Increase the temperature to 315ยฐF (157ยฐC).
  • Cook for another 5 minutes until the cheese has melted and the eggs are set.
  • Mash the avocado with the lime juice in a clean mixing bowl.
  • Stir in the olive oil, basil, green onions, and salt until creamy.
  • Remove the pan carefully from the air fryer.
  • Let the frittata rest for 5 minutes before cutting it into wedges.
  • Serve the warm frittata with the avocado dressing.

Notes & Wine Advice

Serving Suggestions

Serve the frittata warm with avocado dressing spooned over each wedge. Add toasted bread, roasted potatoes, fresh fruit, or a simple green salad. For a larger brunch, serve it alongside our Crispy Breakfast Chimichangas.

Recipe Notes

Salting and draining the tomatoes prevents excess moisture from making the eggs watery. Use an air fryer pan that fits comfortably inside the basket with enough space around it for airflow. The frittata is ready when the centre is set and no liquid egg remains.

Variations

Replace Monterey Jack with cheddar, feta, mozzarella, or goat cheese. Add chopped spinach, roasted bell pepper, jalapeรฑo, or cooked mushrooms. Air-fried corn provides a deeper roasted flavour, but fresh or properly thawed frozen corn also works well.

Wine Advice

A chilled Sauvignon Blanc complements the tomatoes, lime, basil, and avocado. A dry Rosรฉ is another refreshing choice for a summer brunch.

Nutrition values

Serving: 1 wedge with avocado dressing | Calories: 575 kcal | Carbohydrates: 16 g | Protein: 20 g | Fat: 50 g | Saturated Fat: 11 g | Sodium: 510 mg | Sugar: 5 g
————————————————————————————————–
Cuisine; American
Season: Summer
Occasions Breakfast / Weekend

About Tomato Corn Frittata

Tomato Corn Frittata is a colourful air fryer breakfast that combines juicy cherry tomatoes, sweet corn, fresh dill, eggs, and melted Monterey Jack cheese. A creamy avocado dressing with lime, basil, and green onions brings freshness to every serving. The result is a satisfying summer meal with a soft centre, a lightly golden top, and a pleasant balance between rich eggs and vibrant vegetables.

Cooking the frittata in an air fryer means there is no need to heat a full-size oven. The compact cooking chamber heats efficiently and surrounds the pan with circulating hot air. This makes the recipe particularly convenient during warm weather, when tomatoes and corn are at their best and keeping the kitchen cool is especially welcome.

Why This Air Fryer Vegetable Frittata Works

The tomatoes receive a small but important preparation step before they enter the egg mixture. Sprinkling them with salt and letting them stand in a colander draws out excess moisture. This concentrates their flavour and prevents released tomato juice from making the frittata watery. After 10 minutes, the tomatoes are ready to combine with the corn, milk, dill, and eggs.

The air fryer vegetable frittata cooks first at 300ยฐF so the eggs can set gently without becoming rubbery. Monterey Jack cheese is added near the end and the temperature is increased slightly. This allows the cheese to melt while the centre finishes cooking. The two-stage method produces a tender interior and an evenly finished surface.

Preparing the Avocado Dressing

The avocado dressing provides a creamy contrast without needing mayonnaise or heavy cream. Ripe avocado is mashed with fresh lime juice before olive oil, basil, green onions, and salt are added. Lime juice contributes brightness and also slows the browning of the avocado. For the smoothest result, use avocados that yield slightly when gently pressed.

Prepare the dressing while the Tomato Corn Frittata cooks so it remains fresh. A rustic texture works well, but you can blend the ingredients when you prefer a completely smooth dressing. If it becomes too thick, add a teaspoon of water or additional lime juice. Taste before serving and adjust the salt carefully because the cheese already adds seasoning.

Serving Ideas and Variations

Cut the frittata into four substantial wedges and spoon avocado dressing over each portion. Toast, roasted potatoes, fresh fruit, or a green salad can turn it into a complete brunch. For a more generous breakfast spread, pair it with our Crispy Breakfast Chimichangas.

The vegetables and cheese are easy to vary. Feta creates a tangier result, while cheddar provides a stronger savoury flavour. Baby spinach, roasted peppers, mushrooms, jalapeรฑos, or chopped zucchini can be added in moderate quantities. Vegetables containing considerable moisture should be cooked or drained before being mixed with the eggs.

Storage and Safe Reheating

Allow leftover air fryer vegetable frittata to cool before transferring it to a covered container. Refrigerate it for up to three days. Store the avocado dressing separately and press food-safe wrap against its surface to limit contact with air. Some natural discolouration may still occur, but the lime juice helps slow this process.

Reheat individual wedges gently in the air fryer or microwave until hot throughout. Avoid prolonged reheating because eggs can become firm and dry. The frittata can also be enjoyed cold or at room temperature, making it suitable for packed lunches and picnics. Follow current FDA safe food-handling guidance when preparing, cooling, storing, and reheating egg dishes.

Tomato Corn Frittata offers fresh summer flavour, flexible ingredients, and efficient air fryer preparation. The combination of sweet vegetables, melted cheese, tender eggs, and creamy avocado dressing makes it equally suitable for breakfast, brunch, or a light dinner.