Air Fried Hasselback Potatoes with Chive Pesto

Hasselback potatoes are a visually striking and delicious side dish known for their crispy edges and soft interior. This hasselback potatoes recipe uses the air fryer to create perfectly cooked potatoes with a golden exterior and tender center.

What makes hasselback potatoes so appealing is their unique structure. The thin slices allow heat to circulate between the layers, creating a combination of crisp edges and fluffy potato inside. The air fryer enhances this effect by delivering even heat and a beautifully roasted finish.

The chive pesto adds a fresh and vibrant element to the dish. Made with herbs, garlic, nuts, and cheese, it brings brightness and depth that complements the richness of the potatoes. The addition of sour cream adds a creamy contrast, balancing the flavors perfectly.

If you are putting together a complete meal, these potatoes pair well with BBQ chicken recipes or grilled vegetables. They add a flavorful and visually appealing side to your table.

When preparing potatoes and fresh herbs, it is important to handle ingredients properly and cook them thoroughly. For more food safety information, refer to the FDA.

Why hasselback potatoes work so well in the air fryer

Hasselback potatoes are ideal for the air fryer because of their sliced structure. The gaps between the slices allow hot air to circulate freely, resulting in evenly cooked potatoes with crispy edges.

This air fryer potatoes method ensures that the outside becomes golden and crisp while the inside remains soft and tender. It also reduces the need for excessive oil compared to traditional roasting.

The chive pesto adds freshness and complexity. Its herbal flavor cuts through the richness of the potatoes, while the walnuts add a subtle crunch.

Another advantage of this hasselback potatoes recipe is its simplicity. The preparation is straightforward, and the ingredients are easy to find, making it suitable for both everyday meals and special occasions.

This dish is also versatile. You can experiment with different herbs, cheeses, or toppings depending on your taste preferences.

Because it works as both a side dish and a light meal, it fits well into a variety of menus.

With its crispy texture, fresh pesto, and creamy topping, hasselback potatoes are a reliable and impressive dish that adds both flavor and presentation to any meal.

hasselback potatoes air fryer with chive pesto on a rustic wooden table

Air Fried Hasselback Potatoes with Chive Pesto

Crispy hasselback potatoes with fresh chive pesto and sour cream.
Couverts4 servings
estimated costs pp $1.90 per serving
Deel op Facebook Print Recipe

Equipment

Ingredients

For the potatoes:

For the pesto:

For serving:

Instructions

  • Slice potatoes thinly without cutting through.
  • Rub with oil, salt, and pepper.
  • Cook in air fryer at 375°F (190°C) for 40 minutes.
  • Blend pesto ingredients until smooth.
  • Serve potatoes with pesto and sour cream.
Notes & Wine Advice

Notes

Cut evenly for best results. Do not cut fully through the potato. Serve immediately for crisp texture.

Variations

Add cheese between slices. Use different herbs for pesto. Top with bacon bits.

Wine Advice

This dish pairs well with a crisp Sauvignon Blanc or a light Pinot Grigio. These wines complement the fresh herbs and richness.

Nutrition values

Calories: 400 kcal | koolhydraten: 35 g | Eiwitten: 6 g | Vet: 28 g | Verzadigd vet: 6 g | Natrium: 420 mg | Suiker: 2 g
————————————————————————————————–
Cuisine; European / Fusion
Season: All Seasons
Occasions Picnic

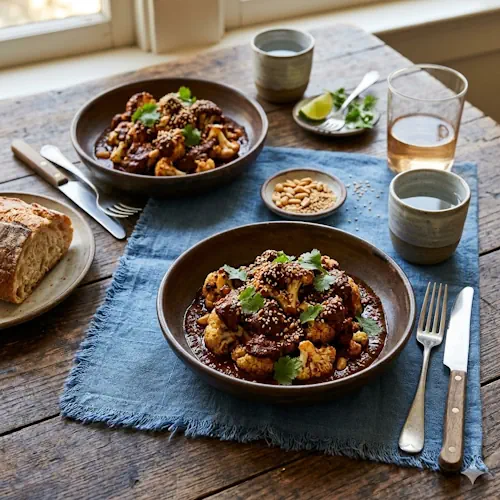
Air Fried Mole Cauliflower

Mole cauliflower is a rich and flavorful dish that brings deep spices and a hint of sweetness together in a modern and simple way. This mole cauliflower recipe uses the air fryer to roast the florets until lightly crisp, while a smooth mole-style sauce adds depth and complexity.

What makes mole cauliflower so special is the balance of flavors. The chile powder brings warmth, the raisins add subtle sweetness, and the peanuts and sesame seeds give the sauce a nutty richness. Together, they create a sauce that coats the cauliflower perfectly without overpowering it.

The air fryer helps the cauliflower develop a lightly charred edge while keeping the inside tender. This contrast in texture makes the dish more satisfying and gives it a roasted, almost grilled character.

If you are building a complete meal, this dish pairs perfectly with BBQ chicken recipes or a simple rice dish. It adds a bold, plant-based option that complements both meat and vegetarian menus.

When working with vegetables and sauces, it is important to handle ingredients properly and cook them thoroughly. For more guidance on safe food preparation, refer to the FDA.

Why mole cauliflower works so well in the air fryer

Mole cauliflower is popular because it transforms simple ingredients into a complex and satisfying dish. The air fryer cooks the cauliflower evenly, allowing it to brown slightly while maintaining its structure.

This air fryer cauliflower method ensures that the florets do not become soggy. Instead, they develop a firm bite that holds up well to the rich sauce.

The mole-style sauce is the highlight of the recipe. It combines spices, sweetness, and nuttiness into a smooth mixture that clings to every piece of cauliflower. The reduction step intensifies the flavor, making the dish feel deeper and more developed.

Another advantage of this mole cauliflower recipe is its versatility. It can be served as a main dish for a vegetarian meal or as a side dish alongside grilled meats or rice.

The preparation is straightforward and does not require advanced techniques. Most of the time is spent roasting the cauliflower and reducing the sauce.

This dish is also adaptable. You can adjust the spice level, add extra sweetness, or include additional toppings such as herbs or seeds.

Because it is both flavorful and plant-based, it fits well into a balanced diet and works for many occasions.

With its bold sauce, tender texture, and satisfying flavor, mole cauliflower is a reliable and impressive dish that brings something different to the table.

Air Fried Mole-Braised Cauliflower on a rustic wooden table

Air Fried Mole Cauliflower

Roasted cauliflower with a rich mole-style sauce made in the air fryer.
Couverts4 servings
Total time 35 minutes
estimated costs pp $1.80 per serving
Deel op Facebook Print Recipe

Equipment

Ingredients

For the cauliflower:

For the mole sauce:

Instructions

  • Toss cauliflower with oil, salt, and pepper.
  • Cook in air fryer at 375°F (190°C) for 10 minutes, stirring halfway.
  • Blend all sauce ingredients until smooth.
  • Simmer sauce for 3 to 5 minutes until reduced.
  • Pour sauce over cauliflower and mix.
  • Cook for 5 more minutes until coated and slightly charred.
  • Serve warm.

Notes & Wine Advice

Notes

Cut cauliflower evenly for consistent cooking.
Do not overcook to keep texture firm.
Stir halfway for even roasting.

Variations

Add cocoa powder for a deeper mole flavor.
Use almonds instead of peanuts.
Top with fresh cilantro.

Wine Advice

This dish pairs well with a light Pinot Noir or a smooth Chardonnay.
These wines complement the spicy and nutty flavors.

Nutrition values

Calories: 200 kcal | koolhydraten: 16 g | Eiwitten: 6 g | Vet: 14 g | Verzadigd vet: 3 g | Natrium: 390 mg | Suiker: 7 g
————————————————————————————————–

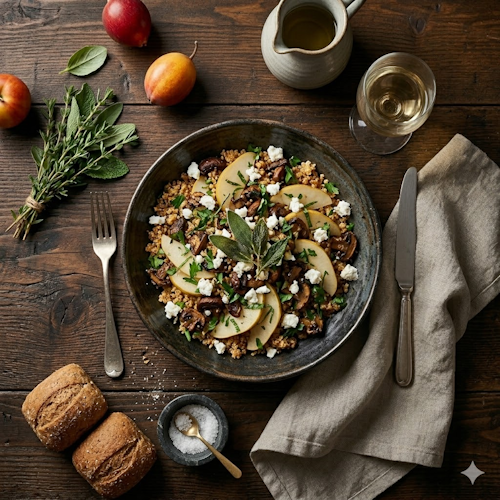
Air Fried Crispy Quinoa Salad with Mushrooms and Pear

Crispy quinoa salad is a fresh and flavorful dish that combines texture, brightness, and crunch in every bite. This crispy quinoa salad uses air-fried quinoa and mushrooms to create a warm, toasted base that pairs beautifully with fresh herbs, juicy pear, and creamy goat cheese.

What makes this crispy quinoa salad stand out is the contrast in textures. The quinoa becomes lightly crispy in the air fryer, while the mushrooms add a savory depth. The pear introduces sweetness and freshness, and the herbs bring a fragrant finish that lifts the entire dish.

If you are creating a balanced meal, this salad pairs perfectly with BBQ chicken recipes. It works as a refreshing side that complements grilled dishes without feeling heavy.

When preparing grains and fresh ingredients, it is important to handle them properly and keep everything clean. For more food safety guidance, refer to the FDA.

Why crispy quinoa salad is a great choice

Crispy quinoa salad is popular because it offers a mix of healthy ingredients and satisfying textures. The air fryer transforms cooked quinoa into a lightly toasted, nutty base that feels more interesting than traditional salads.

The mushrooms absorb the seasoning and develop a rich, slightly caramelized flavor. Combined with garlic and chili flakes, they add warmth and depth without overpowering the dish.

Fresh herbs like parsley, mint, and sage bring brightness and complexity. They balance the richness of the olive oil and goat cheese while enhancing the overall freshness.

The pear adds a subtle sweetness and a juicy bite. This contrast works especially well with the savory and slightly spicy components of the salad.

Another advantage is versatility. This crispy quinoa salad can be served warm or at room temperature, making it suitable for different occasions. It works as a side dish, a light lunch, or part of a larger spread.

Preparation is straightforward and does not require complicated steps. Once the quinoa mixture is air fried, the remaining ingredients come together quickly.

With its combination of crisp texture, fresh herbs, and balanced flavors, crispy quinoa salad is a modern and satisfying dish that fits perfectly into a healthy and flavorful menu.

crispy quinoa salad with mushrooms pear and herbs on a rustic wooden table

Air Fried Crispy Quinoa Salad with Mushrooms and Pear

Crispy quinoa salad with mushrooms, herbs, pear, and goat cheese.
Couverts4 servings
Total time 45 minutes
estimated costs pp $2.40 per serving
Deel op Facebook Print Recipe

Equipment

Ingredients

For the quinoa base:

For the seasoning:

For the salad:

Instructions

  • Combine quinoa, mushrooms, olive oil, salt, and pepper in a bowl.
  • Transfer to a pan and place in the air fryer.
  • Cook at 350°F (175°C), stirring every 5 minutes.
  • During the last 5 minutes, add chili flakes, sage, and garlic.
  • Cook until lightly crispy, about 20 minutes total.
  • Return mixture to bowl.
  • Add lemon juice, parsley, mint, and pear.
  • Toss well and season to taste.
  • Top with goat cheese and serve.

Notes & Wine Advice

Notes

Use cooled quinoa for the best crispy result.
Do not overcrowd the air fryer for even cooking.
Serve slightly warm or at room temperature.

Variations

Add roasted nuts for extra crunch.
Replace pear with apple for a different sweetness.
Use feta instead of goat cheese.

Wine Advice

This salad pairs well with a fresh Pinot Grigio or a crisp Sauvignon Blanc.
These wines enhance the fresh herbs and light acidity of the dish.>

Nutrition values

Calories: 340 kcal | koolhydraten: 30 g | Eiwitten: 10 g | Vet: 20 g | Verzadigd vet: 6 g | Natrium: 320 mg | Suiker: 6 g
————————————————————————————————–

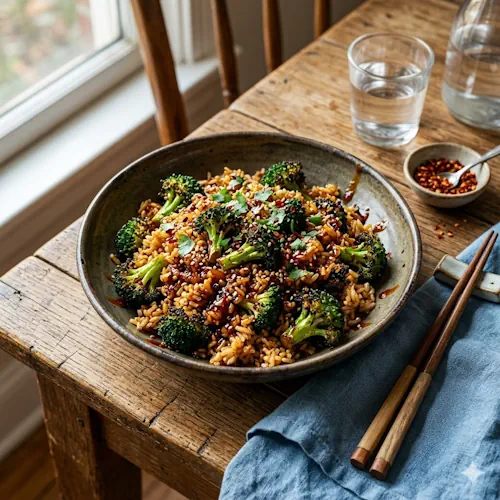
Air Fried General Tso Broccoli Rice

General Tso broccoli rice is a bold and flavorful dish that brings sweet, spicy, and savory elements together in one satisfying bowl. This General Tso broccoli rice recipe uses the air fryer to create a lightly crispy texture while keeping the rice fluffy and the broccoli tender.

What makes General Tso broccoli rice so appealing is the balance of flavors. The sauce combines tangy rice vinegar, rich tomato paste, and savory soy sauce with garlic and ginger for depth. The addition of chili flakes provides a gentle heat that complements the sweetness of the sauce.

The air fryer enhances the texture of the dish. It allows the rice to toast slightly while the broccoli develops a light char. This air fryer rice method creates a more dynamic bite compared to traditional stir-frying.

If you are building a varied menu, this dish pairs perfectly with BBQ chicken recipes or other vegetable sides. It works well as a main dish or as part of a larger spread.

When preparing rice dishes, it is important to handle and store rice properly to avoid food safety risks. Always cool and reheat rice correctly. For more guidance, refer to the FDA.

Why General Tso broccoli rice works so well in the air fryer

General Tso broccoli rice is ideal for the air fryer because it benefits from even heat distribution. The air fryer helps the rice develop a slightly crispy texture while keeping the inside soft and fluffy.

This air fryer broccoli rice approach ensures that the broccoli cooks evenly without becoming mushy. Instead, it retains a slight bite that contrasts nicely with the rice.

The sauce is the highlight of the dish. It thickens quickly on the stovetop and coats the rice evenly, delivering a bold combination of sweet, tangy, and spicy flavors.

Another advantage of this General Tso broccoli rice recipe is its simplicity. The ingredients are easy to prepare, and the cooking process is straightforward, making it suitable for quick meals.

This dish is also versatile. You can adjust the spice level, add extra vegetables, or include protein such as tofu for variation.

Because it is plant-based and filling, it works well for both lunch and dinner. It is especially useful when you want a quick and satisfying meal with minimal effort.

With its bold sauce, crispy texture, and balanced flavor profile, this flavorful broccoli rice dish is a reliable option that adds variety and excitement to your menu.

general tso broccoli rice air fryer with spicy sauce on a rustic wooden table

Air Fried General Tso Broccoli Rice

Crispy rice with broccoli and a bold General Tso style sauce.
Couverts4 servings
Total time 37 minutes
estimated costs pp $1.70 per serving
Deel op Facebook Print Recipe

Equipment

Ingredients

For the rice:

For the sauce:

Instructions

  • Mix rice, broccoli, oil, and seasoning.
  • Cook in air fryer at 350°F (175°C) for 12 minutes, stirring every 5 minutes.
  • Simmer sauce ingredients until thickened.
  • Serve rice with sauce.

Notes & Wine Advice

Notes

Use cooled rice for best texture.
Stir regularly for even crisping.
Do not overcook the broccoli.

Variations

Add tofu for extra protein.
Use brown rice instead.
Adjust spice level to taste.

Wine Advice

This dish pairs well with a slightly sweet Riesling or a fresh Pinot Grigio.
These wines balance the sweet and spicy flavors.

Nutrition values

Calories: 380 kcal | koolhydraten: 54 g | Eiwitten: 7 g | Vet: 16 g | Verzadigd vet: 4 g | Natrium: 620 mg | Suiker: 9 g
————————————————————————————————–
Cuisine; Asia / China
Season: All Seasons
Diets; Vegetarian
Occasions Game Day

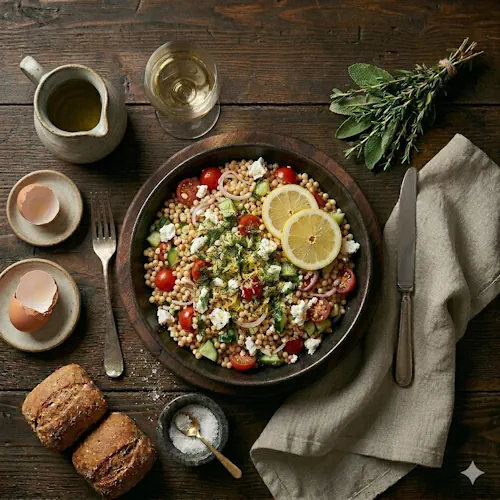
Air Fried Couscous Salad with Lemon and Feta

Couscous salad is a fresh and vibrant dish that combines light textures with bright citrus flavors. This couscous salad recipe uses the air fryer to create a slightly crispy base, which pairs perfectly with juicy vegetables, tangy lemon, and creamy feta cheese.

What makes this couscous salad so appealing is the contrast between warm and fresh ingredients. The couscous develops a lightly toasted texture, while the cucumber and tomatoes add freshness and crunch. The lemon brings acidity that lifts the entire dish, creating a balanced and refreshing result.

If you are building a complete meal, this salad pairs beautifully with BBQ chicken recipes. It works as a light side dish that complements richer flavors without overpowering them.

When preparing fresh ingredients, it is important to wash and store them properly to maintain quality and safety. For more guidance, refer to the FDA.

Why couscous salad is a great choice

Couscous salad is popular because it offers a unique texture compared to traditional salads. The air fryer gives the couscous a slightly crispy bite, which makes the dish more interesting and satisfying.

The combination of lemon and red wine vinegar adds a bright and tangy flavor. This acidity balances the richness of the olive oil and feta cheese, creating a well-rounded taste.

The vegetables play an important role by adding both color and freshness. Cherry tomatoes provide sweetness, while cucumber adds a cool and crisp element that contrasts nicely with the warm couscous.

Feta cheese brings a creamy and slightly salty component that enhances the overall flavor. Its texture also complements the light crunch of the couscous.

Another advantage of this couscous salad is its versatility. It can be served warm or at room temperature, making it suitable for different occasions such as lunch, dinner, or gatherings.

Preparation is simple and does not require complicated techniques. Once the couscous is toasted, the remaining ingredients come together quickly.

This recipe is also easy to adapt. You can add extra herbs, include nuts for crunch, or swap feta for another cheese depending on your preference.

Because it is light yet satisfying, this dish fits well into a balanced diet and works for a variety of meals.

With its fresh ingredients, bright flavors, and lightly crispy texture, couscous salad is a reliable and refreshing dish for any occasion.

Air Fried Toasted Couscous and Lemon Salad with Cucumbers and Feta on rustic wooden table

Air Fried Couscous Salad with Lemon and Feta

Fresh couscous salad with lemon, vegetables, and feta with a lightly crispy texture.
Couverts4 servings
Total time 45 minutes
estimated costs pp $2.20 per serving
Deel op Facebook Print Recipe

Equipment

Ingredients

For the couscous:

For the salad:

For the lemon:

Instructions

  • Chop two slices of lemon and mix with couscous and olive oil.
  • Season with salt and pepper.
  • Place in air fryer and cook at 350°F (175°C) for 20 minutes, stirring every 5 minutes.
  • Return couscous to bowl.
  • Add vinegar, tomatoes, shallot, and cucumber.
  • Grate lemon zest over the mixture.
  • Season and toss well.
  • Top with feta and dill and serve.

Notes & Wine Advice

Notes

Use cooled couscous for the best crispy texture. Stir regularly during cooking for even browning. Serve slightly warm or at room temperature.

Variations

Add olives for extra Mediterranean flavor. Use goat cheese instead of feta. Add nuts for additional crunch.

Wine Advice

This salad pairs well with a crisp Sauvignon Blanc or a fresh Pinot Grigio. These wines complement the citrus and fresh herbs beautifully.

Nutrition values

Calories: 320 kcal | koolhydraten: 31 g | Eiwitten: 9 g | Vet: 19 g | Verzadigd vet: 7 g | Natrium: 380 mg | Suiker: 3 g
————————————————————————————————–

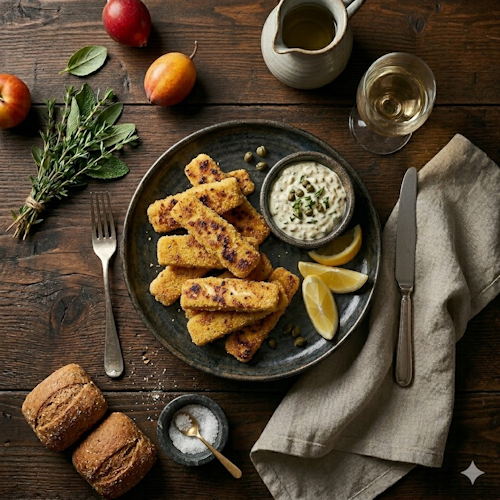
Air Fried Cornmeal-Crusted Trout Fingers with Tartar Sauce

Cornmeal-crusted trout fingers are a crispy and flavorful seafood option that is perfect for a quick and satisfying meal. This cornmeal-crusted trout fingers recipe uses the air fryer to create a golden, crunchy coating while keeping the fish tender and juicy inside.

What makes cornmeal-crusted trout fingers so appealing is the texture. The cornmeal coating gives a satisfying crunch, while the trout remains soft and flaky. The light spice from cayenne and black pepper adds just enough heat to enhance the natural flavor of the fish without overpowering it.

If you are preparing a balanced meal, these trout fingers pair perfectly with BBQ chicken recipes or a fresh green salad. They bring a lighter seafood option to a table often dominated by heavier dishes.

Proper handling of fish is essential to ensure safety and quality. Always cook fish thoroughly and store it correctly. For more information about safe food preparation, refer to the FDA.

Why cornmeal-crusted trout fingers are a great choice

Cornmeal-crusted trout fingers are popular because they combine ease of preparation with excellent flavor. The air fryer reduces the need for excess oil while still delivering a crisp exterior.

The coating mixture is simple but effective. Cornmeal provides crunch, while flour and baking powder help create a light, even crust. The seasoning blend adds depth and balance.

The tartar sauce completes the dish. Its creamy base combined with capers, tarragon, and lemon juice creates a tangy contrast that complements the crispy fish perfectly.

Another advantage is versatility. These trout fingers can be served as a main dish, a snack, or even as part of a larger spread. They are easy to portion and serve, making them ideal for family meals or gatherings.

Preparation is straightforward and does not require complicated techniques. The air fryer ensures consistent results and reduces cooking time.

With their crispy coating, tender interior, and refreshing sauce, cornmeal-crusted trout fingers are a reliable and delicious seafood option.

Krokante trout fingers op een robuuste houten serveerplank met tartaarsaus en citroenpartjes, op een rustieke houten tafel.

Air Fried Cornmeal-Crusted Trout Fingers with Tartar Sauce

Crispy trout fingers with a golden cornmeal crust served with tangy tartar sauce.
Couverts4 servings
estimated costs pp $3.90 per serving
Deel op Facebook Print Recipe

Equipment

Ingredients

For the coating:

For the fish:

For the tartar sauce:

Instructions

  • Preheat the air fryer to 400°F (200°C).
  • Mix all coating ingredients in a bowl.
  • Dip trout strips in egg, then coat in cornmeal mixture.
  • Place on a rack and spray with cooking spray.
  • Cook in batches for 6 minutes until golden and cooked through.
  • Mix all tartar sauce ingredients in a bowl.
  • Serve fish hot with tartar sauce and lemon wedges.

Notes & Wine Advice

Notes

Use fresh trout for the best flavor. Do not overcrowd the air fryer basket. Serve immediately for maximum crispiness.

Variations

Use cod or salmon instead of trout. Add extra spices for a stronger flavor. Serve with spicy mayo instead of tartar sauce.

Wine Advice

This dish pairs perfectly with a crisp Sauvignon Blanc or a fresh Pinot Grigio. These wines enhance the crispy texture and fresh flavors of the fish.

Nutrition values

Calories: 580 kcal | koolhydraten: 39 g | Eiwitten: 32 g | Vet: 34 g | Verzadigd vet: 7 g | Natrium: 640 mg | Suiker: 1 g
————————————————————————————————–

Air Fried Tandoori Salmon with Potatoes

Tandoori salmon is a bold and aromatic dish that brings warm spices and fresh seafood together in a simple and modern way. This tandoori salmon recipe uses the air fryer to create a perfectly cooked fillet with a lightly crisp exterior while keeping the inside tender and juicy.

What makes this tandoori salmon so appealing is the spice blend. Ingredients like turmeric, cumin, ginger, and paprika create a deep and fragrant flavor that enhances the natural taste of the fish. The result is a dish that feels rich, yet balanced and fresh.

The addition of potatoes makes this recipe a complete meal. The potatoes cook alongside the fish, becoming soft on the inside and lightly crisp on the outside. This combination creates a satisfying and well-rounded plate.

If you are building a varied meal, this dish pairs well with BBQ chicken recipes or a fresh green salad. It adds a lighter, spice-forward option to your menu.

When preparing fish, it is important to cook it properly and handle it safely. Always ensure the salmon is cooked through and stored correctly. For more guidance, refer to the FDA.

Why tandoori salmon works so well in the air fryer

Tandoori salmon is popular because it combines bold spices with a quick and efficient cooking method. The air fryer circulates hot air evenly, allowing the salmon to cook consistently while maintaining moisture.

The spice mixture creates a flavorful coating that enhances every bite. The mild heat from cayenne and the warmth of ginger add complexity without overpowering the fish.

The potatoes provide balance. Their neutral flavor softens the spices and adds substance to the dish. Cooking them together ensures everything is ready at the same time.

Another advantage of this tandoori salmon recipe is its simplicity. The steps are easy to follow, and the ingredients are widely available. This makes it suitable for both quick dinners and more elaborate meals.

This dish is also flexible. You can adjust the spices, add vegetables, or include fresh herbs for variation.

Because it is both flavorful and nutritious, it fits well into a balanced diet and works for different occasions.

With its aromatic spices, tender fish, and perfectly cooked potatoes, tandoori salmon is a reliable and impressive meal that delivers consistent results.

Air Fried Tandoori Salmon with Potatoes op rustieke houten tafel

Air Fried Tandoori Salmon with Potatoes

Spiced salmon with tender potatoes cooked together in the air fryer.
Couverts4 servings
Total time 53 minutes
estimated costs pp $4.50 per serving
Deel op Facebook Print Recipe

Equipment

Ingredients

Instructions

  • Preheat the air fryer to 375°F.
  • In a bowl, toss the fingerling potatoes with 1 tablespoon of vegetable oil until evenly coated.
  • Season with salt and pepper.
  • Transfer the potatoes to the air fryer basket and cook for 20 minutes or until tender, shaking the basket halfway through to ensure even cooking.
  • In another bowl, combine the remaining 1 tablespoon of vegetable oil with the ground turmeric, ground cumin, ground ginger, smoked paprika, and cayenne pepper.
  • Add the salmon fillets to the spice mixture and turn until fully coated.
  • Once the potatoes have cooked for 20 minutes, place the seasoned salmon fillets, skin-side up, on top of the potatoes in the air fryer basket.
  • Continue cooking for an additional 5 to 8 minutes, or until the salmon is cooked to your desired level of doneness and the salmon skin is slightly crisp.
  • Transfer the salmon fillets and potatoes to serving plates and serve immediately while warm.

Notes & Wine Advice

Notes

Cut potatoes evenly for consistent cooking.
Do not overcook the salmon.
Serve immediately for best texture.

Variations

Add yogurt marinade for extra tenderness.
Use sweet potatoes instead of fingerlings.
Add fresh herbs for extra flavor.

Wine Advice

This dish pairs well with a crisp Sauvignon Blanc or a fresh Riesling.
These wines balance the aromatic spices and richness of the salmon.

Nutrition values

Calories: 480 kcal | koolhydraten: 29 g | Eiwitten: 34 g | Vet: 27 g | Verzadigd vet: 6 g | Natrium: 420 mg | Suiker: 2 g
————————————————————————————————–
Cuisine; Asia / India
Season: All Seasons
Occasions Summerpartys

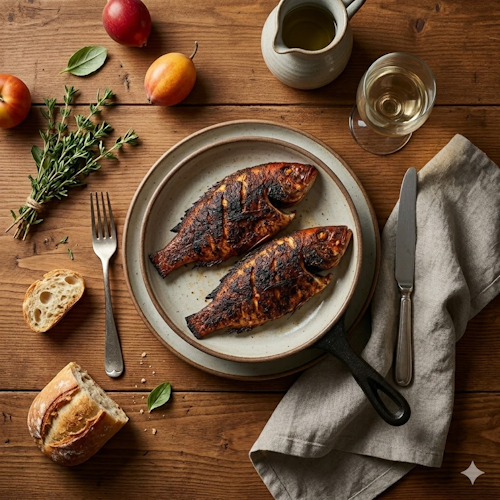
Air Fried Blackened Red Snapper with RéMoulade Sauce

Air fried blackened red snapper is a bold and flavorful dish that brings together spicy seasoning and tender fish in a quick and modern way. This air fried blackened red snapper recipe delivers a perfectly cooked fillet with a slightly crispy exterior and a juicy, flaky inside. The addition of a tangy rémoulade sauce enhances the overall flavor and creates a balanced and satisfying meal.

What makes air fried blackened red snapper stand out is the seasoning. A blend of paprika, cayenne, garlic, and herbs creates a deep, smoky flavor that mimics traditional blackening techniques without needing a heavy pan or excess oil. The air fryer ensures even cooking and a clean finish.

If you are planning a seafood-focused meal, this dish pairs beautifully with BBQ chicken recipes or fresh vegetable sides. It adds variety to your menu while keeping things light and flavorful.

When preparing fish, it is important to cook it to the correct internal temperature and handle it properly. Freshness and hygiene are key. For more detailed food safety guidance, refer to the FDA.

Why air fried blackened red snapper is a great choice

Air fried blackened red snapper is popular because it combines speed, flavor, and simplicity. The air fryer reduces cooking time while still delivering a satisfying texture. The fish cooks evenly and retains its natural moisture.

The spice mix plays a central role in the dish. It forms a flavorful crust that locks in juices and adds a slightly smoky taste. The cayenne pepper provides heat, while the herbs bring balance and freshness.

The rémoulade sauce adds another layer of flavor. Its creamy texture and tangy profile contrast perfectly with the spicy fish. This combination creates a well-rounded dish that feels both rich and refreshing.

Another advantage is how versatile this recipe is. You can adjust the spice level to suit your taste or serve the fish with different sides like rice, salad, or grilled vegetables.

Because the preparation is straightforward, this dish is ideal for both quick weeknight meals and more refined dinners. It delivers restaurant-quality results with minimal effort.

With its bold seasoning, tender texture, and balanced flavors, air fried blackened red snapper is a reliable and impressive seafood option.

air fried blackened red snapper with remoulade sauce on a rustic wooden table

Air Fried Blackened Red Snapper with RéMoulade Sauce

Spicy air fried snapper served with a creamy and tangy rémoulade sauce.
Couverts4 servings
Total time 30 minutes
estimated costs pp $4.20 per serving
Deel op Facebook Print Recipe

Equipment

Ingredients

For the blackened seasoning:

For the fish:

For the rémoulade sauce:

Instructions

  • Mix paprika, salt, onion powder, garlic powder, cayenne, black pepper, oregano, and thyme.
  • Rub fish with oil and coat with seasoning.
  • Preheat air fryer to 375°F (190°C).
  • Cook each fillet for 6 minutes until cooked through.
  • Whisk mayonnaise, mustard, ketchup, hot sauce, Worcestershire sauce, salt, cayenne, and garlic to make the sauce.
  • Serve fish with the sauce on the side.

Notes & Wine Advice

Notes

Use fresh fish for the best flavor and texture. Do not overcook to prevent dryness. Serve immediately after cooking.

Variations

Use cod or tilapia instead of snapper. Add lemon zest for extra freshness. Make it milder by reducing cayenne.

Wine Advice

This dish pairs beautifully with a crisp Sauvignon Blanc or a fresh Riesling. These wines complement the spicy seasoning and tangy sauce.

Nutrition values

Calories: 400 kcal | koolhydraten: 4 g | Eiwitten: 25 g | Vet: 30 g | Verzadigd vet: 6 g | Natrium: 620 mg | Suiker: 2 g
————————————————————————————————–

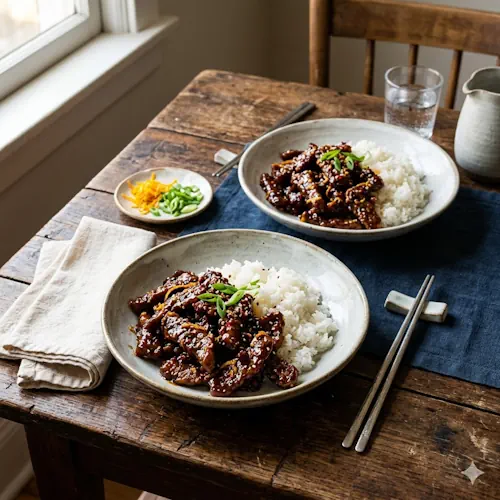
Air Fried Orange Glazed Beef

Orange glazed beef is a bold and flavorful dish that combines sweet citrus notes with savory richness. This orange glazed beef recipe uses the air fryer to create tender strips of beef coated in a glossy, sticky sauce that delivers both sweetness and a subtle kick.

What makes orange glazed beef so appealing is the balance between flavors. The orange marmalade and fresh juice provide sweetness and brightness, while soy sauce and spices bring depth and umami. The result is a dish that feels both comforting and vibrant.

The air fryer plays an important role in this recipe. It helps reduce the sauce quickly while cooking the beef evenly. This air fryer beef method ensures the meat stays tender while the glaze thickens beautifully around it.

Serving the beef over rice completes the dish. The rice absorbs the flavorful sauce, creating a balanced meal with satisfying texture and taste.

If you are building a varied meal, this dish pairs well with BBQ chicken recipes or simple stir-fried vegetables. It adds a sweet and savory option to your table.

When handling raw meat, it is important to follow proper food safety guidelines. Always cook beef thoroughly and store leftovers correctly. For more information, refer to the FDA.

Why orange glazed beef works so well in the air fryer

Orange glazed beef is popular because it delivers strong flavors with minimal effort. The air fryer allows the sauce to reduce quickly while evenly cooking the beef.

This air fryer orange beef technique ensures that each piece is coated in a thick and flavorful glaze. The circulating heat helps the sauce caramelize slightly, enhancing both taste and texture.

The combination of citrus and spice creates a balanced profile. The sweetness of the orange offsets the heat from the hot sauce, while garlic powder adds depth.

Another advantage of this orange glazed beef recipe is its simplicity. The ingredients are easy to prepare, and the cooking process is quick, making it ideal for busy days.

This dish is also flexible. You can adjust the level of spice or sweetness depending on your preference. It can be served as a main dish or combined with other sides for a complete meal.

Because it is both flavorful and satisfying, it works well for both everyday dinners and casual gatherings.

With its glossy glaze, tender beef, and balanced flavor profile, orange glazed beef is a reliable and delicious dish that brings variety to your menu.

orange glazed beef air fryer with rice on a rustic wooden table

Air Fried Orange Glazed Beef

Tender beef in a sweet and spicy orange glaze made in the air fryer.
Couverts4 servings
estimated costs pp $3.40 per serving
Deel op Facebook Print Recipe

Equipment

Ingredients

For the beef:

For serving:

Instructions

  • Mix all ingredients for the beef in a bowl.
  • Transfer to a pan.
  • Preheat air fryer to 375°F (190°C).
  • Cook for 10 minutes, stirring halfway.
  • Serve over rice.

Notes & Wine Advice

Notes

Cut beef evenly for consistent cooking.
Stir halfway to distribute glaze.
Serve immediately for best texture.

Variations

Add vegetables like broccoli or peppers.
Use honey instead of marmalade.
Adjust spice level to taste.

Wine Advice

This dish pairs well with a slightly sweet Riesling or an aromatic Gewürztraminer.
These wines balance the sweet and spicy flavors.

Nutrition values

Calories: 350 kcal | koolhydraten: 25 g | Eiwitten: 20 g | Vet: 15 g | Verzadigd vet: 5 g | Natrium: 540 mg | Suiker: 15 g
————————————————————————————————–
Cuisine; Asia / China
Season: All Seasons
Diets; Dairy-Free
Occasions Game Day

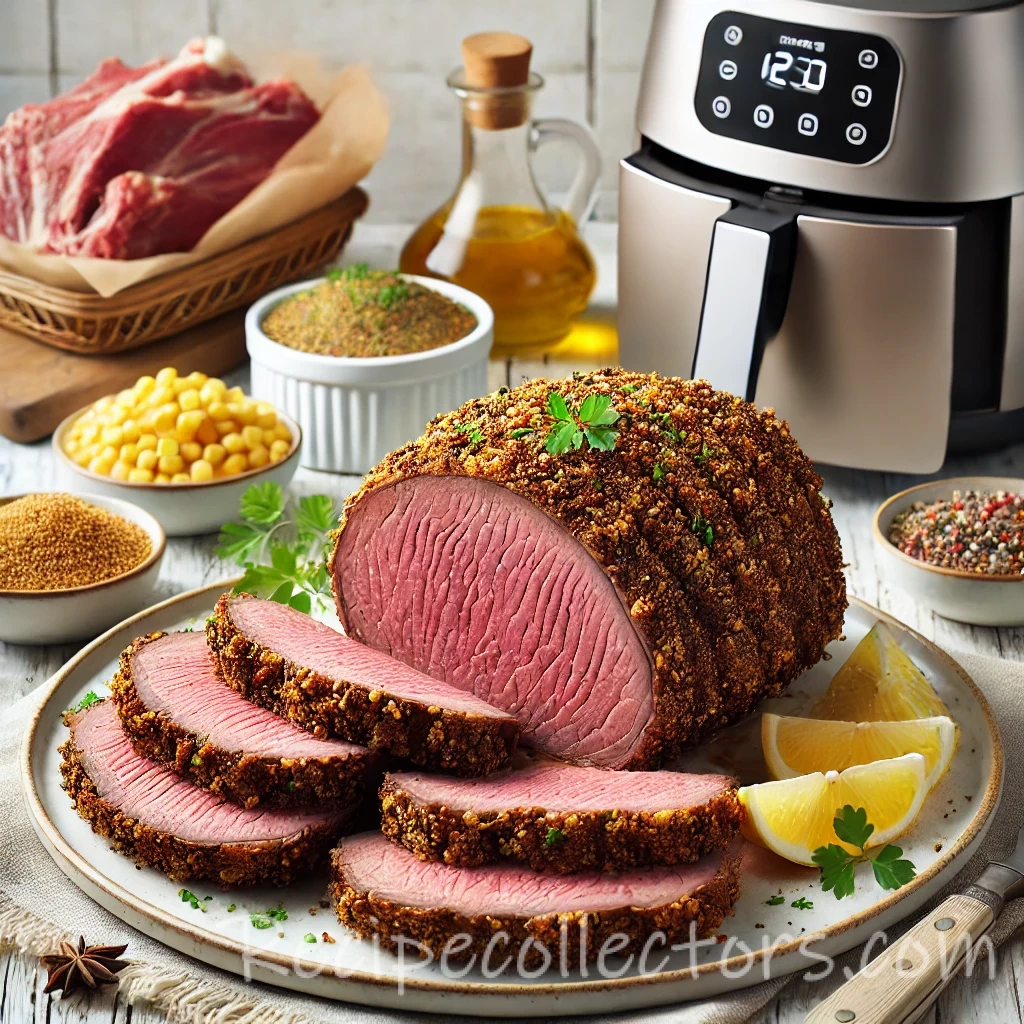
Air Fried Coriander-Crusted Roast Beef

Air Fried Coriander-Crusted Roast Beef

Couverts8
Deel op Facebook Print Recipe

Equipment

  • Airfreyer

Ingredients

Instructions

  • Combine the coriander seeds and black peppercorns in a plastic bag and crush them with a heavy skillet or rolling pin until just cracked open (or use a mortar and pestle).
  • Mix in the vegetable oil and kosher salt to form a spice paste.
  • Spread the spice paste evenly all over the beef top sirloin roast.
  • Preheat the air fryer to 325°F.
  • Transfer the seasoned beef roast to the air fryer basket.
  • Cook at 325°F, turning the roast every 10 minutes, until golden brown and an instant-read thermometer inserted into the middle of the roast reads 125° to 130°F for medium-rare doneness, about 40 minutes.
  • Transfer the cooked beef roast to a cutting board and let it rest for at least 15 minutes.
  • Cut the rested beef into thick slices and serve warm.
  • If not serving immediately or to make sandwiches, wrap the cooled roast in plastic wrap and refrigerate until firm for easier slicing, at least 4 hours and up to 5 days.

Notes & Wine Advice

Wine Advice:

This coriander-crusted roast beef pairs well with a bold red wine such as Cabernet Sauvignon or Syrah. The robust flavors of the wine complement the rich and savory taste of the beef, enhancing the overall dining experience.

Nutrition values

Calories: 300 kcal | koolhydraten: 0 g | Eiwitten: 25 g | Vet: 20 g | Suiker: 0 g
————————————————————————————————–
Cuisine; American
Diets; Dairy-Free