Colorful Roasted Pepper & Garlic Pizza

Roasted pepper garlic pizza with vegan mozzarella and basil

Colorful Roasted Pepper & Garlic Pizza

Colorful Roasted Pepper & Garlic Pizza features sweet bell peppers, creamy roasted garlic, tomato sauce, vegan mozzarella, and fresh basil on a crisp gluten-free crust.
Couverts4 servings
estimated costs pp $2.75
Deel op Facebook Print Recipe

Equipment

  • Baking sheet or pizza stone
  • Knife
  • Rolling Pin
  • spoon

Ingredients

For the Pizza Base

For the Toppings

Instructions

Prepare the Pizza Base

  • Preheat the oven to 220ยฐC (425ยฐF).
  • Place the pizza crust on a baking sheet or preheated pizza stone.
  • Brush the crust evenly with 1 tablespoon extra-virgin olive oil.

Add the Toppings

  • Spread the tomato sauce in a thin, even layer over the pizza crust.
  • Distribute the mashed roasted garlic over the tomato sauce.
  • Arrange the sliced bell peppers evenly over the pizza.
  • Drizzle the toppings with the remaining tablespoon extra-virgin olive oil.
  • Season with salt and black pepper.

Bake and Finish

  • Bake for 10 minutes.
  • Sprinkle the vegan mozzarella evenly over the pizza.
  • Return the pizza to the oven and bake for another 5 to 8 minutes, or until the crust is golden and the cheese has melted.
  • Remove the pizza from the oven.
  • Scatter the chopped basil over the top.
  • Cut into four equal portions and serve hot.

Notes & Wine Advice

Serving Suggestions

Serve with a crisp green salad, grilled courgette, marinated olives, or a simple tomato and cucumber salad. Chilli oil can be offered separately for additional heat.

Recipe Notes

Pat the sliced bell peppers dry before adding them to prevent excess moisture from softening the crust. Use garlic that has already been roasted until tender and lightly caramelised. Check that the pizza crust, tomato sauce, and vegan mozzarella are certified gluten-free when required.

Variations

Use a mixture of red, yellow, and orange bell peppers for extra colour. Add sliced mushrooms, red onion, olives, or chilli flakes. Regular mozzarella can replace the vegan cheese when a dairy-free pizza is not required.

Storage

Store leftover pizza in an airtight container in the refrigerator for up to two days. Reheat it in a hot oven or dry frying pan until the crust is crisp and the topping is thoroughly heated.

Wine Advice

A crisp Sauvignon Blanc balances the sweetness of the peppers and the richness of the roasted garlic. Pinot Grigio is another suitable choice.

Nutrition values

Serving: 1 1/4 pizza | Calories: 330 kcal | koolhydraten: 32 g | Eiwitten: 7 g | Vet: 19 g | Verzadigd vet: 6 g | Natrium: 720 mg | Suiker: 5 g
————————————————————————————————–

Roasted pepper garlic pizza combines sweet bell peppers, mellow roasted garlic, tomato sauce, fresh basil, and vegan mozzarella on a crisp gluten-free base. Roasting transforms the garlic from sharp and pungent into something soft, creamy, and slightly sweet. Together with the colourful peppers, it creates a flavourful vegetable pizza that does not need meat or dairy to feel complete.

Sweet Peppers and Mellow Garlic

Bell peppers become naturally sweeter as they cook. Red, yellow, and orange varieties are particularly suitable because they have a mild flavour and create an attractive mixture of colours. Using more than one colour makes the finished pizza look vibrant without adding extra preparation.

Roasted garlic is noticeably softer than raw garlic. Its flavour becomes nutty and gently caramelised, allowing four cloves to be used without overwhelming the other toppings. Mash the roasted cloves before spreading them over the tomato sauce so that their flavour is distributed throughout the pizza.

For more meat-free inspiration, browse the vegetable recipes collection or discover other creative combinations among the pizza recipes.

Preventing a Soggy Pizza Base

Bell peppers release moisture while cooking. Slice them thinly and pat them dry before placing them on the pizza. If the peppers are especially juicy, sautรฉ them briefly in a dry frying pan before assembling the pizza. This removes some liquid and starts developing their sweetness.

Use only a thin layer of tomato sauce. Too much sauce can soften the centre of the crust, especially when using a gluten-free base. A preheated pizza stone provides the crispest result, but a sturdy metal baking sheet will also work. Allow the oven and pizza stone to become fully hot before baking.

The vegan mozzarella is added during the final minutes because some dairy-free cheeses can dry out or brown too quickly. Different brands melt differently, so check the pizza regularly near the end of the cooking time. Choose a variety designed for melting to achieve the best texture.

A Colourful Vegan Pizza

This vegan bell pepper pizza works well as a light main course for lunch, a relaxed family dinner, or a colourful addition to a party table. Serve it with a green salad, grilled courgette, marinated olives, or a tomato and cucumber salad. Chilli oil can be offered separately for anyone who enjoys additional heat.

Fresh basil should be added after baking. High oven temperatures can darken the leaves and reduce their fresh aroma. Tear or chop the basil shortly before serving and scatter it over the hot pizza. The residual heat releases its fragrance without completely wilting it.

Explore more plant-based meal ideas in the vegan recipes section. When preparing food for someone with allergies or coeliac disease, check every packaged ingredient carefully and follow the FDA safe food handling guidance.

Easy Variations

Add sliced mushrooms, red onion, artichoke hearts, or olives for a more substantial topping. Chilli flakes bring gentle heat, while capers provide a sharper, salty contrast. A small amount of dried oregano can be added to the tomato sauce for a more traditional Italian flavour.

Regular mozzarella may replace the vegan cheese when dairy does not need to be avoided. A traditional wheat crust can also replace the gluten-free base. When making either substitution, update the dietary classification so visitors receive accurate information.

Storage and Reheating

Store leftover pizza in an airtight container in the refrigerator for up to two days. Reheat the slices in a hot oven or dry frying pan until the crust becomes crisp and the topping is thoroughly heated. A microwave works quickly but usually leaves the base softer.

Add a few fresh basil leaves after reheating to restore the bright herbal aroma. With its colourful vegetables and caramelised garlic flavour, roasted pepper garlic pizza offers an easy and satisfying alternative to heavier meat-topped pizzas.

Philly Cheesesteak Pizza

Philly cheesesteak pizza with ribeye, peppers and melted cheese

Philly Cheesesteak Pizza

Philly Cheesesteak Pizza combines tender ribeye steak, sautรฉed bell pepper and onion, creamy mustard sauce, mozzarella, and provolone on a crispy pizza crust.
Couverts4 servings
estimated costs pp $4.50
Deel op Facebook Print Recipe

Equipment

  • Baking sheet or pizza stone
  • Frying pan
  • Mixing Bowl, Small
  • Rolling Pin
  • spatula

Ingredients

For the Pizza Base

  • 1 gluten-free pizza crust
  • 1 tablespoon olive oil

For the Sauce

  • 2 tablespoons mayonnaise
  • 2 tablespoons Dijon mustard

For the Toppings

  • 250 g ribeye steak thinly sliced
  • 1 bell pepper thinly sliced
  • 1/2 onion thinly sliced
  • 1 tablespoon olive oil
  • 200 g mozzarella cheese shredded
  • 100 g provolone cheese shredded
  • Salt to taste
  • Black pepper to taste

Instructions

Prepare the Pizza Base

  • Preheat the oven to 220ยฐC (425ยฐF).
  • Place the pizza crust on a baking sheet or pizza stone.
  • Brush the crust evenly with 1 tablespoon olive oil.

Prepare the Sauce

  • Combine the mayonnaise and Dijon mustard in a small mixing bowl.
  • Stir until smooth.
  • Spread the sauce evenly over the pizza crust.

Cook the Toppings

  • Heat the remaining tablespoon olive oil in a frying pan over medium heat.
  • Add the onion and bell pepper.
  • Sautรฉ for about 5 minutes, or until softened.
  • Transfer the vegetables to a plate and set aside.
  • Add the sliced ribeye to the same frying pan.
  • Cook for 2 to 3 minutes, stirring regularly, until browned.
  • Season with salt and black pepper.
  • Remove the pan from the heat.

Assemble and Bake

  • Distribute the sautรฉed onion, bell pepper, and steak over the pizza crust.
  • Sprinkle the mozzarella and provolone evenly over the toppings.
  • Bake for 12 to 15 minutes, or until the crust is golden and the cheese has melted.
  • Remove the pizza from the oven and let it rest for 2 minutes.
  • Cut into four equal portions and serve hot.

Notes & Wine Advice

Serving Suggestions

Serve with crispy fries, pickles, coleslaw, or a fresh green salad. Add hot sauce or extra Dijon mustard for a sharper finish.

Recipe Notes

Slice the ribeye very thinly so it cooks quickly and remains tender. Chilling the steak for approximately 20 minutes before slicing makes this easier. Use a certified gluten-free pizza crust, mayonnaise, mustard, and packaged cheese when preparing the recipe for someone who must avoid gluten.

Variations

Replace the ribeye with sirloin for a leaner pizza. Mushrooms can be sautรฉed with the bell pepper and onion. For a stronger cheese flavour, add extra provolone or replace part of the mozzarella with cheddar.

Storage

Store leftover pizza in an airtight container in the refrigerator for up to two days. Reheat it in a hot oven or dry frying pan until the base is crisp and the steak is thoroughly heated.

Wine Advice

A full-bodied Cabernet Sauvignon complements the beef and melted cheese. A fruity Zinfandel or a light lager is also suitable.

Nutrition values

Serving: 1 1/4 pizza | Calories: 500 kcal | koolhydraten: 32 g | Eiwitten: 28 g | Vet: 30 g | Verzadigd vet: 13 g | Natrium: 1050 mg | Suiker: 5 g
————————————————————————————————–
Course; Beef / Main Course / Meat / Oven / Pizza
Cuisine; American
Season: All Seasons

Philly cheesesteak pizza combines two American comfort-food favourites in one satisfying meal. A crisp pizza crust is covered with creamy Dijon mayonnaise, tender ribeye steak, sautรฉed bell pepper, onion, mozzarella, and provolone. The result has everything people enjoy about a cheesesteak sandwich, but with the golden base and melted topping of a homemade pizza.

Inspired by an American Classic

The traditional Philadelphia cheesesteak is known for thinly sliced beef, cooked onions, and plenty of melted cheese served in a long roll. This pizza keeps those familiar flavours while replacing the bread roll with a crisp crust. Provolone provides the characteristic sharp, savoury cheese flavour, while mozzarella creates a softer texture and an appetising melted finish.

Ribeye is particularly suitable because its marbling helps the thin slices remain juicy during cooking. Sirloin can also be used when a leaner result is preferred. For more American-inspired ideas, browse the American recipes collection or discover other hearty dishes in the beef recipes category.

Preparing Tender Steak

Thinly sliced steak cooks quickly and is less likely to become tough. Place the meat in the freezer for approximately 20 minutes before slicing it across the grain. It should become firm but not completely frozen. A sharp knife can then produce the thin strips needed for an even pizza topping.

Cook the steak briefly in a hot frying pan and remove it as soon as it has browned. It will continue cooking in the oven, so there is no need to cook it completely during the first stage. Avoid overcrowding the pan because trapped moisture can steam the beef instead of browning it.

Raw beef should be stored, prepared, and cooked carefully. Keep it separate from ingredients that will not receive additional cooking, and clean knives, boards, and work surfaces thoroughly. Additional guidance is available from the FDA safe food handling information.

Building a Crisp, Balanced Pizza

The Dijon mayonnaise acts as a creamy alternative to tomato sauce. Spread it thinly over the crust so that its tanginess supports the steak without overpowering the other ingredients. Sautรฉing the bell pepper and onion before assembling the pizza removes excess moisture and develops their natural sweetness.

Distribute the steak and vegetables evenly so every portion receives a balanced topping. Add the mozzarella and provolone last, allowing the cheese to hold everything in place. A preheated pizza stone gives the base an especially crisp finish, although a sturdy baking sheet also works well.

This steak and cheese pizza pairs well with pickles, coleslaw, fries, or a simple green salad. Hot sauce, extra mustard, or sliced jalapeรฑos can be served separately for anyone who prefers additional heat. Find more homemade combinations in the pizza recipes collection.

Variations and Storage

Add sautรฉed mushrooms for an earthier flavour or use red and green bell peppers for extra colour. Cheddar can replace part of the mozzarella, although provolone should remain in the topping if you want to retain the recognisable cheesesteak character. A traditional pizza crust may be used when gluten does not need to be avoided.

For a gluten-free meal, check the labels on the crust, mayonnaise, mustard, cheese, and seasonings. Store leftovers in an airtight container in the refrigerator for up to two days. Reheat slices in a hot oven or dry frying pan to restore the crisp base. Microwave reheating is possible, but it will make the crust softer.

With its tender beef, sweet vegetables, creamy sauce, and generous layer of melted cheese, Philly cheesesteak pizza is a practical choice for a family dinner, game day, party, or relaxed weekend meal.


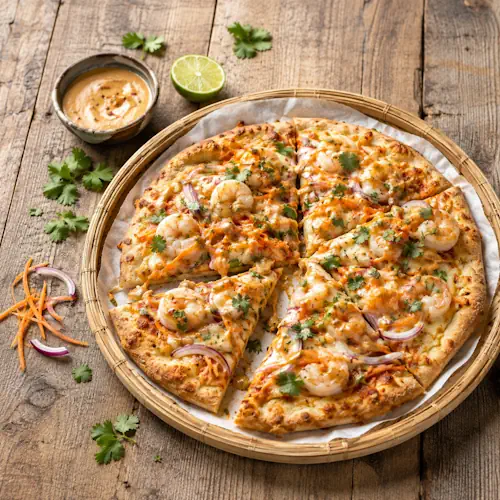
Thai Peanut Shrimp Pizza

Thai peanut shrimp pizza with mozzarella, carrots and cilantro

Thai Peanut Shrimp Pizza

A vibrant fusion pizza topped with juicy shrimp, creamy Thai peanut sauce, mozzarella, red onion, carrots, cilantro, and chilli flakes. Sweet, savoury, fresh, and gently spicy.
Couverts4 servings
estimated costs pp $4.00
Deel op Facebook Print Recipe

Equipment

  • Baking sheet
  • Knife
  • Mixing bowl
  • Pastry brush
  • Pizza Cutter

Ingredients

For the Pizza Base

For the Toppings

Instructions

For the Pizza Base

  • Preheat the oven to 425ยฐF (220ยฐC).
  • Place the gluten-free pizza crust on a baking sheet.
  • Brush the surface of the crust evenly with olive oil.

For the Toppings

  • Combine the shrimp, Thai peanut sauce, and tamari in a mixing bowl.
  • Toss until the shrimp are evenly coated.
  • Spread the shrimp mixture over the pizza crust.
  • Top evenly with the mozzarella, red onion, and shredded carrot.
  • Sprinkle with the red chilli flakes.
  • Bake for 12 to 15 minutes, until the crust is golden and the cheese has melted.
  • Remove the pizza from the oven and garnish with fresh cilantro.
  • Slice into 4 equal portions and serve hot.

Notes & Wine Advice

Serving Suggestions

Serve the pizza with a Thai-style mango salad, cucumber salad, or lightly dressed shredded cabbage. Extra gluten-free peanut sauce can be offered on the side for dipping.

Recipe Notes

Use cooked shrimp that have been thoroughly drained and patted dry. Excess moisture can make the pizza crust soggy. Check that the crust, peanut sauce, and tamari are all certified gluten-free when preparing the pizza for someone with coeliac disease.

Variations

Add sliced bell pepper, bean sprouts, spring onion, or chopped peanuts. Reduce the chilli flakes for a milder pizza or add fresh chilli for more heat. Cooked chicken can replace the shrimp when a seafood-free version is preferred.

Storage

Store cooled leftover pizza in an airtight container in the refrigerator for up to two days. Reheat in the oven until thoroughly hot and the crust is crisp. Avoid reheating the pizza more than once.

Wine Advice

A crisp Riesling balances the chilli heat and complements the sweet, nutty sauce. A fresh Sauvignon Blanc is another suitable choice with the shrimp and cilantro.

Nutrition values

Serving: 1 1/4 slize | Calories: 380 kcal | koolhydraten: 28 g | Eiwitten: 24 g | Vet: 18 g | Verzadigd vet: 6 g | Natrium: 980 mg | Suiker: 6 g
————————————————————————————————–

Thai peanut shrimp pizza combines the comfort of homemade pizza with the sweet, savoury and gently spicy flavours associated with Thai cooking. Juicy shrimp, creamy peanut sauce, melted mozzarella, crisp red onion and colourful carrot create a topping that is rich without feeling too heavy. Fresh cilantro and chilli flakes provide a bright finishing touch, making every slice aromatic, colourful and full of contrast.

A Colourful Fusion Pizza

This recipe is an easy way to turn a familiar family favourite into something more adventurous. The peanut sauce replaces traditional tomato sauce and gives the pizza a creamy, nutty foundation. Tamari seasons the shrimp with extra savoury depth, while mozzarella softens the stronger flavours and helps bind the toppings together.

Red onion brings a mild sharpness, and shredded carrot adds freshness, sweetness and a little texture. The cilantro should be added after baking so that its flavour stays bright. Chilli flakes are optional, but even a small amount provides a pleasant warmth that balances the sweet peanut sauce.

For more inspiration, explore the collection of pizza recipes, discover other satisfying main courses, or browse easy dishes prepared with the help of the oven.

How to Prevent a Soggy Pizza

Cooked shrimp can retain a surprising amount of moisture, so pat them dry thoroughly before mixing them with the tamari and peanut sauce. Use only enough sauce to coat the shrimp lightly. Too much liquid may prevent the crust from becoming crisp, particularly when using a thin gluten-free pizza base.

Preheating the oven fully is equally important. A pizza stone can produce a firmer base, but a sturdy baking sheet also works well. If the gluten-free crust is especially soft, bake it for three to five minutes before adding the toppings. This brief pre-bake gives the base more structure and helps it carry the shrimp, cheese and vegetables.

Because the shrimp are already cooked, avoid baking the pizza longer than necessary. Remove it once the cheese has melted and the crust is golden. Overcooking can make the shrimp dry or rubbery. Follow safe storage and handling practices for seafood as described in the FDA safe food handling guidance.

Serving and Variation Ideas

This Thai-inspired seafood pizza works well for a relaxed family dinner, weekend lunch or colourful party table. Serve it with a fresh cucumber salad, crunchy cabbage slaw or Thai-style mango salad. A squeeze of lime over the finished pizza adds acidity and makes the peanut flavour feel lighter.

For extra vegetables, add thinly sliced bell pepper, courgette or mushrooms. Bean sprouts can be scattered over the pizza after baking for crunch. To increase the heat, add sliced fresh chilli or a drizzle of sriracha. Chopped roasted peanuts also make an excellent garnish, although they should be omitted when serving anyone with a nut allergy.

Dietary Notes and Storage

To keep this recipe gluten-free, check the labels on the pizza crust, peanut sauce and tamari. Ordinary soy sauce commonly contains wheat and should not be substituted unless it is specifically labelled gluten-free. The recipe is naturally suitable for pescatarians and provides plenty of protein from the shrimp and cheese.

Store leftover Thai peanut shrimp pizza in an airtight container in the refrigerator for up to two days. Reheat individual slices in a hot oven or dry frying pan to restore the crisp base. Microwave reheating is convenient, but it will create a softer crust. For the best flavour and texture, add fresh cilantro only after reheating.


Smoky Gouda Chicken Pizza

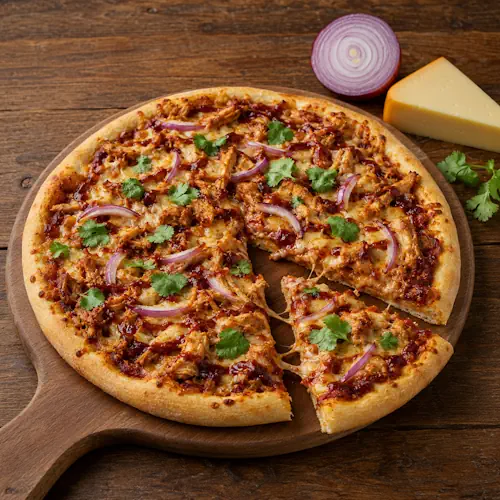
Smoky Gouda chicken pizza topped with barbecue chicken, red onion and fresh coriander

Smoky Gouda Chicken Pizza

Smoky Gouda Chicken Pizza combines shredded chicken, barbecue sauce, smoked Gouda, red onion, and fresh coriander on a crisp gluten-free crust. It delivers a satisfying balance of smoky, savoury, sweet, and tangy flavours.
Couverts4 servings
estimated costs pp $2.85
Deel op Facebook Print Recipe

Equipment

  • Baking sheet
  • Mixing bowl
  • Rolling Pin

Ingredients

For the Pizza Base

  • 1 large Gluten-Free Pizza Crust
  • 1 tablespoon Olive Oil

For the Toppings

  • 200 g Chicken Breast cooked and shredded
  • 150 g Smoked Gouda Cheese shredded
  • ยฝ medium Red Onion thinly sliced
  • 2 tablespoons Barbecue Sauce
  • 2 tablespoons Barbecue Sauce for drizzling
  • 2 tablespoons Fresh Coriander chopped

Instructions

  • For Preparing the Pizza
  • Preheat the oven to 425ยฐF (220ยฐC).
  • Place the gluten-free pizza crust on a baking sheet.
  • Brush the surface evenly with olive oil.
  • Combine the shredded chicken with 2 tablespoons of barbecue sauce in a mixing bowl.
  • Spread the barbecue chicken evenly over the pizza crust.
  • Sprinkle the smoked Gouda over the chicken.
  • Distribute the sliced red onion evenly over the cheese.
  • Bake for 15 minutes until the crust is golden and the cheese is melted and bubbling.
  • Remove the pizza from the oven.
  • Drizzle the remaining barbecue sauce over the pizza.
  • Garnish with the chopped fresh coriander.
  • Cut the pizza into four portions and serve warm.

Notes & Wine Advice

Serving Suggestions

Serve the pizza warm with crispy sweet potato fries, coleslaw, grilled corn, or a fresh green salad. Iced tea or homemade lemonade makes a refreshing non-alcoholic accompaniment, particularly when serving the pizza during summer.

Recipe Notes

Use fully cooked chicken and shred it into small pieces so it distributes evenly. Choose a barbecue sauce and pizza crust carrying a certified gluten-free label when preparing the recipe for someone with coeliac disease or a gluten intolerance.

Variations

Replace smoked Gouda with mozzarella, cheddar, Monterey Jack, or a combination of cheeses. Add sliced jalapeรฑos, sweetcorn, roasted peppers, mushrooms, or pineapple. Pulled pork or cooked turkey can replace the chicken.

Storage

Refrigerate cooled leftover pizza in an airtight container for up to three days. Reheat individual portions in the oven or air fryer until thoroughly hot and the crust is crisp. Avoid repeatedly reheating the same portions.

Wine Advice

A chilled Sauvignon Blanc provides fresh acidity that balances the smoky cheese and sweet barbecue sauce. A fruity Zinfandel is a suitable red wine when you want to emphasise the barbecue flavours.

Nutrition values

Serving: 1 pizza quarter | Calories: 400 kcal | koolhydraten: 35 g | Eiwitten: 28 g | Vet: 20 g | Verzadigd vet: 9 g | Natrium: 780 mg | Suiker: 8 g
————————————————————————————————–

About Smoky Gouda Chicken Pizza

Smoky Gouda Chicken Pizza combines tender shredded chicken, tangy barbecue sauce, smoked cheese, red onion, and fresh coriander on a crisp gluten-free base. The Gouda reinforces the smoky flavour of the sauce, while the onion adds sharpness and the coriander provides a fresh finish. Each bite balances savoury, sweet, smoky, and lightly spicy flavours.

This recipe uses fully cooked chicken, which keeps the preparation short and prevents excess moisture from collecting on the crust. It is a practical way to use leftover roasted or grilled chicken. One large pizza provides four portions and works well for a family dinner, pizza night, game day, or informal party.

Preparing the Gluten-Free Base

Gluten-free pizza crusts vary considerably in thickness and texture. Some are ready to top immediately, while others benefit from a short prebake. Follow the instructions supplied with your chosen crust when they differ from this recipe. Brushing it lightly with olive oil encourages browning and helps prevent the barbecue sauce from soaking into the base.

For people with coeliac disease or a serious gluten intolerance, check every packaged ingredient carefully. The pizza crust and barbecue sauce should carry reliable gluten-free labelling. Use a clean baking sheet, utensils, and preparation area to reduce the risk of cross-contact with ordinary flour.

Barbecue Chicken Pizza

Barbecue chicken pizza works best when the cooked meat is shredded into small, even pieces. Mixing the chicken with sauce before assembling the pizza distributes the flavour more effectively than simply pouring sauce over the top. It also helps keep the chicken moist during baking.

A little extra sauce is drizzled over the finished pizza, but avoid adding too much. Barbecue sauce contains sugar and can burn around the edges or make the crust soggy. If you prefer a homemade base with a different flavour, try our Spicy Southwestern Pizza Oil.

Why Smoked Gouda Works

Smoked Gouda melts smoothly and has enough character to remain noticeable beside the barbecue sauce. Its creamy texture balances the sharper red onion and the sweetness of the sauce. Shred the cheese before adding it so it melts evenly across the chicken.

Mozzarella produces a milder and stretchier topping, while cheddar creates a stronger savoury flavour. Monterey Jack is a good choice when you want a creamy cheese without pronounced smokiness. A mixture of Gouda and mozzarella offers both flavour and a familiar pizza texture.

Toppings and Easy Variations

Thinly sliced red onion softens in the oven while retaining a little texture. Fresh coriander should be added after baking so it remains bright and aromatic. Jalapeรฑos, sweetcorn, roasted peppers, mushrooms, or pineapple can be included when you want additional colour and flavour.

Cooked turkey or pulled pork can replace the chicken. For a vegetarian pizza, use black beans, roasted cauliflower, mushrooms, or a plant-based chicken alternative. You can also prepare a different crust with our Whole Wheat Pizza Dough when a gluten-free meal is not required.

Serving and Storage

Serve the pizza immediately while the Gouda is melted and the crust is crisp. Sweet potato fries make a natural accompaniment and reinforce the sweet and smoky flavours. Coleslaw, grilled corn, or a fresh green salad provides contrast. For another substantial pizza option, try our Chicago Deep-Dish Pizza.

Allow leftovers to cool before placing them in an airtight container. Refrigerate for up to three days and reheat individual portions in an oven or air fryer until thoroughly hot. Avoid leaving cooked chicken pizza at room temperature for longer than two hours.

Follow current FDA safe food-handling guidance when cooking, cooling, storing, and reheating chicken. With its quick preparation, flexible toppings, and distinctive smoked cheese, this pizza offers an easy way to turn cooked chicken into a satisfying family meal.


Chicago Deep-Dish Pizza

Chicago deep-dish pizza layered with mozzarella, Italian sausage, tomato sauce and Parmesan

Chicago Deep-Dish Pizza

Chicago Deep-Dish Pizza features a thick buttery crust layered with mozzarella, Italian sausage, rich tomato sauce, Parmesan, and oregano. This substantial American pizza is baked in a deep pan until crisp and bubbling.
Couverts4 servings
estimated costs pp $3.20
Deel op Facebook Print Recipe

Equipment

  • Deep-Dish Pizza Pan, 9-Inch
  • Mixing bowls
  • Rolling Pin
  • Saucepan

Ingredients

For the Dough

For the Tomato Sauce

For the Toppings

Instructions

For the Dough

  • Combine the warm water, granulated sugar, and active dry yeast in a mixing bowl.
  • Let the mixture stand for 5 minutes until lightly foamy.
  • Add the all-purpose flour, kosher salt, melted butter, and olive oil.
  • Mix until a rough dough forms.
  • Knead the dough for 5 to 7 minutes until smooth and elastic.
  • Cover the bowl and let the dough rise in a warm place for 1 hour.

For the Tomato Sauce

  • Heat the olive oil in a saucepan over medium heat.
  • Add the minced garlic and cook for 1 minute until fragrant.
  • Stir in the crushed tomatoes, basil, oregano, granulated sugar, and kosher salt.
  • Reduce the heat and simmer the sauce for 15 minutes, stirring occasionally.
  • Remove the saucepan from the heat and let the sauce cool slightly.

For Assembling and Baking

  • Preheat the oven to 425ยฐF (220ยฐC).
  • Grease a 9-inch deep-dish pizza pan.
  • Roll the risen dough into a circle larger than the pizza pan.
  • Press the dough evenly across the bottom and up the sides of the pan.
  • Spread the shredded mozzarella directly over the dough.
  • Distribute the cooked Italian sausage over the mozzarella.
  • Spoon the tomato sauce evenly over the sausage.
  • Sprinkle the Parmesan and dried oregano over the sauce.
  • Bake for 40 minutes until the crust is golden brown and the filling is bubbling.
  • Cover the top loosely with foil if it browns too quickly.
  • Remove the pizza from the oven and let it rest for 5 minutes.
  • Carefully remove the pizza from the pan.
  • Cut into four portions and serve warm.

Notes & Wine Advice

Serving Suggestions

Serve the pizza warm with a Caesar salad, mixed green salad, roasted vegetables, or garlic bread. One quarter makes a substantial serving because the crust and layered filling are considerably thicker than those of a traditional thin pizza.

Recipe Notes

Place the mozzarella directly against the dough before adding the sausage and sauce. This traditional reversed order protects the bottom crust from excess tomato moisture. Cook and drain the Italian sausage before adding it to the pizza.

Variations

Replace the Italian sausage with pepperoni, cooked minced beef, mushrooms, spinach, roasted peppers, or artichokes. For a vegetarian version, omit the sausage and add cooked vegetables. Provolone can replace part of the mozzarella for a stronger cheese flavour.

Storage

Refrigerate cooled leftovers in an airtight container for up to three days. Reheat individual portions in the oven or air fryer until thoroughly hot. The microwave can be used, although it will produce a softer crust.

Wine Advice

A fruity Zinfandel complements the Italian sausage and rich tomato sauce. A medium-bodied Chianti provides enough acidity to balance the mozzarella, Parmesan, butter, and tomatoes.
v

Nutrition values

Serving: 1 pizza quarter | Calories: 550 kcal | koolhydraten: 55 g | Eiwitten: 22 g | Vet: 28 g | Verzadigd vet: 12 g | Natrium: 1080 mg | Suiker: 6 g
————————————————————————————————–

About Chicago Deep-Dish Pizza

Chicago Deep-Dish Pizza is known for its tall, buttery crust and substantial layers of cheese, meat, and tomato sauce. Unlike a thin pizza, the ingredients are arranged in reverse order. Mozzarella covers the dough first, followed by cooked Italian sausage and a thick layer of seasoned tomatoes. Parmesan and oregano finish the surface before the pizza is baked until bubbling and golden.

The recipe makes one 9-inch pizza divided into four generous portions. Its deep crust and rich filling make each slice much more substantial than an ordinary pizza wedge. Serve it as the centrepiece of a family dinner, pizza night, or relaxed weekend meal with a crisp salad alongside.

Preparing the Buttery Dough

The dough combines olive oil with melted butter to create a crust that is crisp around the outside but tender inside. Warm water activates the yeast, while a small amount of sugar supports fermentation. The water should be warm rather than hot because excessive heat can damage the yeast.

Knead the dough until it feels smooth and elastic. It then needs one hour in a warm place to rise and relax. This makes it easier to roll and press into the tall sides of the pan. For a different thick-crust pizza, try our Sicilian Thick Crust Pizza Dough.

Layering a Deep-Dish Pizza

The order of the filling is essential. Mozzarella is placed directly on the dough, creating a barrier between the crust and the wetter tomato sauce. The cooked sausage goes over the cheese, while the tomatoes form the upper layer. This arrangement helps the base bake properly during the relatively long cooking time.

Use low-moisture mozzarella for reliable melting without releasing excessive liquid. Cook the Italian sausage completely and drain away surplus fat before assembling the pizza. The tomato sauce should also simmer until slightly thickened. A watery filling can prevent the centre of the crust from baking evenly.

Rich Chicago-Style Pizza

This rich Chicago-style pizza uses a simple homemade tomato sauce flavoured with garlic, oregano, and basil. Simmering the tomatoes before assembly concentrates their flavour and removes some excess moisture. Allow the sauce to cool slightly before spreading it over the cheese and sausage.

If you want to prepare the sauce in advance, our Rich Homemade Pizza Sauce is another suitable option. A no-cook sauce is less appropriate here unless it is naturally thick, as deep-dish pizza needs a concentrated tomato layer that will not flood the crust.

Vegetarian and Meat Variations

Italian sausage gives the filling a savoury, lightly spiced flavour. Pepperoni, cooked minced beef, or shredded chicken can be used instead. Always cook raw meat before placing it inside the pizza because the thick layers can interfere with even cooking.

For a vegetarian version, replace the sausage with sautรฉed mushrooms, spinach, roasted peppers, onions, or artichokes. Cook moisture-rich vegetables first and drain them thoroughly. You can also add provolone, fontina, or cheddar, although mozzarella should remain the principal cheese for the best texture.

Baking and Serving

Bake the pizza until the crust is deeply golden and the tomato layer bubbles around the edges. If the surface darkens before the crust is ready, cover it loosely with foil. Resting the pizza for five minutes allows the layers to settle and makes it easier to remove from the pan and slice cleanly.

Refrigerate leftovers within two hours and reheat them until thoroughly hot. Follow current FDA safe food-handling guidance when preparing sausage, handling cheese, and storing cooked pizza. With its buttery crust and generous filling, Chicago Deep-Dish Pizza delivers a substantial homemade version of this famous American dish.


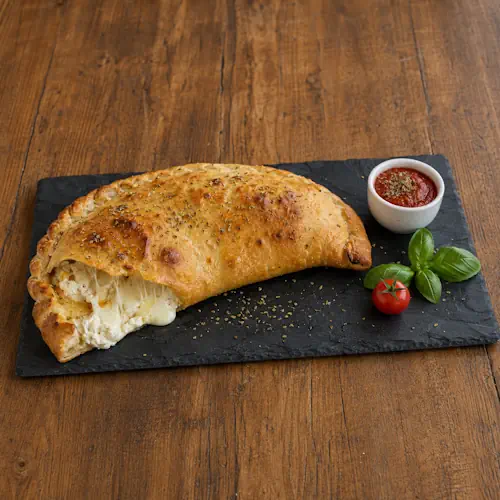
Three Cheese Calzones

Three cheese calzones filled with ricotta, mozzarella and Parmesan beside warm tomato sauce

Three Cheese Calzones

Three Cheese Calzones wrap a creamy mixture of ricotta, mozzarella, and Parmesan inside crisp golden pizza dough. Oregano and garlic add extra flavour, while warm tomato sauce makes a delicious dip.
Couverts4 servings
estimated costs pp $2.25
Deel op Facebook Print Recipe

Equipment

  • Baking sheet
  • Mixing bowls
  • Pastry brush
  • Rolling Pin

Ingredients

  • For the Calzone Dough
  • 400 g All-Purpose Flour
  • 240 ml Water warm
  • 2 teaspoons Olive Oil
  • 1 teaspoon Active Dry Yeast
  • 1 teaspoon Granulated Sugar
  • 1 teaspoon Kosher Salt
  • For the Cheese Filling
  • 200 g Ricotta Cheese
  • 200 g Mozzarella Cheese shredded
  • 100 g Parmesan Cheese grated
  • 1 teaspoon Dried Oregano
  • 1 teaspoon Garlic Powder
  • For Finishing and Serving
  • 2 large Eggs beaten
  • 200 ml Tomato Sauce

Instructions

  • For the Calzone Dough
  • Combine the warm water, active dry yeast, and granulated sugar in a mixing bowl.
  • Let the yeast mixture stand for 5 minutes until lightly foamy.
  • Add the all-purpose flour, olive oil, and kosher salt.
  • Mix until a rough dough forms.
  • Knead the dough for 5 to 7 minutes until smooth and elastic.
  • Cover the dough and let it rest in a warm place for 30 minutes.
  • For the Cheese Filling
  • Combine the ricotta, mozzarella, Parmesan, oregano, and garlic powder in a separate mixing bowl.
  • Stir until the cheeses and seasonings are evenly combined.
  • For Shaping and Baking
  • Preheat the oven to 425ยฐF (220ยฐC).
  • Divide the rested dough into four equal portions.
  • Roll each portion into a circle on a lightly floured work surface.
  • Divide the cheese filling evenly among one half of each dough circle while leaving the edges clear.
  • Fold the uncovered half of each circle over the filling.
  • Press the edges firmly together and seal them with a fork.
  • Transfer the calzones to a baking sheet.
  • Brush the surfaces evenly with the beaten egg.
  • Cut a small steam vent in the top of each calzone.
  • Bake for 15 minutes until puffed and golden brown.
  • Warm the tomato sauce while the calzones bake.
  • Let the baked calzones rest for 5 minutes.
  • Serve warm with the tomato sauce for dipping.

Notes & Wine Advice

Serving Suggestions

Serve each calzone warm with tomato sauce for dipping. Add a green salad, roasted vegetables, marinated olives, or grilled courgette for a complete meal. Fresh basil and a little extra Parmesan provide a simple finishing touch.

Recipe Notes

Leave a clean border around the filling so the dough can be sealed securely. Avoid overfilling the calzones because escaping cheese can burn on the baking sheet. Cutting a small steam vent in each top prevents excessive pressure from building inside.

Variations

Add cooked spinach, mushrooms, roasted peppers, artichokes, or chopped fresh basil to the filling. Replace part of the mozzarella with provolone or fontina. Pepperoni, cooked sausage, or ham can be added when a vegetarian calzone is not required.

Storage

Refrigerate cooled calzones in an airtight container for up to three days. Reheat them in the oven or air fryer until thoroughly hot and crisp. Individual baked calzones can also be frozen for up to two months and reheated after thawing.

Wine Advice

A medium-bodied Chianti complements the tomato sauce, oregano, and Parmesan. A light Pinot Noir is a softer alternative that pairs well with the creamy ricotta and mozzarella filling.

Nutrition values

Serving: 1 calzone | Calories: 450 kcal | koolhydraten: 50 g | Eiwitten: 18 g | Vet: 20 g | Verzadigd vet: 10 g | Natrium: 760 mg | Suiker: 3 g
————————————————————————————————–

About Three Cheese Calzones

Three Cheese Calzones wrap a creamy mixture of ricotta, mozzarella, and Parmesan inside crisp, golden pizza dough. Oregano and garlic add familiar Italian flavour, while warm tomato sauce provides a bright, savoury contrast. Making four individual portions ensures that everyone receives a freshly baked calzone with plenty of melted cheese.

A calzone is essentially a folded pizza, but enclosing the toppings changes both its texture and eating experience. The crust becomes crisp on the outside while steam keeps the inside tender. The cheese melts together in the enclosed centre, creating a rich filling that remains hotter than the surface may suggest. Allowing the calzones to rest briefly before serving is therefore essential.

Preparing a Flexible Calzone Dough

Warm water activates the yeast, while sugar provides a small amount of food to help it become active. The water should feel comfortably warm rather than hot. Excessive heat can damage the yeast and prevent the dough from rising. After five minutes, the mixture should appear slightly foamy.

Kneading develops the doughโ€™s structure and makes it elastic enough to stretch around the filling. Continue until it feels smooth and springs back slowly when pressed. The 30-minute rest relaxes the dough and allows it to rise slightly. For another dependable homemade base, you can adapt our Whole Wheat Pizza Dough.

Italian Cheese Calzone

An Italian cheese calzone depends on cheeses with complementary textures. Ricotta creates a soft and creamy centre, mozzarella supplies the familiar stretch, and Parmesan contributes a sharper, saltier flavour. Stirring them together before filling the dough ensures that each calzone receives a balanced mixture.

If the ricotta contains visible liquid, drain it before mixing. Excess moisture can soften the bottom crust and make sealing more difficult. Low-moisture mozzarella is particularly suitable because it melts evenly without releasing too much water. Fresh mozzarella can be used, but it should be drained and patted dry first.

Shaping and Sealing

Divide the dough into four equal pieces before rolling so the portions remain consistent. Roll each piece into a circle of even thickness. Place the filling on one half and keep a clear border around the edge. Folding the empty half over the filling creates the characteristic half-moon shape.

Press out excessive air before sealing the edges. Use your fingers first and then reinforce the seal with a fork. A small slit in the top allows steam to escape during baking. Without this vent, pressure can force the seam open and release the cheese onto the baking sheet.

Serving Ideas and Variations

Serve the calzones with our Rich Homemade Pizza Sauce for dipping. When time is limited, our Easy No-Cook Pizza Sauce is a faster alternative. A crisp salad or roasted vegetables balance the rich cheese filling and turn each calzone into a complete meal.

The filling can be adapted with cooked spinach, sautรฉed mushrooms, roasted peppers, olives, or artichokes. Cook watery vegetables first and let them cool before adding them to the cheese. This reduces excess moisture. Meat additions such as pepperoni, sausage, or ham should also be fully cooked when necessary before being enclosed in the dough.

Storage and Reheating

Let leftover calzones cool before transferring them to an airtight container. Refrigerate them for up to three days. Reheat them in a hot oven or air fryer so the crust becomes crisp again. A microwave will warm the filling but generally leaves the dough softer.

Follow current FDA safe food-handling guidance when handling eggs, dairy products, and cooked leftovers. Make sure reheated calzones are thoroughly hot in the centre. With careful sealing and a balanced filling, Three Cheese Calzones offer all the comfort of homemade pizza in a convenient folded crust.


Sunny-Side Breakfast Pizza

Sunny-side breakfast pizza topped with baked eggs, baby spinach, mozzarella and Parmesan

Sunny-Side Breakfast Pizza

Sunny-Side Breakfast Pizza combines a crisp golden crust with garlic pizza oil, melted mozzarella, Parmesan, baby spinach, and softly baked eggs. It is a satisfying vegetarian breakfast or brunch for four people.
Couverts4 servings
estimated costs pp $2.15
Deel op Facebook Print Recipe

Equipment

  • Baking sheet
  • Measuring cups
  • Measuring spoons
  • Rolling Pin

Ingredients

Instructions

  • Preheat the oven to 425ยฐF (220ยฐC).
  • Roll the pizza dough out on a lightly floured work surface.
  • Transfer the rolled dough to a baking sheet.
  • Spread the garlic-infused pizza oil evenly over the dough.
  • Sprinkle the mozzarella and Parmesan evenly over the sauce.
  • Distribute the baby spinach across the pizza.
  • Create four wells in the cheese and spinach.
  • Carefully crack one egg into each well.
  • Drizzle the pizza with olive oil.
  • Season with kosher salt, black pepper, and red pepper flakes.
  • Bake for 15 minutes until the crust is golden and the egg whites are completely set.
  • Remove the pizza from the oven.
  • Let it rest for 3 minutes before cutting it into four portions.
  • Serve warm.

Notes & Wine Advice

Serving Suggestions

Serve the breakfast pizza warm with sliced avocado, fresh tomatoes, hot sauce, or a simple green salad. Fresh fruit provides a lighter accompaniment for brunch. Cut the pizza into smaller pieces when serving it as part of a larger breakfast buffet.

Recipe Notes

Create sufficiently deep wells in the cheese so the eggs remain in position. Crack each egg into a small bowl before transferring it to the pizza if you want more control. The egg whites must be completely set before the pizza is served.

Variations

Add sautรฉed mushrooms, roasted peppers, spring onions, jalapeรฑos, or fresh herbs. Replace the spinach with rocket, or use cheddar, goat cheese, or Monterey Jack instead of mozzarella. Cooked bacon, ham, or breakfast sausage can be added for a non-vegetarian version.

Storage

This pizza is best served immediately. Refrigerate leftovers in an airtight container for up to two days. Reheat individual portions in a hot oven or air fryer until thoroughly heated. Reheated egg yolks will be firmer than when freshly baked.

Wine Advice

A chilled Prosecco provides a crisp contrast to the melted cheese and eggs. For a non-sparkling option, choose a fresh Sauvignon Blanc with enough acidity to balance the rich toppings.

Nutrition values

Serving: 1 pizza quarter | Calories: 350 kcal | koolhydraten: 35 g | Eiwitten: 18 g | Vet: 16 g | Verzadigd vet: 6 g | Natrium: 710 mg | Suiker: 3 g
————————————————————————————————–
Course; Breakfast / Brunch / Eggs / Oven / Pizza
Cuisine; American
Season: All Seasons

About Sunny-Side Breakfast Pizza

Sunny-Side Breakfast Pizza turns familiar morning ingredients into a colourful meal with a crisp crust, melted cheese, tender spinach, and baked eggs. Garlic-infused pizza oil replaces a heavy tomato sauce and gives the base a savoury flavour without overpowering the eggs. Every quarter receives one egg, making the pizza easy to divide among four people.

This recipe works well for breakfast, brunch, or a relaxed weekend lunch. Using prepared pizza dough keeps the preparation short, while baking all four eggs together avoids the need to stand over a frying pan. For a homemade base, prepare our Whole Wheat Pizza Dough in advance and refrigerate it until needed.

Preparing the Pizza Base

Roll the dough to an even thickness so the centre and edges cook at approximately the same rate. A very thick centre can remain soft beneath the eggs, while edges rolled too thinly may become overly crisp. Transfer the dough to the baking sheet before adding the toppings because a fully assembled pizza is difficult to move without disturbing the eggs.

A thin coating of our Garlic-Infused Pizza Oil gives the crust plenty of flavour. Avoid using too much because excess oil can collect beneath the cheese and soften the base. If you prefer tomatoes, substitute our Easy No-Cook Pizza Sauce.

Baked Egg Pizza

The defining feature of a baked egg pizza is the balance between a fully cooked white and a yolk that remains pleasantly soft. Creating wells in the mozzarella, Parmesan, and spinach helps prevent the eggs from spreading toward the edge. Crack each egg carefully and position the yolk near the centre of its section.

Ovens vary, so inspect the pizza near the end of the baking time. The crust should be golden, the cheese should be bubbling, and no transparent egg white should remain. If the crust is ready before the egg whites have set, loosely cover the outer edge with foil and continue baking for another minute or two.

Choosing Cheese and Vegetables

Mozzarella melts evenly and provides the familiar texture expected from pizza. Parmesan adds a saltier, more concentrated flavour. Baby spinach wilts quickly in the oven and requires no precooking. Distribute it in a thin layer so it does not trap too much moisture underneath the eggs.

Other quick-cooking vegetables can be added in modest quantities. Thinly sliced mushrooms, spring onions, roasted peppers, or halved cherry tomatoes are suitable choices. Vegetables containing considerable moisture should be cooked or drained first. This keeps the crust crisp and prevents liquid from collecting around the eggs.

Breakfast Pizza Variations

Breakfast pizza is easy to adjust for different occasions. Add avocado and fresh coriander after baking for a colourful finish. Goat cheese creates a tangier flavour, while cheddar makes the pizza richer. Cooked bacon, crumbled sausage, or sliced ham can be included when a vegetarian meal is not required.

For a thicker and softer crust, use our Sicilian Pizza Dough. A spoonful of Spicy Southwestern Pizza Oil adds paprika, cumin, and cayenne, making a good base for eggs served with black beans, corn, and jalapeรฑos.

Storage and Food Safety

Serve the pizza shortly after baking for the best balance of crisp crust and soft egg yolk. Place leftovers in an airtight container and refrigerate them within two hours. Reheat only the portions you plan to eat and make sure they are thoroughly hot before serving.

Eggs should be handled carefully and baked until the whites are completely set. Follow current FDA safe food-handling guidance when storing eggs, cheese, prepared dough, and leftover pizza. With its simple preparation and flexible toppings, Sunny-Side Breakfast Pizza is an easy centrepiece for a relaxed breakfast or weekend brunch.


Spicy Southwestern Pizza Oil

Spicy Southwestern pizza oil with smoked paprika, cumin and cayenne pepper

Spicy Southwestern Pizza Oil

Spicy Southwestern Pizza Oil is a smoky, tomato-free pizza sauce made with olive oil, paprika, cumin, garlic, and cayenne. It adds bold flavour to pizzas topped with chicken, beans, corn, vegetables, or cheese.
Couverts4 servings
estimated costs pp $0.35
Deel op Facebook Print Recipe

Equipment

  • Measuring cups
  • Measuring spoons
  • Mixing bowl
  • Whisk

Ingredients

Instructions

  • Pour the extra-virgin olive oil into a mixing bowl.
  • Add the smoked paprika, cumin, garlic powder, onion powder, cayenne pepper, kosher salt, and black pepper.
  • Whisk until the spices are evenly distributed throughout the oil.
  • Let the pizza oil rest for 10 minutes so the flavours can develop.
  • Whisk the sauce again immediately before using.
  • Brush a thin, even layer over prepared pizza dough.
  • Add the desired toppings and bake the pizza according to the dough recipe.

Notes & Wine Advice

Serving Suggestions

Brush a thin layer of pizza oil over prepared dough and top it with grilled chicken, black beans, sweetcorn, red onion, jalapeรฑos, roasted peppers, cheddar, or Monterey Jack. Finish the baked pizza with avocado, coriander, spring onions, or a squeeze of lime.

Recipe Notes

The ground spices gradually settle at the bottom of the bowl, so whisk the sauce again immediately before using it. Apply only a thin coating to prevent the pizza base from becoming oily. This recipe provides enough sauce for one large pizza serving four people.

Variations

Reduce the cayenne for a milder sauce or increase it for more heat. Add dried oregano for a herbal note, chipotle powder for deeper smokiness, or lime zest for freshness. A small amount of maple syrup can balance the spices when using particularly hot toppings.

Storage

Store unused pizza oil in a clean, airtight container in the refrigerator for up to four days. Let it return to room temperature before use because olive oil can become cloudy or firm when chilled. Stir or shake thoroughly before brushing it onto the dough.

Wine Advice

A fruity Zinfandel stands up well to the smoky spices and cayenne. A peppery Shiraz is another suitable choice, particularly when the pizza includes grilled meat, beans, or mature cheese.

Nutrition values

Serving: 1 portion | Calories: 90 kcal | koolhydraten: 1 g | Eiwitten: 0 g | Vet: 10 g | Verzadigd vet: 15 g | Natrium: 145 mg | Suiker: 0 g
————————————————————————————————–

About Spicy Southwestern Pizza Oil

Spicy Southwestern Pizza Oil is a quick tomato-free base that brings smoky warmth to homemade pizza. Extra-virgin olive oil carries the flavours of smoked paprika, cumin, garlic, onion, and cayenne across the dough. The result is bold enough for Tex-Mex-inspired toppings without hiding the individual flavours of the vegetables, cheese, beans, or meat.

This sauce requires no cooking and can be prepared in five minutes. Resting it briefly allows the dried spices to hydrate in the oil and creates a more rounded flavour. The recipe makes enough for one large pizza serving four people. For a lighter and more herbal alternative, try our California Herb Pizza Oil.

Getting an Evenly Seasoned Base

Ground spices do not dissolve in olive oil, so they will eventually settle at the bottom of the bowl. Whisk the mixture thoroughly when preparing it and whisk it once more immediately before brushing it onto the dough. This prevents one section of the pizza from receiving most of the cayenne or salt.

Use a pastry brush or the back of a spoon to spread a thin coating across the dough. Leave a narrow border around the outside to create a clean, golden crust. Oil-based sauces are more concentrated than tomato sauces, and applying too much can prevent the centre of the pizza from becoming crisp.

Southwestern Pizza Sauce

Southwestern pizza sauce works particularly well with toppings that have sweet, smoky, or creamy flavours. Black beans, sweetcorn, roasted peppers, red onion, jalapeรฑos, grilled chicken, and pulled pork are dependable choices. Cheddar and Monterey Jack melt smoothly and balance the cayenne, while crumbled feta adds a sharper contrast.

Fresh toppings can be added after baking. Diced avocado, coriander, sliced spring onions, fresh tomato, and lime juice provide colour and brightness. A spoonful of sour cream can cool a particularly spicy pizza, while dairy-free yogurt offers a suitable plant-based alternative.

Choosing the Right Pizza Dough

This oil sauce can be used on thin or thick pizza bases. A thin crust produces crisp edges and keeps the spicy oil prominent. A thicker base provides a softer contrast and supports generous toppings. Our Whole Wheat Pizza Dough adds a nutty flavour, while Sicilian Pizza Dough creates a thicker, airy pizza.

For a vegetable-based option, spread it over our Parmesan Zucchini Pizza Crust. If you prefer a classic tomato base, compare it with our Easy No-Cook Pizza Sauce or Rich Homemade Pizza Sauce.

Adjusting the Heat and Flavour

Cayenne provides direct heat, while smoked paprika adds warmth and a barbecue-like aroma. For a milder sauce, reduce the cayenne without changing the other ingredients. Chipotle powder can replace the cayenne when you want smokier, slower-building heat. Dried oregano creates a more familiar pizza flavour, and finely grated lime zest adds freshness without thinning the sauce.

The oil can also be used as a marinade or finishing drizzle for roasted vegetables, grilled corn, chicken, tofu, or flatbread. Avoid reusing sauce that has touched raw meat. Keep any portion intended for serving or brushing the finished pizza in a separate clean container.

Storage and Food Safety

Refrigerate leftover sauce in an airtight container and use it within four days. Chilled olive oil may become cloudy or partially solid, which is normal. Let it stand at room temperature until fluid, then stir thoroughly. Do not leave the prepared sauce at room temperature for extended periods.

Use clean utensils and keep the sauce separate from raw ingredients. Follow current FDA safe food-handling guidance when preparing pizza with chicken, meat, cheese, or other perishable toppings. Spicy Southwestern Pizza Oil makes it easy to give homemade pizza a smoky, vibrant character without using traditional tomato sauce.


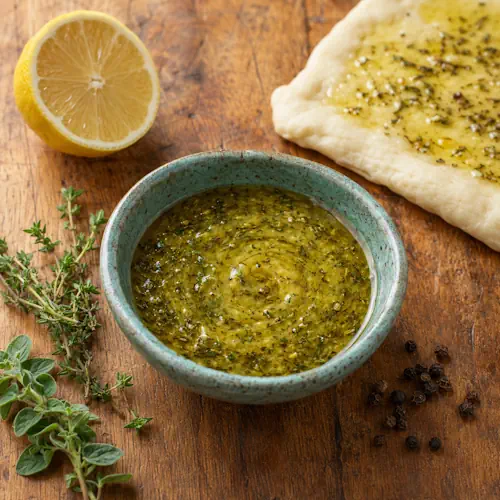
California Herb Pizza Oil

California herb pizza oil with lemon, Dijon mustard, oregano and thyme

California Herb Pizza Oil

California Herb Pizza Oil is a fresh, zesty alternative to tomato-based pizza sauce. Olive oil, lemon, Dijon mustard, honey, and aromatic herbs create a light base for vegetable and cheese pizzas.
Couverts4 servings
estimated costs pp $0.45
Deel op Facebook Print Recipe

Equipment

  • Measuring cups
  • Measuring spoons
  • Mixing bowl
  • Whisk

Ingredients

Instructions

  • Pour the extra-virgin olive oil and lemon juice into a mixing bowl.
  • Add the honey and Dijon mustard.
  • Whisk until the ingredients are thoroughly combined.
  • Add the oregano, thyme, kosher salt, and black pepper.
  • Whisk again until the herbs and seasoning are evenly distributed.
  • Let the pizza oil rest for 10 minutes so the flavours can develop.
  • Brush a thin, even layer over prepared pizza dough.
  • Add the desired cheese and toppings before baking the pizza as directed.

Notes & Wine Advice

Serving Suggestions

Brush a thin layer of California Herb Pizza Oil over pizza dough before adding toppings. It pairs particularly well with goat cheese, mozzarella, artichokes, mushrooms, roasted peppers, courgette, fresh tomatoes, or rocket. The oil can also be served as a dip for warm focaccia or breadsticks.

Recipe Notes

Whisk the sauce immediately before using it because the oil and lemon juice will gradually separate. Apply it sparingly so the pizza base remains crisp rather than oily. This quantity provides enough sauce for approximately one large pizza serving four people.

Variations

Replace the honey with maple syrup for a vegan version. Add crushed red pepper flakes for heat, minced garlic for a stronger savoury flavour, or finely grated lemon zest for additional freshness. Fresh thyme and oregano can replace the dried herbs when available.

Storage

Transfer unused sauce to an airtight container and refrigerate it for up to four days. Allow refrigerated pizza oil to reach room temperature and whisk thoroughly before using, as the olive oil may become cloudy or partially solidify when chilled.

Wine Advice

A crisp Sauvignon Blanc complements the lemon, mustard, and fresh-tasting herbs. A light Pinot Grigio is another refreshing choice, especially when the pizza is topped with mild cheese and vegetables.

Nutrition values

Serving: 1 portion | Calories: 85 kcal | koolhydraten: 2 g | Eiwitten: 0 g | Vet: 9 g | Verzadigd vet: 1 g | Natrium: 105 mg | Suiker: 1 g
————————————————————————————————–

About California Herb Pizza Oil

California Herb Pizza Oil is a fresh, tomato-free sauce designed for light pizzas topped with vegetables, herbs, and creamy cheeses. Extra-virgin olive oil forms the base, while lemon juice adds brightness and Dijon mustard helps bring the ingredients together. Honey softens the acidity, and oregano and thyme provide the familiar savoury aroma associated with freshly baked pizza. The result is flavourful without overwhelming delicate toppings.

This no-cook recipe takes only a few minutes to mix and requires no specialist equipment. It is especially useful when you want a change from traditional tomato sauce or need a pizza base that will complement lighter ingredients. Try it on homemade dough such as our Whole Wheat Pizza Dough or use it to add another layer of flavour to a thick, airy Sicilian Pizza Dough.

California Herb Pizza Oil

The key to a successful oil-based sauce is restraint. Unlike tomato sauce, the oil does not evaporate significantly during baking. A thin coating is therefore sufficient to carry the herbs across the dough and help the toppings brown. Applying too much can make the centre of the pizza heavy or greasy. Brush the mixture evenly across the surface while leaving a narrow border around the crust.

Whisking the Dijon mustard with the olive oil and lemon juice creates a temporary emulsion. This distributes the acidity and seasoning more evenly than simply drizzling each ingredient over the dough. The sauce will eventually separate while standing, which is entirely normal. Whisk it briefly again immediately before brushing it onto the pizza.

Choosing the Pizza Toppings

Mild and fresh toppings allow the character of this sauce to remain noticeable. Mozzarella, goat cheese, ricotta, or feta all work particularly well. Suitable vegetables include mushrooms, artichoke hearts, asparagus, courgette, sweet peppers, red onion, and cherry tomatoes. Add delicate rocket or fresh basil only after baking so the leaves retain their colour and texture.

For a completely dairy-free pizza, use grilled vegetables and a suitable plant-based cheese. Replacing the honey with maple syrup makes the sauce vegan. If you prefer a more traditional flavour, compare it with our Easy No-Cook Pizza Sauce or the deeper tomato flavour of our Rich Homemade Pizza Sauce.

Tomato-Free Pizza Sauce

This tomato-free pizza sauce can be adjusted without changing its basic method. A small amount of grated garlic adds pungency, while lemon zest strengthens its citrus character without adding extra liquid. Crushed red pepper flakes create gentle heat. Rosemary offers a woodier aroma, although it should be chopped finely and used sparingly so it does not dominate the thyme and oregano.

The mixture also works beyond pizza. Brush it over flatbread before baking, spoon it over roasted vegetables, or serve it as a dressing for a simple pasta salad. It makes an easy dipping oil for our Garlic Rosemary Focaccia and provides a lighter alternative to the richer options featured in our Oil-Based Pizza Sauces.

Storage and Food Safety

Store leftover sauce in a clean, airtight container in the refrigerator and use it within four days. Olive oil may become cloudy or firm at refrigerator temperature, but this does not indicate spoilage. Let the sauce stand briefly at room temperature and whisk it before use. Discard any portion that has come into contact with raw ingredients or an unclean pastry brush.

Use clean utensils and refrigerate leftovers promptly. Consult current FDA safe food-handling guidance for advice about storing prepared sauces and perishable pizza toppings. With its quick preparation and adaptable flavour, California Herb Pizza Oil offers a convenient way to create a bright, aromatic pizza without relying on tomatoes.


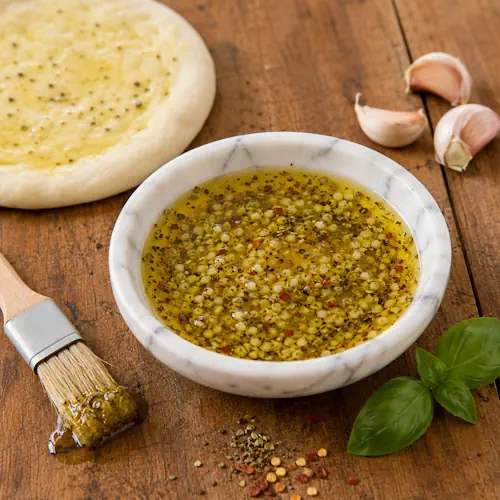
Garlic Herb Pizza Oil

Garlic pizza oil in a small bowl with fresh garlic, dried herbs and red pepper flakes

Garlic Herb Pizza Oil

Garlic Herb Pizza Oil is a fragrant tomato-free pizza sauce made with extra-virgin olive oil, fresh garlic, oregano, basil, and chilli flakes. Brush it over pizza dough or serve it as a dip with bread and focaccia.
Couverts4 servings
estimated costs pp $0.35
Deel op Facebook Print Recipe

Equipment

  • Fine-mesh strainer
  • heatproof bowl
  • Saucepan, Small
  • Whisk

Ingredients

Instructions

  • Pour the extra-virgin olive oil into a small saucepan.
  • Add the minced garlic.
  • Place the saucepan over low heat.
  • Cook for 5 minutes while stirring occasionally.
  • Keep the heat low and do not allow the garlic to brown.
  • Remove the saucepan from the heat.
  • Add the dried oregano, dried basil, kosher salt, black pepper, and red pepper flakes.
  • Whisk until the seasonings are evenly distributed.
  • Let the oil rest for 10 minutes so the flavours can infuse.
  • Place a fine-mesh strainer over a heatproof bowl.
  • Pour the oil through the strainer to remove the garlic pieces.
  • Whisk the strained oil briefly before use.
  • Brush a thin layer over prepared pizza dough before adding toppings.

Notes & Wine Advice

Serving Suggestions

Brush the oil lightly over pizza dough before adding mozzarella, mushrooms, spinach, artichokes, onions, or roasted peppers. It also works as a dip for breadsticks and our Garlic Rosemary Focaccia, or as a finishing drizzle over pasta and roasted vegetables.

Recipe Notes

Keep the saucepan over low heat because browned or burnt garlic will make the oil bitter. Straining removes the garlic pieces and creates a smoother pizza base. Use only a thin coating so the crust becomes flavourful without feeling greasy.

Variations

Add finely chopped rosemary or thyme for a stronger herbal flavour. Increase the red pepper flakes for additional heat. Lemon zest provides freshness, while smoked paprika gives the oil a warmer character. Parmesan can be added after cooking for a non-vegan variation.

Storage

Fresh garlic stored in oil can present a food-safety risk when kept incorrectly. Refrigerate the finished oil immediately in a clean airtight container and use it within three days. Never store homemade garlic oil at room temperature.

Wine Advice

A crisp Sauvignon Blanc balances the olive oil and garlic. A light-bodied Pinot Grigio complements pizzas topped with mozzarella, herbs, mushrooms, or fresh vegetables.

Nutrition values

Calories: 65 kcal | koolhydraten: 1 g | Eiwitten: 0 g | Vet: 7 g | Verzadigd vet: 1 g | Natrium: 75 mg | Suiker: 0 g
————————————————————————————————–

About Garlic Pizza Oil

Garlic pizza oil is a fragrant tomato-free sauce made by gently infusing extra-virgin olive oil with fresh garlic, oregano, basil, black pepper, and chilli flakes. A thin coating adds savoury flavour to homemade pizza without covering delicate toppings with tomatoes or a heavy cream sauce.

The original recipe made eight portions and has been recalculated for four. This smaller quantity is enough for four individual pizzas or one large pizza when applied sparingly. The oil can also be used for dipping bread, finishing pasta, or seasoning roasted vegetables.

Why Infused Olive Oil Works

Infused olive oil carries the flavour of garlic and dried herbs across the entire pizza base. Fat absorbs and distributes aromatic compounds particularly effectively, so only a small amount is needed. The oil also encourages browning where it touches the dough.

Unlike a tomato sauce, this mixture contains almost no water. It is therefore useful with toppings that release moisture, including mushrooms, spinach, courgette, and fresh mozzarella. The dry base reduces the chance of the centre becoming soggy.

Heating the Garlic Gently

Low heat is essential when preparing Garlic Herb Pizza Oil. Garlic can progress from fragrant to bitter very quickly. It should soften and release its aroma without developing a dark brown colour.

Five minutes over low heat is sufficient for finely minced garlic. Remove the saucepan immediately if the pieces begin to brown. Residual heat continues cooking the garlic briefly after the pan leaves the stovetop.

Adding Herbs and Chilli

Dried oregano and basil provide familiar Italian flavours. Adding them after removing the pan from the heat prevents the herbs from scorching. Black pepper contributes warmth, while red pepper flakes provide a mild chilli finish.

Let the mixture stand for 10 minutes before straining. This short resting period allows the oil to absorb the garlic, herbs, and spices. Straining creates a smooth sauce and removes garlic pieces that could burn during pizza baking.

Choosing Pizza Toppings

Garlic Herb Pizza Oil pairs naturally with mozzarella, Parmesan, ricotta, mushrooms, spinach, artichokes, olives, onions, courgette, or roasted peppers. It is also suitable for white pizzas topped with potatoes, rosemary, or caramelised onions.

Brush it over our Whole Wheat Pizza Dough for a nutty base or use it with the thicker Sicilian Pizza Dough. For three different tomato-free flavour options, see our Three Oil-Based Pizza Sauces.

Other Ways to Use the Oil

Serve the infused oil as a dip for focaccia, breadsticks, or crusty bread. It can also be drizzled over pasta, roasted potatoes, grilled vegetables, or soup. Browse the pizza collection, sauce recipes, and spreads for more homemade accompaniments.

For a salad dressing, whisk the oil with lemon juice or white wine vinegar. When using it as a finishing oil, add it immediately before serving so the garlic and herb aromas remain noticeable.

Safe Storage of Homemade Garlic Oil

Fresh garlic in oil must be handled carefully. Oil creates a low-oxygen environment in which harmful bacteria may grow when the mixture is stored improperly. Homemade garlic oil should never be kept at room temperature.

Transfer the cooled oil to a clean airtight container, refrigerate it promptly, and use it within three days. Discard it when its storage history is uncertain. Olive oil may become cloudy or partially solid in the refrigerator; this is normal and reverses as it warms slightly.

Follow current FDA safe food-handling guidance when preparing and storing infused oils. With low heat, a brief infusion, and safe refrigeration, garlic pizza oil provides an aromatic base for pizza, bread, pasta, and vegetables.