Grilled Leeks & Peppers

Grilled Leeks & Peppers served on a rustic platter with lightly charred bell peppers and tender leeks.

Grilled Leeks & Peppers

Grilled Leeks & Peppers is a simple Spanish-inspired side dish featuring smoky leeks and sweet bell peppers brushed with olive oil and grilled until beautifully charred. It’s a colorful addition to barbecues, grilled meats, fish, or vegetarian meals.
Couverts4 servings
Total time 35 minutes
estimated costs pp $2.10
Deel op Facebook Print Recipe

Equipment

Ingredients

Instructions

  • Preheat the grill to medium-high heat.
  • Wash and trim the leeks, keeping the white and light green parts intact.
  • Cut the bell peppers in half and remove the seeds and membranes.
  • Brush the leeks and peppers with olive oil.
  • Season with salt and black pepper.
  • Place the vegetables on the grill.
  • Grill the leeks for 10 to 15 minutes, turning occasionally, until tender and lightly charred.
  • Grill the peppers for 15 to 20 minutes, turning occasionally, until the skins are charred and the flesh is tender.
  • Transfer the peppers to a bowl and cover for 5 minutes to loosen the skins.
  • Peel away the charred skins and slice the peppers into strips.
  • Cut the grilled leeks into 2-inch (5 cm) pieces.
  • Arrange the leeks and peppers on a serving platter.
  • Drizzle with the remaining olive oil and serve warm.

Notes & Wine Advice

Recipe Notes

Turn the vegetables regularly to achieve even grill marks without burning.
Covering the peppers after grilling makes the skins much easier to remove.
Finish with a drizzle of extra virgin olive oil just before serving for the best flavor.
These grilled vegetables are delicious alongside meat, seafood, or crusty artisan bread.

Wine Advice

A crisp Sauvignon Blanc pairs beautifully with the smoky grilled vegetables.
A chilled Rosรฉ is another refreshing choice for this summer side dish.

Nutrition values

Calories: 150 kcal | koolhydraten: 15 g | Eiwitten: 3 g | Vet: 10 g | Verzadigd vet: 1.5 g | Natrium: 600 mg | Suiker: 8 g
————————————————————————————————–

About This Recipe

Grilled Leeks & Peppers is a simple Spanish-inspired vegetable dish that celebrates the natural sweetness of fresh leeks and colorful bell peppers. Grilling over high heat creates lightly charred edges while keeping the vegetables tender and juicy. Finished with extra virgin olive oil, this recipe is packed with fresh Mediterranean flavors and makes a healthy side dish for everything from grilled meats to seafood and vegetarian meals.

Why You’ll Love Grilled Leeks & Peppers

This Spanish grilled vegetables recipe requires only a handful of ingredients yet delivers wonderful flavor. The grilling process caramelizes the vegetables naturally, creating a delicious balance of sweetness and smoky notes. If you enjoy fresh vegetable dishes, browse our Vegetable Recipes, Barbecue Recipes, Grill Recipes, Spanish Recipes, and Vegan Recipes.

Preparing Spanish Grilled Vegetables

Trim the leeks carefully while keeping them intact, then halve the peppers and remove the seeds. Brush everything generously with olive oil before seasoning with salt and pepper. Grill until the vegetables are tender with lightly charred edges. Peel the peppers after grilling for an even sweeter flavor and combine them with the sliced leeks before serving. Grilled Leeks & Peppers are equally delicious warm or at room temperature.

Serving Grilled Leeks & Peppers

Grilled Leeks & Peppers pair beautifully with grilled steak, chicken, lamb, fish, or vegetarian dishes. They also make a delicious topping for toasted bread, can be stirred into pasta, or served alongside roasted potatoes and fresh salads. Finish with chopped parsley or a squeeze of fresh lemon for extra brightness.

Storage Tips

Store leftover Spanish grilled vegetables in an airtight container in the refrigerator for up to four days. Enjoy them cold in salads or gently reheat them in a skillet or oven before serving. For additional food storage recommendations, visit the FDA Food Safety website.

This colorful grilled vegetable recipe proves that simple Mediterranean ingredients can create outstanding flavor with very little effort. Whether served at a summer barbecue or alongside a weeknight dinner, it is a versatile dish you’ll make again and again.


Mustard Glazed Baby Back Ribs

Mustard Glazed Baby Back Ribs

Summary

Mustard Glazed Baby Back Ribs are slow-smoked until fall-off-the-bone tender, then finished with a sweet and tangy Dijon mustard glaze. These juicy ribs are packed with smoky barbecue flavor and are perfect for cookouts, family dinners, and weekend grilling.

Equipment

Aluminum foil
Basting brush
Large bowl
Meat thermometer
Smoker or grill

Ingredients

ยผ cup apple cider vinegar
ยผ cup brown sugar
ยฝ cup Dijon mustard
1 tablespoon garlic powder
1 tablespoon paprika
1 tablespoon salt
1 tablespoon smoked paprika
1 tablespoon Worcestershire sauce
2 tablespoons honey
4 lb pork baby back ribs

Instructions

Combine the brown sugar, paprika, smoked paprika, garlic powder, and salt in a large bowl.
Rub the seasoning mixture evenly over the ribs.
Preheat the smoker or grill to 225ยฐF (107ยฐC).
Place the ribs bone-side down on the grill.
Smoke for 2ยฝ hours.
Whisk together the Dijon mustard, honey, apple cider vinegar, and Worcestershire sauce.
Brush the ribs generously with the mustard glaze.
Continue cooking for another 30 minutes until the ribs reach an internal temperature of 88ยฐC (190ยฐF).
Remove the ribs from the grill.
Let them rest for 10 minutes.
Slice and serve.

Mustard Glazed Baby Back Ribs coated with a tangy Dijon glaze and served fresh from the smoker on a rustic wooden platter.

Mustard Glazed Baby Back Ribs

Mustard Glazed Baby Back Ribs are slow-smoked until fall-off-the-bone tender, then finished with a sweet and tangy Dijon mustard glaze. These juicy ribs are packed with smoky barbecue flavor and are perfect for cookouts, family dinners, and weekend grilling.
Couverts4 servings
estimated costs pp $8.95
Deel op Facebook Print Recipe

Equipment

  • aluminum foil
  • Large bowl
  • Meat thermometer
  • Smoker or grill

Ingredients

Instructions

  • Combine the brown sugar, paprika, smoked paprika, garlic powder, and salt in a large bowl.
  • Rub the seasoning mixture evenly over the ribs.
  • Preheat the smoker or grill to 225ยฐF (107ยฐC).
  • Place the ribs bone-side down on the grill.
  • Smoke for 2ยฝ hours.
  • Whisk together the Dijon mustard, honey, apple cider vinegar, and Worcestershire sauce.
  • Brush the ribs generously with the mustard glaze.
  • Continue cooking for another 30 minutes until the ribs reach an internal temperature of 88ยฐC (190ยฐF).
  • Remove the ribs from the grill.
  • Let them rest for 10 minutes.
  • Slice and serve.

Notes & Wine Advice

Recipe Notes

Remove the membrane from the back of the ribs before seasoning for the most tender result.
Keep the smoker temperature steady throughout cooking to ensure even tenderness.
Brush the mustard glaze on during the final 30 minutes to create a flavorful, sticky coating without burning the sugars.
Allow the ribs to rest before slicing so the juices stay inside the meat.

Wine Advice

A fruity Pinot Noir pairs beautifully with the smoky and tangy flavors of the ribs.
A crisp Riesling offers a refreshing contrast to the rich barbecue glaze.

Nutrition values

Calories: 700 kcal | koolhydraten: 20 g | Eiwitten: 55 g | Vet: 50 g | Verzadigd vet: 18 g | Natrium: 960 mg | Suiker: 15 g
————————————————————————————————–
Cuisine; American
Season: Summer
Diets; Gluten-Free / Paleo

About This Recipe

Mustard Glazed Baby Back Ribs are everything barbecue lovers hope for: tender, juicy pork ribs coated with a smoky spice rub and finished with a rich Dijon mustard glaze that caramelizes beautifully during the final stage of cooking. Slow smoking allows the meat to become incredibly tender while the sweet and tangy glaze creates a glossy finish packed with bold flavor. Whether you’re hosting a backyard cookout or preparing a weekend feast, these ribs are guaranteed to impress.

Why You’ll Love Mustard Glazed Baby Back Ribs

This smoked mustard ribs recipe combines a flavorful dry rub with a simple homemade glaze that perfectly balances sweetness, acidity, and gentle heat. The slow cooking process produces juicy meat that pulls cleanly from the bone while developing an irresistible smoky crust. If you enjoy outdoor cooking, browse our Barbecue Recipes, Grill Recipes, Pork Recipes, American Recipes, and Outdoor Cooking Recipes.

Preparing Smoked Mustard Ribs

Begin by coating the ribs generously with the spice mixture, allowing every surface to absorb the seasoning. Smoke the ribs slowly over low heat until they become tender before brushing on the Dijon mustard glaze. During the final cooking stage, the glaze thickens into a sticky coating that locks in moisture and flavor. Mustard Glazed Baby Back Ribs are ready when they reach the ideal internal temperature and the meat is beautifully tender.

Serving Mustard Glazed Baby Back Ribs

Mustard Glazed Baby Back Ribs are delicious served with grilled corn, baked potatoes, creamy coleslaw, potato salad, baked beans, or grilled vegetables. Finish the platter with fresh parsley and lemon wedges for a bright contrast to the rich barbecue flavors. These ribs are equally at home at summer cookouts, family dinners, and holiday barbecues.

Storage Tips

Store leftover smoked mustard ribs in an airtight container in the refrigerator for up to four days. Reheat gently in the oven, wrapped in foil, to keep the meat moist. The cooked ribs can also be frozen for up to three months. For additional food storage recommendations, visit the FDA Food Safety website.

This slow-smoked rib recipe delivers classic American barbecue flavor with a delicious mustard twist. Once you’ve tasted the combination of smoky pork and sweet, tangy glaze, it’s sure to become one of your favorite recipes for every barbecue season.


Memphis Style Barbecued Ribs

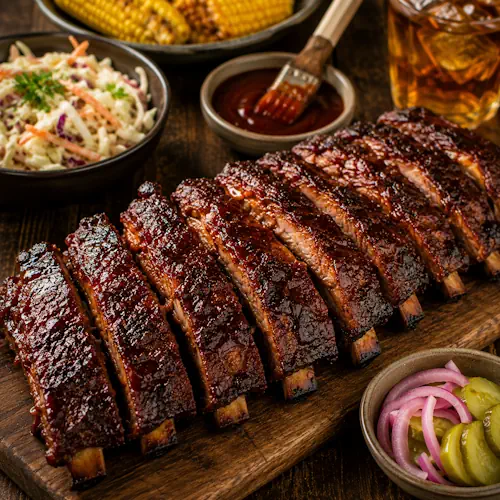
Memphis Style Barbecued Ribs with a smoky dry rub served on a rustic wooden platter after slow smoking.

Memphis Style Barbecued Ribs

Memphis Style Barbecued Ribs are coated with a classic dry rub before being slow-smoked until tender and full of rich barbecue flavor. This American barbecue favorite delivers smoky, savory ribs with a beautifully seasoned crust.
Couverts4 servings
estimated costs pp $7.95
Deel op Facebook Print Recipe

Equipment

  • aluminum foil
  • Large bowl
  • Meat thermometer
  • Smoker or grill

Ingredients

Instructions

  • Combine the brown sugar, paprika, smoked paprika, garlic powder, mustard powder, white pepper, and salt in a large bowl.
  • Coat the ribs evenly with the dry rub.
  • Preheat the smoker or grill to 225ยฐF (107ยฐC).
  • Place the ribs bone-side down over indirect heat.
  • Smoke for 3 to 4 hours until the ribs are tender and reach an internal temperature of 88ยฐC (190ยฐF).
  • Transfer the ribs to a cutting board.
  • Rest for 10 minutes.
  • Slice between the bones and serve.

Notes & Wine Advice

Recipe Notes

Remove the membrane from the back of the ribs before applying the dry rub for a more tender result.
Apply the seasoning at least one hour before smoking for deeper flavor.
Maintain a steady smoker temperature throughout the cook for evenly tender ribs.
Let the ribs rest before slicing to keep the juices inside the meat.

Wine Advice

A dry Rosรฉ balances the smoky spices beautifully.
A light Pinot Noir also pairs very well with these Memphis-style ribs.

Nutrition values

Calories: 905 kcal | koolhydraten: 24 g | Eiwitten: 69 g | Vet: 63 g | Verzadigd vet: 23 g | Natrium: 980 mg | Suiker: 1 g
————————————————————————————————–
Cuisine; American
Season: Summer
Diets; Gluten-Free / Paleo

About This Recipe

Memphis Style Barbecued Ribs are one of the most iconic dishes in American barbecue. Unlike many other rib recipes, these ribs rely on a bold dry rub instead of a thick barbecue sauce. A blend of paprika, garlic, mustard powder, brown sugar, and white pepper creates a flavorful crust while slow smoking produces juicy, fall-off-the-bone pork. The result is smoky, savory, and packed with authentic Memphis barbecue character that shines at every backyard cookout.

Why You’ll Love Memphis Style Barbecued Ribs

This dry rub ribs recipe is easy to prepare and delivers authentic barbecue flavor with only a handful of ingredients. Slow smoking allows the spices to develop a rich bark while keeping the meat moist and tender. If you love traditional barbecue, browse our Barbecue Recipes, Grill Recipes, Pork Recipes, American Recipes, and Outdoor Cooking Recipes.

Preparing Dry Rub Ribs

Mix the dry seasoning thoroughly before rubbing it generously over every side of the ribs. Allow the spices to rest on the meat before placing the ribs in the smoker. Cook slowly over indirect heat until the meat becomes tender and develops a deep, flavorful crust. Memphis Style Barbecued Ribs are at their best after a short resting period, which helps the juices stay inside the meat.

Serving Memphis Style Barbecued Ribs

Memphis Style Barbecued Ribs pair perfectly with creamy coleslaw, potato salad, baked beans, grilled corn, cornbread, or roasted vegetables. Serve extra dry rub on the side for guests who enjoy even bolder barbecue flavor. These ribs are ideal for family gatherings, summer parties, and weekend grilling.

Storage Tips

Store leftover dry rub ribs in an airtight container in the refrigerator for up to four days. Reheat gently in a low oven wrapped in foil to keep the meat moist. The cooked ribs also freeze well for up to three months. For additional food storage recommendations, visit the FDA Food Safety website.

Memphis Style Barbecued Ribs prove that outstanding barbecue doesn’t require heavy sauce. With a perfectly balanced dry rub and patient slow smoking, you’ll enjoy authentic Southern barbecue flavor every time you fire up the grill.


Classic BBQ Sauce

Classic BBQ Sauce in a rustic bowl with a brush, surrounded by barbecue ingredients on a wooden table.

Classic BBQ Sauce

Classic BBQ Sauce is a rich, tangy homemade barbecue sauce with the perfect balance of sweetness, smokiness, and spice. It’s ideal for glazing, dipping, marinating, or brushing onto grilled meats and vegetables.
Couverts4 servings
Total time 40 minutes
Deel op Facebook Print Recipe

Equipment

  • medium saucepan
  • Whisk

Ingredients

Instructions

  • Add all the ingredients to a medium saucepan.
  • Whisk until smooth.
  • Bring the sauce to a gentle simmer over medium heat.
  • Reduce the heat to low.
  • Cook for 30 minutes, stirring occasionally.
  • Remove the saucepan from the heat.
  • Allow the sauce to cool completely before serving or storing.

Notes & Wine Advice

Recipe Notes

Simmer the sauce gently to allow the flavors to blend without scorching.
Store the cooled sauce in a sealed jar in the refrigerator for up to two weeks.
Brush the sauce onto meat during the final minutes of grilling to prevent burning.
This sauce also works well as a dipping sauce for fries, chicken, or roasted vegetables.

Wine Advice

A fruity Zinfandel complements the sweet and smoky flavors beautifully.
A light-bodied red wine is another excellent match for grilled dishes with this sauce.

Nutrition values

Calories: 62 kcal | koolhydraten: 15 g | Eiwitten: 1 g | Vet: 0 g | Verzadigd vet: 0 g | Natrium: 310 mg | Suiker: 12 g
————————————————————————————————–

About This Recipe

Classic BBQ Sauce is a homemade American barbecue sauce with the perfect balance of sweet, tangy, smoky, and savory flavors. Ketchup, apple cider vinegar, brown sugar, Worcestershire sauce, paprika, and spices slowly simmer together to create a smooth sauce that’s ideal for grilling, dipping, glazing, or marinating. Whether you’re firing up the barbecue or looking for a versatile homemade sauce, this easy recipe delivers bold flavor every time.

Why You’ll Love Homemade BBQ Sauce

This homemade barbecue sauce comes together with simple pantry ingredients and takes very little effort to prepare. Simmering the sauce slowly allows every ingredient to blend into a rich, well-balanced flavor. Make a batch ahead of time and keep it in the refrigerator so it’s always ready for your next barbecue. If you enjoy outdoor cooking, browse our Barbecue Recipes, Sauce Recipes, Grill Recipes, American Recipes, and Outdoor Cooking Recipes.

Making Homemade Barbecue Sauce

Add all the ingredients to a saucepan and whisk until smooth before bringing the mixture to a gentle simmer. Stir regularly while the sauce thickens and the flavors develop. Allow the sauce to cool completely before storing it in a sealed jar. Classic BBQ Sauce becomes even more flavorful after resting overnight in the refrigerator.

Serving Classic BBQ Sauce

Classic BBQ Sauce is perfect for ribs, burgers, pulled pork, grilled chicken, steak, sausages, roasted vegetables, and crispy fries. Brush it onto food during the final minutes of grilling for a glossy finish, or serve it as a flavorful dipping sauce alongside your favorite barbecue dishes.

Storage Tips

Store homemade barbecue sauce in a clean airtight jar in the refrigerator for up to two weeks. Stir before each use and always use a clean spoon to keep the sauce fresh. For additional food storage recommendations, visit the FDA Food Safety website.

With its balanced flavor and simple preparation, Classic BBQ Sauce deserves a place in every home kitchen. It’s an easy recipe you’ll reach for throughout the grilling season and whenever homemade barbecue flavor is on the menu.


Applewood Bliss BBQ Ribs

applewood smoked ribs combine tender pork ribs, smoky applewood flavor, savory spices, and rich barbecue character into a classic low-and-slow barbecue recipe perfect for summer grilling. The applewood smoke creates slightly sweet smoky depth while the spice rub builds rich flavor throughout the ribs.

This smoked pork ribs recipe remains popular because the gentle applewood smoke gives the pork a softer sweeter flavor compared to stronger woods like mesquite or hickory. Slow cooking also helps create juicy tender meat that pulls beautifully from the bone.

Applewood smoked ribs with sweet smoky flavor

The popularity of applewood smoked ribs continues to grow because applewood creates balanced smoky flavor without overpowering the natural richness of the pork. Soaking the wood chips in apple juice also adds subtle fruity sweetness while helping the smoke last longer during cooking.

Another reason this smoked pork ribs recipe works so well is the balance between smoky flavor, savory spices, and juicy pork texture. Paprika, smoked paprika, garlic powder, brown sugar, and Worcestershire sauce create deep barbecue richness throughout the ribs.

Smoked pork ribs stay juicy during slow cooking

The combination of low heat and long smoking time gives these applewood barbecue ribs their tender texture. Cooking the ribs slowly at 225ยฐF allows the connective tissue to break down gradually while preserving moisture inside the meat.

If you enjoy smoky barbecue pork recipes, you may also like our Easy Backyard Spareribs, another flavorful pork rib recipe packed with rich barbecue flavor.

Texture plays an important role in this recipe. The outside develops flavorful bark from the dry rub and smoke while the inside stays juicy and tender. Resting the ribs before slicing also helps preserve moisture throughout the meat.

Brushing the ribs with barbecue sauce during the final stage of cooking creates sticky caramelized glaze while still allowing the applewood smoked ribs flavor to shine through.

Perfect barbecue pork ribs for outdoor grilling

These smoked pork ribs work perfectly for summer cookouts, family dinners, backyard parties, and outdoor barbecue weekends because the smoky sweet flavor appeals to nearly everyone at the table.

The ribs pair beautifully with coleslaw, corn on the cob, baked beans, potato salad, cornbread, pickles, or extra barbecue sauce served on the side.

Proper food handling remains important whenever preparing pork and barbecue marinades. Pork should always stay refrigerated before cooking and should be cooked thoroughly before serving. For additional meat preparation and barbecue safety guidance, visit the FDA.

Ultimately, applewood smoked ribs deliver tender pork texture, sweet smoky richness, flavorful barbecue bark, and juicy slow-cooked flavor in a satisfying recipe perfect for smokers and grills.

applewood smoked ribs served on a rustic wooden table with smoky barbecue pork ribs

Applewood Smoked BBQ Ribs

Tender smoked pork ribs with sweet applewood flavor and rich barbecue spices.
Couverts4 servings
Total time 43 minutes
estimated costs pp $9.25 per person
Deel op Facebook Print Recipe

Equipment

  • aluminum foil
  • Large bowl
  • Meat thermometer
  • Smoker or grill

Ingredients

  • 2 cups applewood chips
  • 1 cup apple juice
  • 1/4 cup brown sugar
  • 1 tablespoon garlic powder
  • 2 tablespoons paprika
  • 4 pounds pork ribs
  • 1 tablespoon salt
  • 1 tablespoon smoked paprika
  • 2 tablespoons Worcestershire sauce

Instructions

  • Combine brown sugar, paprika, smoked paprika, garlic powder, and salt in a bowl.
  • Rub the spice mixture thoroughly over the pork ribs.
  • Soak the applewood chips in apple juice for 30 minutes.
  • Preheat the smoker or grill to 225ยฐF.
  • Add the soaked applewood chips to the smoker or grill.
  • Place the ribs bone-side down onto the grill grates.
  • Smoke the ribs for 3 hours or until tender and the internal temperature reaches 190ยฐF.
  • Brush with barbecue sauce during the final 30 minutes if desired.
  • Remove the ribs from the smoker and let rest for 10 minutes before slicing.

Notes & Wine Advice

Notes

Applewood creates a softer sweeter smoke flavor that pairs beautifully with pork ribs.

Serve Tip

Serve these ribs with coleslaw, corn on the cob, baked beans, potato salad, or cornbread.

Variations

Add cayenne pepper, bourbon glaze, honey, garlic butter, or chipotle powder for deeper smoky sweetness and spice.

Wine Advice

A fruity Zinfandel pairs beautifully with the smoky pork and sweet barbecue spices.

Nutrition values

Calories: 650 kcal | koolhydraten: 15 g | Eiwitten: 50 g | Vet: 40 g | Verzadigd vet: 14 g | Natrium: 980 mg | Suiker: 10 g
————————————————————————————————–
Course; Barbecue / Main Course / Meat / Pork
Cuisine; American
Season: Summer
Diets; Gluten-Free / Paleo
Occasions Game Day / Summerpartys

Grilled Key Lime Chicken

Grilled Key Lime Chicken with fresh Key lime slices and grilled vegetables on a rustic wooden serving board.

Grilled Key Lime Chicken

Grilled Key Lime Chicken is a juicy American barbecue recipe featuring tender chicken breasts marinated in fresh Key lime juice, garlic, and olive oil. The bright citrus flavor makes this an easy and refreshing meal for summer grilling.
Couverts4 servings
Total time 50 minutes
estimated costs pp $3.95
Deel op Facebook Print Recipe

Equipment

  • grill
  • Mixing bowl
  • Tongs

Ingredients

Instructions

  • Whisk together the Key lime juice, Key lime zest, olive oil, garlic, salt, and black pepper in a mixing bowl.
  • Add the chicken breasts and coat them evenly with the marinade.
  • Cover and refrigerate.
  • Preheat the grill to medium-high heat.
  • Place the chicken on the hot grill.
  • Cook for 5 to 7 minutes per side until the chicken reaches an internal temperature of 74ยฐC (165ยฐF).
  • Transfer the chicken to a serving platter.
  • Rest for 5 minutes before serving.

Notes & Wine Advice

Recipe Notes

Fresh Key limes provide the brightest flavor, but regular limes work well if needed.
Avoid marinating the chicken for more than two hours, as the citrus can affect the texture of the meat.
Let the chicken rest for five minutes after grilling to keep it juicy.
Serve with grilled vegetables, rice, or a fresh green salad for a complete meal.

Wine Advice

A crisp Sauvignon Blanc highlights the fresh citrus flavors beautifully.
A refreshing Pinot Grigio is another excellent pairing with this grilled chicken.

Nutrition values

Calories: 250 kcal | koolhydraten: 3 g | Eiwitten: 38 g | Vet: 9 g | Verzadigd vet: 1.5 g | Natrium: 641 mg | Suiker: 1 g
————————————————————————————————–

About This Recipe

Grilled Key Lime Chicken is a light and flavorful American barbecue recipe that combines juicy chicken breasts with the bright taste of fresh Key limes. A simple marinade of Key lime juice, zest, garlic, olive oil, salt, and pepper adds fresh citrus flavor while keeping the chicken tender and moist. After a quick trip to the grill, the chicken develops beautiful grill marks and a delicious smoky finish. It’s an easy recipe that’s perfect for warm-weather meals and outdoor gatherings.

Why You’ll Love Key Lime Chicken

This citrus grilled chicken recipe comes together with just a few fresh ingredients. The marinade is quick to prepare and gives the chicken a refreshing flavor without overpowering the meat. Whether you’re planning a casual cookout or a family dinner, this recipe fits the occasion perfectly. Browse our Barbecue Recipes, Chicken Recipes, Grill Recipes, American Recipes, and Outdoor Cooking Recipes.

Making Citrus Grilled Chicken

Mix the marinade until well blended before coating each chicken breast evenly. Allow the chicken to marinate so the citrus flavors can penetrate the meat. Grill over medium-high heat until the chicken reaches a safe internal temperature. Grilled Key Lime Chicken benefits from a short resting period, helping the juices stay inside every bite while keeping the meat tender.

Serving Grilled Key Lime Chicken

Grilled Key Lime Chicken pairs beautifully with grilled vegetables, corn on the cob, rice, roasted potatoes, or a crisp green salad. Add fresh lime wedges and chopped cilantro before serving for extra freshness. Leftovers are excellent in wraps, sandwiches, tacos, or sliced over a salad for lunch.

Storage Tips

Store leftover citrus grilled chicken in an airtight container in the refrigerator for up to four days. Reheat gently to maintain its tenderness or enjoy it cold in salads and sandwiches. For additional food storage recommendations, visit the FDA Food Safety website.

Grilled Key Lime Chicken is a simple recipe that delivers bright citrus flavor with very little effort. It’s a reliable choice for summer grilling and a delicious addition to any barbecue menu.


Cinnamon Honey Chicken Wings

Cinnamon Honey Chicken Wings coated in a sticky honey glaze and served on a rustic platter with fresh herbs.

Cinnamon Honey Chicken Wings

Cinnamon Honey Chicken Wings are oven-baked until crispy, then coated in a sticky glaze made with honey, cinnamon, butter, and a hint of ginger. The result is a delicious balance of sweet, warm spice, and crispy texture that’s perfect for parties, game day, or family dinners.
Couverts4 $4.25
estimated costs pp $4.25
Deel op Facebook Print Recipe

Equipment

  • Baking sheet
  • Large mixing bowl
  • Measuring spoons
  • Whisk
  • Wire rack (optional)

Ingredients

Instructions

  • Preheat the oven to 200ยฐC (400ยฐF).
  • Line a baking sheet with parchment paper.
  • Combine the flour, baking powder, salt, black pepper, and cayenne pepper in a large bowl.
  • Add the chicken wings and toss until evenly coated.
  • Arrange the wings in a single layer on the baking sheet.
  • Bake for 40 minutes, turning halfway through, until golden brown and crispy.
  • Whisk together the honey, melted butter, apple cider vinegar, cinnamon, and ginger.
  • Transfer the cooked wings to a clean bowl.
  • Pour the glaze over the wings and toss until evenly coated.
  • Serve immediately.

Notes & Wine Advice

<h2>Recipe Notes</h2>
<p>Pat the wings dry before coating them to achieve the crispiest texture.</p>
<p>Turn the wings halfway through baking so they brown evenly on all sides.</p>
<p>Toss the wings with the glaze just before serving to keep the coating glossy and sticky.</p>
<p>Serve with celery sticks, carrot sticks, or a creamy yogurt dip for a balanced appetizer.</p>
<h2>Wine Advice</h2>
<p>A lightly sweet <a href=”https://recipecollectors.com/riesling/”>Riesling</a> balances the sweet honey glaze and gentle spices.</p>
<p>An aromatic <a href=”https://recipecollectors.com/gewurztraminer/”>Gewรผrztraminer</a> pairs beautifully with the cinnamon and ginger flavors.</p>

Nutrition values

Calories: 505 kcal | koolhydraten: 31 g | Eiwitten: 36 g | Vet: 27 g | Verzadigd vet: 9 g | Natrium: 710 mg | Suiker: 25 g
————————————————————————————————–
Cuisine; American
Season: All Seasons
Diets; Nut Free
Occasions Game Day / Party / Weekend

About This Recipe

Cinnamon Honey Chicken Wings combine crispy oven-baked chicken wings with a glossy honey glaze flavored with cinnamon, ginger, and a touch of apple cider vinegar. The sweet honey balances the warm spices while the baked wings stay wonderfully crispy on the outside and juicy inside. This easy recipe is perfect for parties, game nights, weekend snacks, or as a flavorful appetizer for any gathering.

Why You’ll Love Honey Chicken Wings

This baked honey wings recipe delivers big flavor without deep frying. Baking the wings with baking powder creates an extra crispy skin, while the homemade glaze coats every piece with a delicious sweet and lightly spiced finish. If you enjoy finger food, browse our Chicken Recipes, Fingerfood Recipes, Snack Recipes, American Recipes, and Game Day Recipes.

Making Baked Honey Wings

Coat the chicken wings evenly before arranging them in a single layer on the baking tray. Turn the wings halfway through cooking so they become evenly crisp. While they bake, prepare the honey glaze until smooth. Toss the hot wings with the glaze immediately after baking so every piece becomes beautifully coated. Cinnamon Honey Chicken Wings are best served fresh from the oven while the coating is warm and sticky.

Serving Cinnamon Honey Chicken Wings

Cinnamon Honey Chicken Wings are delicious with celery sticks, carrot sticks, ranch dressing, blue cheese dip, fries, coleslaw, or a fresh green salad. Sprinkle with chopped parsley or sesame seeds before serving for extra color and texture. They also make a fantastic addition to party platters and barbecue buffets.

Storage Tips

Store leftover baked honey wings in an airtight container in the refrigerator for up to four days. Reheat them in the oven or air fryer to restore their crispy texture. For additional food storage recommendations, visit the FDA Food Safety website.

Cinnamon Honey Chicken Wings offer the perfect combination of crispy chicken and a rich homemade glaze. Whether you’re serving them as an appetizer, snack, or casual dinner, they’re guaranteed to disappear quickly.


Maple Barbecue Rub

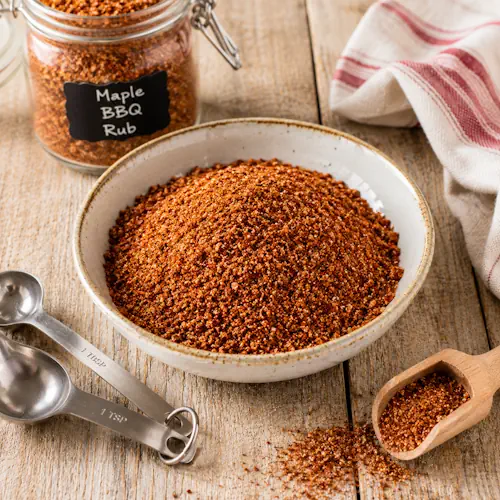
Maple Barbecue Rub in a rustic glass jar with paprika, garlic powder, and barbecue spices on a wooden table.

Maple Barbecue Rub

Maple Barbecue Rub is a sweet, smoky, and savory dry seasoning blend that’s perfect for ribs, chicken, pork, and grilled vegetables. This homemade spice mix adds rich barbecue flavor and creates a delicious crust during grilling or smoking.
Couverts4 servings
Total time 5 minutes
estimated costs pp $0.60
Deel op Facebook Print Recipe

Equipment

  • airtight container
  • Measuring spoons
  • Mixing bowl

Ingredients

Instructions

  • Combine all the ingredients in a mixing bowl.
  • Mix thoroughly until the spices are evenly distributed.
  • Transfer the seasoning blend to an airtight container.
  • Store in a cool, dry place until ready to use.

Notes & Wine Advice

Recipe Notes

Apply the rub at least 30 minutes before grilling or smoking for deeper flavor.
Store the seasoning in an airtight container away from heat and sunlight for maximum freshness.
This rub also works well on chicken, pork, burgers, and roasted vegetables.
Adjust the cayenne pepper to make the blend milder or spicier.

Wine Advice

A fruity Merlot pairs beautifully with foods seasoned with this barbecue rub.
A bold Cabernet Sauvignon complements the smoky spices and grilled flavors.

Nutrition values

Calories: 30 kcal | koolhydraten: 7 g | Eiwitten: 1 g | Vet: 0.5 g | Verzadigd vet: 0 g | Natrium: 470 mg | Suiker: 5 g
————————————————————————————————–

About This Recipe

Maple Barbecue Rub is a homemade seasoning blend that combines brown sugar, paprika, garlic, onion, cumin, and mustard into a sweet and smoky barbecue favorite. The balanced mix creates a flavorful crust on grilled and smoked foods while enhancing their natural taste. It’s quick to prepare, stores well, and belongs in every barbecue lover’s spice collection.

Why You’ll Love Maple Barbecue Rub

This barbecue spice rub is made with everyday pantry ingredients and takes only a few minutes to mix together. It works equally well on ribs, chicken, pork, burgers, steaks, and vegetables. If you enjoy making your own seasonings, browse our Barbecue Recipes, Spices & Seasoning Recipes, Grill Recipes, American Recipes, and Outdoor Cooking Recipes.

How To Make Barbecue Spice Rub

Mix all the spices until evenly blended before transferring the mixture to an airtight container. The seasoning develops even more flavor after resting for a day. Sprinkle the blend generously over meat or vegetables before grilling, roasting, or smoking. Maple Barbecue Rub creates a rich, caramelized crust while adding classic American barbecue flavor.

Ways To Use Maple Barbecue Rub

Use this barbecue spice rub on ribs, chicken, pork chops, burgers, steaks, roasted potatoes, grilled corn, or vegetables. Brush your favorite barbecue sauce over the food during the last few minutes of cooking for an extra layer of smoky sweetness.

Storage Tips

Store barbecue spice rub in a tightly sealed container in a cool, dry place for up to six months. Shake the jar before each use to evenly distribute the spices. For additional food storage recommendations, visit the FDA Food Safety website.

Keep a jar of Maple Barbecue Rub in your pantry and you’ll always have a versatile homemade seasoning ready for your next barbecue, grill session, or family cookout.

This versatile homemade BBQ rub also makes a thoughtful gift for barbecue enthusiasts. Fill a small glass jar, add a label, and keep it ready for cookouts, camping trips, or weekend grilling. Because the seasoning keeps well, you’ll always have a flavorful blend on hand whenever it’s time to fire up the grill.


Kansas City Rib Rub

Kansas City Rib Rub

Kansas City Rib Rub is a sweet, smoky, and flavorful dry seasoning blend made with brown sugar, paprika, chili powder, garlic, onion, and warm spices. It’s perfect for coating ribs, pork, chicken, or beef before grilling, smoking, or roasting.
Couverts4 servings
Total time 5 minutes
estimated costs pp $0.45 per person
Deel op Facebook Print Recipe

Equipment

  • airtight container
  • Measuring spoons
  • Mixing bowl

Ingredients

Instructions

  • Combine the brown sugar, paprika, chili powder, garlic powder, onion powder, cumin, dry mustard, salt, black pepper, and cayenne pepper in a mixing bowl.
  • Stir until the spices are evenly blended.
  • Transfer the rib rub to an airtight container.
  • Store in a cool, dry place until ready to use.
  • Rub generously over ribs, pork, chicken, or beef at least 30 minutes before cooking for the best flavor.

Notes & Wine Advice

Recipe Notes

Massage the rub generously into the meat to help the flavors penetrate before cooking.
Let the seasoned meat rest for at least 30 minutes, or refrigerate overnight for an even deeper flavor.
This versatile spice blend also works well on chicken, pork chops, burgers, and roasted vegetables.
Store the rub in an airtight container away from heat and sunlight for maximum freshness.

Wine Advice

A smooth Merlot complements the sweet and smoky flavors beautifully.
For bold barbecue dishes, enjoy a glass of Cabernet Sauvignon alongside your ribs.

Nutrition values

Calories: 30 kcal | koolhydraten: 7 g | Eiwitten: 1 g | Vet: 0.5 g | Verzadigd vet: 0 g | Natrium: 390 mg | Suiker: 5 g
————————————————————————————————–

About This Recipe

Kansas City Rib Rub is a classic American dry seasoning blend that delivers the signature sweet, smoky, and slightly spicy flavor Kansas City barbecue is famous for. Brown sugar creates a rich caramelized crust, while paprika, chili powder, garlic, onion, cumin, and mustard build layers of savory flavor. This easy homemade rub takes only minutes to prepare and transforms ordinary ribs into authentic barbecue favorites with deep, bold flavor.

Why You’ll Love Kansas City Rib Rub

This homemade BBQ rub uses common pantry spices to create a balanced seasoning that works on much more than ribs. The brown sugar helps develop a beautiful bark during grilling or smoking, while the spices enhance the natural flavor of the meat without overpowering it. If you enjoy barbecue cooking, browse our Barbecue Recipes, Grill Recipes, Outdoor Cooking Recipes, American Recipes, and Spices & Seasoning Recipes.

Making Homemade BBQ Rub

Measure every spice carefully before combining them in a bowl. Stir until the mixture is completely uniform, then transfer it to an airtight container for storage. Apply Kansas City Rib Rub generously to ribs, pork shoulder, chicken, or beef at least thirty minutes before cooking. For an even richer flavor, season the meat the night before and refrigerate it until ready to cook.

Serving Kansas City Rib Rub

Kansas City Rib Rub is perfect for smoked ribs, grilled pork chops, chicken wings, brisket, burgers, and even roasted vegetables. Pair it with homemade coleslaw, baked beans, corn on the cob, or potato salad for a complete barbecue feast. This versatile seasoning also makes a thoughtful homemade gift for barbecue enthusiasts.

Storage Tips

Store your homemade BBQ rub in a tightly sealed container in a cool, dry cupboard for up to six months. Shake the container before each use to redistribute the spices. Avoid exposing the seasoning to moisture to keep it fresh and flavorful. For additional food storage recommendations, visit the FDA Food Safety website.

This seasoning blend captures the unmistakable flavors of Kansas City barbecue using simple ingredients you probably already have at home. Whether you’re grilling for family or smoking ribs for a special occasion, this homemade spice blend adds authentic barbecue character to every bite.


Thai Chili Paste

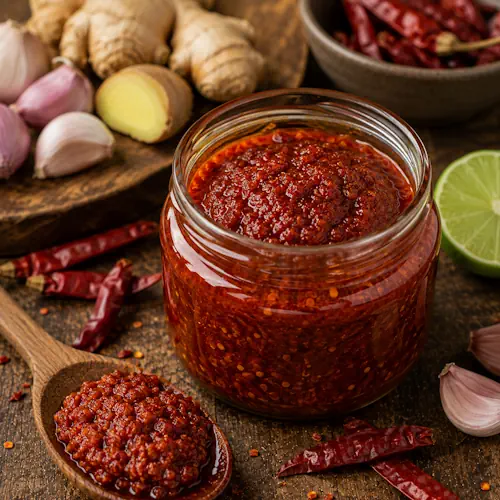
Thai Chili Paste made with dried chilies, garlic, ginger, and lime served in a rustic bowl.

Thai Chili Paste

Thai Chili Paste is a bold, aromatic condiment made with dried red chilies, garlic, shallots, ginger, and lime juice. This versatile homemade paste adds authentic Thai flavor and fiery heat to curries, stir-fries, marinades, soups, and noodle dishes.
Couverts2 servings
Total time 35 minutes
estimated costs pp $0.65 per person
Deel op Facebook Print Recipe

Equipment

  • airtight container
  • food processor, or blender
  • medium saucepan
  • Measuring spoons

Ingredients

Instructions

  • Drain the soaked chilies.
  • Place the chilies, garlic, shallots, and ginger into a food processor or blender.
  • Blend until a smooth paste forms.
  • Heat the vegetable oil in a medium saucepan over medium heat.
  • Add the chili paste.
  • Cook for 5 minutes while stirring constantly.
  • Stir in the fish sauce or soy sauce, lime juice, and brown sugar.
  • Continue cooking for 15 minutes, stirring occasionally, until the paste thickens.
  • Remove from the heat.
  • Allow the chili paste to cool completely.
  • Transfer to an airtight container.
  • Store in the refrigerator.

Notes & Wine Advice

Recipe Notes

Wear gloves when handling dried chilies if you have sensitive skin.
Blend the ingredients until completely smooth for the best texture.
The chili paste develops even more flavor after resting overnight in the refrigerator.
Use small amounts at first, then adjust to your preferred level of heat.

Wine Advice

A chilled Riesling balances the spicy heat with refreshing fruit flavors.
For an aromatic pairing, enjoy a glass of Gewรผrztraminer alongside dishes made with this chili paste.

Nutrition values

Calories: 30 kcal | koolhydraten: 4 g | Eiwitten: 1 g | Vet: 2 g | Verzadigd vet: 0 g | Natrium: 180 mg | Suiker: 2 g
————————————————————————————————–

About This Recipe

Thai Chili Paste is a bold, aromatic condiment that delivers the signature balance of heat, sweetness, and savory flavor found in many traditional Thai dishes. Made with dried red chilies, garlic, shallots, fresh ginger, lime juice, and fish sauce or soy sauce, this homemade paste is incredibly versatile. It works as a base for curries, a marinade for grilled meats, a seasoning for stir-fries, or a spicy addition to soups and noodle dishes.

Why You’ll Love Thai Chili Paste

This homemade chili paste comes together with simple ingredients while delivering authentic Thai flavor without unnecessary preservatives. Adjust the amount of chilies or sweetener to suit your own taste, making it as mild or fiery as you like. If you enjoy cooking Asian dishes, browse our Thai Recipes, Sauce Recipes, Marinade Recipes, Spices & Seasoning Recipes, and Vegetarian Recipes.

Making Homemade Chili Paste

Soak the dried chilies until they soften before blending them with the garlic, shallots, and ginger into a smooth paste. Cook the mixture gently in oil, then stir in the lime juice, fish sauce or soy sauce, and brown sugar. Continue simmering until the mixture thickens into a rich, glossy paste. Thai Chili Paste develops even deeper flavor after resting in the refrigerator overnight.

Serving Thai Chili Paste

Thai Chili Paste adds incredible depth to curries, noodle dishes, fried rice, stir-fries, grilled chicken, seafood, and vegetable recipes. Stir a spoonful into soups, blend it into marinades, or mix it with mayonnaise for a spicy sandwich spread. A small amount delivers plenty of flavor, so start modestly and adjust to your preferred heat level.

Storage Tips

Store your homemade chili paste in a clean airtight container in the refrigerator for up to two weeks. Always use a clean spoon when serving to help preserve freshness. The paste can also be frozen in small portions for longer storage. For additional food storage recommendations, visit the FDA Food Safety website.

This homemade condiment brings authentic Thai flavors to your kitchen with very little effort. Once you have a jar of this versatile chili paste ready to use, you’ll find countless ways to add bold flavor and gentle heat to everyday meals.