Homestyle Rotisserie Chicken

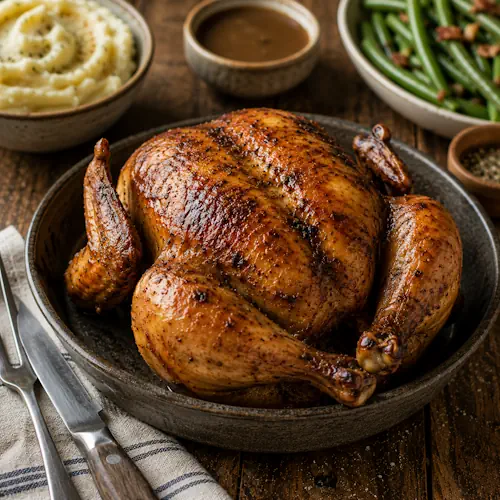
Rotisserie Chicken with crispy golden skin served on a platter with roasted vegetables.

Homestyle Rotisserie Chicken

Homestyle Rotisserie Chicken is a juicy, oven-roasted whole chicken seasoned with garlic, herbs, paprika, and a touch of lemon. Inspired by the famous Boston Market favorite, this easy recipe delivers tender meat, crispy golden skin, and classic comfort food flavor that’s perfect for family dinners and special occasions.
Couverts4 servings
Preparation 10 minutes
Preparation time:1 hour 15 minutes
Resting Time 10 minutes
Total time 1 hour 35 minutes
estimated costs pp $4.25 per serving
Deel op Facebook Print Recipe

Equipment

Ingredients

  • ยฝ teaspoon black pepper
  • ยฝ teaspoon lemon zest optional
  • ยฝ teaspoon salt
  • 1 lemon quartered (optional)
  • 1 teaspoon dried rosemary
  • 1 teaspoon dried thyme
  • 1 teaspoon onion powder
  • 2 tablespoons olive oil
  • 2 teaspoons garlic powder
  • 1 teaspoon paprika
  • 1 whole chicken about 4 lbs

Instructions

  • Preheat the oven to 190ยฐC (375ยฐF).
  • Pat the chicken dry with paper towels.
  • Rub the chicken all over with the olive oil.
  • Mix the garlic powder, onion powder, thyme, rosemary, paprika, salt, pepper, and lemon zest in a small bowl.
  • Rub the seasoning mixture evenly over the chicken.
  • Stuff the cavity with the lemon quarters if using.
  • Place the chicken breast-side up in a baking dish or on a roasting rack.
  • Roast for 1 hour and 15 minutes or until the internal temperature reaches 75ยฐC (165ยฐF).
  • Remove the chicken from the oven.
  • Let it rest for 10 minutes before carving.
  • Slice and serve with your favorite side dishes.

Notes & Wine Advice

Recipe Notes

Patting the chicken dry before seasoning helps create beautifully crisp, golden skin during roasting.
Always use a meat thermometer and cook until the thickest part of the breast or thigh reaches 75ยฐC (165ยฐF).
Let the chicken rest for at least 10 minutes before carving so the juices remain inside the meat.
Leftover chicken is perfect for sandwiches, salads, soups, wraps, or casseroles the next day.

Wine Advice

A lightly oaked Chardonnay pairs beautifully with the juicy roasted chicken and fragrant herbs.
If you prefer a fresher style, a crisp Sauvignon Blanc offers a bright contrast to the savory seasoning.

Nutrition values

Calories: 270 kcal | Carbohydrates: 1 g | Protein: 36 g | Fat: 14 g | Saturated Fat: -13 g | Sodium: 340 mg | Sugar: 0 g
————————————————————————————————–

About This Recipe

Rotisserie Chicken is one of America’s favorite comfort food meals, inspired by the well-known Boston Market classic. This recipe uses a whole chicken seasoned with garlic, herbs, paprika, and olive oil before roasting it until the skin turns crisp and golden. The meat stays juicy, tender, and full of flavor. With only a handful of everyday ingredients, you can prepare a restaurant-style dinner in your own kitchen.

Why You’ll Love Rotisserie Chicken

This homestyle roast chicken is simple to prepare and requires very little hands-on time. The seasoning creates flavorful, crispy skin while allowing the natural taste of the chicken to shine. The oven does most of the work, making this recipe ideal for busy weeknights and relaxed weekends alike. Browse our Poultry Recipes, Comfort Food Recipes, Main Course Recipes, American Recipes, and Oven Recipes for more inspiration.

How to Make Homestyle Roast Chicken

Prepare Rotisserie Chicken by drying the chicken thoroughly before adding the seasoning mixture. This simple step helps the skin become beautifully crisp during roasting. Roast the chicken until the thickest part reaches 75ยฐC (165ยฐF). Let it rest before carving so the juices stay inside the meat. Every slice remains tender, moist, and full of flavor.

Serving Homestyle Roast Chicken

This homestyle roast chicken tastes delicious with mashed potatoes, roasted vegetables, buttered corn, stuffing, rice, or a fresh garden salad. Serve it for a Family Dinner, a Thanksgiving celebration, a Holiday gathering, or a relaxing Weekend meal.

Storage Tips

Store leftover Rotisserie Chicken in an airtight container for up to four days in the refrigerator. Freeze portions for up to three months if needed. Use the leftovers in sandwiches, wraps, soups, casseroles, or fresh salads for quick meals throughout the week. For safe food storage recommendations, visit the FDA Food Safety website.

Rotisserie Chicken delivers juicy meat, crispy skin, and classic homemade flavor. It is an easy recipe that works equally well for everyday dinners and special family occasions.

Homemade Sweetened Condensed Milk

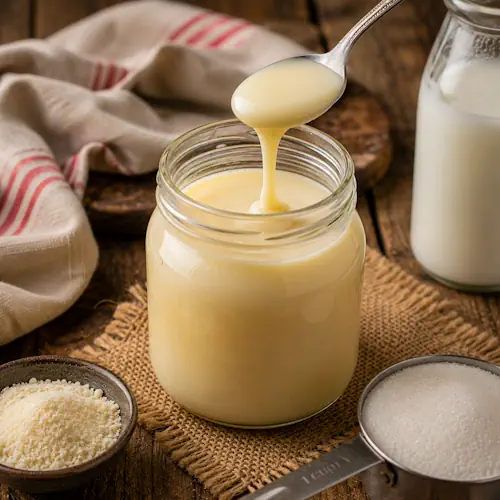
Homemade Sweetened Condensed Milk in a glass jar ready for baking and dessert recipes.

Homemade Sweetened Condensed Milk

Homemade Sweetened Condensed Milk is a rich, creamy pantry staple that’s easy to make and perfect for baking, desserts, candy, coffee, and countless sweet treats. This simple recipe delivers smooth, sweet flavor whenever you need it.
Couverts4 servings
Preparation 5 minutes
Total time 5 minutes
estimated costs pp $0.65 per person
Deel op Facebook Print Recipe

Equipment

  • Can opener
  • Mixing bowl
  • spoon

Ingredients

  • 1 can 14 oz sweetened condensed milk

Instructions

  • Open the can of sweetened condensed milk with a can opener.
  • Pour the condensed milk into a mixing bowl or directly into your recipe.
  • Use it for pies, cheesecakes, cookies, cakes, candies, ice cream, or coffee.
  • Transfer any leftovers to an airtight container.
  • Store in the refrigerator until needed.

Notes & Wine Advice

Recipe Notes

Sweetened condensed milk adds rich sweetness and a creamy texture to countless desserts.
Keep any unused portion in an airtight container and refrigerate for up to one week.
Stir before using if the mixture thickens during storage.
Use it in pies, cheesecakes, cookies, fudge, caramel, ice cream, or coffee for extra richness.

Wine Advice

A chilled Moscato complements the creamy sweetness beautifully.
For an elegant dessert pairing, try a glass of Dessert Wine.

Nutrition values

Calories: 130 kcal | Carbohydrates: 22 g | Protein: 3 g | Fat: 4 g | Saturated Fat: 2.5 g | Sodium: 35 mg | Sugar: 21 g
————————————————————————————————–
Cuisine; American
Season: All Seasons
Diets; Vegetarian

About This Recipe

Homemade Sweetened Condensed Milk is a rich, creamy ingredient that belongs in every baker’s kitchen. Its smooth texture and concentrated sweetness make it an essential addition to countless desserts, candies, frostings, and beverages. Whether you’re preparing a classic pie, homemade fudge, creamy cheesecake, or a refreshing iced coffee, this versatile ingredient delivers consistent results with very little effort.

Why You’ll Love Homemade Sweetened Condensed Milk

This condensed milk recipe is incredibly versatile and works in recipes all year round. Its thick consistency blends easily into batters, fillings, and sauces while adding both sweetness and creaminess. If you enjoy homemade desserts, be sure to browse our Dessert Recipes, Basic Recipes, Baking Recipes, American Recipes, and Condiment Recipes for even more inspiration.

Using Sweetened Condensed Milk

Homemade Sweetened Condensed Milk is perfect for key lime pie, caramel slices, cheesecakes, cookies, cakes, brownies, homemade ice cream, and fudge. It also creates delicious coffee drinks, milkshakes, and dessert sauces. Because of its concentrated sweetness, a small amount adds plenty of flavor and richness to your favorite recipes.

Storage and Serving Tips

This condensed milk recipe should always be stored in an airtight container after opening. Keep it refrigerated and use it within one week for the best flavor and texture. Stir well before using if it thickens slightly during storage. It also makes a wonderful topping for fresh fruit, pancakes, waffles, and baked desserts.

A Pantry Essential

Every home baker benefits from keeping Homemade Sweetened Condensed Milk on hand. Its versatility, creamy texture, and rich sweetness make it one of the most useful ingredients in the kitchen. For safe food storage information, visit the FDA Food Safety website.

Homemade Sweetened Condensed Milk is a dependable pantry staple that transforms everyday desserts into rich and delicious homemade treats.


Easy Homemade Pizza Crust

Easy Homemade Pizza Crust baked until golden brown and ready for pizza toppings.

Easy Homemade Pizza Crust

Easy Homemade Pizza Crust is the perfect foundation for creating delicious homemade pizzas in minutes. It bakes with a crisp exterior and a soft, chewy center, making it ideal for family dinners, pizza nights, or quick weeknight meals. Simply add your favorite sauce, cheese, and toppings for a pizza everyone will love.
Couverts4 servings
Preparation 10 minutes
Preparation time:20 minutes
Total time 30 minutes
estimated costs pp $2.10 per person
Deel op Facebook Print Recipe

Equipment

  • Baking sheet
  • oven
  • Pizza Cutter
  • Rolling pin (optional)
  • spoon

Ingredients

  • 1 package 12-inch pizza crust
  • ยฝ cup olive oil optional
  • ยผ teaspoon dried basil optional
  • ยผ teaspoon dried oregano optional
  • ยผ teaspoon garlic powder optional

Instructions

  • Preheat the oven to 450ยฐF (230ยฐC).
  • Place the pizza crust on a baking sheet.
  • Brush the crust lightly with olive oil if desired.
  • Sprinkle with the garlic powder, oregano, and basil.
  • Bake for 10 to 12 minutes until lightly golden.
  • Remove the crust from the oven.
  • Spread your favorite pizza sauce over the crust.
  • Add cheese and your preferred toppings.
  • Return the pizza to the oven.
  • Bake for another 8 to 10 minutes until the cheese is melted and bubbly.
  • Slice and serve immediately.

Notes & Wine Advice

Recipe Notes

Roll the dough evenly.
Allow the crackers to cool completely.
Store in an airtight container.
Serve with your favorite dips.

Wine Advice

A chilled Rosรฉ pairs beautifully.
A light Pinot Noir is another excellent choice.

Nutrition values

Calories: 180 kcal | Carbohydrates: 24 g | Protein: 4 g | Fat: 7 g | Saturated Fat: 1 g | Sodium: 260 mg | Sugar: 1 g
————————————————————————————————–
Course; Bread / Main Course / Pizza / Snack
Cuisine; American
Season: All Seasons
Diets; Vegetarian

About This Recipe

Easy Homemade Pizza Crust is the perfect starting point for creating delicious homemade pizzas with very little effort. It bakes into a crisp, golden crust with a soft interior, making it suitable for everything from simple cheese pizzas to fully loaded family favorites. Because the crust is partially prepared, you can have a hot pizza on the table in about 30 minutes, making it ideal for busy weeknights.

Why You’ll Love This Pizza Crust

This homemade pizza base is quick, reliable, and easy to customize. Add your favorite tomato sauce, cheeses, vegetables, or meats to create a pizza that suits everyone’s taste. If you enjoy making pizza at home, be sure to browse our Pizza Recipes, Bread Recipes, Main Course Recipes, Snack Recipes, and American Recipes for even more inspiration.

Making Easy Homemade Pizza Crust

Easy Homemade Pizza Crust requires only a few minutes of preparation. Pre-bake the crust until lightly crisp, then add your sauce, cheese, and toppings before returning it to the oven. This two-step baking method helps keep the base crisp while ensuring the toppings cook evenly.

Serving Ideas

This homemade pizza base is perfect for family pizza nights, parties, movie nights, or weekend dinners. Serve it with a fresh green salad, garlic bread, or roasted vegetables for a complete meal. You can also prepare several pizzas with different toppings so everyone can enjoy their favorite combination.

Storage Tips

Leftover pizza keeps well in an airtight container in the refrigerator for up to three days. Reheat slices in a hot oven or air fryer to restore a crispy crust. For additional food safety information, visit the FDA Food Safety website.

Easy Homemade Pizza Crust gives you complete freedom to create your favorite pizza at home using fresh ingredients and endless topping combinations. Whether you prefer a classic cheese pizza, spicy pepperoni, grilled vegetables, or gourmet flavors, this simple crust provides a reliable base that turns every homemade pizza into a delicious meal everyone can enjoy.


Creamy Broccoli Cheddar Soup

Creamy Broccoli Cheddar Soup served in a rustic bowl with fresh broccoli and melted cheddar cheese.

Creamy Broccoli Cheddar Soup

Creamy Broccoli Cheddar Soup is a rich, velvety comfort food packed with tender broccoli, sharp cheddar cheese, and Parmesan. This easy homemade soup comes together in just 40 minutes and makes a satisfying lunch or dinner on chilly days.
Couverts4 servings
Preparation 15 minutes
Preparation time:25 minutes
Total time 40 minutes
estimated costs pp $2.45 per person
Deel op Facebook Print Recipe

Equipment

Ingredients

  • ยฝ cup grated Parmesan cheese
  • 1 cup shredded cheddar cheese
  • 1 cup whole milk
  • 1 medium onion chopped
  • 2 cloves garlic minced
  • 2 tablespoons all-purpose flour or gluten-free flour
  • 2 tablespoons unsalted butter
  • 4 cups fresh broccoli florets
  • 4 cups vegetable broth
  • Black pepper to taste
  • Salt to taste

Instructions

  • Melt the butter in a large pot over medium heat.
  • Add the onion and garlic.
  • Cook for about 5 minutes until softened.
  • Sprinkle the flour over the vegetables.
  • Cook for 1 to 2 minutes while stirring.
  • Gradually whisk in the vegetable broth until smooth.
  • Bring the soup to a gentle simmer.
  • Add the broccoli florets.
  • Cook for 10 to 12 minutes until tender.
  • Blend the soup with an immersion blender or carefully transfer it to a blender until smooth.
  • Return the soup to the pot if needed.
  • Stir in the milk, cheddar cheese, and Parmesan cheese.
  • Continue stirring until the cheese has completely melted.
  • Season with salt and black pepper.
  • Serve immediately while hot.

Notes & Wine Advice

Recipe Notes

Fresh broccoli gives the soup the best flavor and a vibrant green color.
Blend only part of the soup if you prefer a chunkier texture with pieces of broccoli.
Add extra cheddar just before serving for an even richer finish.
Serve with crusty bread, garlic bread, or a fresh green salad for a complete meal.

Wine Advice

A buttery Chardonnay pairs beautifully with the creamy cheese flavors.
A crisp Sauvignon Blanc provides a fresh contrast to the rich soup.

Nutrition values

Calories: 250 kcal | Carbohydrates: 22 g | Protein: 10 g | Fat: 16 g | Saturated Fat: 9 g | Sodium: 540 mg | Sugar: 5 g
————————————————————————————————–
Cuisine; American
Season: Winter

About This Recipe

Creamy Broccoli Cheddar Soup is a rich and comforting classic that’s perfect for chilly days or whenever you’re craving a warm, satisfying meal. Fresh broccoli, sharp cheddar cheese, Parmesan, and a creamy broth come together to create a smooth soup that’s packed with flavor. It’s simple enough for a weeknight dinner while being delicious enough to serve guests for lunch or as a starter.

Why You’ll Love Creamy Broccoli Cheddar Soup

This broccoli cheese soup is easy to prepare using everyday ingredients. Fresh broccoli provides a vibrant color and wholesome flavor, while cheddar and Parmesan create a creamy texture that makes every spoonful satisfying. If you enjoy comforting homemade meals, browse our Soup Recipes, Comfort Food Recipes, Vegetarian Recipes, Main Course Recipes, and American Recipes.

Making Broccoli Cheese Soup

Creamy Broccoli Cheddar Soup starts by cooking onion and garlic in butter before creating a light roux. Vegetable broth and broccoli are then added and simmered until tender. Blending the soup creates its silky texture, while cheddar and Parmesan melt into the broth to produce a rich, creamy finish. You can blend the soup completely smooth or leave a few broccoli pieces for extra texture.

Serving Ideas

This broccoli cheese soup pairs wonderfully with crusty bread, garlic bread, crackers, or a crisp green salad. It also makes an excellent lunch, light dinner, or starter for a larger meal. Add crispy bacon, homemade croutons, or extra shredded cheddar as optional toppings for even more flavor and texture.

Storage Tips

Store leftover Creamy Broccoli Cheddar Soup in an airtight container in the refrigerator for up to three days. Reheat gently over low heat while stirring to maintain its smooth consistency. Avoid boiling after adding the cheese to help prevent separation. For additional food safety information, visit the FDA Food Safety website.

Creamy Broccoli Cheddar Soup is a comforting homemade favorite that combines fresh vegetables, creamy cheese, and simple preparation into a recipe you’ll enjoy throughout the year.


Ultimate Garlic Cheese Bread

Ultimate Garlic Cheese Bread baked with mozzarella, Parmesan, garlic butter, and parsley on a rustic wooden board.

Ultimate Garlic Cheese Bread

Ultimate Garlic Cheese Bread is loaded with creamy garlic butter, melted mozzarella, Parmesan cheese, and fresh parsley, then baked until perfectly golden and crisp. It’s the ultimate side dish for pasta, barbecue, soups, or simply sharing as a delicious snack.
Couverts4 servings
Preparation 10 minutes
Preparation time:15 minutes
Total time 25 minutes
estimated costs pp $2.35 per person
Deel op Facebook Print Recipe

Equipment

  • Baking sheet
  • Bread knife
  • Mixing bowl
  • oven
  • Pastry brush

Ingredients

  • 1 loaf French bread
  • ยฝ cup grated Parmesan cheese
  • ยฝ cup unsalted butter softened
  • 1 cup grated mozzarella cheese
  • 1 tablespoon fresh parsley chopped
  • 3 cloves garlic minced
  • Black pepper
  • Salt

Instructions

  • Preheat the oven to 190ยฐC (375ยฐF).
  • Slice the French bread in half lengthwise.
  • Combine the softened butter, garlic, parsley, salt, and black pepper in a mixing bowl.
  • Mix until smooth.
  • Spread the garlic butter evenly over both halves of the bread.
  • Sprinkle the mozzarella over the buttered bread.
  • Top with the grated Parmesan cheese.
  • Place the bread on a baking sheet.
  • Bake for 12 to 15 minutes until the cheese is melted and golden.
  • Slice into portions.
  • Serve warm.

Notes & Wine Advice

Recipe Notes

Use freshly grated mozzarella and Parmesan for the best melting texture and flavor.
For extra crispy edges, broil the bread for the final minute while watching carefully.
Add a pinch of chili flakes or Italian seasoning for additional flavor if desired.
Serve warm alongside pasta, soups, salads, grilled meats, or your favorite barbecue dishes.

Wine Advice

A crisp Sauvignon Blanc balances the rich garlic butter and melted cheese beautifully.
For a smooth red pairing, enjoy a light Pinot Noir with this cheesy garlic bread.

Nutrition values

Calories: 310 kcal | Carbohydrates: 32 g | Protein: 9 g | Fat: 18 g | Saturated Fat: 10 g | Sodium: 540 mg | Sugar: 3 g
————————————————————————————————–
Course; Bread / Pie / Side Dish / Snack
Cuisine; American
Season: All Seasons
Diets; Vegetarian

About This Recipe

Ultimate Garlic Cheese Bread is everything you want from a homemade garlic bread. A crispy French loaf is generously coated with creamy garlic butter, topped with mozzarella and Parmesan cheese, and baked until golden, bubbly, and irresistibly cheesy. It’s a simple recipe that delivers bakery-style results, making it perfect as a side dish, appetizer, or snack for any occasion.

Why You’ll Love Ultimate Garlic Cheese Bread

This cheesy garlic bread recipe comes together with just a handful of everyday ingredients while delivering bold flavor and a wonderfully crisp texture. The combination of buttery garlic, fresh parsley, and two melted cheeses creates a crowd-pleasing favorite that’s ideal for family dinners, parties, and barbecues. If you enjoy homemade bread recipes, browse our Bread Recipes, Side Dish Recipes, Snack Recipes, American Recipes, and Barbecue Recipes.

Making Cheesy Garlic Bread

Softened butter is mixed with fresh garlic, parsley, salt, and pepper before being spread generously over sliced French bread. A layer of mozzarella followed by Parmesan creates a beautifully golden topping as the bread bakes. The result is crisp around the edges, soft in the middle, and packed with rich garlic flavor in every bite.

Serving Suggestions

Ultimate Garlic Cheese Bread pairs perfectly with pasta dishes, soups, fresh salads, grilled chicken, steaks, burgers, and barbecue favorites. It also makes an excellent appetizer for parties or a quick snack served with marinara sauce for dipping. Slice it into smaller pieces for sharing at family gatherings or game day celebrations.

Storage Tips

Store leftover cheesy garlic bread in an airtight container in the refrigerator for up to three days. Reheat in the oven or air fryer for a few minutes to restore the crispy crust and melted cheese. Avoid microwaving if possible, as it softens the bread. For additional food storage recommendations, visit the FDA Food Safety website.

Ultimate Garlic Cheese Bread is an easy homemade favorite that combines crispy bread, buttery garlic, and bubbling cheese into a comforting recipe everyone will happily reach for again and again.


All-Purpose Baking Mix

All-Purpose Baking Mix

All-Purpose Baking Mix is an easy homemade pantry staple that replaces store-bought baking mixes for pancakes, biscuits, waffles, and quick breads. Made with just a few everyday ingredients, this versatile mix is ready in minutes and stores well for months.
Couverts4 servings
Preparation 10 minutes
Total time 10 minutes
estimated costs pp $1.45 per serving
Deel op Facebook Print Recipe

Equipment

  • Airtight storage container
  • Food processor (optional)
  • Large mixing bowl
  • Measuring cups
  • Whisk

Ingredients

  • 1 cup unsalted butter or vegetable shortening cubed
  • 1 tablespoon salt
  • 3 tablespoons baking powder
  • 6 cups all-purpose flour

Instructions

  • Whisk the flour, baking powder, and salt together in a large mixing bowl.
  • Add the cubed butter or vegetable shortening.
  • Cut the fat into the dry ingredients using a pastry cutter or food processor until the mixture resembles coarse crumbs.
  • Transfer the baking mix to an airtight container.
  • Store it in the refrigerator for up to 3 months.
  • Use the mix whenever a recipe calls for a baking mix.

Notes & Wine Advice

Recipe Notes

Keep the butter or shortening cold while preparing the mix to achieve the best texture in your baked goods.
Store the mix in an airtight container in the refrigerator to keep it fresh for up to three months.
Use this homemade mix for pancakes, waffles, biscuits, scones, and quick breads whenever a recipe calls for a baking mix.
Label the container with the preparation date so you always know when to make a fresh batch.

Wine Advice

This versatile baking mix is intended for use in recipes, so no wine pairing is recommended.

Nutrition values

Calories: 140 kcal | Carbohydrates: 18 g | Protein: 2 g | Fat: 7 g | Saturated Fat: 4 g | Sodium: 290 mg | Sugar: 0 g
————————————————————————————————–

About This Recipe

All-Purpose Baking Mix is a simple homemade pantry staple that replaces store-bought baking mixes in countless recipes. Made with flour, baking powder, salt, and butter or shortening, this versatile mix helps you prepare pancakes, waffles, biscuits, scones, and quick breads in just a few minutes. Keeping a batch in your refrigerator means you’re always ready to bake whenever inspiration strikes.

Why You’ll Love This Homemade Baking Mix

This homemade baking mix saves both time and money while giving you complete control over the ingredients. There are no unnecessary preservatives, and you can prepare a large batch whenever you need it. Browse more kitchen essentials in our Basic Recipes, Bread Recipes, Pancake’s / Crepes Recipes, American Recipes, and Breakfast Recipes.

Simple Ingredients for All-Purpose Baking Mix

All-Purpose Baking Mix requires only four everyday ingredients that you probably already have in your kitchen. The flour provides structure, baking powder creates a light texture, salt enhances the flavor, and butter or shortening gives baked goods a tender crumb. Mixing everything together takes only a few minutes and provides a convenient base for many homemade recipes.

Ways to Use This Baking Mix

This homemade baking mix works beautifully for fluffy pancakes, golden waffles, tender biscuits, quick breads, dumplings, and savory bakes. Simply add the wet ingredients required by your favorite recipe and you’ll have fresh homemade baking without measuring dry ingredients each time.

Storage Tips

Store All-Purpose Baking Mix in a tightly sealed container in the refrigerator for up to three months. Stir the mixture before each use if it has settled during storage. Always use clean, dry measuring cups to keep the mix fresh. For food storage guidance, visit the FDA Food Safety website.

Whether you’re making breakfast, baking fresh biscuits, or preparing quick breads, All-Purpose Baking Mix is a convenient homemade staple that belongs in every well-stocked kitchen.


Classic Steakhouse Onion Soup

Classic Steakhouse Onion Soup

Classic Steakhouse Onion Soup is a rich, comforting soup with slowly caramelized onions, savory beef and chicken broth, toasted baguette, and bubbling melted cheese. Inspired by the famous restaurant favorite, this hearty soup is perfect for lunch or dinner.
Couverts4 servings
Preparation 15 minutes
Preparation time:45 minutes
Total time 1 hour
estimated costs pp $3.95 per serving
Deel op Facebook Print Recipe

Equipment

Ingredients

  • ยฝ cup dry white wine
  • ยฝ cup grated Parmesan cheese
  • ยฝ teaspoon black pepper
  • ยฝ teaspoon dried thyme
  • 1 baguette sliced
  • 1 tablespoon olive oil
  • 1 teaspoon salt
  • 1 teaspoon sugar
  • 1 teaspoon Worcestershire sauce
  • 2 cups chicken broth
  • 2 cups shredded Swiss cheese
  • 3 tablespoons butter
  • 4 cups beef broth
  • 4 large onions thinly sliced

Instructions

  • Heat the butter and olive oil in a large pot over medium heat.
  • Add the sliced onions.
  • Cook for 10 minutes, stirring occasionally.
  • Sprinkle the sugar over the onions.
  • Continue cooking for 15 minutes until the onions become deeply caramelized.
  • Pour in the beef broth, chicken broth, and white wine.
  • Stir well.
  • Add the Worcestershire sauce, salt, black pepper, and thyme.
  • Bring the soup to a gentle simmer.
  • Cook for 20 minutes.
  • Meanwhile, toast the baguette slices in a 190ยฐC (375ยฐF) oven until golden brown.
  • Ladle the soup into oven-safe bowls.
  • Top each bowl with toasted baguette slices.
  • Sprinkle generously with Swiss cheese and Parmesan cheese.
  • Place the bowls under the broiler until the cheese is melted, golden, and bubbling.
  • Serve immediately.

Notes & Wine Advice

Recipe Notes

Take your time caramelizing the onions, as this step creates the deep, sweet flavor that makes this soup special.
For the best cheese topping, broil the soup just until the cheese bubbles and turns lightly golden.
Use Gruyรจre instead of Swiss cheese for an even richer, traditional flavor.
Serve with a crisp green salad or extra crusty bread for a complete meal.

Wine Advice

A glass of Sauvignon Blanc complements the sweet onions and rich broth beautifully.
If you prefer red wine, a light Pinot Noir pairs wonderfully with the melted cheese and savory broth.

Nutrition values

Calories: 380 kcal | Carbohydrates: 40 g | Protein: 15 g | Fat: 18 g | Saturated Fat: 10 g | Sodium: 980 mg | Sugar: 7 g
————————————————————————————————–
Course; Dinner / Lunch / Main Course / Soup
Cuisine; American
Season: Winter
Diets; Nut Free

About This Recipe

Classic Steakhouse Onion Soup is a comforting American favorite inspired by the famous restaurant recipe. Sweet caramelized onions simmer slowly in a rich blend of beef and chicken broth before being topped with toasted baguette, melted Swiss cheese, and Parmesan. Every spoonful offers deep flavor, a golden cheese crust, and plenty of comforting warmth.

Why You’ll Love This Onion Soup

This onion soup is easy to prepare with simple ingredients that develop incredible flavor as they cook. Slowly caramelizing the onions creates natural sweetness, while the combination of broths produces a rich and savory base. If you enjoy hearty comfort food, browse our Soup Recipes, American Recipes, Main Course Recipes, Dinner Recipes, and Winter Recipes.

Simple Ingredients for Classic Steakhouse Onion Soup

Classic Steakhouse Onion Soup combines everyday ingredients into a restaurant-quality meal. The onions become soft and sweet during the slow cooking process, while white wine adds brightness to the broth. Toasted baguette slices soak up the flavorful soup before the melted cheese creates the signature golden topping that everyone loves.

Serving Suggestions

This onion soup is delicious with a crisp green salad, roasted vegetables, or a simple sandwich. It also makes an excellent starter before grilled steak or roast beef. Serve it for a cozy Family Dinner, a relaxed Weekend meal, or an elegant Gourmet dinner.

Storage Tips

Store Classic Steakhouse Onion Soup without the bread and cheese topping in an airtight container for up to four days. Reheat the soup gently on the stovetop, then add freshly toasted bread and cheese before serving. The soup also freezes well for up to three months. For safe food storage recommendations, visit the FDA Food Safety website.

Whether you’re recreating a restaurant favorite or serving a comforting homemade meal, Classic Steakhouse Onion Soup delivers rich broth, sweet caramelized onions, and bubbling cheese in every satisfying bowl.


Warm Bacon Honey Dressing

Warm Bacon Dressing served warm with crispy bacon pieces in a small bowl.

Warm Bacon Honey Dressing

Warm Bacon Honey Dressing is a rich, smoky dressing made with crispy bacon, honey, Dijon mustard, and red wine vinegar. Served warm, this American classic adds bold flavor to fresh salads, roasted vegetables, grilled meats, and sandwiches.
Couverts4 servings
Preparation 10 minutes
Preparation time:10 minutes
Total time 20 minutes
estimated costs pp $1.15 per serving
Deel op Facebook Print Recipe

Equipment

  • medium saucepan
  • Measuring spoons
  • Whisk
  • Wooden spoon

Ingredients

  • ยผ cup red wine vinegar
  • ยผ cup water
  • ยฝ teaspoon cornstarch optional
  • 1 tablespoon Dijon mustard
  • 3 tablespoons honey
  • 4 slices bacon finely chopped
  • Black pepper to taste
  • Salt to taste

Instructions

  • Cook the chopped bacon in a medium saucepan over medium heat until crisp.
  • Transfer the bacon to a plate, leaving the rendered bacon fat in the pan.
  • Reduce the heat to low.
  • Add the red wine vinegar, water, honey, and Dijon mustard.
  • Whisk until the ingredients are fully combined.
  • If you prefer a thicker dressing, dissolve the cornstarch in a little water and whisk it into the saucepan.
  • Simmer gently for 2 to 3 minutes until the dressing lightly thickens.
  • Return the crispy bacon to the pan.
  • Season with salt and black pepper to taste.
  • Serve warm over salads, roasted vegetables, or grilled meats.

Notes & Wine Advice

Recipe Notes

Cook the bacon until crisp to develop the best smoky flavor and texture.
Serve the dressing while it’s still warm so it coats leafy salads evenly.
This dressing is also delicious over roasted Brussels sprouts, grilled asparagus, or baked potatoes.
Store leftovers in the refrigerator for up to three days and gently reheat before serving.

Wine Advice

A chilled Sauvignon Blanc balances the smoky bacon and tangy vinegar beautifully.
If you prefer a light red wine, a glass of Pinot Noir pairs wonderfully with salads topped with this dressing.

Nutrition values

Calories: 120 kcal | Carbohydrates: 10 g | Protein: 3 g | Fat: 8 g | Saturated Fat: 2 g | Sodium: 230 mg | Sugar: 8 g
————————————————————————————————–

About This Recipe

Warm Bacon Honey Dressing is a classic American dressing that combines crispy bacon, honey, Dijon mustard, and red wine vinegar into a rich and flavorful sauce. The warm dressing coats fresh greens beautifully while adding a smoky, tangy flavor that transforms even a simple salad into something special. It also pairs wonderfully with roasted vegetables, grilled meats, and baked potatoes.

Why You’ll Love This Hot Bacon Dressing

This hot bacon dressing comes together in just a few minutes using everyday ingredients. Crispy bacon provides smoky richness, while honey balances the tangy vinegar and Dijon mustard. The result is a silky dressing that’s equally delicious on salads or as a warm finishing sauce. If you enjoy homemade sauces, browse our American Recipes, Dressing Recipes, Condiment Recipes, Sauce Recipes, and Salad Recipes.

Simple Ingredients for Warm Bacon Honey Dressing

Warm Bacon Honey Dressing uses only a handful of ingredients, yet every one plays an important role. Bacon drippings create the rich base, Dijon mustard adds depth, honey softens the acidity of the vinegar, and freshly cooked bacon pieces provide texture in every spoonful.

Serving Suggestions

This hot bacon dressing tastes wonderful over spinach salads with mushrooms, red onions, and hard-boiled eggs. It also complements grilled chicken, roasted Brussels sprouts, green beans, asparagus, or baked potatoes. Serve it during a Barbecue, a Family Dinner, or a relaxed Weekend meal.

Storage Tips

Store Warm Bacon Honey Dressing in a sealed container in the refrigerator for up to three days. Reheat gently over low heat and stir well before serving. Avoid boiling the dressing, as this may affect its texture. For safe food handling recommendations, visit the FDA Food Safety website.

Whether you’re dressing a fresh salad or adding extra flavor to grilled vegetables or meats, Warm Bacon Honey Dressing delivers smoky, sweet, and tangy flavor in every delicious spoonful.


Japanese Mustard Dipping Sauce

Japanese Mustard Dipping Sauce made with Dijon mustard, mayonnaise, honey, rice vinegar, and soy sauce served in a small bowl.

Japanese Mustard Dipping Sauce

Japanese Mustard Dipping Sauce is a creamy, tangy sauce made with Dijon mustard, mayonnaise, honey, soy sauce, and rice vinegar. Ready in just minutes, it’s perfect for grilled meats, seafood, vegetables, tempura, and sandwiches.
Couverts4 servings
Preparation 5 minutes
Chilling Time 30 minutes
Total time 35 minutes
estimated costs pp $0.65 per serving
Deel op Facebook Print Recipe

Equipment

  • Measuring cups
  • Mixing bowl
  • Whisk

Ingredients

  • ยผ cup Dijon mustard
  • ยฝ cup mayonnaise
  • 1 tablespoon rice vinegar
  • 1 teaspoon soy sauce
  • 2 tablespoons honey

Instructions

  • Add the mayonnaise and Dijon mustard to a mixing bowl.
  • Pour in the honey, rice vinegar, and soy sauce.
  • Whisk until the sauce is smooth and creamy.
  • Taste and adjust the seasoning if desired.
  • Serve immediately or refrigerate until ready to use.

Notes & Wine Advice

Recipe Notes

Chill the sauce for at least 30 minutes before serving to allow the flavors to blend.
For a smoother texture, whisk thoroughly until the honey is fully incorporated.
This dipping sauce is delicious with grilled meats, seafood, tempura, roasted vegetables, and sandwiches.
Store in a sealed container in the refrigerator for up to one week.

Wine Advice

A crisp Riesling balances the tangy mustard and subtle sweetness beautifully.
For a lighter pairing, enjoy a chilled Sauvignon Blanc with dishes served alongside this sauce.

Nutrition values

Calories: 75 kcal | Carbohydrates: 4 g | Protein: 1 g | Fat: 7 g | Saturated Fat: 1 g | Sodium: 180 mg | Sugar: 3 g
————————————————————————————————–

About This Recipe

Japanese Mustard Dipping Sauce is a creamy, tangy condiment inspired by the famous sauces served in Japanese steakhouses. Dijon mustard, mayonnaise, honey, rice vinegar, and soy sauce blend together into a smooth sauce with the perfect balance of sweetness and acidity. Since it takes only a few minutes to prepare, it’s an easy way to add bold flavor to everyday meals.

Why You’ll Love This Mustard Dipping Sauce

This mustard dipping sauce is incredibly versatile and requires only a handful of pantry ingredients. The creamy mayonnaise softens the sharpness of the Dijon mustard, while honey adds gentle sweetness and rice vinegar brings a fresh finish. If you enjoy homemade sauces, browse our Japanese Recipes, Condiment Recipes, Sauce Recipes, Dressing Recipes, and Barbecue Recipes.

Simple Ingredients for Japanese Mustard Dipping Sauce

Japanese Mustard Dipping Sauce comes together with everyday ingredients that create a rich and balanced flavor. Dijon mustard provides a gentle kick, soy sauce adds umami depth, and sesame-free mayonnaise creates a silky texture. A quick whisk is all it takes to prepare this restaurant-style favorite at home.

Serving Suggestions

This mustard dipping sauce is delicious with grilled chicken, steak, seafood, roasted vegetables, tempura, or crispy fries. It also works well as a spread for burgers, wraps, and sandwiches. Serve it during a Family Dinner, at a Picnic, or alongside your favorite dishes from our Weekend collection.

Storage Tips

Store Japanese Mustard Dipping Sauce in a tightly sealed container in the refrigerator for up to one week. Stir or whisk the sauce before serving if the ingredients have separated during storage. The flavor becomes even smoother after a few hours in the refrigerator, making it an excellent make-ahead condiment for busy days.

Use clean utensils each time you serve the sauce to help keep it fresh for as long as possible. For safe food handling recommendations, visit the FDA Food Safety website.

Restaurant-Style Japanese Ginger Dressing

Japanese Ginger Dressing served in a glass bowl with a fresh green salad on a wooden table.

Restaurant-Style Japanese Ginger Dressing

A fresh Japanese-inspired dressing made with ginger, garlic, sesame oil, apple cider vinegar, lemon juice, and honey. Serve it with salads, vegetables, chicken, or seafood.
Couverts4 servings
Preparation 15 minutes
Chilling Time 30 minutes
Total time 45 minutes
estimated costs pp $0.55
Deel op Facebook Print Recipe

Equipment

  • blender
  • Glass jar
  • Measuring cups
  • Measuring spoons
  • Microplane Grater

Ingredients

  • ยผ cup apple cider vinegar
  • ยผ cup canola oil
  • ยผ cup water
  • ยผ teaspoon finely grated onion
  • ยผ teaspoon salt
  • 1 garlic clove
  • 1 tablespoon freshly grated ginger
  • 1 tablespoon lemon juice
  • 1 tablespoon sesame oil
  • 1 teaspoon honey

Instructions

  • Peel and finely grate the fresh ginger.
  • Finely grate the onion.
  • Add the apple cider vinegar, canola oil, water, onion, salt, garlic, ginger, lemon juice, sesame oil, and honey to a blender.
  • Blend until the dressing is smooth and creamy.
  • Taste and adjust the salt or lemon juice if necessary.
  • Pour the dressing into a clean glass jar.
  • Cover and refrigerate for at least 30 minutes.
  • Shake the jar thoroughly before each use.

Notes & Wine Advice

Serving Suggestions

Serve the dressing over green salads, cabbage slaw, rice bowls, grilled vegetables, chicken, shrimp, or seafood. It can also be used as a dipping sauce for cucumber, carrots, bell peppers, or spring rolls.

Recipe Notes

Chilling the dressing for at least 30 minutes allows the ginger, garlic, and sesame flavors to combine. Natural separation is normal, so shake the jar thoroughly before every use.

Variations

Add extra ginger for a sharper flavor or another teaspoon of honey for additional sweetness. A small amount of white miso can provide more savory depth, although this will change the dietary classifications.

Wine Advice

A chilled Riesling complements the fresh ginger and citrus without overpowering the dressing. A crisp Pinot Grigio is another suitable choice for salads served with this dressing.

Nutrition values

Calories: 90 kcal | Carbohydrates: 3 g | Protein: 0 g | Fat: 9 g | Saturated Fat: 1 g | Sodium: 150 mg | Sugar: 2 g
————————————————————————————————–

About Japanese Ginger Dressing

Japanese ginger dressing combines fresh ginger, garlic, sesame oil, apple cider vinegar, lemon juice, and honey in a light but flavorful sauce. The ginger supplies clean warmth, vinegar and lemon provide acidity, and sesame oil adds a toasted, nutty aroma. Blending the ingredients creates a smooth consistency that coats salad leaves evenly without becoming excessively thick.

This Japanese ginger dressing can be prepared in approximately 15 minutes and requires no cooking. Chilling it before serving allows the sharper ingredients to soften and combine. It is an easy way to add restaurant-inspired flavor to simple salads, vegetables, chicken, seafood, and rice bowls. Browse our dressing recipes and Japanese recipes for more homemade options.

Balancing Ginger, Sesame and Acidity

The balance between fresh ginger and acidity gives this ginger sesame dressing its distinctive character. Ginger should be freshly grated so its juice and aromatic oils blend throughout the mixture. A microplane grater produces a fine texture and prevents large fibrous pieces from remaining in the finished dressing.

Apple cider vinegar provides a rounded acidity, while lemon juice adds a brighter citrus note. Honey softens both ingredients without making the dressing noticeably sweet. Sesame oil has a strong flavor, so one tablespoon is enough to provide depth without dominating the ginger.

Canola oil creates a neutral base for the ginger sesame dressing. Its mild flavor allows the garlic, citrus, and sesame to remain noticeable. Avoid strongly flavored vegetable oils because they may compete with the other ingredients.

Making Japanese Ginger Dressing

Add all the ingredients to a blender and process them until the mixture looks smooth and lightly creamy. Blending breaks down the ginger, garlic, and onion while temporarily combining the oil and water-based ingredients. Scrape down the blender when necessary so no pieces remain around the sides.

Taste the Japanese ginger dressing before chilling it. Add a small amount of lemon juice when it needs more brightness or another teaspoon of honey when the acidity feels too sharp. Extra ginger can be added for more warmth, but it is best to make small adjustments because its flavor becomes stronger while resting.

Fresh ginger and garlic are central to this recipe. Visit our Spices & Seasoning recipes for more ideas about using aromatic ingredients in sauces, marinades, and homemade blends.

Ways to Serve This Fresh Dressing

This ginger sesame dressing works especially well with crisp lettuce, shredded cabbage, carrots, cucumber, radishes, and spring onions. Its acidity refreshes leafy salads, while the sesame oil provides enough richness to make simple vegetables feel more substantial.

Use it as a finishing sauce for grilled chicken, salmon, shrimp, tofu, or roasted vegetables. It can also be spooned over rice bowls or noodles. For additional combinations, explore our salad recipes and sauce recipes.

When using the dressing as a marinade, keep a separate portion for serving. Dressing that has touched raw meat, poultry, or seafood should not be reused unless it is thoroughly cooked first.

Storing Japanese Ginger Dressing

Transfer the dressing to a clean glass jar or airtight container immediately after blending. Refrigerate it for at least 30 minutes before serving and use it within one week. Natural separation occurs because the recipe does not contain a commercial emulsifier.

Shake the container vigorously before each use. Discard the dressing if it develops an unusual odor, visible mold, unexpected bubbling, or a significant change in texture. Do not leave it at room temperature for extended periods.

For additional storage guidance, consult the FDA safe food-handling information. With fresh aromatics, lively acidity, and toasted sesame flavor, this ginger sesame dressing is a versatile homemade condiment for salads and everyday meals.