BBQ Lamb Chops

BBQ lamb chops are a premium choice for grilling, offering a rich and slightly earthy flavor that stands out on any barbecue menu. This BBQ lamb chops recipe focuses on simplicity and technique, allowing the natural qualities of the meat to shine while adding a subtle smoky finish from the grill. It is an excellent option for those looking to elevate their barbecue game without adding unnecessary complexity.

What makes BBQ lamb chops so appealing is their balance of flavor and speed. Unlike larger cuts, lamb chops cook quickly, making them ideal for both weeknight grilling and weekend gatherings. With the right preparation, they deliver a tender texture with a beautifully caramelized crust.

If you are building a strong barbecue lineup, consider pairing this dish with BBQ Beef Skewers for a varied and high-performing meat selection.

For proper food safety and cooking temperatures, always follow the recommendations from the FDA.

BBQ lamb chops with smoky flavor and tender texture

Choosing quality lamb is key to achieving the best result. Chops with a small amount of fat provide more flavor and remain juicy during grilling. Bringing the meat to room temperature before cooking ensures more even heat distribution and better texture.

A simple marinade enhances the lamb without overpowering it. Olive oil, garlic, rosemary, salt, and pepper create a classic flavor profile that complements the natural richness of the meat. Allowing the lamb to marinate for at least 30 minutes helps the seasoning absorb properly.

Grilling technique is crucial with lamb chops because of their size. Cooking over medium-high heat allows the outside to develop a crisp, slightly charred surface while keeping the inside tender. Turning the chops regularly ensures even cooking and prevents burning.

Timing should be closely monitored. Lamb chops typically require only a few minutes per side, depending on thickness and preferred doneness. Overcooking can quickly lead to a tougher texture, so it is important to remove them from the grill at the right moment.

After grilling, letting the chops rest briefly allows the juices to redistribute, improving both flavor and tenderness. This step is small but makes a noticeable difference in the final result.

BBQ lamb chops pair well with roasted vegetables, fresh salads, or simple potato dishes. The combination of bold flavor and quick preparation makes this recipe a strong addition to any barbecue collection, especially for those looking to move beyond standard grilled meats.

BBQ Lamb Chops on rustic wooden table

BBQ Lamb Chops

Juicy grilled lamb chops with herbs and smoky barbecue flavor, quick and easy to prepare.
Couverts4 servings
Preparation 10 minutes
Preparation time:8 minutes
estimated costs pp $6.00 per serving
Deel op Facebook Print Recipe

Equipment

  • grill
  • Tongs
  • Mixing bowl

Ingredients

  • 8 lamb chops
  • 2 tablespoons olive oil
  • 2 cloves garlic minced
  • 1 teaspoon fresh rosemary
  • 1 teaspoon salt
  • 1 teaspoon black pepper

Instructions

  • Bring the lamb chops to room temperature before cooking.
  • Mix olive oil, garlic, rosemary, salt, and pepper in a bowl.
  • Coat the lamb chops evenly with the marinade and let rest for 30 minutes.
  • Preheat the grill to medium-high heat.
  • Place the lamb chops on the grill and cook for 3 to 4 minutes per side.
  • Turn regularly for even browning and desired doneness.
  • Remove from the grill and let rest briefly before serving.

Notes & Wine Advice

Notes

Lamb chops cook quickly, so keep a close eye on them to avoid overcooking. Medium to medium-rare gives the best texture and flavor.

Wine Advice

A bold red wine such as Syrah or a classic Bordeaux pairs beautifully with the rich and slightly earthy flavor of lamb.

Nutrition values

Calories: 480 kcal | Carbohydrates: 4 g | Protein: 36 g | Fat: 36 g | Saturated Fat: 14 g | Sodium: 620 mg | Sugar: 1 g
————————————————————————————————–
Season: Summer

BBQ Beef Skewers

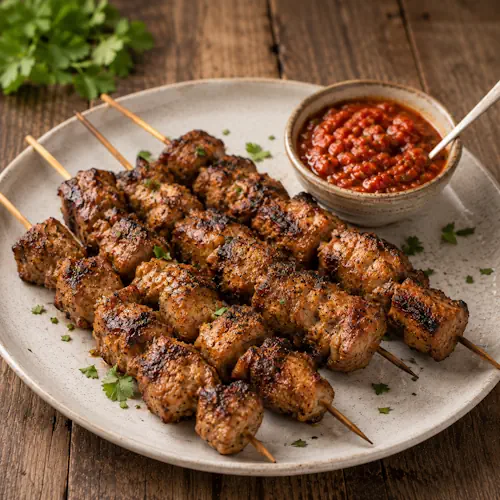
BBQ beef skewers are a classic choice for anyone who enjoys rich, grilled flavors combined with simplicity. Tender pieces of beef are threaded onto skewers and grilled to perfection, creating a juicy interior with a lightly charred exterior. This recipe is ideal for both quick weeknight meals and relaxed weekend barbecues.

What makes this dish stand out is the balance between seasoning and natural flavor. The beef is enhanced with a simple marinade that adds depth without overpowering the meat. As it cooks on the grill, the edges caramelize slightly, giving every bite a satisfying texture and smoky taste.

If you enjoy easy grill recipes, you might also like these BBQ Chicken Recipes for more inspiration.

For safe handling and cooking of beef, always follow the guidelines from the FDA.

Juicy grilled beef skewers with a smoky finish

Preparing skewers is not only simple but also versatile. Choosing the right cut of beef is important for tenderness. Cuts like sirloin or ribeye work best because they stay juicy even at high temperatures. Cutting the meat into equal pieces ensures even cooking and prevents some pieces from overcooking while others remain underdone.

The marinade plays a subtle but important role. A mix of oil, garlic, and herbs enhances the flavor while helping to keep the meat moist during grilling. Letting the beef rest in the marinade for at least an hour allows the flavors to fully develop without making the texture too soft.

Grilling over medium-high heat gives the best results. Turning the skewers regularly ensures even cooking and helps achieve a nice crust on all sides. Avoid pressing the meat, as this releases juices and can lead to dryness.

Serving these skewers is where you can get creative. They pair beautifully with grilled vegetables, fresh salads, or even warm flatbread. A light sauce or dip on the side can add an extra layer of flavor without taking away from the beef itself.

Whether you are cooking for a small group or a larger gathering, this recipe delivers consistent results. The combination of simplicity, bold flavor, and quick preparation makes it a reliable favorite for any barbecue occasion.

BBQ Beef Skewers on rustic wooden table

BBQ Beef Skewers

Juicy grilled beef skewers with smoky flavor and tender texture, perfect for a summer barbecue.
Couverts4 servings
Preparation 15 minutes
Preparation time:10 minutes
Total time 25 minutes
estimated costs pp 4.50
Deel op Facebook Print Recipe

Equipment

  • Skewers
  • grill
  • Mixing bowl

Ingredients

  • 600 g beef sirloin
  • 2 tablespoons olive oil
  • 2 cloves garlic minced
  • 1 teaspoon paprika
  • 1 teaspoon black pepper
  • 1 teaspoon salt
  • 1 teaspoon oregano
  • 1 red bell pepper cut into chunks
  • 1 onion cut into chunks

Instructions

  • Cut the beef into equal cubes and place them in a mixing bowl.
  • Add the olive oil, garlic, paprika, black pepper, salt, and oregano, then mix until the beef is evenly coated.
  • Let the beef marinate for at least 1 hour.
  • Thread the beef, bell pepper, and onion onto skewers.
  • Preheat the grill to medium-high heat.
  • Place the skewers on the grill and cook for 8 to 10 minutes, turning regularly, until browned and cooked to your preference.
  • Remove from the grill and let rest briefly before serving.

Notes & Wine Advice

Notes

Use evenly sized beef cubes for the most consistent cooking. Do not pack the skewers too tightly, because a little space helps the heat circulate better.

Wine Advice

A structured Cabernet Sauvignon works beautifully with the grilled beef, while a spicy Syrah also pairs very well with the smoky barbecue character.

Nutrition values

Calories: 420 kcal | Carbohydrates: 6 g | Protein: 38 g | Fat: 28 g | Saturated Fat: 10 g | Sodium: 640 mg | Sugar: 3 g
————————————————————————————————–
Season: Summer
Diets; Gluten-Free

BBQ Bacon Wrapped Chicken

BBQ bacon wrapped chicken is one of the most satisfying dishes you can prepare on the grill. This recipe combines juicy chicken with crispy bacon and a rich barbecue glaze, creating a perfect balance of smoky, savory, and slightly sweet flavors. It works equally well for relaxed weeknight dinners and larger outdoor gatherings.

What makes this dish so appealing is the contrast in texture. The chicken remains tender while the bacon slowly renders and becomes crisp on the outside. As the sauce caramelizes, it forms a glossy coating that enhances both the flavor and presentation. This combination ensures every bite feels complete and well balanced.

If you enjoy grilled chicken recipes, you should also try these BBQ Chicken Wings for another easy and popular option.

For safe poultry preparation and proper cooking temperatures, always follow recommendations from the FDA.

Grilled chicken wrapped in bacon with a rich BBQ glaze

Preparing this recipe requires attention to heat control and timing. Cooking over medium heat allows the bacon to crisp slowly without burning, while the chicken cooks evenly inside. Turning the meat regularly ensures even browning and prevents flare-ups caused by dripping fat.

Applying the sauce at the right moment is essential. If added too early, the sugars can burn before the chicken is fully cooked. Brushing the glaze during the final minutes allows it to caramelize properly, creating a sticky and flavorful coating. This step greatly improves both taste and texture.

Resting the meat after grilling is another important step. Letting it sit for a few minutes helps the juices redistribute, keeping the chicken moist and tender. Skipping this step often leads to dryness, which is easy to avoid with a bit of patience.

This dish pairs well with a wide range of sides. Grilled vegetables, corn on the cob, or a fresh salad all complement the smoky flavors. The richness of the bacon works especially well with lighter side dishes, creating a balanced meal.

Whether you are preparing a quick dinner or hosting a barbecue, this recipe delivers consistent results. The combination of crispy bacon, juicy chicken, and caramelized glaze makes it a reliable favorite that stands out every time.

BBQ Bacon Wrapped Chicken on rustic wooden table

BBQ Bacon Wrapped Chicken

Juicy chicken wrapped in crispy bacon with a BBQ glaze.
Couverts4 servings
Preparation 15 minutes
Preparation time:25 minutes
Total time 40 minutes
estimated costs pp $3.00
Deel op Facebook Print Recipe

Equipment

  • BBQ grill
  • Tongs

Ingredients

  • 4 chicken breasts
  • 8 bacon strips
  • BBQ sauce

Instructions

  • Wrap chicken with bacon.
  • Preheat BBQ grill.
  • Grill 20 to 25 minutes.
  • Brush BBQ sauce near the end.
  • Rest and serve.

Notes & Wine Advice

Notes

Cook over medium heat to allow the bacon to crisp slowly without burning. Apply sauce at the end for best results.

Wine Advice

A smooth Merlot pairs perfectly with the smoky bacon and juicy chicken.

Nutrition values

Calories: 520 kcal | Carbohydrates: 6 g | Protein: 34 g | Fat: 40 g | Saturated Fat: 16 g | Sodium: 650 mg | Sugar: 5 g
————————————————————————————————–
Season: Summer
Diets; Gluten-Free

BBQ Garlic Herb Lamb Chops

BBQ lamb chops are one of the most flavorful and elegant options you can prepare on the grill, combining rich meat with simple seasoning for maximum impact. These BBQ lamb chops are infused with garlic and herbs, creating a balanced dish that delivers both depth and freshness in every bite. Perfect for summer grilling or a special outdoor dinner, this recipe proves that simplicity often leads to the best results.

The key to great lamb chops lies in high-quality meat and proper seasoning. A mixture of garlic, olive oil, and herbs enhances the natural flavor of the lamb without overpowering it. As the chops cook on the grill, they develop a lightly charred exterior while staying juicy and tender inside. This contrast in texture makes them especially satisfying.

If you enjoy grilled meat recipes, you should also try these BBQ Steak Skewers for another bold and easy BBQ option.

For safe meat preparation and cooking temperatures, always follow guidelines from the FDA.

How to grill tender lamb chops on the BBQ

Cooking lamb chops on the BBQ requires attention to timing and heat. Because the cuts are relatively small, they cook quickly and benefit from high direct heat. This method creates a flavorful crust while keeping the inside tender and juicy. Turning the chops only once helps develop a proper sear without losing moisture.

Resting the meat after grilling is an essential step that should not be skipped. Allowing the chops to sit for a few minutes helps redistribute the juices, ensuring every bite remains flavorful. This also improves the overall texture and prevents dryness.

Lamb pairs exceptionally well with fresh and simple sides. Consider serving these chops with grilled vegetables, a light salad, or roasted potatoes. The natural richness of the meat works well with bright and fresh flavors, creating a balanced plate.

This recipe is ideal for both beginners and experienced grillers. It requires minimal ingredients while still delivering a restaurant-quality result. Whether youโ€™re hosting a BBQ or preparing a quick dinner, these lamb chops offer a reliable and impressive option that never disappoints.

BBQ Garlic Herb Lamb Chops on rustic wooden table

BBQ Garlic Herb Lamb Chops

Juicy lamb chops with garlic and herbs grilled over high heat.
Couverts4 servings
Preparation 15 minutes
Preparation time:10 minutes
Total time 25 minutes
estimated costs pp $5.00
Deel op Facebook Print Recipe

Equipment

  • BBQ grill
  • Tongs
  • Mixing bowl

Ingredients

  • 8 lamb chops
  • 2 tablespoons olive oil
  • 2 cloves garlic
  • 1 teaspoon dried herbs
  • Salt
  • Black pepper

Instructions

  • Mix oil, garlic, herbs, salt and pepper.
  • Coat lamb chops.
  • Preheat BBQ grill.
  • Grill 4 to 5 minutes per side.
  • Rest before serving.

Notes & Wine Advice

Notes

Cook the lamb chops over high heat for a quick sear and tender result. Do not overcook to keep them juicy.

Wine Advice

A rich Malbec pairs beautifully with the bold flavor of lamb and enhances the grilled character of the dish.

Nutrition values

Calories: 480 kcal | Carbohydrates: 2 g | Protein: 32 g | Fat: 38 g | Saturated Fat: 14 g | Sodium: 520 mg | Sugar: 0 g
————————————————————————————————–
Season: Summer
Diets; Gluten-Free

BBQ Smoky Pulled Pork

BBQ pulled pork is a true barbecue classic that delivers deep flavor and incredibly tender meat. This recipe focuses on creating juicy, slow-cooked pork that easily falls apart and absorbs a rich smoky sauce, making it perfect for sandwiches, wraps, or serving straight from the grill.

The preparation starts with a well-balanced spice rub that enhances the natural flavor of the pork without overpowering it. During the slow cooking process, the meat becomes soft and develops a flavorful outer crust, often called the bark. This contrast between crispy edges and tender interior is what makes this dish so satisfying.

If you enjoy bold barbecue recipes, you should also try these BBQ Chicken Thighs for another easy grilling option.

For safe cooking temperatures and proper meat handling, always follow recommendations from the FDA.

How to make smoky pulled pork on the BBQ

The key to great results is patience. Cooking the pork over indirect heat allows the fibers to slowly break down, resulting in a soft and juicy texture. This method prevents the meat from drying out while building layers of flavor over time.

Turning the meat occasionally ensures even cooking and helps develop a consistent crust. Toward the end, adding sauce enhances the richness without masking the natural taste of the pork. Letting the meat rest before shredding helps retain juices and improves the final texture.

This dish is highly versatile and works well with many sides. Serve it with coleslaw, grilled vegetables, or on a toasted bun. Whether you’re preparing a casual meal or hosting a barbecue, this recipe delivers reliable and flavorful results every time.

BBQ Smoky Pulled Pork on rustic wooden table

BBQ Smoky Pulled Pork

Tender slow-cooked pork shoulder with rich smoky BBQ flavor.
Couverts4 servings
Preparation 20 minutes
Preparation time:4 hours
Total time 4 hours 21 minutes
estimated costs pp $3.50
Deel op Facebook Print Recipe

Equipment

  • BBQ grill
  • Dutch oven

Ingredients

  • 2 pounds pork shoulder
  • 2 tablespoons BBQ rub
  • 1 cup BBQ sauce

Instructions

  • Season pork.
  • Cook indirect heat for 4 hours.
  • Shred meat.
  • Mix with sauce.
  • Serve hot.

Notes & Wine Advice

Notes

Cook the pork slowly over indirect heat for the best texture and flavor. Let it rest before shredding to retain juices.

Wine Advice

A bold Zinfandel pairs perfectly with the smoky richness of the pork and enhances the BBQ flavors.

Nutrition values

Calories: 520 kcal | Carbohydrates: 8 g | Protein: 35 g | Fat: 38 g | Saturated Fat: 14 g | Sodium: 620 mg | Sugar: 6 g
————————————————————————————————–
Season: Summer
Diets; Gluten-Free

BBQ Garlic Butter Steak Skewers

BBQ garlic butter steak skewers are the ultimate combination of juicy beef and rich, savory flavor. This recipe delivers tender, perfectly grilled steak pieces coated in a bold garlic butter glaze that melts over the meat as it cooks. Ideal for summer grilling or quick outdoor dinners, these skewers bring steakhouse quality straight to your backyard.

The secret lies in the marinade and finishing butter. A simple mix of garlic, butter, and seasoning enhances the natural flavor of the beef without overpowering it. As the skewers hit the grill, the fat renders slightly, creating a caramelized crust while keeping the inside juicy.

If you enjoy grilled beef recipes, you might also like these BBQ Chicken Thighs for another flavorful BBQ option.

For safe grilling temperatures and meat handling, always follow guidelines from the FDA.

BBQ garlic butter steak skewers with juicy grilled flavor

These skewers are all about texture and flavor. The outside develops a beautiful char while the inside remains tender and juicy. Cutting the steak into even chunks ensures consistent cooking and perfect bites every time.

The garlic butter is added during the final stage, allowing it to melt over the hot meat without burning. This creates a glossy, flavorful coating that enhances every bite. You can also brush extra butter just before serving for even more richness.

Serve these skewers with grilled vegetables, a fresh salad, or crusty bread. They are perfect for BBQ parties, quick dinners, or weekend grilling sessions. This recipe is simple, powerful, and guaranteed to impress any meat lover.

BBQ Garlic Butter Steak Skewers op rustieke houten tafel

BBQ Garlic Butter Steak Skewers

Juicy steak skewers grilled to perfection and finished with rich garlic butter.
Couverts4 servings
Preparation 20 minutes
Preparation time:15 minutes
Total time 35 minutes
estimated costs pp $4.50
Deel op Facebook Print Recipe

Equipment

  • BBQ grill
  • Skewers
  • Mixing bowl

Ingredients

  • 1 pound beef steak
  • 2 tablespoons butter
  • 3 cloves garlic
  • 1 tablespoon olive oil
  • Salt
  • Black pepper

Instructions

  • Cut steak into cubes.
  • Season with salt and pepper.
  • Thread onto skewers.
  • Preheat BBQ grill.
  • Grill for 10 to 15 minutes turning regularly.
  • Melt butter with garlic.
  • Brush over skewers before serving.

Notes & Wine Advice

Notes

Pressing the tofu is essential for achieving the best texture and allowing the sauce to fully absorb. For extra crispiness, cook a few minutes longer, but keep an eye on the glaze to prevent burning.

Wine Advice

A slightly sweet Riesling pairs beautifully with the savory and spicy flavors. Alternatively, a light Pinot Noir offers a soft contrast to the umami richness of the dish.

Nutrition values

Calories: 520 kcal | Carbohydrates: 2 g | Protein: 38 g | Fat: 40 g | Saturated Fat: 16 g | Sodium: 580 mg | Sugar: 0 g
————————————————————————————————–
Season: Summer
Diets; Gluten-Free

Savory Red Wine Infused Grand Steak

red wine steak combines juicy grilled beef, savory herbs, soy sauce, warming spices, and rich marinade flavor into a bold barbecue recipe packed with smoky character. The marinade helps tenderize the meat while adding deep savory richness and aromatic spice throughout the steaks.

This marinated grilled steak recipe remains popular because the flavorful marinade transforms simple beef into an impressive barbecue dinner with very little preparation. Red wine, oregano, parsley, soy sauce, and tandoori spices combine beautifully while grilling over high heat.

Red wine marinade builds rich grilled flavor

The popularity of red wine steak continues to grow because red wine naturally helps tenderize beef while adding bold savory depth to the meat. Allowing the steaks to marinate for several hours also helps the herbs and spices fully develop throughout the beef.

Another reason this marinated grilled steak recipe works so well is the balance between smoky grilled flavor and aromatic seasoning. Soy sauce adds savory richness while oregano, parsley, and tandoori masala create warm herbal spice.

Fresh herbs and spices create bold barbecue richness

The combination of parsley, oregano, black pepper, and tandoori seasoning gives this savory beef steak its signature flavor. The marinade creates rich seasoning throughout the meat while preserving tenderness during grilling.

If you enjoy flavorful grilled beef recipes, you may also like our Cranberry Spice Ruby Steak, another rich marinated grilled steak recipe packed with bold barbecue flavor.

Texture plays an important role in this recipe. The outside of the steak develops caramelized grill marks while the inside remains juicy and tender. Resting the steaks after cooking also helps preserve moisture before slicing and serving.

Basting the steaks lightly during grilling helps deepen the flavor while creating glossy caramelized edges around the outside of the meat. Medium-high grilling heat also creates the perfect barbecue crust.

Perfect barbecue steak recipe for outdoor grilling

This red wine steak recipe works perfectly for backyard cookouts, summer grilling, family dinners, and outdoor barbecue meals because the steaks cook quickly while still delivering rich savory flavor.

The grilled beef pairs beautifully with roasted potatoes, mushrooms, grilled vegetables, rice, salads, garlic bread, or herb butter. Fresh parsley also adds brightness and color before serving.

Proper food handling remains important whenever preparing raw beef and marinades. Beef should always stay refrigerated during marinating and should be cooked safely before serving. For additional meat preparation and grilling safety guidance, visit the FDA.

Ultimately, red wine steak delivers juicy grilled beef, savory herb flavor, smoky barbecue richness, and deep marinade flavor in a satisfying recipe perfect for outdoor grilling and steak dinners.

red wine steak served on a rustic wooden table with juicy grilled beef and herbs

Savory Red Wine Grand Steak

Juicy grilled steak with savory red wine marinade and smoky barbecue flavor.
Couverts4 servings
Preparation 10 minutes
Preparation time:8 minutes
Marinating Time+resting time 4 hours 5 minutes
Total time 4 hours 23 minutes
estimated costs pp $9.95 per person
Deel op Facebook Print Recipe

Equipment

  • grill or skillet
  • medium bowl
  • Tongs
  • Whisk

Ingredients

  • 4 steaks
  • 1/2 cup soy sauce
  • 1/4 cup red wine
  • 3 tablespoons white sugar
  • 1 tablespoon dried oregano
  • 1 tablespoon tandoori masala
  • 1 tablespoon chopped parsley
  • 1 tablespoon dry vegetarian soup mix
  • 2 tablespoons black pepper

Instructions

  • Whisk together soy sauce, red wine, sugar, oregano, tandoori masala, parsley, soup mix, and black pepper in a medium bowl.
  • Place the steaks into a shallow dish or resealable bag.
  • Pour the marinade over the steaks and coat evenly.
  • Cover and refrigerate for at least 4 hours or overnight.
  • Preheat the grill or skillet over medium-high heat.
  • Remove the steaks from the marinade and allow excess marinade to drip off.
  • Grill or pan-sear the steaks for 3 to 4 minutes per side.
  • Baste occasionally with the remaining marinade while cooking.
  • Cook to your preferred level of doneness.
  • Remove the steaks from the heat and rest briefly before serving.
  • Serve hot garnished with parsley if desired.

Notes & Wine Advice

Notes

Allowing the steaks to marinate overnight creates even deeper savory flavor and tenderness.

Serve Tip

Serve these steaks with grilled vegetables, roasted potatoes, mushrooms, salads, or garlic bread.

Variations

Add rosemary, smoked paprika, garlic, chili flakes, or herb butter for extra barbecue richness and spice.

Wine Advice

A bold Cabernet Sauvignon pairs beautifully with the savory marinade and smoky grilled beef.

Nutrition values

Calories: 450 kcal | Carbohydrates: 15 g | Protein: 35 g | Fat: 20 g | Saturated Fat: 7 g | Sodium: 980 mg | Sugar: 10 g
————————————————————————————————–

Spanish Veal Puff Pastries

ALT text: Aguja de Ternera beef stew served in a rustic pan on a rustic wooden table.

Spanish Veal Puff Pastries

Spanish Veal Puff Pastries are crisp, flaky pastries filled with a rich, savory veal mixture. These traditional Spanish pastries are perfect as tapas, appetizers, party food, or a light lunch served warm or at room temperature.
Couverts10 pastries
Preparation 20 minutes
Preparation time:14 minutes
Total time 34 minutes
estimated costs pp $2.80 per pastry
Deel op Facebook Print Recipe

Equipment

  • Baking sheet
  • Knife
  • Measuring spoons
  • oven
  • Pastry brush (optional)
  • Rolling Pin

Ingredients

  • 1 recipe Veal Filling prepared
  • 2ยพ pounds puff pastry dough homemade or store-bought

Instructions

  • Prepare the puff pastry if using homemade dough.
  • Prepare the veal filling according to the recipe instructions.
  • Preheat the oven to 425ยฐF (220ยฐC).
  • Roll the pastry into two rectangles measuring approximately 25 ร— 15 inches and โ…› inch thick.
  • Cut each rectangle into five equal rectangles.
  • Place about 3 tablespoons of veal filling along the center of each pastry.
  • Fold the pastry over the filling and seal the edges firmly.
  • Place the pastries seam-side down on a baking sheet.
  • Bake for about 15 minutes until puffed and golden brown.
  • Serve warm or at room temperature.

Notes & Wine Advice

Recipe Notes

Use good-quality all-butter puff pastry for the flakiest texture.
Allow the veal filling to cool before filling the pastry to prevent soggy dough.
Seal the edges well to keep the filling inside while baking.
These pastries can be prepared ahead and reheated in the oven before serving.

Wine Advice

A medium-bodied Spanish Tempranillo pairs beautifully with the rich veal filling.
For a non-alcoholic option, serve with sparkling grape juice or lightly sparkling mineral water.

Nutrition values

Calories: 420 kcal | Carbohydrates: 28 g | Protein: 16 g | Fat: 27 g | Saturated Fat: 9 g | Sodium: 0.8 mg | Sugar: 2 g
————————————————————————————————–

About This Recipe

Spanish Veal Puff Pastries are a traditional Spanish tapas specialty known in Spain as Aguja de Ternera. These flaky pastries are filled with a rich veal mixture and baked until beautifully golden and crisp. They are commonly served in tapas bars, bakeries, and cafรฉs throughout Spain, where they are enjoyed as a snack, appetizer, or light meal. Their combination of buttery pastry and savory filling makes them an irresistible addition to any tapas spread.

Why You’ll Love These Veal Puff Pastries

Spanish Veal Puff Pastries are simple to prepare, especially when using ready-made puff pastry. The crisp, buttery layers contrast perfectly with the tender, flavorful veal filling. Because they can be served warm or at room temperature, they are ideal for entertaining, buffets, picnics, and casual gatherings. They are also easy to prepare in advance, making them a practical recipe for busy hosts.

Authentic Aguja de Ternera

The traditional veal puff pastries found throughout Spain often use homemade pastry and slow-cooked veal filling. The secret is allowing the filling to cool before assembling the pastries, preventing the pastry from becoming soggy during baking. Baking at a high temperature helps create the light, flaky layers that make these pastries so distinctive.

Serving Spanish Veal Puff Pastries

Spanish Veal Puff Pastries are delicious as part of a tapas selection alongside olives, Manchego cheese, roasted peppers, cured meats, and fresh bread. They also pair well with soups or fresh salads for a light lunch. If you enjoy Spanish cuisine, browse our Spanish Recipes collection for more authentic tapas and regional specialties.

Veal Puff Pastries Storage Tips

Store leftover veal puff pastries in an airtight container in the refrigerator for up to three days. Reheat them in a hot oven for several minutes to restore their crisp pastry. They also freeze well after baking and can be reheated directly from frozen. For food safety information when handling cooked meat and pastry, visit the FDA Food Safety website.

Spanish Veal Puff Pastries bring authentic Spanish flavors to your table with very little effort. Their flaky pastry, rich filling, and versatile serving options make them a favorite recipe for tapas nights, parties, and family gatherings throughout the year.


Seville Orange Marmalade

Seville Orange Marmalade in glass jars with fresh oranges and slices of toasted sourdough bread.

Seville Orange Marmalade

Seville Orange Marmalade is a classic homemade preserve with the perfect balance of sweet and bitter citrus flavors. Delicious on toast, fresh sourdough, croissants, or as an ingredient in baking and desserts.
Couverts4 jars
Preparation 20 minutes
Preparation time:2 hours 20 minutes
Resting Time 12 hours
Total time 14 hours 40 minutes
estimated costs pp $3.25 per jar
Deel op Facebook Print Recipe

Equipment

  • Citrus juicer
  • Knife
  • Large bowl
  • Large preserving pan or saucepan
  • ladle,
  • Measuring jug
  • Sterilized jars with lids
  • Sugar thermometer
  • Wooden spoon

Ingredients

  • ยผ cup 60 ml lemon juice
  • 1 kg Seville oranges
  • 1.5 kg granulated sugar
  • 9 cups 2.25 litres water

Instructions

  • Wash the oranges thoroughly.
  • Cut the oranges in half.
  • Squeeze the juice into a large bowl.
  • Thinly slice the orange halves, including the peel and pith.
  • Add the sliced oranges to the bowl with the juice.
  • Pour in the water.
  • Cover and leave to soak overnight or for at least 12 hours.
  • Transfer the mixture to a preserving pan.
  • Bring to a boil over high heat.
  • Reduce the heat and simmer for about 2 hours until the peel is tender.
  • Add the sugar and lemon juice.
  • Bring back to a boil while stirring regularly.
  • Cook until the marmalade reaches 105ยฐC (221ยฐF) or passes the wrinkle test.
  • Carefully ladle the hot marmalade into sterilized jars.
  • Seal immediately.
  • Allow to cool before storing in a cool, dark place.

Notes & Wine Advice

Recipe Notes

Seville oranges produce the traditional bittersweet flavor that classic marmalade is known for.
If Seville oranges are unavailable, use regular oranges with one or two lemons for extra acidity.
Always use sterilized jars to maximize shelf life.
The marmalade will continue to thicken as it cools.

Wine Advice

This marmalade pairs beautifully with a fresh breakfast and a cup of strong coffee or black tea.
It also complements sparkling wine at a festive brunch or afternoon tea.

Nutrition values

Calories: 68 kcal | Carbohydrates: 17 g | Protein: 0 g | Fat: 0 g | Saturated Fat: 0 g | Sodium: 0 mg | Sugar: 16 g
————————————————————————————————–

About This Recipe

Seville Orange Marmalade is a classic British preserve made with Seville oranges, sugar, and lemon juice. Its perfect balance of sweetness and gentle bitterness has made it a breakfast favorite for generations. Whether spread on warm toast, fresh sourdough, croissants, or scones, this homemade preserve delivers a rich citrus flavor that is difficult to match with commercial marmalades.

Why You’ll Love This Marmalade

Seville Orange Marmalade is surprisingly easy to make using only a few ingredients. The overnight soaking process softens the peel while naturally extracting pectin, helping the marmalade achieve its signature texture. Slow cooking develops a deep citrus flavor while keeping the peel pleasantly tender.

Traditional Orange Marmalade

This orange marmalade follows the traditional British preserving method that has been used for generations. Cooking the fruit slowly before adding the sugar produces a clear, glossy preserve with beautifully suspended strips of peel. The final cooking temperature of 105ยฐC (221ยฐF) ensures a perfect set every time.

Serving Seville Orange Marmalade

Seville Orange Marmalade is delicious on toasted sourdough, English muffins, crumpets, pancakes, waffles, and buttery croissants. It also makes an excellent glaze for roasted ham, duck, or chicken and can be stirred into cakes, muffins, cookies, and dessert fillings. Browse our Sandwich Toppings collection for more homemade spreads and preserves.

Orange Marmalade Storage Tips

Store unopened jars of orange marmalade in a cool, dark place for several months. Once opened, refrigerate and use within a few weeks. Always use sterilized jars and clean utensils to maximise shelf life. Proper sealing also helps preserve both flavour and colour. For safe home preserving information, visit the FDA Food Safety website.

Homemade marmalade also makes a thoughtful edible gift during the winter citrus season. Pack a jar with fresh bread, crackers, or homemade biscuits for a simple but appreciated present. Seville Orange Marmalade remains one of the finest traditional preserves you can make at home, bringing bright citrus flavour to breakfast throughout the year.


Arizona Desert Beef Chili

Arizona desert beef chili is a bold, slow-simmered dish known for its deep chili flavor, tender beef, and subtle smoky heat. Designed for cooks who appreciate structure and richness, arizona desert beef chili delivers a dependable one-pot meal that feels both grounded and satisfying without requiring overly complex technique.

If you enjoy hearty beef recipes with layered flavor, the African Groundnut Chicken Stew offers another excellent option built around slow cooking and strong ingredient balance.

Safe food handling is essential when preparing beef dishes. Always follow recommendations from the FDA to ensure proper cooking temperatures and kitchen safety.

Why Arizona Desert Beef Chili Stands Out

The strength of arizona desert beef chili begins with its foundation. Browning the beef properly develops savory depth that carries throughout the entire pot, while onion and garlic create an aromatic base that signals comfort from the first stir.

Unlike thinner chili variations, this version leans into body and concentration. Tomato paste reinforces structure, beef broth builds continuity, and a measured blend of chili powder, cumin, and smoked paprika provides warmth without overwhelming the palate. The result is flavor that tastes deliberate rather than aggressive.

Slow simmering plays a critical role. Allowing the chili time to reduce naturally helps the spices integrate while tenderizing the beef. This patient approach produces a texture that feels cohesive โ€” every spoonful delivering both richness and balance.

Another reason arizona desert beef chili earns repeat status is practicality. Everything cooks in one pot, the preparation is straightforward, and the recipe scales easily for gatherings or meal prep. It performs just as well for a relaxed weekend dinner as it does for game-day style serving.

Ultimately, arizona desert beef chili succeeds because it prioritizes depth over novelty. It is the kind of reliable, flavor-forward meal experienced home cooks return to when they want something hearty, predictable, and unquestionably satisfying.

Arizona Desert Beef Chili

Arizona Desert Beef Chili

Arizona desert beef chili is a slow-simmered one-pot meal with tender beef bold spices and a rich tomato base built for dependable comfort.
Couverts6
Preparation 15 minutes
Preparation time:1 hour
Total time 1 hour 15 minutes
estimated costs pp $3.95 pp
Deel op Facebook Print Recipe

Equipment

  • Large Dutch oven
  • Wooden spoon
  • Chef knife
  • Measuring spoons
  • Can opener

Ingredients

  • 2 pounds ground beef
  • 1 tablespoon olive oil
  • 1 large onion diced
  • 3 garlic cloves minced
  • 2 tablespoons tomato paste
  • 2 cups beef broth
  • 1 can crushed tomatoes
  • 1 can kidney beans drained
  • 1 tablespoon chili powder
  • 1 teaspoon ground cumin
  • 1 teaspoon smoked paprika
  • ยฝ teaspoon kosher salt
  • ยฝ teaspoon black pepper

Instructions

  • Heat olive oil in a Dutch oven over medium heat.
  • Add ground beef and cook until browned breaking it apart as it cooks.
  • Stir in onion and garlic and sautรฉ until softened.
  • Add tomato paste and cook for 1 minute to deepen flavor.
  • Pour in beef broth and crushed tomatoes stirring well.
  • Add beans chili powder cumin paprika salt and pepper.
  • Bring to a gentle simmer and cook uncovered for about 1 hour stirring occasionally.
  • Adjust seasoning and serve hot.

Notes & Wine Advice

Notes

For deeper flavor, prepare the chili a day ahead โ€” the spices continue to develop as it rests. If the chili thickens too much during reheating, loosen it with a small splash of broth.

Wine Advice

A fruit-forward Zinfandel pairs naturally with the chiliโ€™s spice, while a Syrah complements the dish with peppery depth and structure.

Nutrition values

Calories: 520 kcal | Carbohydrates: 18 g | Protein: 38 g | Fat: 32 g | Saturated Fat: 11 g | Sodium: 780 mg | Sugar: 6 g
————————————————————————————————–
Course; Beef / Dinner / Main Course
Cuisine; American
Season: Autumn / Winter
Diets; Gluten-Free
Occasions Game Day