Air Fryer Lemon Myrtle Garlic Bread

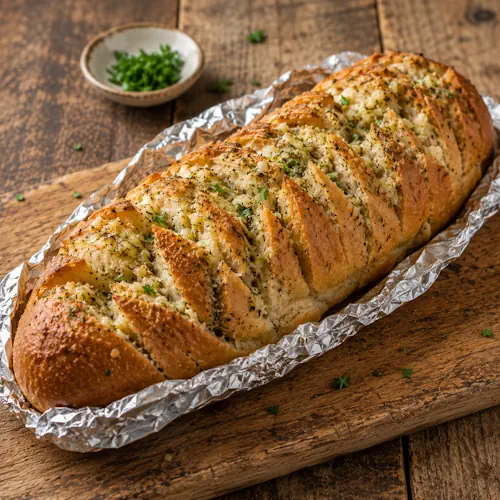
Lemon myrtle garlic bread with a crisp crust and melted garlic butter

Air Fryer Lemon Myrtle Garlic Bread

Air Fryer Lemon Myrtle Garlic Bread combines crisp, warm bread with melted garlic butter and aromatic Australian lemon myrtle. It is an easy side dish for barbecues, pasta dinners, soups, or shared appetizers.
Couverts4 servings
Total time 22 minutes
estimated costs pp $1.60
Deel op Facebook Print Recipe

Equipment

  • Measuring spoons
  • Mixing bowl
  • Serrated knife
  • Silicone spatula

Ingredients

Instructions

  • Preheat the air fryer to 180ยฐC (356ยฐF) for 3 minutes.
  • Combine the softened butter, lemon myrtle powder, garlic, salt, and black pepper in a mixing bowl.
  • Cut diagonal slices across the bread approximately 2.5 cm apart without cutting through the bottom.
  • Spread the lemon myrtle garlic butter generously inside each cut.
  • Wrap the bread in aluminum foil while leaving the top exposed.
  • Place the wrapped bread in the air fryer basket.
  • Air fry for 10โ€“12 minutes until the bread is hot and the butter has melted.
  • Open the foil during the final 2 minutes for a crisper surface.
  • Carefully remove the bread from the air fryer.
  • Garnish with chopped parsley if desired.
  • Serve immediately while warm.

Notes & Wine Advice

Serving Suggestions

Serve the bread warm with grilled meat, pasta, tomato soup, roasted vegetables, or a fresh salad. It works especially well alongside recipes from our Barbecue collection or as part of a shared platter featuring other appetizer recipes.

Recipe Notes

Use properly softened butter so it spreads evenly between the bread slices. Do not cut completely through the bottom of the loaf because the intact base keeps the bread together. Lemon myrtle has an intense citrus aroma, so measure it carefully. Find more ways to use flavorful herbs in our Spices & Seasoning recipes.

Variations

Add grated Parmesan or mozzarella between the cuts for a cheesy version. Chili flakes provide gentle heat, while chopped basil creates a fresher flavor. Replace half the butter with olive oil for a lighter texture. Browse our Bread recipes and Australian recipes for more inspiration.

Wine Advice

A fresh Sauvignon Blanc complements the citrus character of lemon myrtle and cuts through the melted butter. A crisp Pinot Grigio is a lighter alternative.

Nutrition values

Calories: 402 kcal | koolhydraten: 58 g | Eiwitten: 10 g | Vet: 14 g | Verzadigd vet: 8 g | Natrium: 610 mg | Suiker: 3 g
————————————————————————————————–
Cuisine; Australia / Fusion
Season: All Seasons
Diets; Vegetarian

About Lemon Myrtle Garlic Bread

Lemon myrtle garlic bread gives familiar garlic bread a distinctly Australian character. A crusty loaf is filled with softened butter, fresh garlic, and fragrant lemon myrtle before being warmed in the air fryer. The butter melts deep into the cuts while the exposed surface becomes lightly crisp. Every piece delivers a combination of savory garlic, creamy butter, aromatic citrus, and warm bread.

Lemon myrtle is a native Australian plant known for its powerful lemon fragrance. Unlike lemon juice, it adds citrus flavor without introducing additional liquid or acidity. This makes the ground herb especially suitable for flavored butter because it blends easily and does not soften the bread. Its concentrated character means that a relatively small quantity can season an entire loaf.

This recipe is a useful addition to an Australian recipe collection and offers an approachable way to experiment with native ingredients. It retains everything people enjoy about traditional garlic bread while introducing a flavor that feels fresh and slightly unexpected.

Why Australian Garlic Bread Works in the Air Fryer

Australian garlic bread cooks particularly well in the air fryer because circulating heat warms the loaf quickly and evenly. The butter melts into the interior before the outside has time to become excessively hard. Leaving the top of the foil open allows the crust to develop color while the covered sides retain moisture.

The air fryer also removes the need to heat a full-sized oven for one loaf. This is helpful when preparing a quick side dish or when the oven is already being used for another part of the meal. Browse our complete collection of air fryer recipes for other dishes that use this efficient cooking method.

Basket dimensions vary between appliances, so check that the loaf fits before adding the butter. If necessary, divide it into two shorter sections. Leave a little room around the bread so the heated air can circulate rather than becoming trapped beneath the foil.

How to Make Lemon Myrtle Garlic Bread

Begin with softened butter that can be spread without tearing the bread. Combine it thoroughly with minced garlic, lemon myrtle powder, salt, and black pepper. Mixing the ingredients evenly prevents concentrated pockets of seasoning and ensures that every slice has the same balanced flavor.

Use a serrated knife to make diagonal cuts while keeping the base intact. Gently open each cut and spread the seasoned butter onto both interior surfaces. This is more effective than placing the butter only on top because it allows the flavor to penetrate the softer center of the loaf.

Wrapping most of the loaf in foil prevents the lower crust from becoming too dark. Open the foil slightly during the final 2 minutes if you prefer a noticeably crisper finish. Additional seasoning ideas are available in our Spices & Seasoning collection.

Serving Ideas for This Australian Bread

Serve this aromatic bread beside grilled chicken, steak, seafood, vegetable skewers, pasta, soup, or salad. Its bright herbal flavor works particularly well with outdoor meals and recipes from our Barbecue collection. It can also be placed in the center of the table as an informal pull-apart appetizer.

For a complete vegetarian meal, pair it with tomato soup and a crisp green salad. The bread is also excellent with roasted vegetables or a tomato-based pasta dish because its citrus notes provide contrast to rich sauces. Explore our Side Dish recipes for more suitable accompaniments.

If serving the loaf at a gathering, prepare the butter mixture earlier in the day. Cut and fill the bread shortly before cooking so it does not absorb too much moisture while waiting.

Storage and Reheating

Lemon myrtle garlic bread is best eaten immediately, when the crust is crisp and the seasoned butter is fully melted. Refrigerate leftovers in an airtight container or wrap them securely in foil. Use the refrigerated bread within three days.

Reheat individual portions in the air fryer at 160ยฐC (320ยฐF) for 3โ€“5 minutes. Keep them loosely covered with foil during the first few minutes to prevent the crust from becoming overly hard. Microwaving is possible, but it produces softer bread and will not restore the crisp surface.

The uncooked prepared loaf can also be frozen. Wrap it securely and freeze it for up to one month. Allow it to thaw in the refrigerator before air frying. With its easy preparation and aromatic native seasoning, lemon myrtle garlic bread is a practical way to bring Australian flavor to everyday meals.
Crispy Bush Tomato Arancini

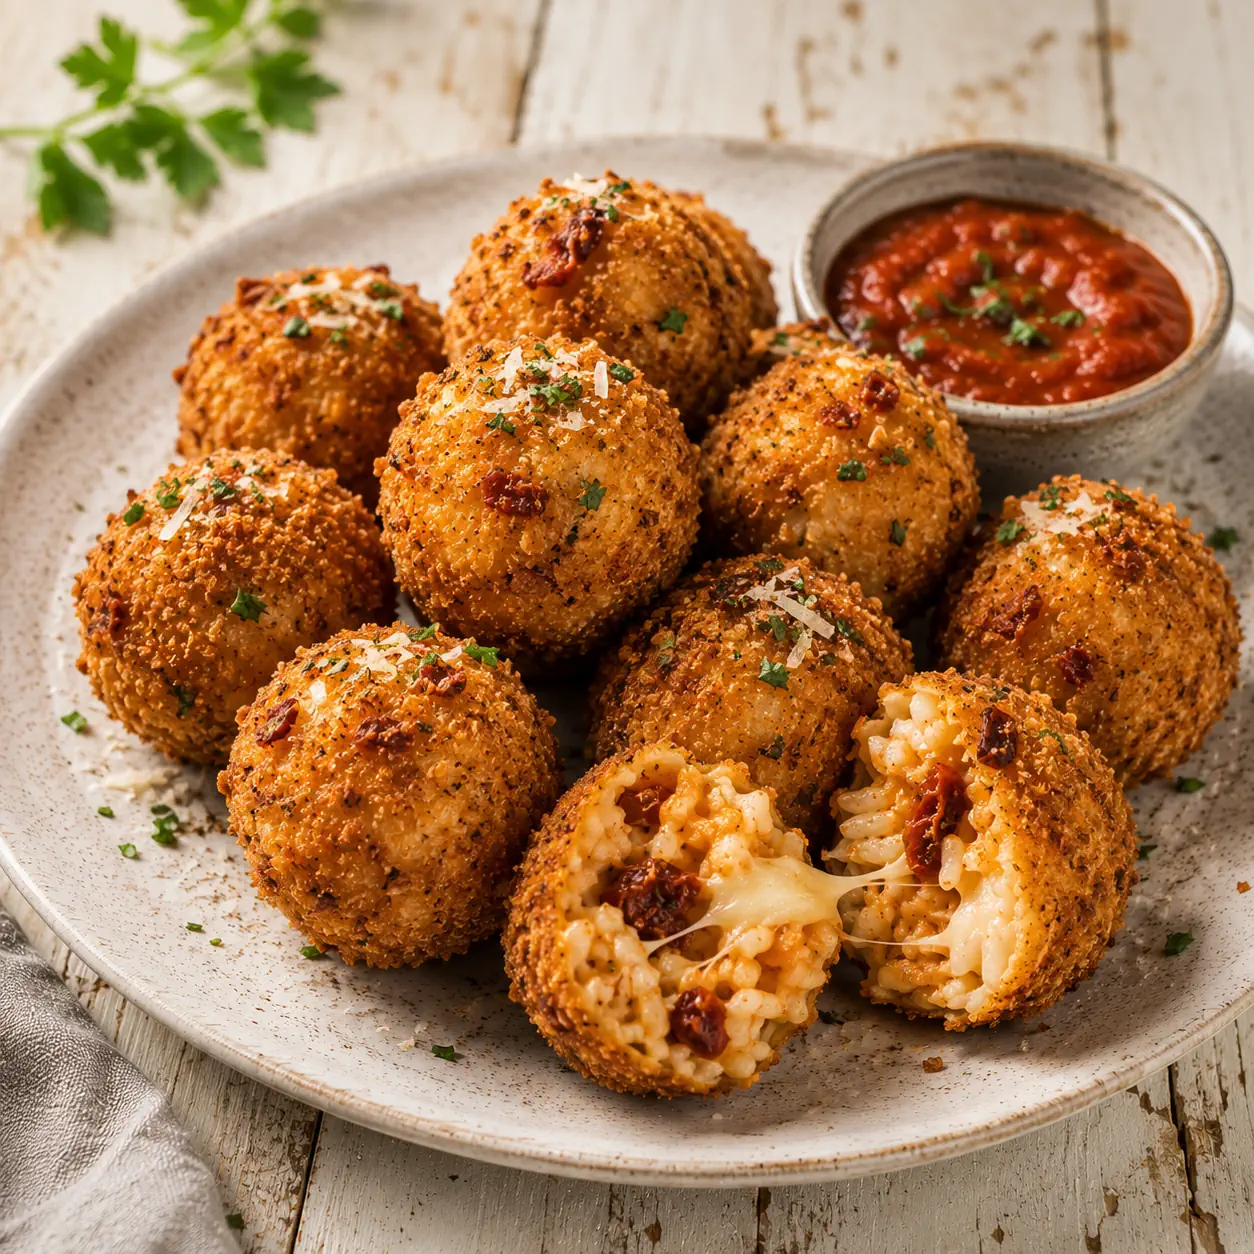
Bush tomato arancini with a crisp golden coating and creamy cheese filling

Crispy Bush Tomato Arancini

Crispy Bush Tomato Arancini combine creamy risotto, native Australian bush tomato, Parmesan, and mozzarella in golden air-fried bites. These Australian-inspired arancini are perfect as an appetizer, snack, or party dish.
Couverts4 servings
estimated costs pp $2.25
Deel op Facebook Print Recipe

Equipment

Ingredients

Instructions

  • Combine the cooled risotto, Parmesan, mozzarella, sun-dried tomatoes, and bush tomato powder in a mixing bowl.
  • Mix until the cheese and seasonings are evenly distributed.
  • Divide the mixture into 12 equal portions and firmly shape each portion into a ball.
  • Dip each risotto ball into the beaten eggs and allow the excess to drip away.
  • Roll each ball in the breadcrumbs until evenly coated.
  • Preheat the air fryer to 200ยฐC (390ยฐF) for 3 minutes.
  • Arrange the arancini in the air fryer basket in a single layer, leaving room for airflow.
  • Lightly coat the arancini with olive oil spray.
  • Air fry for 12โ€“15 minutes, turning halfway through, until crisp and golden brown.
  • Transfer the arancini to a serving plate and let them cool for 3 minutes.
  • Serve warm with your preferred dipping sauce.

Notes & Wine Advice

Serving Suggestions

Serve these arancini with warm tomato sauce, garlic aioli, or a fresh herb dip. They make an excellent addition to an appetizer platter and pair naturally with recipes from our salad collection. For entertaining, combine them with other party food recipes.

Recipe Notes

Use completely cooled risotto because warm rice is softer and more difficult to shape. Press each ball firmly so it remains intact during cooking. Leave enough space between the arancini for hot air to circulate, cooking them in batches when necessary. Bush tomato has an intense savory flavor, so measure it carefully. Discover other ways to use herbs and spices in our Spices & Seasoning recipes.

Variations

Place a small mozzarella cube inside each ball for an extra-melting center. Replace the sun-dried tomatoes with finely chopped roasted peppers or add fresh basil for a more Italian character. For a hotter version, mix chili flakes into the breadcrumbs. Browse our cheese recipes and Australian recipes for additional variations.

Wine Advice

A crisp Sauvignon Blanc balances the rich cheese and highlights the tomato flavor. A dry Pinot Grigio is another refreshing choice for these savory arancini.

Nutrition values

Serving: 3 arancini | Calories: 356 kcal | koolhydraten: 49 g | Eiwitten: 14 g | Vet: 9 g | Verzadigd vet: 4 g | Natrium: 550 mg | Suiker: 4 g
————————————————————————————————–

About These Bush Tomato Arancini

Bush tomato arancini bring Australian native flavor to one of Italyโ€™s most popular rice dishes. Creamy cooked risotto is combined with Parmesan, mozzarella, sun-dried tomatoes, and aromatic bush tomato powder before being shaped into compact balls. A breadcrumb coating gives the outside its familiar crunch, while the air fryer keeps the center soft, cheesy, and satisfying.

Bush tomato is an Australian native ingredient valued for its concentrated savory, earthy, and slightly caramelized character. Its robust flavor complements the mild rice and rich cheese without dominating them. Sun-dried tomatoes reinforce the tomato notes and add small bursts of sweetness, creating a balanced filling with more complexity than traditional plain cheese arancini.

This recipe belongs naturally among both Australian recipes and Italian-inspired recipes. It demonstrates how a classic preparation can incorporate regional ingredients while preserving the qualities that make the original dish so appealing.

Why Australian Arancini Balls Work in the Air Fryer

Australian arancini balls benefit from the rapid circulation of hot air around their breadcrumb coating. This creates an evenly browned exterior with considerably less added oil than conventional deep-frying. A light coating of olive oil spray is enough to encourage browning and give the crumbs an appetizing golden finish.

Spacing is particularly important. If the balls touch or the basket is overcrowded, moisture becomes trapped and the coating may soften instead of becoming crisp. Arrange them in one layer and prepare multiple batches when necessary. Turning them halfway through cooking helps every side develop an even color.

The result fits perfectly into an air fryer recipe collection, especially for cooks seeking convenient appetizers with dependable texture and minimal cleanup.

How to Prepare Bush Tomato Arancini

Successful bush tomato arancini begin with completely cooled risotto. Cold rice becomes firmer and easier to compress, helping the balls retain their shape. Mixing the cheeses and seasonings thoroughly also prevents individual portions from having noticeably different flavors.

Divide the mixture before shaping so the finished portions cook at the same rate. Each ball should be approximately the size of a golf ball. Press the mixture firmly between your palms, coat it with beaten egg, and then cover it completely with breadcrumbs. Any uncovered areas will remain pale during air frying.

The combination of Parmesan and mozzarella serves two purposes: Parmesan supplies a salty, savory flavor, while mozzarella creates the soft, melting texture in the center. More ideas featuring these ingredients can be found in our cheese recipes and rice recipes.

Serving Australian Arancini Balls

These Australian arancini balls are best served warm after resting for several minutes. The short resting period allows the filling to settle and reduces the risk of biting into extremely hot cheese. Tomato dipping sauce provides a familiar Italian pairing, while garlic aioli or herb yogurt offers a creamy contrast to the crisp coating.

For a larger meal, serve three arancini with a green salad, grilled vegetables, or a bowl of tomato soup. Smaller portions can become part of a shared appetizer board alongside olives, roasted peppers, cheese, and crusty bread. Their compact size also makes them suitable for a party food menu or a selection of easy appetizers.

Storing and Reheating Bush Tomato Arancini

Leftover bush tomato arancini can be refrigerated in an airtight container for up to three days. Allow them to cool before covering, but do not leave cooked rice at room temperature for an extended period. Follow current FDA food-safety guidance when cooling and storing leftovers.

Reheat the arancini in the air fryer at 180ยฐC (356ยฐF) for 4โ€“6 minutes. This restores the crisp breadcrumb coating more effectively than microwaving. They can also be frozen after cooking and cooling. Freeze them separately before transferring them to a sealed container, then reheat directly from frozen until thoroughly hot.

With their crisp exterior, creamy center, and distinct native seasoning, these fusion arancini offer a memorable way to explore Australian ingredients while enjoying familiar Italian comfort food.


Air Fryer Caprese Bread

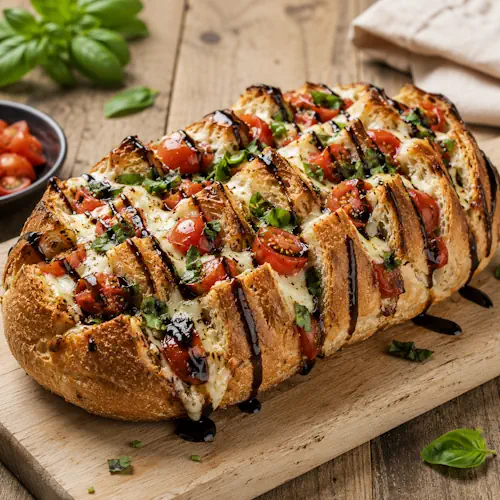
Air fryer Caprese bread filled with melted mozzarella, cherry tomatoes, and fresh basil

Air Fryer Caprese Bread

A crusty loaf is filled with mozzarella, cherry tomatoes, and fresh basil before being air-fried and finished with olive oil and balsamic glaze.
Couverts4 servings
Total time 27 minutes
estimated costs pp $3.00
Deel op Facebook Print Recipe

Equipment

Ingredients

Instructions

  • Preheat the air fryer to 356ยฐF (180ยฐC) for 3โ€“5 minutes.
  • Place the bread on a cutting board.
  • Make diagonal cuts across the loaf approximately 1 inch apart.
  • Do not cut completely through the bottom crust.
  • Combine the mozzarella, cherry tomatoes, basil, salt, and black pepper in a mixing bowl.
  • Gently open the cuts in the bread.
  • Divide the cheese and tomato mixture evenly among the openings.
  • Drizzle the olive oil over the filled loaf.
  • Wrap the bottom and sides of the bread loosely with aluminum foil.
  • Leave the top exposed.
  • Place the bread in the air fryer basket.
  • Air fry for 10โ€“12 minutes until the cheese is melted and the exposed bread is crisp.
  • Carefully transfer the bread to a serving platter.
  • Drizzle the balsamic glaze over the top.
  • Serve immediately while warm.

Notes & Wine Advice

Serving Suggestions

Serve the bread as a shared appetizer or alongside soup, pasta, grilled chicken, or a dish from our salad recipes. It also works well as part of a relaxed brunch or party platter.

Recipe Notes

Check that the loaf fits comfortably inside the air fryer before cutting and filling it. Do not slice completely through the bottom crust. Browse our air fryer recipes for more quick snacks and appetizers.

Variations

Add pesto, sliced olives, roasted peppers, garlic, or chili flakes. Replace some mozzarella with Parmesan or another option from our cheese recipes.

Wine Advice

A crisp Pinot Grigio complements the tomatoes and fresh basil while balancing the melted cheese. A lively Sauvignon Blanc provides a brighter alternative.

Nutrition values

Calories: 485 kcal | koolhydraten: 60 g | Eiwitten: 17 g | Vet: 21 g | Verzadigd vet: 7 g | Natrium: 650 mg | Suiker: 8 g
————————————————————————————————–
Cuisine; Fusion / Italian
Season: All Seasons
Diets; Vegetarian

About Air Fryer Caprese Bread

Air fryer Caprese bread transforms the familiar combination of mozzarella, tomatoes, basil, and balsamic glaze into a warm sharing loaf. The bread becomes crisp around the exposed edges while the cheese melts between the slices. Cherry tomatoes add freshness and gentle acidity, and basil provides the aromatic flavor associated with a traditional Caprese salad.

This air fryer Caprese bread works as an appetizer, party snack, brunch dish, or accompaniment to a family dinner. Using a pre-baked loaf keeps preparation simple, while the air fryer melts the cheese and crisps the surface in approximately 12 minutes. Browse our bread recipes for more savory loaves and sharing dishes.

Choosing and Cutting the Bread

A sturdy sourdough or Italian loaf provides the best base for cheesy pull apart bread. The crust should be firm enough to hold the filling, while the interior needs enough softness to absorb the olive oil and tomato juices.

Check the size of the loaf against the air fryer basket before preparing it. A loaf that touches the heating element or prevents the basket from closing safely should be trimmed or replaced with a smaller one.

Make diagonal cuts approximately 1 inch apart, stopping before the knife reaches the bottom crust. Keeping the base intact holds the cheesy pull apart bread together and allows diners to tear off individual sections after cooking.

Making Air Fryer Caprese Bread

Combine the mozzarella, tomatoes, basil, salt, and black pepper before filling the loaf. This distributes the ingredients evenly and prevents some sections from receiving only cheese or tomato.

Gently open each cut and press in a portion of the filling. Avoid forcing too much mixture into one opening because the bread may split. Drizzle the olive oil over the loaf after filling so it reaches both the crust and the interior.

Wrap the bottom and sides loosely with foil while leaving the top exposed. This protects the base from becoming excessively dark. Air fryer Caprese bread is ready when the mozzarella has melted and the exposed crust feels crisp. Visit our air fryer collection for more bread and snack recipes.

Serving the Cheesy Sharing Loaf

Cheesy pull apart bread should be served immediately while the mozzarella remains soft. Drizzle the balsamic glaze over the loaf after cooking because the sugar in the glaze can burn when exposed to the air fryerโ€™s high heat.

Serve it with soup, pasta, grilled chicken, roasted vegetables, or salad. It can also be placed in the center of a table as part of an appetizer platter. Explore our appetizer recipes and brunch recipes for complementary dishes.

For easier sharing, provide a bread knife and small plates. The tomato filling can be hot and juicy, so allow the loaf to stand for one or two minutes before people begin pulling it apart.

Storing Cheesy Pull Apart Bread

Refrigerate leftovers in an airtight container within two hours and use them within two days. Reheat individual portions in the air fryer at 320ยฐF (160ยฐC) for 3โ€“4 minutes until the bread is crisp and the cheese is thoroughly hot.

A microwave will melt the cheese but usually makes the crust soft. Freezing is not recommended because fresh tomatoes can release water after thawing and affect the texture of the bread.

Follow the FDA safe food-handling guidance when storing dishes containing cheese and cooked tomatoes. With crisp bread, melted mozzarella, fresh basil, and balsamic glaze, air fryer Caprese bread is an easy centerpiece for sharing.


Zesty Lemon Myrtle Fish Tacos

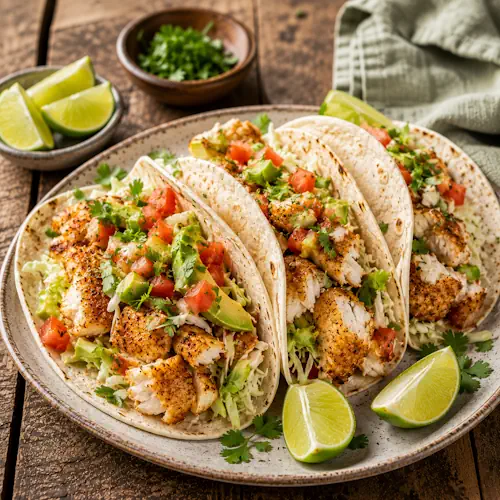
Lemon myrtle fish tacos filled with air-fried white fish, cabbage, tomato, avocado, and cilantro

Zesty Lemon Myrtle Fish Tacos

Tender air-fried fish is seasoned with aromatic lemon myrtle, paprika, garlic, and onion before being served in warm tortillas with fresh vegetables.
Couverts4 servings
estimated costs pp $4.25
Deel op Facebook Print Recipe

Equipment

Ingredients

Instructions

  • Preheat the air fryer to 390ยฐF (200ยฐC) for 3โ€“5 minutes.
  • Combine the olive oil, lemon myrtle, paprika, garlic powder, onion powder, salt, and black pepper in a mixing bowl.
  • Pat the fish fillets thoroughly dry with paper towels.
  • Brush both sides of each fillet with the seasoning mixture.
  • Arrange the fish in the air fryer basket in a single layer.
  • Leave space between the fillets for air circulation.
  • Cook in batches if necessary.
  • Air fry for 8โ€“10 minutes.
  • Check that the fish reaches 145ยฐF (63ยฐC) and flakes easily with a fork.
  • Transfer the fish to a clean plate.
  • Let it rest for 3 minutes.
  • Warm the tortillas briefly in a dry skillet.
  • Flake the fish into bite-sized pieces.
  • Divide the fish evenly among the tortillas.
  • Top with cabbage, tomato, avocado, and cilantro.
  • Serve with lime wedges.

Notes & Wine Advice

Serving Suggestions

Serve the tacos with lime wedges, avocado, shredded cabbage, tomato salsa, or a side from our salad recipes. Seasoned rice, corn, or black beans can make the meal more substantial.

Recipe Notes

Use firm white fish such as barramundi, snapper, cod, or tilapia. Pat the fillets dry before seasoning and leave space between them in the basket. Browse our air fryer recipes for more fish and seafood ideas.

Variations

Replace the flour tortillas with corn tortillas or lettuce wraps. Add chili flakes, smoked paprika, cumin, or extra lemon myrtle from our Spices & Seasoning recipes.

Wine Advice

A crisp Sauvignon Blanc complements the citrus character of lemon myrtle and the fresh toppings. A dry Riesling is another refreshing choice, especially when chili is added.

Nutrition values

Serving: 2 tacos | Calories: 490 kcal | koolhydraten: 43 g | Eiwitten: 35 g | Vet: 22 g | Verzadigd vet: 3 g | Natrium: 570 mg | Suiker: 4 g
————————————————————————————————–

About Lemon Myrtle Fish Tacos

Lemon myrtle fish tacos combine tender white fish, warm tortillas, fresh vegetables, and one of Australiaโ€™s best-known native herbs. Lemon myrtle has an intense citrus aroma that brightens the fish without adding extra liquid. Paprika, garlic powder, onion powder, salt, and black pepper create a savory base, while lime, cabbage, tomato, avocado, and cilantro complete each taco.

These lemon myrtle fish tacos are ready in approximately 30 minutes and work well for lunch, a quick family dinner, or a relaxed weekend meal. Cooking the fish in the air fryer keeps the method simple and uses only a small amount of oil. Browse our Australian recipes for more ideas featuring native herbs and regional ingredients.

Choosing and Seasoning the Fish

Firm white fish is best for Australian fish tacos because it remains intact during cooking but flakes easily when served. Barramundi reinforces the Australian character of the recipe, while snapper, cod, haddock, or tilapia are practical alternatives.

Pat the fillets thoroughly dry before applying the seasoning mixture. Surface moisture dilutes the oil and prevents the spices from coating the fish evenly. Brush both sides so every portion has the same aromatic flavor.

Lemon myrtle is concentrated, so two teaspoons are enough for 4 servings of Australian fish tacos. Too much can create a sharp, almost medicinal flavor. Paprika provides color, while garlic and onion powder add savory depth without competing with the citrus aroma.

Making Lemon Myrtle Fish Tacos

Preheat the air fryer before adding the fillets. Immediate exposure to high heat supports even cooking and prevents the fish from sitting in a cold basket. Arrange the pieces in one layer with space between them.

Lemon myrtle fish tacos need fish that remains moist enough to flake into large pieces. Begin checking it after 8 minutes, especially when using thin fillets. The center should reach 145ยฐF (63ยฐC), appear opaque, and separate easily when pressed with a fork.

Let the fish rest briefly before flaking it. Meanwhile, warm the tortillas in a dry skillet until soft and flexible. Visit our fish recipes and air fryer collection for more quick seafood dinners.

Fresh Toppings and Serving Ideas

Australian fish tacos benefit from toppings that provide freshness and texture. Shredded cabbage stays crisp beneath the warm fish, while lettuce creates a softer result. Diced tomatoes contribute moisture, avocado adds creaminess, and cilantro provides a clean herbal finish.

Lime wedges are particularly useful because their acidity balances the olive oil and avocado. For extra heat, add sliced jalapeรฑos, chili sauce, or a pinch of cayenne. A spoonful of yogurt sauce, avocado crema, or tomato salsa also works well.

Serve the tacos with rice, corn, black beans, or recipes from our salad collection. More handheld meal ideas can be found among our taco recipes.

Storing Australian Fish Tacos

Store leftover fish separately from the tortillas and fresh toppings. Refrigerate the cooked fish in an airtight container within two hours and use it within two days. Reheat it gently in the air fryer or serve it cold over a salad.

Keep the tortillas sealed at room temperature according to their package instructions. Refrigerate sliced avocado separately with a little lime juice to slow browning. Fresh cabbage and tomato should also be stored in individual containers.

Follow the FDA safe food-handling guidance when preparing and storing seafood. With aromatic seasoning, tender fish, and crisp toppings, lemon myrtle fish tacos provide a fresh fusion of Australian ingredients and Mexican-inspired presentation.


Australian Herb Potato Wedges

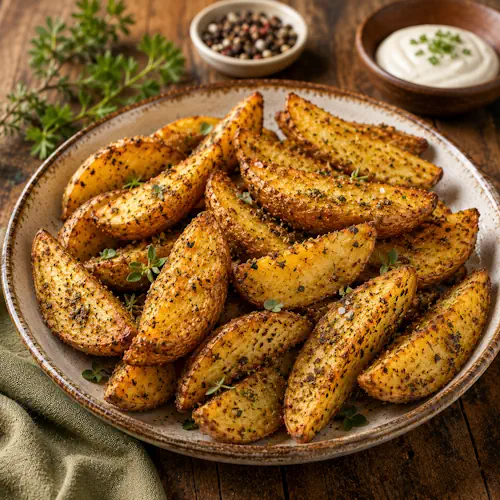
Australian herb potato wedges seasoned with lemon myrtle, bush tomato, and wattleseed

Australian Herb Potato Wedges

Crispy air fryer potato wedges are seasoned with native Australian herbs such as lemon myrtle, bush tomato, and wattleseed.
Couverts4 servings
estimated costs pp $1.15
Deel op Facebook Print Recipe

Equipment

Ingredients

Instructions

  • Preheat the air fryer to 390ยฐF (200ยฐC) for 3โ€“5 minutes.
  • Scrub the potatoes thoroughly.
  • Cut each potato into evenly sized wedges.
  • Place the potato wedges in a mixing bowl.
  • Add the olive oil.
  • Toss until every wedge is lightly coated.
  • Add the Australian herb blend, salt, and black pepper.
  • Toss again until the seasoning is evenly distributed.
  • Arrange the wedges in the air fryer basket in a single layer.
  • Leave space between the wedges for air circulation.
  • Cook in batches if necessary.
  • Air fry for 15โ€“20 minutes.
  • Shake the basket halfway through cooking.
  • Remove the wedges when golden and crisp outside and tender inside.
  • Transfer them to a serving plate.
  • Serve immediately.

Notes & Wine Advice

Serving Suggestions

Serve these wedges with grilled meat, fish, burgers, or vegetables. They also pair well with options from our dip recipes, including garlic sauce, herb yogurt dip, tomato relish, or spicy mayonnaise.

Recipe Notes

Cut the wedges to a similar thickness so they cook evenly. Leave space between them and cook in batches when necessary. Browse our air fryer recipes for more crispy side dishes.

Variations

Use lemon myrtle for a bright citrus aroma, bush tomato for savory depth, or wattleseed for a roasted, nutty flavor. Find more combinations in our Spices & Seasoning recipes.

Wine Advice

A crisp Sauvignon Blanc complements the aromatic herbs and keeps the potatoes feeling light. An unoaked Chardonnay is a rounder alternative for serving with grilled chicken or fish.

Nutrition values

Calories: 255 kcal | koolhydraten: 44 g | Eiwitten: 5 g | Vet: 7 g | Verzadigd vet: 1 g | Natrium: 440 mg | Suiker: 2 g
————————————————————————————————–

About Australian Herb Potato Wedges

Australian herb potato wedges transform a familiar side dish with the aromatic flavors of native herbs and spices. Fresh potatoes are cut into thick wedges, coated with olive oil, and seasoned with ingredients such as lemon myrtle, bush tomato, and wattleseed. The air fryer creates a crisp golden exterior while the center remains soft and fluffy.

These Australian herb potato wedges require only a few ingredients and approximately 30 minutes from preparation to serving. They work as a side dish with meat, fish, or vegetables and are equally suitable as a snack with dipping sauce. Browse our Australian recipes for more ideas featuring the countryโ€™s distinctive ingredients.

Choosing and Cutting the Potatoes

Starchy or all-purpose potatoes produce the best native herb potato wedges. Their interiors become light and tender while the exposed surfaces develop a crisp finish. Waxy potatoes can be used, but they generally remain firmer after cooking.

Scrub the skins carefully because leaving them attached provides extra texture. Cut each potato lengthwise, then divide the halves into wedges of similar thickness. Uniform pieces are important because thin wedges cook faster than thick ones.

For especially crisp native herb potato wedges, soak the cut potatoes in cold water for 20โ€“30 minutes. This optional step removes some surface starch. Drain them and dry them thoroughly before adding oil because remaining water will create steam inside the air fryer.

Making Australian Herb Potato Wedges

Use enough olive oil to coat the potatoes lightly without leaving excess oil in the bottom of the bowl. The thin coating helps the seasoning adhere and supports browning during air frying. Toss the wedges once with oil and again after adding the herbs.

Australian herb potato wedges should be placed in a single layer with small spaces between them. Air must circulate around the potatoes to remove moisture and crisp the surfaces. Cook in batches when the basket is too small to hold them comfortably.

Shake the basket halfway through cooking so different sides are exposed to the hot air. The wedges are ready when a knife slides easily into the center and the edges look golden. Explore our potato recipes and air fryer collection for more side dishes.

Using Native Australian Seasonings

The seasoning blend determines the character of the native herb potato wedges. Lemon myrtle adds a fresh citrus aroma without adding liquid. Bush tomato contributes savory depth and gentle acidity, while finely ground wattleseed supplies toasted and slightly coffee-like notes.

You can use one prepared Australian herb blend or combine several individual ingredients. Begin with a modest amount because native seasonings can have concentrated flavors. Additional garlic powder, smoked paprika, dried thyme, or chili flakes can be included when desired.

Visit our Spices & Seasoning recipes for more homemade blends and practical seasoning ideas. Taste one cooked wedge before adding extra salt because some prepared blends already contain it.

Storing Native Herb Potato Wedges

Serve the wedges immediately for the crispest texture. Refrigerate leftovers in an airtight container within two hours and use them within three days. Reheat them in the air fryer at 375ยฐF (190ยฐC) for 4โ€“6 minutes until thoroughly hot and crisp.

A microwave will warm the potatoes but usually makes the exterior soft. Freezing cooked wedges is possible, although freshly prepared potatoes provide the best texture. Freeze them in a single layer before transferring them to a freezer-safe container.

For additional storage information, consult the FDA safe food-handling guidance. Crisp, aromatic, and simple to prepare, Australian herb potato wedges provide a distinctive side dish for family dinners, barbecues, and relaxed weekend meals.


Crispy Crocodile Spring Rolls

Crispy crocodile spring rolls filled with seasoned meat and vegetables

Crispy Crocodile Spring Rolls

Crocodile meat, cabbage, carrot, bean sprouts, garlic, and ginger are wrapped in spring roll pastry and air-fried until crisp and golden.
Couverts4 servings
estimated costs pp $4.75
Deel op Facebook Print Recipe

Equipment

Ingredients

Instructions

  • Combine the crocodile meat, soy sauce, sesame oil, and cornstarch in a mixing bowl.
  • Toss until the meat is evenly coated.
  • Cover and marinate for 15 minutes.
  • Heat a skillet over medium heat.
  • Lightly coat the skillet with cooking spray.
  • Add the garlic and ginger.
  • Cook for 30 seconds until fragrant.
  • Add the marinated crocodile meat.
  • Stir-fry until the meat is lightly browned.
  • Add the cabbage, carrot, and bean sprouts.
  • Stir-fry for 2โ€“3 minutes until slightly softened.
  • Add the oyster sauce, hoisin sauce, and spring onions.
  • Stir until everything is evenly combined.
  • Remove the skillet from the heat.
  • Let the filling cool for 10 minutes.
  • Place one spring roll wrapper on the work surface.
  • Spoon ยนโ„โ‚โ‚‚ of the filling near one corner.
  • Fold the sides over the filling.
  • Roll the wrapper tightly.
  • Seal the final edge with water.
  • Repeat with the remaining wrappers and filling.
  • Preheat the air fryer to 356ยฐF (180ยฐC) for 3โ€“5 minutes.
  • Lightly coat the spring rolls with cooking spray.
  • Arrange them in the air fryer basket in a single layer.
  • Cook in batches if necessary.
  • Air fry for 8โ€“10 minutes.
  • Turn the spring rolls halfway through cooking.
  • Remove them when crisp and golden brown.
  • Let them cool for 3 minutes before serving.

Notes & Wine Advice

Serving Suggestions

Serve the spring rolls with sweet chili sauce, plum sauce, soy dipping sauce, or another option from our dip recipes. Add cucumber salad, Asian slaw, or steamed rice for a more substantial meal.

Recipe Notes

Let the filling cool before wrapping the rolls. Warm filling softens the wrappers and can cause tearing. Leave space between the rolls and browse our air fryer recipes for more crisp appetizers.

Variations

Add sliced mushrooms, bell pepper, water chestnuts, chili flakes, or extra ginger. More seasoning ideas can be found in our Spices & Seasoning recipes. Chicken or shrimp can replace the crocodile meat.

Wine Advice

A slightly off-dry Riesling complements the ginger and balances sweet chili sauce. A crisp Sauvignon Blanc provides a fresh alternative for lighter dipping sauces.

Nutrition values

Serving: 3 spring rolls | koolhydraten: 310 g | Eiwitten: 36 g | Vet: 18 g | Verzadigd vet: 2 g | Natrium: 760 mg | Suiker: 5 g
————————————————————————————————–

About Crispy Crocodile Spring Rolls

Crispy crocodile spring rolls combine an unusual Australian ingredient with a familiar Asian cooking technique. Thinly sliced crocodile meat is seasoned with soy sauce and sesame oil before being stir-fried with cabbage, carrot, bean sprouts, garlic, and ginger. Oyster sauce and hoisin sauce give the filling a balanced combination of savory, sweet, and aromatic flavors.

These crispy crocodile spring rolls are cooked in the air fryer instead of being submerged in oil. The wrappers become golden and crisp while the filling remains moist. They work well as an appetizer, party snack, light lunch, or distinctive addition to a shared meal. Browse our Asian recipes and Australian recipes for more globally inspired dishes.

Preparing the Crocodile Filling

Slice the crocodile meat thinly and evenly so it cooks quickly. The short marinade helps Australian crocodile rolls develop flavor while the cornstarch creates a light coating that protects the lean meat during stir-frying.

Cook the garlic and ginger briefly before adding the meat. Both ingredients can burn quickly, so stir continuously and add the crocodile as soon as they become fragrant. Once the meat begins to brown, add the vegetables and cook them only until slightly softened.

The vegetables should retain some texture because they will cook again inside the Australian crocodile rolls. Excessively soft or watery vegetables may make the wrappers soggy. Remove the skillet from the heat once the sauces are evenly distributed.

Making Crispy Crocodile Spring Rolls

Let the filling cool before assembling the rolls. Steam from warm ingredients softens spring roll wrappers and makes them difficult to handle. Drain away any excess liquid before dividing the filling into 12 equal portions.

Place the filling near one corner of each wrapper, fold the sides inward, and roll tightly. Keep the filling compact, but do not pull the wrapper so firmly that it tears. Seal the final edge with water and place the completed roll seam-side down.

Lightly coat the crispy crocodile spring rolls with oil before cooking. Arrange them in one layer with space between each roll. Turn them halfway through so both sides become evenly browned. Visit our air fryer collection for more appetizers and finger foods.

Dipping Sauces and Serving Ideas

Australian crocodile rolls pair naturally with sweet chili sauce or plum sauce. Their sweetness balances the savory oyster sauce and soy sauce in the filling. A dipping sauce made with soy, lime juice, ginger, and chopped spring onions provides a sharper alternative.

For a light meal, serve 3 rolls per person with cucumber salad, Asian slaw, or steamed vegetables. Rice or noodles make the plate more substantial. Browse our appetizer recipes and party food recipes for complementary dishes.

Serve the rolls soon after cooking. Covering them traps steam and softens the wrappers. If they need to wait briefly, place them on a wire rack so air can circulate underneath.

Storing Australian Crocodile Rolls

Refrigerate cooked spring rolls in an airtight container within two hours and use them within three days. Reheat them in the air fryer at 340ยฐF (170ยฐC) until crisp and thoroughly hot. Avoid using a microwave when crispness is important.

Uncooked rolls can be refrigerated for several hours under a lightly dampened cloth. They can also be frozen in a single layer before being transferred to a freezer-safe container. Cook frozen rolls without thawing and increase the air-frying time as necessary.

Follow the FDA safe food-handling guidance when preparing and storing meat. With crisp wrappers and a savory vegetable filling, crispy crocodile spring rolls offer an approachable fusion of Australian ingredients and Asian technique.


Sticky Pork Belly Bites

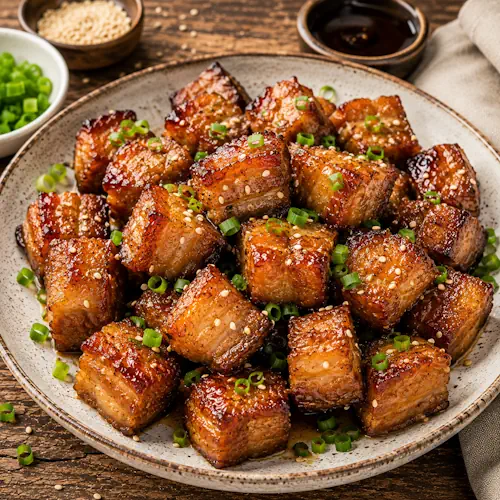
Sticky pork belly bites with a caramelized honey glaze and chopped green onions

Sticky Pork Belly Bites

Crispy air-fried pork belly is seasoned with soy sauce, garlic, and ginger, then finished with a sticky honey glaze and optional sesame seeds.
Couverts4 servings
estimated costs pp $4.50
Deel op Facebook Print Recipe

Equipment

Ingredients

Instructions

  • Preheat the air fryer to 390ยฐF (200ยฐC) for 3โ€“5 minutes.
  • Combine the soy sauce, olive oil, garlic powder, ginger, black pepper, and salt in a mixing bowl.
  • Add the pork belly cubes.
  • Toss until every piece is evenly coated.
  • Arrange the pork belly in the air fryer basket in a single layer.
  • Leave space between the pieces for air circulation.
  • Cook in batches if necessary.
  • Air fry for 10 minutes.
  • Shake the basket to turn the pieces.
  • Brush or drizzle the pork belly with the honey.
  • Air fry for another 3โ€“5 minutes until caramelized and crisp.
  • Watch carefully during the final minutes to prevent the honey from burning.
  • Transfer the pork belly bites to a clean serving plate.
  • Let them rest for 3 minutes.
  • Garnish with sesame seeds and chopped green onions if desired.
  • Serve immediately.

Notes & Wine Advice

Serving Suggestions

Serve the bites with steamed rice, cucumber salad, coleslaw, pickled vegetables, or recipes from our salad collection. Smaller portions work well as part of a party platter.

Recipe Notes

Add the honey during the final minutes instead of at the beginning. This allows the pork belly to crisp before the sugar caramelizes. Find more practical cooking ideas among our air fryer recipes.

Variations

Add chili flakes, smoked paprika, Chinese five-spice, or cayenne pepper. Browse our Spices & Seasoning recipes for more flavor combinations. Maple syrup can replace the honey.

Wine Advice

A slightly off-dry Riesling balances the salty-sweet glaze and richness of the pork. A fruit-forward Pinot Noir provides a lighter red-wine alternative.

Nutrition values

Calories: 700 kcal | koolhydraten: 10 g | Eiwitten: 15 g | Vet: 66 g | Verzadigd vet: 24 g | Natrium: 560 mg | Suiker: 9 g
————————————————————————————————–

About Sticky Pork Belly Bites

Sticky pork belly bites combine crisp edges, tender meat, and a sweet honey glaze in one rich Australian-inspired dish. Soy sauce provides saltiness and umami, while garlic powder and ground ginger add warmth. The air fryer renders some of the pork fat and browns the surface without requiring the pieces to be submerged in additional oil.

These sticky pork belly bites can be served as an appetizer, party snack, or rich main course. Adding the honey during the final cooking stage is important because it allows the pork to brown before the sugar begins to caramelize. Explore our pork recipes for more ways to prepare flavorful cuts of pork.

Preparing Pork Belly for the Air Fryer

Cut the meat into evenly sized cubes so every piece of honey glazed pork belly cooks at approximately the same speed. Cubes measuring around 1 inch provide enough surface area for browning while retaining a tender center.

Very large pieces take longer to render, while small pieces can become dry or overly crisp. Pat the pork belly dry before adding the seasoning. Removing excess moisture encourages browning and helps the soy sauce mixture adhere more evenly.

Arrange the honey glazed pork belly in a single layer. Overcrowding the basket traps steam and prevents the exposed fat from becoming crisp. Cook the pieces in batches when necessary rather than stacking them.

Making Sticky Pork Belly Bites

Begin cooking the seasoned pork without the honey. This gives the meat time to brown and allows some of the fat to render. Shake the air fryer basket after approximately 10 minutes so different surfaces are exposed to the circulating heat.

Add the honey only during the final 3โ€“5 minutes. Honey contains natural sugar that caramelizes quickly at high temperatures. Watch the pork closely during this stage because the difference between a glossy glaze and a burned coating can be brief.

Sticky pork belly bites are ready when the edges are crisp and the glaze looks shiny and caramelized. Transfer them to a clean plate and allow them to rest briefly before serving. Browse our air fryer collection for more appetizers and quick meals.

Serving the Honey Glazed Pork Belly

Honey glazed pork belly is rich, so fresh and acidic side dishes provide the best balance. Cucumber salad, cabbage slaw, pickled onions, or lightly dressed greens help cut through the fat. Steamed rice absorbs the extra glaze and turns the bites into a more substantial meal.

For a party platter, serve small portions with cocktail picks and add sweet chili sauce or mustard on the side. Visit our appetizer recipes and party food recipes for complementary dishes.

Sesame seeds add a subtle toasted flavor, while chopped green onions provide color and freshness. Lime wedges can also be served alongside for additional acidity.

Storing Honey Glazed Pork Belly

Refrigerate leftovers in an airtight container within two hours and use them within three days. Reheat the bites in the air fryer at 340ยฐF (170ยฐC) until thoroughly hot. Watch them carefully because the honey glaze may darken during reheating.

A microwave can reheat the meat but will soften the crisp edges. Freezing is possible, although the texture of the fat and glaze may change after thawing. For the best result, prepare only the quantity you expect to serve.

Follow the FDA safe food-handling guidance when preparing, cooling, and reheating pork. With crisp edges and a balanced sweet-savory glaze, sticky pork belly bites make a bold appetizer or indulgent weekend dish.


Aussie Beef Hand Pies

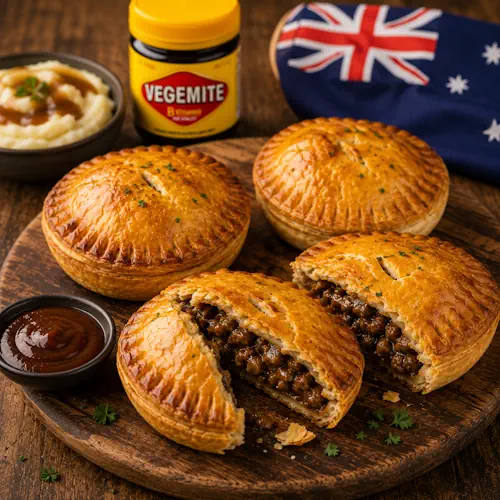
Aussie beef hand pies with golden puff pastry and savory ground beef filling

Aussie Beef Hand Pies

Golden puff pastry is filled with seasoned ground beef, onion, garlic, tomato paste, broth, and Worcestershire sauce, then cooked until crisp in the air fryer.
Couverts4 servings
estimated costs pp $3.75
Deel op Facebook Print Recipe

Equipment

Ingredients

Instructions

  • Heat a skillet over medium-high heat.
  • Add the ground beef and cook until browned.
  • Break the meat apart with a wooden spoon while it cooks.
  • Add the onion and cook for 4โ€“5 minutes until softened.
  • Add the garlic and cook for 1 minute.
  • Stir in the Worcestershire sauce, tomato paste, beef broth, salt, and black pepper.
  • Simmer for 8โ€“10 minutes until the liquid reduces and the filling thickens.
  • Remove the skillet from the heat.
  • Let the beef filling cool for 10 minutes.
  • Preheat the air fryer to 356ยฐF (180ยฐC) for 3โ€“5 minutes.
  • Roll the puff pastry into an even sheet.
  • Divide the pastry into 4 equal pieces.
  • Place ยผ of the cooled filling onto one half of each pastry piece.
  • Leave a small border uncovered around the edges.
  • Fold the pastry over the filling to create 4 hand pies.
  • Press the edges together.
  • Crimp the edges with a fork to seal.
  • Brush the tops lightly with beaten egg.
  • Cut a small steam vent in the top of each pie.
  • Arrange the pies in the air fryer basket in a single layer.
  • Cook in batches if necessary.
  • Air fry for 12โ€“15 minutes until puffed and golden brown.
  • Transfer the pies to a clean plate.
  • Let them cool for 5 minutes before serving.

Notes & Wine Advice

Serving Suggestions

Serve the pies with mashed potatoes, roasted vegetables, green beans, coleslaw, or a fresh salad. Browse our potato recipes and salad recipes for suitable accompaniments.

Recipe Notes

Let the filling cool before placing it on the pastry. Hot filling softens the pastry and makes the pies difficult to seal. More useful cooking ideas can be found in our air fryer recipes.

Variations

Add diced carrots, peas, mushrooms, grated cheese, or smoked paprika to the filling. Serve the pies with gravy, tomato sauce, or another option from our sauce recipes.

Wine Advice

A fruit-forward Shiraz complements the savory beef and rich pastry. A medium-bodied Cabernet Sauvignon is another suitable choice, especially when the pies are served with gravy.

Nutrition values

Serving: 1 hand pie | Calories: 760 kcal | koolhydraten: 46 g | Eiwitten: 36 g | Vet: 48 g | Verzadigd vet: 17 g | Natrium: 920 mg | Suiker: 5 g
————————————————————————————————–

About Aussie Beef Hand Pies

Aussie beef hand pies combine crisp golden pastry with a rich filling of ground beef, onion, garlic, tomato paste, broth, and Worcestershire sauce. They are inspired by the classic Australian meat pie but shaped into convenient individual portions that fit comfortably inside an air fryer. The pastry becomes crisp and flaky while the filling remains moist and savory.

These Aussie beef hand pies work as a main course, substantial lunch, picnic dish, or portable snack. Air frying reduces the need for additional cooking oil and gives the pastry an evenly browned finish. Explore our Australian recipes for more dishes inspired by the countryโ€™s familiar ingredients and food traditions.

Preparing a Thick Beef Filling

The filling for Australian meat pies must be thick enough to remain inside the pastry. Begin by browning the ground beef thoroughly. Breaking it into small pieces produces an even texture and makes the finished pies easier to eat.

Cook the onion in the same skillet until soft, then add the garlic briefly. Tomato paste adds body and concentrated tomato flavor, while Worcestershire sauce provides acidity and savory depth. Beef broth loosens the mixture initially but should be reduced before the filling is used.

Simmer the filling uncovered until most of the liquid has evaporated. A spoon drawn across the bottom of the skillet should leave a visible path. Let the mixture cool before assembling the Australian meat pies because hot filling can melt the fat in the puff pastry.

Making Aussie Beef Hand Pies

Keep the puff pastry cool while working with it. If it becomes soft or sticky, return it to the refrigerator for 10 minutes. Divide the sheet into 4 equal portions so each serving contains a similar amount of pastry and filling.

Place the filling on one half of each piece and leave a clear border. Fold the pastry over and press out any trapped air before sealing the edges. Crimping with a fork strengthens the seal and gives the pies a traditional decorative finish.

Brush the tops with beaten egg and cut a small steam vent in each pie. The egg creates a glossy surface, while the vent prevents pressure from forcing the seams open. Aussie beef hand pies should be arranged with enough room for hot air to circulate around them.

Air Frying and Serving the Pies

Preheat the air fryer so the pastry begins cooking immediately. A cold basket may allow the butter in the pastry to soften before the layers start to rise. Cook in batches if the pies do not fit in one layer without touching.

Australian meat pies are ready when the tops and edges are evenly browned. Check the bottoms as well, because the upper surface may color before the pastry underneath is fully cooked. Let the pies rest briefly before serving because the filling will be extremely hot.

Serve them with mashed potatoes, peas, roasted vegetables, coleslaw, or salad. Browse our beef recipes and comfort food recipes for more hearty dinner ideas.

Storing Australian Meat Pies

Allow leftover pies to cool before transferring them to an airtight container. Refrigerate them within two hours and use them within three days. Reheat the pies in the air fryer at 340ยฐF (170ยฐC) for approximately 5 minutes or until thoroughly hot.

Assembled uncooked pies can be frozen on a baking sheet before being transferred to a freezer-safe container. Cook them directly from frozen and increase the air-frying time as necessary. Check that the filling is hot in the center before serving.

Follow the FDA safe food-handling guidance when preparing, cooling, and reheating ground beef. With their flaky pastry and deeply savory filling, Aussie beef hand pies offer a practical air-fried version of an Australian comfort-food favorite.


Crispy Air Fryer Crocodile Bites

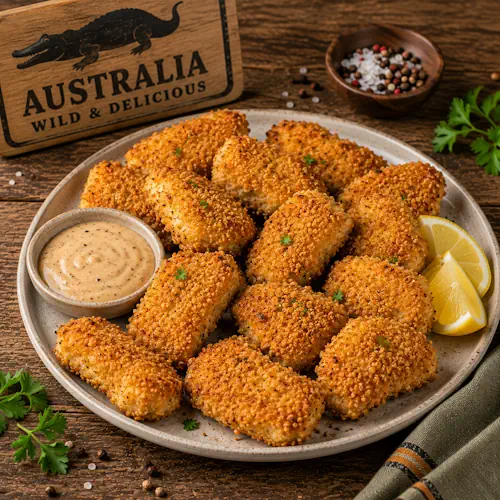
Air fryer crocodile bites with a golden seasoned breadcrumb coating

Crispy Air Fryer Crocodile Bites

Tender crocodile meat is coated with seasoned breadcrumbs and air-fried until golden and crisp. These Australian-inspired bites make an unusual appetizer or party snack.
Couverts4 servings
estimated costs pp $7.50
Deel op Facebook Print Recipe

Equipment

Ingredients

Instructions

  • Preheat the air fryer to 390ยฐF (200ยฐC) for 3โ€“5 minutes.
  • Combine the breadcrumbs, garlic powder, onion powder, paprika, salt, and black pepper in a mixing bowl.
  • Place the beaten eggs in a separate mixing bowl.
  • Dip each piece of crocodile meat into the beaten egg.
  • Let the excess egg drip back into the bowl.
  • Coat each piece evenly with the breadcrumb mixture.
  • Press the coating gently onto the meat.
  • Arrange the breaded crocodile pieces in the air fryer basket in a single layer.
  • Leave space between the pieces for air circulation.
  • Cook in batches if necessary.
  • Lightly coat the pieces with cooking spray.
  • Air fry for 10โ€“12 minutes.
  • Turn the crocodile bites halfway through cooking.
  • Remove them when the coating is golden and the meat is cooked through.
  • Transfer the bites to a clean plate.
  • Let them cool for 3 minutes before serving.

Notes & Wine Advice

Serving Suggestions

Serve the crocodile bites with sweet chili sauce, garlic mayonnaise, barbecue sauce, or another option from our dip recipes. Potato wedges, coleslaw, salad, or grilled vegetables can turn them into a complete meal.

Recipe Notes

Cut the crocodile meat into evenly sized pieces so they finish cooking together. Leave room between them in the basket and browse our air fryer recipes for more advice about achieving a crisp coating.

Variations

Add cayenne pepper, smoked paprika, dried herbs, or chili flakes to the breadcrumbs. More coating ideas can be found among our Spices & Seasoning recipes. Gluten-free breadcrumbs can be used when required.

Wine Advice

A crisp Sauvignon Blanc refreshes the palate and complements light dipping sauces. A slightly off-dry Riesling pairs especially well when the bites are served with a spicy or sweet chili sauce.

Nutrition values

Calories: 290 kcal | koolhydraten: 21 g | Eiwitten: 33 g | Vet: 7 g | Verzadigd vet: 2 g | Natrium: 620 mg | Suiker: 2 g
————————————————————————————————–

About Air Fryer Crocodile Bites

Air fryer crocodile bites transform lean crocodile meat into a crisp Australian-inspired appetizer. Bite-sized pieces are dipped in egg, covered with seasoned breadcrumbs, and cooked with only a light coating of oil. Garlic powder, onion powder, paprika, salt, and black pepper create a savory crust without hiding the distinctive but relatively mild flavor of the meat.

These air fryer crocodile bites are suitable for parties, game-day platters, special occasions, or an adventurous weekend meal. The cooking method is straightforward and requires much less oil than deep frying. Explore our Australian recipes for more dishes featuring ingredients and flavors associated with the country.

Preparing Crocodile Meat for Cooking

Crocodile meat is lean and can become firm when overcooked. Cut it into evenly sized pieces so each crispy crocodile nugget cooks at approximately the same speed. Pieces measuring around 1 inch are large enough to remain tender but small enough to cook quickly.

Pat the meat dry before dipping it into the egg. Removing surface moisture helps the egg and breadcrumb coating adhere more effectively. Keep the raw meat refrigerated until preparation begins and use separate utensils and plates for the raw and cooked pieces.

For the best crispy crocodile nuggets, avoid cutting pieces with very different thicknesses. Thin strips may become dry before thick cubes are ready. Trim away any noticeable tough connective tissue with a sharp knife.

Making Air Fryer Crocodile Bites

Prepare the egg and breadcrumb mixture in separate bowls. Dip each piece into the egg and allow the excess to drip away. Too much egg can make the breadcrumb coating thick and uneven. Press the crumbs gently onto every side without compacting them heavily.

Preheat the air fryer so the coating begins to cook immediately. Arrange the pieces in one layer and leave space between them. Overcrowding traps moisture and prevents the exterior from becoming crisp. Work in batches when necessary rather than stacking the meat.

Air fryer crocodile bites usually need 10โ€“12 minutes. Turn them halfway through so both sides brown evenly. Cooking time can vary according to the size of the pieces and the air fryer model. Browse our air fryer collection for more appetizers and finger foods.

Dipping Sauces and Serving Ideas

Crispy crocodile nuggets have a mild savory flavor that works with many sauces. Sweet chili sauce adds sweetness and heat, while garlic mayonnaise provides a creamy contrast. Barbecue sauce, mustard sauce, lemon aioli, or a fresh herb dip are also suitable.

Serve smaller portions with cocktail sticks as part of a party platter. For a complete meal, add potato wedges, rice, coleslaw, roasted vegetables, or a garden salad. Browse our appetizer recipes and party food recipes for complementary dishes.

Serve the bites shortly after cooking. Leaving them covered for too long traps steam and softens the breadcrumb crust. If they must wait briefly, arrange them on a wire rack instead of a flat plate.

Storing Crispy Crocodile Nuggets

Refrigerate leftover cooked pieces in an airtight container within two hours and use them within three days. Reheat them in the air fryer at 340ยฐF (170ยฐC) until thoroughly hot. This method restores more crispness than reheating them in a microwave.

Store uncooked breaded pieces in the refrigerator and cook them on the same day. Avoid placing cooked meat back into a container that previously held raw crocodile. Wash preparation surfaces, knives, bowls, and utensils thoroughly after use.

Consult the FDA safe food-handling guidance for more information about handling and storing meat. With a golden coating and tender interior, air fryer crocodile bites offer an approachable way to serve an unusual Australian ingredient.


Macadamia Crusted Barramundi

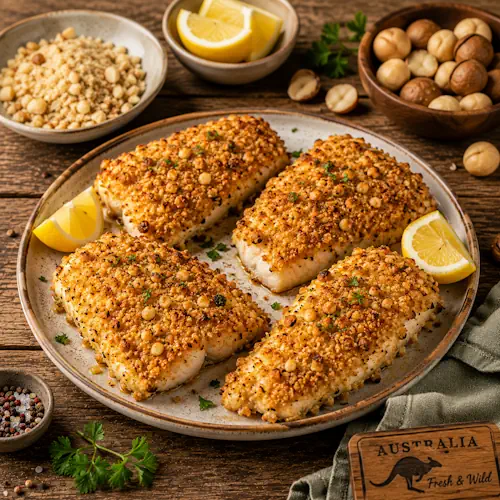
Macadamia crusted barramundi with a golden nut coating and fresh lemon wedges

Macadamia Crusted Barramundi

Tender barramundi fillets are coated with crushed macadamia nuts and breadcrumbs, then air-fried until the crust is crisp and golden.
Couverts4 servings
estimated costs pp $6.75
Deel op Facebook Print Recipe

Equipment

  • Food processor
  • Measuring cups
  • Meat thermometer
  • Mixing bowl
  • Tongs

Ingredients

Instructions

  • Preheat the air fryer to 390ยฐF (200ยฐC) for 3โ€“5 minutes.
  • Combine the crushed macadamia nuts and breadcrumbs in a mixing bowl.
  • Season the coating with salt and black pepper.
  • Place the beaten eggs in a separate mixing bowl.
  • Dip each barramundi fillet into the beaten egg.
  • Let the excess egg drip back into the bowl.
  • Press each fillet into the macadamia and breadcrumb mixture.
  • Coat both sides evenly and press gently so the crust adheres.
  • Arrange the coated fillets in the air fryer basket in a single layer.
  • Leave space between the fillets for air circulation.
  • Cook in batches if necessary.
  • Air fry for 10โ€“12 minutes until the crust is golden.
  • Check that the center of the fish reaches 145ยฐF (63ยฐC).
  • Transfer the cooked fillets to a clean plate.
  • Let the fish rest for 3 minutes.
  • Serve with lemon wedges.

Notes & Wine Advice

Serving Suggestions

Serve the barramundi with lemon wedges, roasted vegetables, steamed green beans, seasoned rice, or recipes from our salad collection. Air-fried potato wedges also make a suitable accompaniment.

Recipe Notes

Finely crush the macadamia nuts so the coating adheres evenly. Larger pieces may fall from the fish during cooking. Leave space between the fillets and browse our air fryer recipes for more cooking ideas.

Variations

Replace barramundi with cod, haddock, snapper, or another firm white fish from our fish recipes. Add lemon zest, garlic powder, parsley, or smoked paprika to the coating for additional flavor.

Wine Advice

A crisp Sauvignon Blanc complements the lemon and delicate fish while balancing the rich macadamia crust. A lightly oaked Chardonnay provides a rounder alternative.

Nutrition values

Serving: 1 barramundi fillet | Calories: 495 kcal | koolhydraten: 16 g | Eiwitten: 46 g | Vet: 33 g | Verzadigd vet: 5 g | Natrium: 470 mg | Suiker: 2 g
————————————————————————————————–

About Macadamia Crusted Barramundi

Macadamia crusted barramundi combines two ingredients closely associated with Australian cuisine. Barramundi has tender white flesh and a mild flavor, while macadamia nuts create richness, crunch, and a lightly buttery character. Breadcrumbs help stabilize the nut coating, and beaten egg allows it to adhere to the fish during air frying.

This macadamia crusted barramundi has an elegant appearance but requires only a short preparation and cooking time. It is suitable for a family dinner, a weekend meal, or a special occasion. The air fryer circulates heat around the fillets, producing a crisp surface without submerging the fish in oil. Browse our Australian recipes for more dishes inspired by the countryโ€™s ingredients and food traditions.

Preparing the Fish and Nut Coating

Pat the Australian barramundi fillets dry before coating them. Excess surface moisture can prevent the egg from adhering and may soften the crust. Check each fillet for remaining bones and remove them carefully with kitchen tweezers when necessary.

Use a food processor to pulse the macadamia nuts into small pieces. Stop before they become a paste because the nuts release oil as they are processed. Combine them with breadcrumbs to create a coating that is rich but still light enough to become crisp.

Season the Australian barramundi fillets and coating evenly. Lemon zest, parsley, garlic powder, or paprika can be added for more flavor. Avoid heavily salting the mixture because the delicate fish and rich nuts need only moderate seasoning.

Making Macadamia Crusted Barramundi

Dip one fillet at a time into the beaten egg and let the excess drip away. Press the fish gently into the nut mixture, coating both sides and paying attention to the edges. Applying too thick a layer may cause the crust to loosen during cooking.

Preheat the air fryer before adding the fish. Arrange the fillets in a single layer and leave enough room for hot air to circulate around them. If they overlap, the coating may remain soft where the pieces touch.

Macadamia crusted barramundi usually cooks in 10โ€“12 minutes, although the exact time depends on the thickness of the fillets and the air fryer model. The fish should reach 145ยฐF (63ยฐC) and flake easily. Visit our air fryer recipe collection for additional fish and seafood ideas.

Serving Ideas for an Australian Fish Dinner

Australian barramundi fillets pair naturally with fresh lemon because the acidity balances the macadamia crust. Roasted asparagus, green beans, zucchini, carrots, or broccoli add color without competing with the fish. Rice, couscous, or potato wedges make the meal more substantial.

A simple salad dressed with lemon and olive oil provides a fresh contrast. You can find more options in our salad recipes and side dish recipes. Keep accompanying sauces light so the texture of the nut coating remains noticeable.

Let the fish rest for several minutes before serving. This allows the internal heat to settle while the crust remains crisp. Serve the fillets whole rather than cutting them immediately.

Storing Australian Barramundi Fillets

Refrigerate leftover cooked fish in an airtight container within two hours and use it within two days. Store the fillets in a single layer when possible so the crust is not compressed. Reheat them briefly in the air fryer at 340ยฐF (170ยฐC) until thoroughly hot.

A microwave will warm the fish but usually softens the macadamia coating. Freezing cooked fillets is possible, although the crust may lose some texture after thawing. For the best result, prepare only the amount you expect to serve.

Follow the FDA safe food-handling guidance when preparing and storing seafood. With tender fish and a golden nut crust, macadamia crusted barramundi is a distinctive Australian-inspired dinner that remains approachable for home cooks.