Air Fryer Vegemite Scrolls

Air fryer Vegemite scrolls made with golden puff pastry and melted cheese

Air Fryer Vegemite Scrolls

Golden puff pastry scrolls are filled with savory Vegemite and melted cheese, then cooked in the air fryer for an easy Australian breakfast or snack.
Couverts4 servings
estimated costs pp $2.25
Deel op Facebook Print Recipe

Equipment

Ingredients

Instructions

  • Preheat the air fryer to 356ยฐF (180ยฐC) for 3โ€“5 minutes.
  • Roll the puff pastry into a rectangle approximately ยฝ cm thick.
  • Spread the Vegemite evenly over the pastry.
  • Leave a small border uncovered around the edges.
  • Sprinkle the shredded cheese evenly over the Vegemite.
  • Starting at one long edge, roll the pastry tightly into a log.
  • Cut the pastry log into 8 equal scrolls.
  • Arrange the scrolls in the air fryer basket with space between them.
  • Cook in batches if necessary.
  • Brush the tops of the scrolls with beaten egg.
  • Air fry for 10โ€“12 minutes until puffed and golden brown.
  • Transfer the scrolls to a clean plate.
  • Let them cool for 5 minutes before serving.

Notes & Wine Advice

Serving Suggestions

Serve the scrolls warm for breakfast, add them to a relaxed brunch, or pack them for a picnic. Fresh fruit, sliced tomatoes, scrambled eggs, or a crisp salad provide a lighter contrast to the rich pastry and cheese.

Recipe Notes

Vegemite has a concentrated, salty flavor, so spread it thinly and evenly. Leave enough space between the scrolls for the pastry to expand. Browse our air fryer recipes for more advice and convenient cooking ideas.

Variations

Add finely chopped spring onions, tomato, cooked mushrooms, or a pinch of chili flakes before rolling the pastry. Try different cheeses from our cheese recipes, including mozzarella for a milder result or mature cheddar for stronger flavor.

Wine Advice

A crisp Chardonnay balances the salty Vegemite and rich pastry. A dry sparkling wine is another refreshing option for serving these scrolls at brunch or a party.

Nutrition values

Serving: 2 scrolls | Calories: 700 kcal | koolhydraten: 48 g | Eiwitten: 18 g | Vet: 49 g | Verzadigd vet: 18 g | Natrium: 1380 mg | Suiker: 3 g
————————————————————————————————–
Cuisine; Australia
Season: All Seasons
Diets; Vegetarian
Occasions Kids / Movie night / Party / Picnic / Weekend

About Air Fryer Vegemite Scrolls

Air fryer Vegemite scrolls combine three familiar Australian favorites: savory Vegemite, melted cheese, and golden pastry. Puff pastry provides crisp layers without requiring homemade dough, while the concentrated yeast spread adds its unmistakable salty and umami character. Cheddar delivers a stronger flavor, whereas mozzarella creates a milder and stretchier filling.

These air fryer Vegemite scrolls are suitable for breakfast, brunch, lunchboxes, picnics, or casual snacking. The pastry can be assembled in approximately 15 minutes, and the scrolls cook in only 10โ€“12 minutes. Explore our Australian recipes for more dishes featuring the countryโ€™s familiar ingredients and cooking traditions.

Rolling and Cutting the Pastry

Thaw the puff pastry according to the package directions, but keep it cool. Warm pastry becomes soft and sticky, which makes it difficult to roll and prevents the layers from puffing properly. If the pastry becomes too soft while you work, refrigerate it for 10 minutes before continuing.

Spread the Vegemite in a thin layer because its flavor is highly concentrated. Add the cheese evenly, leaving a small uncovered border around the pastry. Roll the rectangle tightly from one long side to produce cheesy Vegemite scrolls with visible layers and a consistent filling.

Use a sharp knife and a gentle sawing motion to cut the log into 8 pieces. Pressing straight down may flatten the pastry. If the log feels too soft to cut neatly, refrigerate it briefly until firm.

Making Air Fryer Vegemite Scrolls

Preheating gives the pastry immediate exposure to hot circulating air. Arrange the pieces cut-side up and leave enough room between them to expand. Overcrowding restricts airflow and may leave the centers soft while the exposed edges become too dark.

Brush the tops lightly with beaten egg to encourage a glossy, golden finish. Avoid allowing too much egg to run down the sides because it can seal the pastry layers together. Cook the scrolls in batches when your air fryer basket cannot hold all 8 pieces comfortably.

Air fryer Vegemite scrolls are ready when the pastry looks puffed and evenly browned. Check the bottom and center before removing them, as the cheese may appear melted before the pastry is completely cooked. Visit our air fryer recipe collection for more pastries, snacks, and quick meals.

Serving Ideas for Breakfast and Snacks

Serve cheesy Vegemite scrolls warm when the pastry is crisp and the cheese remains soft. They pair naturally with scrambled eggs, fresh tomatoes, avocado, fruit, or a simple green salad. Smaller portions also work as part of a party platter.

For a leisurely morning meal, combine them with recipes from our breakfast collection or brunch collection. They can also be packed for lunch once completely cooled, although the pastry will gradually soften in a sealed container.

Vegemite and cheese are both salty, so fresh and lightly seasoned accompaniments provide the best balance. Avoid adding additional salt unless you have tasted the finished filling.

Storing Cheesy Vegemite Scrolls

Allow the scrolls to cool completely before placing them in an airtight container. Refrigerate them within two hours and use them within three days. Reheat them in the air fryer at 320ยฐF (160ยฐC) for 3โ€“4 minutes to restore some of the pastryโ€™s crispness.

The unbaked pastry log can be prepared several hours ahead and refrigerated until needed. Cut and egg-wash the pieces shortly before cooking. For longer storage, freeze the baked scrolls in a single layer before transferring them to a freezer-safe container.

Follow the FDA safe food-handling guidance when storing recipes containing cheese and egg. With crisp pastry, melted cheese, and distinctive savory flavor, air fryer Vegemite scrolls are an easy Australian snack for almost any time of day.


Air Fryer Emu Skewers

Air fryer emu skewers seasoned with garlic, cumin, paprika, and thyme

Air Fryer Emu Skewers

Lean emu meat is marinated with garlic, cumin, paprika, thyme, and olive oil before being threaded onto skewers and cooked in the air fryer.
Couverts4 servings
Total time 55 minutes
estimated costs pp $6.50
Deel op Facebook Print Recipe

Equipment

Ingredients

Instructions

  • Soak wooden skewers in water for at least 30 minutes before using.
  • Combine the olive oil, garlic, cumin, paprika, thyme, salt, and black pepper in a mixing bowl.
  • Add the cubed emu meat.
  • Toss until every piece is evenly coated with the marinade.
  • Cover the bowl and refrigerate for at least 30 minutes.
  • Preheat the air fryer to 400ยฐF (200ยฐC) for 3โ€“5 minutes.
  • Divide the marinated meat evenly among the skewers.
  • Leave a small amount of space between the pieces.
  • Arrange the skewers in the air fryer basket in a single layer.
  • Cook in batches if necessary.
  • Air fry for 8โ€“10 minutes.
  • Turn the skewers halfway through the cooking time.
  • Remove the skewers when the meat is browned and cooked through.
  • Transfer them to a clean plate.
  • Let the meat rest for 3 minutes before serving.

Notes & Wine Advice

Serving Suggestions

Serve the skewers with roasted vegetables, a fresh salad, seasoned rice, couscous, or air-fried potato wedges. Lemon wedges, garlic yogurt sauce, or a fresh herb dressing make suitable accompaniments.

Recipe Notes

Cut the emu meat into evenly sized cubes so every piece cooks at the same rate. Emu is naturally lean, so avoid cooking it longer than necessary. Make sure the skewers fit comfortably inside the air fryer basket before threading the meat.

Variations

Add bell pepper, red onion, zucchini, or mushrooms between the pieces of emu. Smoked paprika can replace regular paprika, while chili flakes or cayenne pepper provide additional heat.

Wine Advice

A fruit-forward Shiraz complements the rich game flavor and warm spices. A medium-bodied Cabernet Sauvignon is another suitable choice for these savory skewers.

Nutrition values

Serving: 2 skewers | Calories: 245 kcal | koolhydraten: 2 g | Eiwitten: 29 g | Vet: 13 g | Verzadigd vet: 3 g | Natrium: 470 mg | Suiker: 0 g
————————————————————————————————–

About Air Fryer Emu Skewers

Air fryer emu skewers offer a convenient way to prepare one of Australiaโ€™s distinctive game meats. Cubes of lean emu are coated with olive oil, garlic, cumin, paprika, thyme, salt, and black pepper. Marinating gives the seasonings time to develop, while the air fryer cooks the outside quickly and creates lightly charred edges without requiring a large amount of oil.

These air fryer emu skewers work as a main course, party dish, or unusual addition to a shared meal. They take only 8โ€“10 minutes to cook after marinating. Serve them with rice and vegetables for dinner or present smaller skewers with dipping sauces as an appetizer. Browse our air fryer recipes for more meals prepared with fast circulating heat.

Preparing Lean Emu Meat

Emu is naturally lean, so careful preparation helps Australian emu skewers remain tender. Cut the meat into cubes of approximately the same size. Uneven pieces cook at different rates, which may leave smaller cubes dry before larger ones are ready.

Remove any tough connective tissue with a sharp knife, but do not trim away every small trace of fat. A little natural fat supports browning and flavor. Place the meat in the marinade promptly and keep it refrigerated throughout the marinating time.

Thirty minutes gives the Australian emu skewers enough time to absorb the surface seasoning. Marinating for up to two hours creates a stronger flavor. Avoid leaving the meat in the mixture overnight because the garlic and spices may become dominant.

Seasoning Australian Emu Skewers

The marinade balances earthy, savory, and aromatic flavors. Cumin adds warmth, paprika provides color, and thyme contributes a gentle herbal note. Garlic supports the meatโ€™s robust flavor, while olive oil helps the seasonings cling to each cube.

Regular paprika creates a mild result. Smoked paprika introduces a barbecue-like character, and cayenne pepper can be added when more heat is wanted. Lemon zest or a small amount of lemon juice provides brightness, but excessive acidic liquid may affect the meatโ€™s texture during a long marinating period.

Visit our Spices & Seasoning recipes for more ideas about pairing herbs and spices with game meat. Keep the quantities balanced so the natural flavor of the emu remains noticeable.

Cooking Air Fryer Emu Skewers

Preheat the air fryer before adding the meat. Immediate exposure to high heat supports browning and reduces the time the lean cubes spend cooking. Thread the pieces onto the skewers with a small gap between them so hot air can reach more of their surface.

Arrange the skewers in a single layer and avoid overcrowding the basket. Cook them in batches if necessary. Turn the skewers halfway through so the cubes color more evenly. Cooking time may vary according to the size of the pieces and the air fryer model.

Transfer the cooked skewers to a clean plate and let them rest briefly before serving. Explore our high-protein recipes and quick dinner recipes for additional lean meal ideas.

Serving and Storing Game Meat Skewers

Australian emu skewers pair well with roasted peppers, zucchini, onions, seasoned rice, couscous, potato wedges, or salad. A yogurt and garlic dip adds creaminess, while lemon wedges provide a fresh contrast to the warm spices.

Refrigerate leftover cooked meat in an airtight container within two hours and use it within three days. Reheat it briefly in the air fryer or a covered skillet. Long reheating can dry out the lean meat, so stop as soon as it is thoroughly hot.

Keep raw emu separate from cooked food and use clean utensils and plates after cooking. Consult the FDA safe food-handling guidance for more information about preparing and storing meat. With bold seasoning and a short cooking time, air fryer emu skewers provide an approachable introduction to Australian game meat.


Air Fryer Kangaroo Burgers

Air fryer kangaroo burgers served on toasted buns with lettuce, tomato, and onion

Air Fryer Kangaroo Burgers

Lean kangaroo meat is seasoned with garlic, onion, black pepper, and Worcestershire sauce before being cooked in the air fryer and served on toasted burger buns.
Couverts4 servings
estimated costs pp $5.25
Deel op Facebook Print Recipe

Equipment

Ingredients

Instructions

  • Preheat the air fryer to 375ยฐF (190ยฐC) for 3โ€“5 minutes.
  • Combine the kangaroo meat, salt, black pepper, onion powder, garlic powder, and Worcestershire sauce in a mixing bowl.
  • Mix gently until the seasonings are evenly distributed.
  • Divide the mixture into 4 equal portions.
  • Shape each portion into a burger patty.
  • Brush both sides of the patties lightly with olive oil.
  • Arrange the patties in the air fryer basket with space between them.
  • Air fry for 8โ€“10 minutes.
  • Turn the patties halfway through the cooking time.
  • Check that the center of each burger reaches 160ยฐF (71ยฐC).
  • Transfer the cooked burgers to a clean plate.
  • Toast the burger buns in the air fryer for 1โ€“2 minutes if desired.
  • Place each kangaroo patty on a bun.
  • Add lettuce, tomato, onion, cheese, or condiments as desired.
  • Serve immediately.

Notes & Wine Advice

Serving Suggestions

Serve the burgers with air-fried potato wedges, sweet potato fries, coleslaw, grilled vegetables, or a fresh salad. Lettuce, sliced tomato, red onion, cheese, mustard, and barbecue sauce all make suitable toppings.

Recipe Notes

Kangaroo is extremely lean, so avoid overmixing or overcooking the meat. A light coating of olive oil supports browning and helps prevent sticking. Use a meat thermometer to check the center of each patty.

Variations

Add smoked paprika, ground cumin, chili flakes, or finely chopped fresh herbs to the meat. For a gluten-free version, use certified gluten-free Worcestershire sauce and gluten-free burger buns.

Wine Advice

A fruit-forward Shiraz complements the robust game flavor without overwhelming the lean meat. A medium-bodied Cabernet Sauvignon is another suitable choice, particularly when the burgers are served with cheese or barbecue sauce.

Nutrition values

Serving: 1 burger | Calories: 390 kcal | koolhydraten: 29 g | Eiwitten: 34 g | Vet: 14 g | Verzadigd vet: 3 g | Natrium: 910 mg | Suiker: 4 g
————————————————————————————————–

About Air Fryer Kangaroo Burgers

Air fryer kangaroo burgers offer a distinctly Australian alternative to traditional beef burgers. Ground kangaroo is naturally lean, high in protein, and rich in flavor. Garlic powder, onion powder, black pepper, and Worcestershire sauce provide a savory seasoning that supports the meat without disguising its distinctive character. Cooking the patties in an air fryer creates a browned exterior while using only a small amount of olive oil.

These air fryer kangaroo burgers take approximately 20 minutes to prepare and cook, making them practical for a quick dinner. They can be served simply with lettuce and tomato or finished with cheese, onions, and your preferred condiments. Explore our air fryer recipes for more convenient meals prepared with circulating heat.

Handling Lean Kangaroo Meat

Kangaroo contains considerably less fat than many traditional burger meats. This makes Australian kangaroo burgers flavorful but less forgiving when overworked or cooked for too long. Mix the meat and seasonings gently, stopping as soon as everything is evenly combined.

Divide the mixture into equal portions so all four patties cook at the same rate. Shape them slightly wider than the buns and make a shallow indentation in the center of each one. This helps limit swelling and encourages a more even burger shape.

A thin coating of olive oil helps the Australian kangaroo burgers develop color and reduces the chance of sticking to the air fryer basket. Avoid adding large amounts of oil because the circulating heat only requires a light surface coating.

Seasoning Australian Kangaroo Burgers

The savory seasoning mixture adds depth without overpowering the game meat. Worcestershire sauce contributes acidity and umami, while garlic powder, onion powder, salt, and black pepper distribute evenly throughout the patties.

Additional seasonings can be used to change the character of the burgers. Smoked paprika introduces gentle smokiness, cumin adds warmth, and chili flakes provide heat. Finely chopped parsley, rosemary, or thyme can also be mixed into the meat. Browse our Spices & Seasoning recipes for more ideas about building balanced seasoning combinations.

Do not add too much liquid because the lean patties may become difficult to shape. If preparing the mixture ahead, cover it and keep it refrigerated until you are ready to form and cook the burgers.

Cooking Air Fryer Kangaroo Burgers

Preheating ensures the basket is already hot when the patties are added. Arrange them in a single layer and leave space between each one. Proper airflow is essential for even browning, so cook in batches if your air fryer basket is small.

Turn the patties halfway through cooking and begin checking their temperature near the lower end of the suggested cooking time. Ground kangaroo should reach 160ยฐF (71ยฐC) in the center. Insert the thermometer horizontally into the thickest part for the most reliable reading.

After removing the patties, let them rest briefly while you toast the buns. For more convenient meal ideas, visit our quick dinner recipes and high-protein recipes.

Serving and Storing Game Meat Burgers

Serve Australian kangaroo burgers with lettuce, tomato, sliced red onion, cheese, mustard, mayonnaise, relish, or barbecue sauce. Air-fried potato wedges, coleslaw, grilled vegetables, and fresh salads all make suitable side dishes.

Refrigerate leftover cooked patties in an airtight container within two hours and use them within three days. Reheat them gently in the air fryer to reduce moisture loss. Uncooked patties should remain refrigerated and be cooked within one day.

Follow the FDA safe food-handling guidance when preparing ground meat and keep raw ingredients separate from cooked food. With their lean texture, savory seasoning, and quick cooking method, air fryer kangaroo burgers provide an approachable way to experience a distinctive Australian ingredient.


Minted Broad Bean Salad

Minted Broad Bean Salad with fresh broad beans, mint, preserved lemon, and olive oil served in a rustic bowl.

Minted Broad Bean Salad

Minted Broad Bean Salad is a fresh and vibrant side dish made with tender broad beans, fresh mint, preserved lemon, and olive oil. It is a light Mediterranean-inspired salad that pairs perfectly with tagines, grilled meats, or seafood.
Couverts4 servings
Total time 19 minutes
estimated costs pp $1.40 per person
Deel op Facebook Print Recipe

Equipment

  • large saucepan
  • Measuring spoons
  • Mixing bowl
  • serving bowl
  • slotted spoon

Instructions

  • Fill a large saucepan with water and bring it to a boil.
  • Add the broad beans and cook for 4 minutes until tender.
  • Drain and rinse under cold running water.
  • Transfer the beans to a serving bowl.
  • Add the olive oil, lemon juice, most of the preserved lemon rind, and most of the mint.
  • Toss gently until well coated.
  • Season with sea salt and black pepper.
  • Garnish with the remaining preserved lemon rind and fresh mint.
  • Serve immediately or lightly chilled.

Notes & Wine Advice

Recipe Notes

Large broad beans can be peeled after cooking for a smoother texture and sweeter flavor.
This salad tastes even better after resting for 15 minutes before serving.
Serve as a side dish with Moroccan tagines, grilled lamb, chicken, or seafood.
Leftovers can be refrigerated for up to two days.

Wine Advice

A chilled Sauvignon Blanc or dry Vermentino pairs beautifully with the fresh herbs and citrus flavors.
For a non-alcoholic option, serve with sparkling lemon water and fresh mint.

Nutrition values

Calories: 145 kcal | koolhydraten: 14 g | Eiwitten: 6 g | Vet: 8 g | Verzadigd vet: 1 g | Natrium: 0.2 mg | Suiker: 3 g
————————————————————————————————–

About This Recipe

Minted Broad Bean Salad is a refreshing side dish that celebrates the fresh flavors of broad beans, mint, preserved lemon, and extra virgin olive oil. Popular throughout North Africa and the Mediterranean, this simple salad is light, vibrant, and full of bright citrus notes. It pairs beautifully with grilled meats, seafood, vegetarian dishes, and especially traditional Moroccan tagines.

Why You’ll Love This Broad Bean Salad

This recipe comes together in just a few minutes and uses only a handful of fresh ingredients. The broad beans provide a creamy texture, while the mint adds freshness and the preserved lemon brings a unique tangy flavor. The dressing is simple but allows every ingredient to shine naturally without becoming heavy.
Fresh Mediterranean Flavors

Minted Broad Bean Salad is inspired by the fresh flavors found throughout Moroccan and Arabic cooking. Preserved lemon is one of the signature ingredients in many North African recipes. Combined with olive oil and fresh herbs, it transforms simple broad beans into an elegant side dish. If the broad beans are large, removing their outer skins creates an even smoother texture.

About This Recipe

Minted Broad Bean Salad is a refreshing Mediterranean side dish made with tender broad beans, fresh mint, preserved lemon, and extra virgin olive oil. This simple recipe is full of fresh flavors and comes together in just a few minutes. It is perfect alongside grilled meats, seafood, vegetarian dishes, or traditional Moroccan tagines.

Why You’ll Love This Broad Bean Salad

Minted Broad Bean Salad is quick to prepare and uses only a handful of fresh ingredients. The broad beans provide a creamy texture, while the mint adds freshness and the preserved lemon contributes a bright citrus flavor. Together they create a light salad that is both healthy and satisfying.

Minted Broad Bean Salad with Mediterranean Flavors

This broad bean salad is inspired by the fresh ingredients found throughout Moroccan and Mediterranean cooking. Preserved lemon is one of the region’s signature ingredients and gives the salad its distinctive taste. If using large broad beans, removing the outer skins creates an even smoother texture and a more delicate bite.

Serving This Broad Bean Salad

Minted Broad Bean Salad can be served chilled or at room temperature. It pairs beautifully with grilled lamb, roasted chicken, seafood, vegetarian dishes, and traditional tagines. It also makes an excellent addition to mezze platters, buffets, or summer barbecues. For more fresh seasonal dishes, browse our Vegetable Recipes collection.

Broad Bean Salad Storage Tips

Store any leftover broad bean salad in an airtight container in the refrigerator for up to two days. Stir gently before serving. You can also blend the broad beans with garlic, cumin, coriander, olive oil, and lemon juice to create a delicious dip for toasted flatbreads or fresh vegetables. For food safety information, visit the FDA Food Safety website.

Minted Broad Bean Salad is an easy recipe that highlights simple ingredients and fresh Mediterranean flavors. Whether served with a Moroccan meal or enjoyed on its own, this colorful salad is always a delicious addition to the table.


Garden Herb Picada

Garden Herb Picada made with fresh parsley, garlic, pickles, and olive oil served in a rustic bowl.

Garden Herb Picada

Garden Herb Picada is a fresh Spanish-style herb dressing made with parsley, garlic, pickles, and olive oil. This vibrant condiment adds bright Mediterranean flavor to tapas, grilled vegetables, seafood, meats, and salads in just a few minutes.
Couverts4 servings
Total time 10 minutes
estimated costs pp $0.55 per person
Deel op Facebook Print Recipe

Equipment

  • Food processor
  • Measuring spoons
  • Rubber spatula
  • Small serving bowl

Ingredients

Instructions

  • Place the parsley, garlic, and chopped pickle into a food processor.
  • Pulse until finely chopped.
  • With the motor running, slowly drizzle in the olive oil.
  • Continue blending until the dressing is as smooth as possible.
  • Transfer to a serving bowl.
  • Serve immediately or refrigerate in a sealed container for up to 5 days.
  • Allow the dressing to come to room temperature before serving.

Notes & Wine Advice

Recipe Notes

Use fresh flat-leaf parsley for the brightest flavor and color.
Allow the dressing to sit for 15 to 30 minutes before serving so the flavors blend beautifully.
This versatile dressing is excellent with grilled vegetables, seafood, roasted potatoes, and traditional Spanish tapas.
Store refrigerated in a sealed container for up to five days and stir well before serving.

Wine Advice

This fresh herb dressing pairs beautifully with a crisp Sauvignon Blanc, whose citrus notes enhance the parsley and garlic.
For a Mediterranean-inspired meal, enjoy it alongside a chilled Albariรฑo, which complements seafood and classic Spanish tapas perfectly.

Nutrition values

Calories: 85 kcal | koolhydraten: 2 g | Eiwitten: 0 g | Vet: 9 g | Verzadigd vet: 1 g | Natrium: 120 mg | Suiker: 1 g
————————————————————————————————–

About This Recipe

Garden Herb Picada is a classic Spanish herb dressing that delivers bright, fresh flavor with only a handful of ingredients. Made with parsley, garlic, pickles, and extra virgin olive oil, this versatile condiment is a staple in many Spanish kitchens. The dressing comes together in minutes and adds a vibrant finishing touch to everything from grilled vegetables to seafood and traditional tapas.

Why You’ll Love This Herb Dressing

This herb dressing is simple, fresh, and incredibly versatile. Fresh parsley provides a clean herbal flavor, garlic adds depth, while the finely chopped pickles contribute a pleasant tang that balances the richness of the olive oil. If you enjoy making homemade condiments, be sure to browse our Dressing Recipes, Condiment Recipes, Sauce Recipes, and Tapas Recipes.

Garden Herb Picada Ingredients

Garden Herb Picada uses everyday ingredients to create authentic Mediterranean flavor. Although traditionally served with Spanish tapas, this dressing is equally delicious spooned over grilled fish, roasted potatoes, vegetables, chicken, or crusty bread. For more Mediterranean inspiration, explore our Spanish Recipes, Mediterranean Recipes, Vegetable Recipes, and Fish Recipes.

Serving Ideas

This herb dressing is best served at room temperature so the olive oil remains silky and the fresh herbs shine. It makes an excellent accompaniment to grilled meats, roasted vegetables, seafood, sandwiches, or as a dipping sauce for fresh bread. It also pairs wonderfully with many recipes from our Appetizer Recipes collection.

Storage Tips

Store Garden Herb Picada in a sealed container in the refrigerator for up to five days. Allow it to return to room temperature before serving and stir well to recombine the ingredients. For additional food safety guidance, visit the FDA Food Safety website.

Whether you’re preparing a Spanish-inspired tapas evening or simply looking for a fresh homemade condiment, Garden Herb Picada is an easy recipe that brings vibrant Mediterranean flavor to countless dishes throughout the year.


Banderillas

Spanish Tapas Skewers with olives, shrimp, Serrano ham, anchovies, eggs, and peppers served on a rustic platter.

Banderillas

Banderillass are colorful bite-sized appetizers featuring classic Spanish ingredients layered onto cocktail skewers. Quick to assemble and endlessly customizable, they're perfect for entertaining, tapas nights, parties, or serving with drinks.
Couverts4 servings (4 tapas)
Total time 10 minutes
estimated costs pp $1.25 per tapa
Deel op Facebook Print Recipe

Equipment

Ingredients

Instructions

  • Choose one of your preferred ingredient combinations.
  • Thread the selected ingredients onto a cocktail skewer in the desired order.
  • Add a small amount of mayonnaise where needed.
  • Garnish with fresh parsley if desired.
  • Arrange the finished tapas skewers on a serving platter.
  • Serve at room temperature.

Notes & Wine Advice

Recipe Notes

Mix several ingredient combinations on one serving platter to create a colorful and authentic tapas selection.
Use high-quality Spanish olives, Serrano ham, anchovies, and piquillo peppers for the best flavor.
Prepare the skewers a few hours ahead and keep them refrigerated until serving.
Serve at room temperature to enjoy the full flavor of every ingredient.

Wine Advice

A chilled Albariรฑo is a classic Spanish pairing that beautifully complements seafood, olives, and cured meats.
For a festive tapas evening, serve with a glass of Cava, whose crisp bubbles refresh the palate between bites.

Nutrition values

Calories: 85 kcal | koolhydraten: 2 g | Eiwitten: 8 g | Vet: 5 g | Verzadigd vet: 1 g | Natrium: 0.8 mg | Suiker: 1 g
————————————————————————————————–

About This Recipe

Spanish Banderillas are one of the easiest and most colorful tapas you can prepare. These small skewered appetizers combine olives, seafood, cured meats, vegetables, eggs, and other flavorful ingredients into a single bite. Every skewer offers a unique combination of textures and flavors, making them a favorite addition to Spanish tapas bars, family gatherings, and festive celebrations.

Why You’ll Love Spanish Banderillas

The beauty of Spanish Banderillas lies in their simplicity. They require no cooking if the ingredients are already prepared and can be assembled in just a few minutes. Because every skewer can contain different ingredients, they are perfect for serving a variety of flavors on one platter. Guests can choose their favorite combinations while enjoying an authentic Spanish tapas experience.

Choosing the Best Ingredients

Traditional banderillas often include Spanish olives, anchovies, tuna, shrimp, Serrano ham, asparagus, pickles, piquillo peppers, and hard-boiled eggs. Fresh, high-quality ingredients make a noticeable difference because every flavor remains distinct. A small amount of mayonnaise can add extra richness without overpowering the other ingredients.

Serving Spanish Banderillas

Spanish Banderillas are best served at room temperature on a large tapas platter. They pair perfectly with other traditional Spanish appetizers such as marinated olives, Manchego cheese, cured meats, and crusty bread. If you enjoy authentic Spanish cuisine, browse our Spanish Recipes collection for more tapas and regional favorites.

Storage and Helpful Tips

Prepare the skewers a few hours before serving and keep them refrigerated until needed. Cover the platter with plastic wrap to keep the ingredients fresh. Assemble the skewers shortly before serving to maintain the best appearance and texture. For food safety guidance when handling seafood and cooked eggs, visit the FDA Food Safety website.

Spanish Banderillas are an easy appetizer that brings authentic Spanish flavors to any table. Their colorful presentation, endless ingredient combinations, and quick preparation make them one of the most enjoyable tapas to serve for parties, holidays, and casual entertaining.


Stock Recipes

Stock Recipes with homemade stock recipes on a rustic wooden table

Stock Recipes are essential for soups, sauces, stews, and homemade cooking. From classic chicken stock and beef stock to vegetable-based favorites, this collection is packed with flavorful kitchen inspiration.


Stock Recipes for Flavorful Homemade Cooking

Stock Recipes are perfect for soups, sauces, stews, gravies, and countless homemade meals. Rich flavors, slow simmering, fresh ingredients, and traditional cooking methods help create the foundation for delicious dishes throughout the year. Homemade stock recipes remain a favorite choice for cooks who want maximum flavor and quality.

Many people enjoy homemade kitchen stocks because they provide exceptional flavor and complete control over ingredients. Chicken stock, beef stock, vegetable stock, fish stock, herbs, vegetables, and aromatic seasonings all help create flavorful bases for a wide range of recipes.

Different stock preparations offer unique flavors and experiences. Some create rich and hearty foundations for comforting soups and stews, while others provide lighter options that complement delicate dishes. Meanwhile, traditional cooking techniques continue to make homemade stocks a favorite choice among home cooks.

These kitchen essentials are also popular because they can easily be customized. Herbs, vegetables, spices, bones, and cooking times can completely change the final flavor profile and create endless homemade possibilities.

Kitchen Foundations and Traditional Cooking

Homemade stock recipes remain popular throughout the year because they combine simple ingredients with remarkable flavor. During colder months, hearty broths and soup bases become especially popular. Throughout every season, homemade stocks continue to provide a reliable foundation for countless recipes.

Fresh ingredients and homemade preparation provide more control over flavors, quality, and nutrition. Because of that flexibility, homemade stocks can easily match personal preferences and family traditions.

Many people also enjoy experimenting with ingredients and flavor combinations. Fresh herbs, vegetables, bones, spices, and aromatic ingredients all help create exciting homemade cooking possibilities. Homemade stock recipes make it easy to develop deeper flavors and create a stronger foundation for soups, sauces, and stews.

These flavorful foundations continue to be popular for soups, sauces, stews, and everyday cooking because they combine tradition, versatility, and exceptional taste.

If you enjoy homemade cooking, you can also explore broth recipes, soup recipes, and sauce recipes that pair perfectly with homemade stocks.

For additional information about healthy eating and balanced nutrition, visit USDA MyPlate.

Whether you are preparing soup bases, rich gravies, hearty stews, or classic sauces, homemade stock ideas provide endless inspiration for flavorful cooking.

Stir-Fry & Wok Recipes

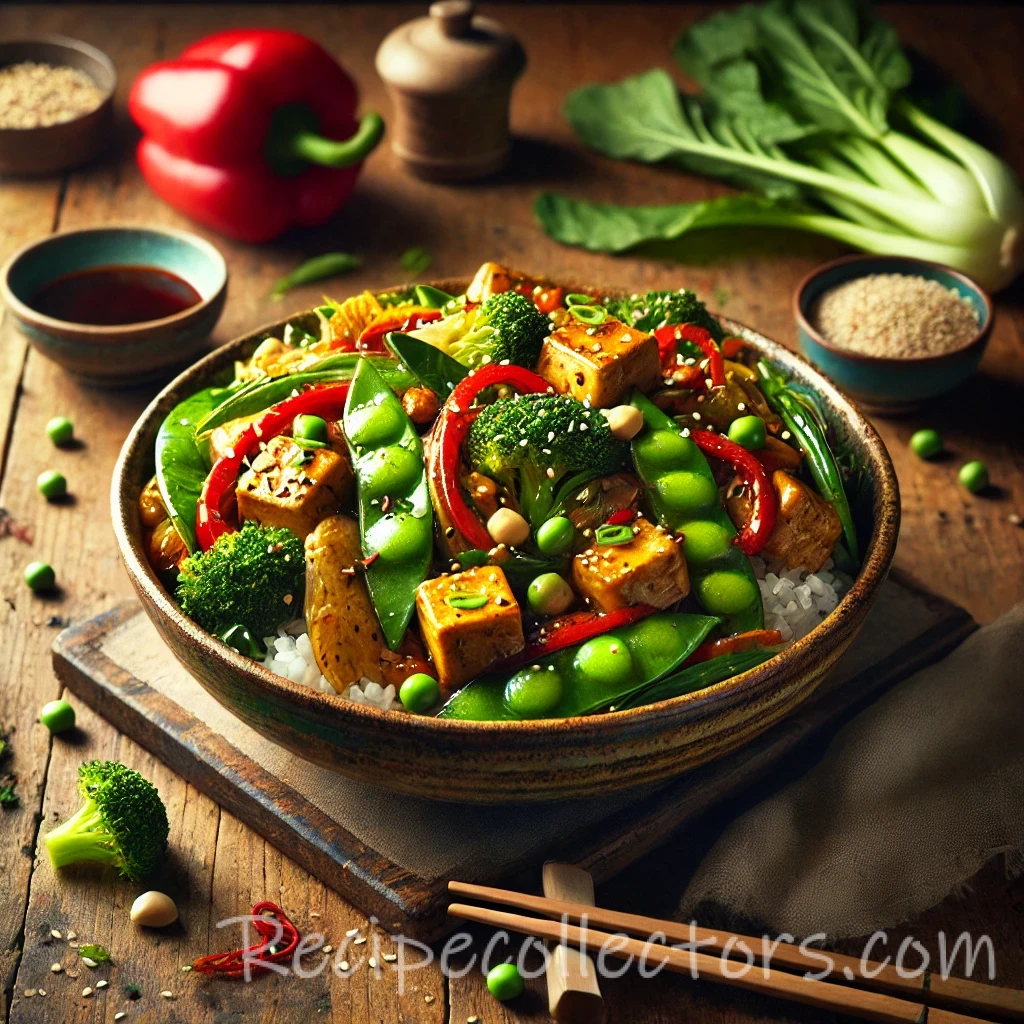
Stir-Fry & Wok Recipes with homemade stir-fry dishes on a rustic wooden table

Stir-Fry & Wok Recipes bring bold flavors and homemade inspiration to quick dinners, healthy meals, and everyday cooking. From colorful vegetable stir-fries and noodle dishes to savory wok favorites, this collection is packed with delicious ideas.


Stir-Fry & Wok Recipes for Fast Homemade Meals

Stir-Fry & Wok Recipes are perfect for quick dinners, healthy lunches, meal preparation, and flavorful homemade cooking. Fresh ingredients, fast cooking methods, vibrant vegetables, and rich sauces help create meals that are both satisfying and convenient.

Many people enjoy homemade stir-fry dishes because they combine speed with delicious flavor and endless versatility. Vegetables, noodles, rice, chicken, beef, seafood, herbs, and savory sauces all help create enjoyable meals for busy weeknights and family dinners.

Different wok creations offer unique flavors and experiences. Some provide light and fresh combinations packed with vegetables, while others create hearty meals with rich sauces and satisfying textures. Meanwhile, international influences bring even more variety to homemade cooking.

These quick meal ideas are also popular because they can easily be customized. Proteins, vegetables, herbs, spices, noodles, rice, and sauces can completely change the flavor profile and create endless homemade possibilities.

Quick Weeknight Dinners and Fresh Flavors

Homemade stir-fry dishes remain popular throughout the year because they combine convenience with excellent flavor. During busy workweeks, fast-cooking meals become especially valuable. Throughout every season, fresh ingredients and colorful combinations continue to make wok cooking a favorite choice.

Fresh ingredients and homemade preparation provide more control over flavors and textures. Because of that flexibility, homemade stir-fry dishes can easily match personal preferences and family traditions.

Many people also enjoy experimenting with ingredients and flavor combinations. Fresh vegetables, herbs, proteins, noodles, rice, and creative sauces all help create exciting homemade meal ideas.

These versatile dishes continue to be popular for family dinners, quick lunches, and everyday cooking because they combine flavor, nutrition, and convenience.

If you enjoy quick homemade meals, you can also explore quick dinner recipes, rice recipes, and noodle recipes that pair perfectly with wok favorites.

For additional information about healthy eating and balanced nutrition, visit USDA MyPlate.

Whether you are preparing vegetable stir-fries, noodle dishes, wok specialties, or quick family meals, these Stir-Fry & Wok Recipes provide endless inspiration for homemade cooking.

Stew Recipes

Stew Recipes with homemade stew dishes on a rustic wooden table

Stew Recipes bring comforting flavors and homemade inspiration to family dinners, cold evenings, and hearty meals. From traditional slow-simmered favorites and rich meat stews to vegetable-packed classics, this collection is packed with delicious ideas.


1
2
3
4
5

Stew Recipes for Comforting Homemade Meals

Stew Recipes are perfect for family dinners, cozy evenings, weekend cooking, and comforting homemade meals. Rich ingredients, slow cooking methods, deep flavors, and hearty textures help create dishes that are satisfying throughout the year.

Many people enjoy homemade stew dishes because they combine simple ingredients with exceptional flavor and warmth. Beef, lamb, poultry, vegetables, potatoes, herbs, beans, and flavorful broths all help create enjoyable meals for both everyday dining and special occasions.

Different stew creations offer unique flavors and experiences. Some provide rich and traditional comfort food with slow-cooked tenderness, while others create lighter versions packed with vegetables and fresh ingredients. Meanwhile, regional specialties and international favorites bring even more variety to homemade cooking.

These hearty meals are also popular because they can easily be customized. Herbs, vegetables, spices, proteins, grains, and cooking techniques can completely change the flavor profile and create endless homemade possibilities.

Traditional Comfort Food and Family Favorites

Homemade stew dishes remain popular throughout the year because they combine nourishment with rich flavors. During autumn and winter, warming bowls and slow-cooked favorites become especially popular. During cooler spring evenings, lighter versions often become favorite choices.

Fresh ingredients and homemade preparation provide more control over flavors and textures. Because of that flexibility, homemade stew dishes can easily match personal preferences and family traditions.

Many people also enjoy experimenting with ingredients and flavor combinations. Fresh herbs, vegetables, rich broths, spices, and creative additions all help create exciting homemade meal ideas.

These comforting favorites continue to be popular for family dinners, gatherings, and everyday cooking because they combine flavor, warmth, and satisfying textures.

If you enjoy homemade comfort food, you can also explore crockpot recipes, soup recipes, and main course recipes that pair perfectly with hearty homemade meals.

For additional information about healthy eating and balanced nutrition, visit USDA MyPlate.

Whether you are preparing traditional comfort food, slow-cooked family favorites, hearty dinners, or seasonal classics, these Stew Recipes provide endless inspiration for homemade cooking.

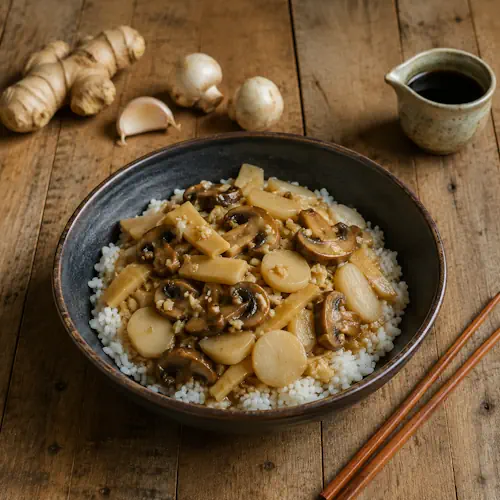
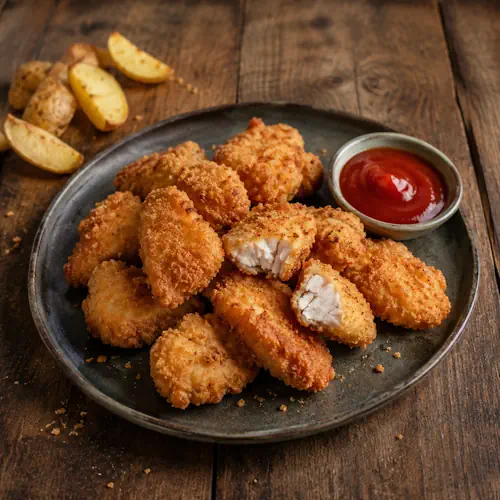
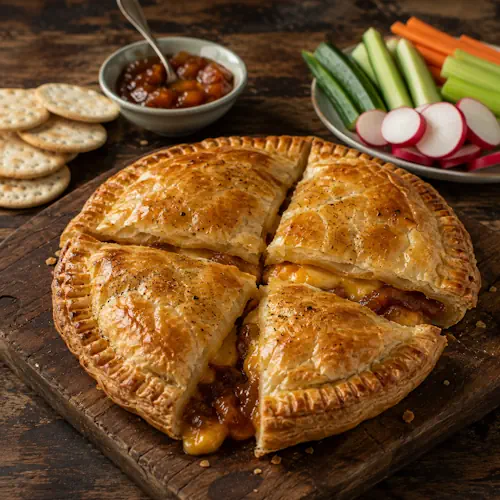
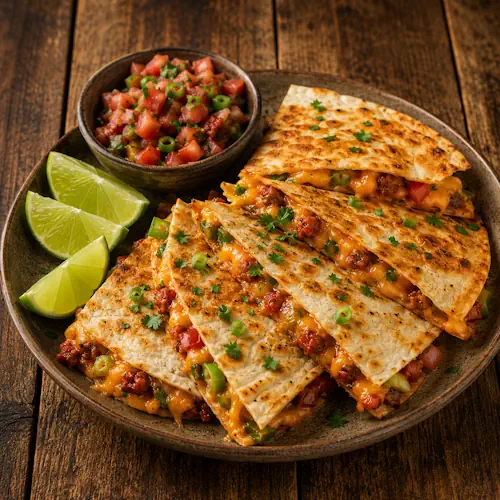
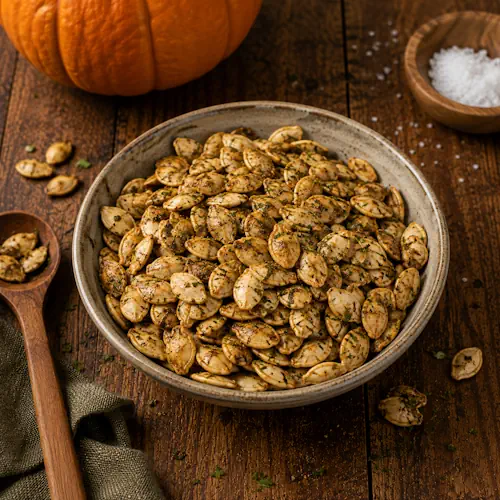
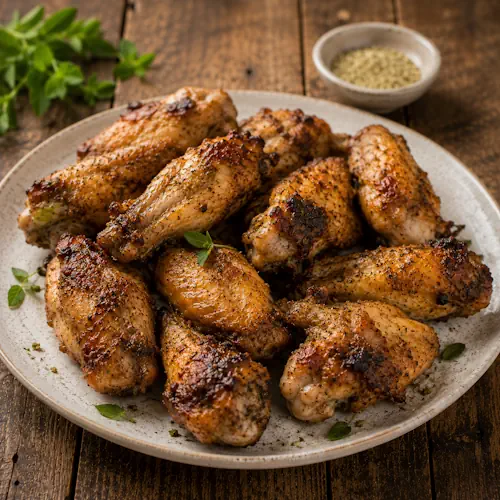
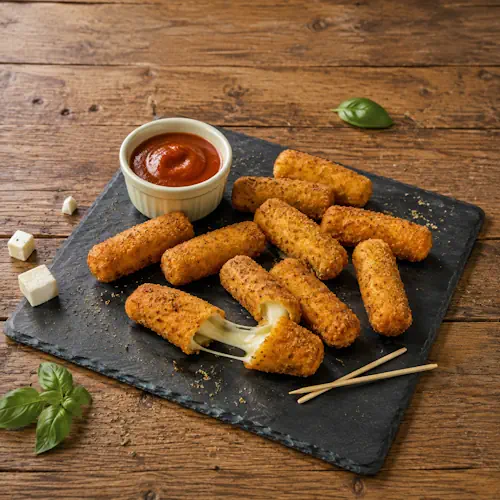
Finger Food Recipes


Finger food recipes with homemade party snacks on a rustic wooden table

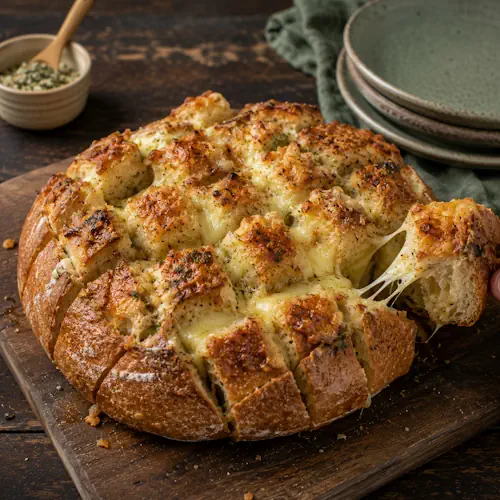
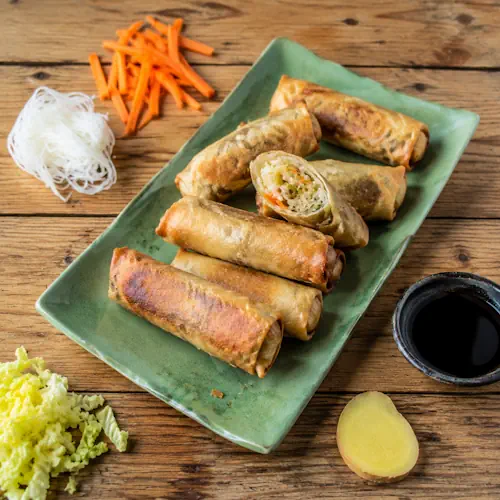
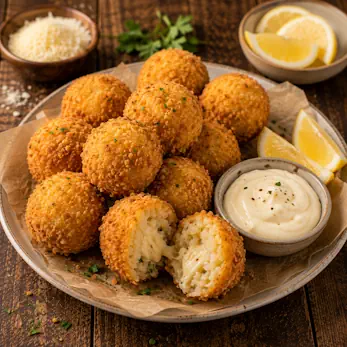
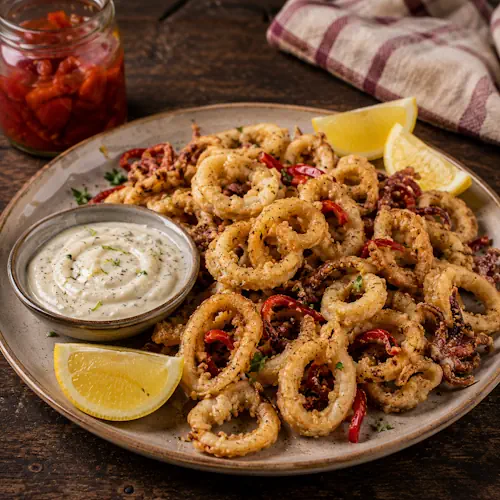
Finger food recipes are perfect for parties, birthdays, BBQs, holidays, game nights, and festive gatherings. From crispy appetizers and cheesy bites to wraps, sliders, and savory snacks, this collection is packed with flavorful homemade inspiration.


1
2

Easy Homemade Finger Food Recipes for Every Occasion

Finger food recipes remain some of the most popular homemade snacks for parties, birthdays, BBQs, holidays, game nights, and casual gatherings with family and friends. Crispy textures, melted cheese, savory fillings, colorful platters, fresh herbs, and flavorful seasonings all help create crowd-pleasing dishes full of variety and comfort. Because there are many styles and serving ideas, this collection offers inspiration for every celebration and every season.

Many people enjoy homemade finger food recipes because they combine easy preparation with bold flavor and festive presentation. Cheese, chicken, vegetables, wraps, bread, dips, potatoes, sauces, bacon, and savory toppings all help create delicious homemade appetizers and party snacks. In addition, finger foods are easy to serve, simple to share, and perfect for relaxed gatherings and buffet tables.

Mini sandwiches, cheesy appetizers, crispy snacks, sliders, savory wraps, baked bites, party platters, and warm comfort food snacks all bring variety to homemade entertaining. Therefore, these recipes work beautifully for birthdays, football nights, outdoor parties, holiday gatherings, movie evenings, and cozy weekends at home.

These homemade finger food ideas fit perfectly into both casual snack tables and festive homemade celebrations throughout the entire year.

Crispy Snacks, Party Platters and Savory Favorites

Many homemade finger food recipes are easier to prepare than people expect. Some require only a few ingredients while still delivering rich flavor and satisfying texture. As a result, homemade appetizers become approachable and enjoyable for both beginner and experienced home cooks alike.

Different finger food recipes create unique flavors and textures. Crispy snacks provide crunchy texture and savory flavor, while cheesy bites create rich comfort food for parties and gatherings. Meanwhile, wraps, sliders, and fresh appetizer platters offer lighter and refreshing options that pair beautifully with drinks and homemade sauces.

Many finger food recipes are also perfect for barbecue evenings, appetizer buffets, snack platters, family gatherings, holiday parties, and relaxing weekends with friends.

These flavorful homemade finger foods pair beautifully with dips, cold drinks, grilled dishes, savory sauces, and festive homemade meals.

If you enjoy homemade party snacks, you can also explore delicious party food recipes, flavorful barbecue recipes, and refreshing drink recipes that pair perfectly with homemade appetizers and festive snack platters.

Festive Homemade Snacks for Every Season

Finger food recipes work wonderfully throughout every season. During spring and summer, lighter wraps, fresh appetizer platters, grilled snacks, and outdoor party dishes become especially popular. However, autumn and winter often bring warm comfort food snacks, baked appetizers, cheesy bites, and hearty homemade treats.

Fresh homemade finger foods help turn simple gatherings into festive celebrations. Crispy textures, melted cheese, savory fillings, fresh herbs, and colorful presentation all help create flavorful homemade snacks and relaxed party atmosphere. In addition, many recipes can easily be customized with sauces, vegetables, meats, herbs, or festive toppings.

Many people also enjoy the social atmosphere that comes with homemade finger foods. Preparing appetizer platters, serving buffet tables, sharing snacks, and enjoying casual bites together creates a fun and relaxed experience. Meanwhile, homemade appetizers instantly add warmth and excitement to every gathering.

Fresh homemade finger food favorites remain some of the most enjoyable snacks for birthdays, BBQs, holidays, movie nights, and festive weekends with family and friends.

These homemade finger food recipes continue to be popular because they combine easy preparation, bold flavor, and crowd-pleasing presentation in every bite.

If you are looking for more inspiration, you can also discover flavorful snack recipes, tasty appetizer recipes, and comforting comfort food recipes that work perfectly alongside homemade snacks and savory appetizers.

For even more savory inspiration, visit our Dutch collection of hapjes recepten filled with homemade appetizers, snacks, and party favorites.

Whether you are preparing crispy appetizers, cheesy bites, savory wraps, sliders, baked snacks, or festive party platters, this collection offers endless inspiration for flavorful homemade entertaining.