Spiced Tortilla Chips and Guacamole

Tortilla chips and guacamole served with lime and fresh coriander

Spiced Tortilla Chips and Guacamole

Crisp air-fried corn tortilla chips seasoned with cumin and smoked paprika, served with chunky homemade guacamole, fresh chilli and lime.
Couverts4 servings
Preparation 15 minutes
Preparation time:21 minutes
estimated costs pp $1.35
Deel op Facebook Print Recipe

Equipment

  • Air fryer, 5- or 6-quart
  • Fork or potato masher
  • Large Serving Platter
  • Sharp knife
  • Small mixing bowl
  • spoon

Ingredients

For the Tortilla Chips

  • 10 white corn tortillas approximately 285 g
  • 1 teaspoon ground cumin
  • 1 teaspoon smoked paprika
  • 1 teaspoon sea salt flakes
  • Extra-virgin olive oil cooking spray

For the Guacamole

  • 2 medium avocados
  • 1 small red chilli finely chopped
  • 15 g fresh coriander finely chopped
  • 2 tablespoons freshly squeezed lime juice
  • 1 small garlic clove crushed
  • ยผ teaspoon ground cumin
  • 1 teaspoon chipotle hot sauce
  • 4 lime wedges

Instructions

For the Tortilla Chips

  • Preheat the air fryer to 200ยฐC for 3 minutes.
  • Stack 3 corn tortillas on a cutting board.
  • Cut the stack into 6 equal wedges.
  • Repeat with the remaining tortillas.
  • Combine the cumin, smoked paprika and sea salt flakes in a small bowl.
  • Arrange one-third of the tortilla wedges in the air-fryer basket.
  • Keep the wedges in a single layer as much as possible.
  • Air-fry for 7 minutes.
  • Turn the tortilla wedges halfway through the cooking time.
  • Remove the chips when they are crisp and lightly golden.
  • Lightly spray the hot chips with olive oil.
  • Sprinkle them immediately with one-third of the seasoning mixture.
  • Transfer the seasoned chips to a serving platter.
  • Repeat the cooking process with the remaining tortilla wedges and seasoning.

For the Guacamole

  • Cut the avocados in half.
  • Remove the stones carefully.
  • Scoop the avocado flesh into a small mixing bowl.
  • Reserve half of the chopped chilli for garnish.
  • Add the remaining chilli, coriander, lime juice, garlic and cumin.
  • Mash the ingredients together until chunky.
  • Taste the guacamole and adjust the lime juice when necessary.
  • Transfer the guacamole to a serving bowl.
  • Top it with the reserved chilli.
  • Drizzle the chipotle hot sauce over the guacamole.
  • Serve immediately with the tortilla chips and lime wedges.

Notes & Wine Advice

Serving Suggestions

Serve the chips and guacamole with tomato salsa, black bean dip or grilled sweetcorn. Add extra lime wedges, fresh coriander and chipotle sauce to the platter so everyone can adjust the flavours.

Recipe Notes

The original total time of 30 minutes is slightly too short because the tortilla chips require three separate batches of seven minutes. The corrected preparation time is 15 minutes and the cooking time is 21 minutes. Preheating takes another 3 minutes, but you can prepare the guacamole while the chips cook.

Dietary Information

The dietary classifications apply when the corn tortillas, cooking spray and chipotle sauce have suitable allergen and certification information. Check labels carefully for gluten, wheat, egg, milk, nuts and soya. Halal and kosher preparation also requires appropriately certified packaged products and suitable kitchen handling.

Nutrition Information

The nutritional values have been recalculated using approximately 285 g corn tortillas, two medium avocados and an estimated light coating of olive oil spray. The original recipe supplied no nutrition values. The sodium content depends heavily on the tortillas, added salt and chipotle sauce. Reducing the salt by half lowers the sodium considerably.

Variations

Add finely diced tomato or red onion to the guacamole. Replace the red chilli with jalapeรฑo or omit it for a mild version. Lime zest can strengthen the citrus flavour. For less sodium, use unsalted corn tortillas and reduce the sea salt flakes.

Storage

Allow the tortilla chips to cool completely before storing them in an airtight container for up to one week. Press reusable food wrap directly onto the surface of the guacamole and refrigerate it for no longer than one day. Some browning may still occur, but this does not necessarily mean the guacamole has spoiled.

Wine Advice

A crisp Sauvignon Blanc complements the lime, coriander and chilli while balancing the richness of the avocado. An off-dry Riesling is a suitable alternative when the guacamole contains extra chilli.

Nutrition values

Serving: 15 tortilla chips with guacamole | Calories: 300 kcal | Carbohydrates: 38 g | Protein: 6 g | Fat: 15 g | Saturated Fat: 3 g | Sodium: 680 mg | Sugar: 2 g
————————————————————————————————–

Tortilla chips and guacamole bring crisp texture, creamy richness, citrus, and gentle heat together in one irresistible snack. The air fryer transforms simple corn tortillas into golden chips while using much less oil than conventional deep-frying. A homemade avocado dip completes the dish with fresh lime, coriander, garlic, cumin, red chilli, and smoky chipotle sauce.

This recipe works well for parties, movie nights, game-day spreads, and relaxed weekend snacking. You can prepare the chips in batches and serve them straight from the air fryer, or make them ahead and store them after they cool completely. The guacamole takes only a few minutes to mix, so the entire platter remains manageable even when guests arrive unexpectedly.

Why the Air Fryer Works So Well

Hot circulating air removes moisture from the tortilla wedges and creates crisp edges without submerging them in oil. Cooking the wedges in three batches prevents crowding and promotes even browning. Turn each batch halfway through so both sides become crisp.

Spraying the chips immediately after air-frying helps the cumin, smoked paprika, and salt adhere to their warm surfaces. This method produces flavorful spiced corn chips with a lighter finish than deep-fried versions. Watch the final minutes carefully because tortilla thickness and air-fryer performance can affect the cooking time.

Tortilla Chips and Guacamole

The guacamole balances the smoky seasoning on the chips. Ripe avocados provide a smooth, buttery foundation, while lime juice adds acidity and helps slow browning. Fresh coriander contributes a bright herbal note, and garlic, chilli, cumin, and chipotle sauce create savory depth.

For a chunky texture, mash the avocados briefly and leave several small pieces intact. For a smoother dip, continue mashing until creamy. Taste the mixture before adding extra salt because the chips and chipotle sauce already contribute sodium.

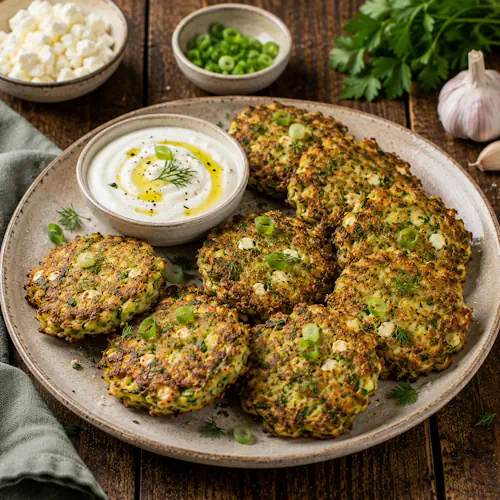
You can also serve this dip with Vegetable Spring Rolls or spoon it into Green Falafel pita pockets. For a larger snack table, add Spicy Potato Nests to provide another crisp, warmly seasoned option.

Choosing and Preparing the Avocados

Select avocados that yield slightly when pressed gently near the stem. Avoid fruit with deep dents or a loose, collapsed texture because the flesh may have brown areas. If the avocados still feel firm, leave them at room temperature until they soften.

Prepare the guacamole shortly before serving for the freshest color and flavor. If you need to make it ahead, press reusable food wrap directly against the surface and refrigerate it. This barrier limits air exposure and helps reduce oxidation. Stir the dip before serving and add another squeeze of lime if it needs refreshing.

Serving and Food-Safety Guidance

Arrange the chips around a central bowl of guacamole and finish the platter with coriander sprigs, lime wedges, sliced chilli, and a small drizzle of chipotle sauce. Serve the chips only after they cool enough to become fully crisp.

Use clean utensils and preparation surfaces, especially when serving the snack alongside dishes that contain meat, dairy, eggs, or other allergens. The FDA provides additional advice in its safe food-handling guidance.

The core recipe uses plant-based ingredients, but packaged tortillas, oil sprays, and sauces may contain allergens or undergo processing on shared equipment. Check every label when preparing the dish for someone with coeliac disease, allergies, or religious dietary requirements.

Easy Flavor Variations

Replace the smoked paprika with chilli powder for stronger heat, or add finely diced tomato and red onion to the guacamole for extra freshness. A pinch of cayenne makes the chips hotter, while mild paprika creates a family-friendly version. You can also omit the coriander if guests dislike its distinctive flavor.

Freshly prepared tortilla chips and guacamole offer the best contrast between crunchy, smoky wedges and cool avocado dip. Their simple ingredients, quick preparation, and flexible seasoning make this recipe a dependable choice for casual entertaining throughout the year.


Loaded Nacho Potatoes

Loaded nacho potatoes with chilli beans, melted cheese, salsa and jalapeรฑo

Loaded Nacho Potatoes

Crisp air-fried potatoes filled with chilli beans, melted Cheddar, crunchy corn chips, sour cream, jalapeรฑo, salsa and fresh coriander.
Couverts4 servings
Preparation 15 minutes
Preparation time:45 minutes
Total time 1 hour
estimated costs pp $2.20
Deel op Facebook Print Recipe

Equipment

  • Air fryer, 5- or 6-quart
  • Fork
  • Kitchen tongs
  • Sharp knife
  • Small saucepan
  • Wooden spoon

Ingredients

For the Potatoes

  • 4 medium russet potatoes approximately 300 g each
  • Olive oil cooking spray
  • ยฝ teaspoon sea salt flakes

For the Nacho Topping

  • 1 can chilli beans 440 g
  • 110 g shredded Cheddar
  • 120 g sour cream
  • 120 g tomato salsa
  • 25 g corn chips lightly crushed
  • 1 fresh jalapeรฑo thinly sliced
  • 15 g fresh coriander leaves
  • ยผ teaspoon ground black pepper

Instructions

For the Potatoes

  • Preheat the air fryer to 200ยฐC for 3 minutes.
  • Scrub the potatoes thoroughly.
  • Dry the potatoes with a clean kitchen towel.
  • Prick each potato several times with a fork.
  • Lightly spray the potatoes with olive oil.
  • Sprinkle the sea salt flakes over the skins.
  • Arrange the potatoes in the air-fryer basket without overcrowding.
  • Air-fry for 40 minutes.
  • Turn the potatoes halfway through the cooking time.
  • Insert a sharp knife into the centre of each potato.
  • Continue cooking for 5 to 10 minutes if the centres remain firm.
  • Transfer the cooked potatoes to a cutting board.
  • Cut a deep cross in the top of each potato.
  • Gently squeeze the sides to open the potatoes.

For the Nacho Topping

  • Heat the chilli beans in a small saucepan over medium heat.
  • Stir regularly until the beans are piping hot.
  • Divide the warm chilli beans among the opened potatoes.
  • Sprinkle the crushed corn chips over the beans.
  • Top each potato with shredded Cheddar.
  • Return the potatoes to the air fryer.
  • Air-fry at 200ยฐC for 2 to 3 minutes.
  • Remove the potatoes when the cheese has melted.
  • Top each potato with sour cream.
  • Spoon the salsa over the sour cream.
  • Add the sliced jalapeรฑo and fresh coriander.
  • Season with ground black pepper.
  • Serve immediately.

Notes & Wine Advice

Serving Suggestions

Serve each loaded potato with a crisp green salad, avocado slices or grilled sweetcorn. Place extra salsa, jalapeรฑo and sour cream on the table so everyone can adjust the toppings.

Recipe Notes

The original recipe listed eight potatoes weighing approximately 2.3 kg for four servings, which would provide two very large potatoes per person. This version uses four medium potatoes totalling approximately 1.2 kg. The cooking time has been adjusted to include heating the topping and melting the cheese. Large potatoes may require an additional 5 to 10 minutes.

Dietary Information

The listed diets apply only when the chilli beans, corn chips, salsa and seasonings carry suitable gluten-free and wheat-free labels. Check every packaged ingredient for traces of egg, nuts, gluten and wheat. The recipe contains cowโ€™s milk, lactose and dairy through the Cheddar and sour cream. It is therefore not dairy-free, lactose-free or suitable for a cowโ€™s milk allergy.

Variations

Replace the chilli beans with black beans seasoned with cumin and smoked paprika. Add sweetcorn, diced avocado or spring onions. For a milder version, omit the jalapeรฑo. The baked barbecue bean topping from the original recipe can be used separately, but combining both toppings would make each portion unusually large and increase its sodium and calories considerably.

Storage

Store the potatoes, beans and cold toppings separately in airtight containers in the refrigerator for up to two days. Reheat the potatoes and beans until piping hot, then add fresh sour cream, salsa, jalapeรฑo and coriander immediately before serving.

Wine Advice

A fruity Riesling balances the jalapeรฑo, salty cheese and chilli beans. Sauvignon Blanc provides a drier alternative with enough acidity to cut through the rich toppings.

Nutrition values

Serving: 1 loaded potato | Calories: 550 kcal | Carbohydrates: 75 g | Protein: 20 g | Fat: 19 g | Saturated Fat: 10 g | Sodium: 1050 mg | Sugar: 8 g
————————————————————————————————–

Loaded nacho potatoes combine crisp air-fried potato skins with fluffy centres, warm chilli beans, melted Cheddar and classic nacho toppings. Crushed corn chips add crunch, while sour cream, salsa, jalapeรฑo and coriander provide contrasting flavours and textures. One generously topped potato makes a substantial vegetarian meal.

Loaded nacho potatoes

Russet potatoes work particularly well because their thick skins become crisp while their starchy centres turn light and fluffy. Choose four potatoes of approximately equal size so they cook at the same rate. Potatoes weighing around 300 g each provide a generous but practical main-course portion.

Scrub the skins thoroughly because the recipe serves them with the filling. Drying the potatoes before applying cooking spray helps the skins become crisper. Prick each potato several times so steam can escape during cooking.

Getting the cooking time right

Medium russet potatoes usually need about 40 minutes at 200ยฐC. Size, shape and air-fryer power can alter the time, so check the centres with a sharp knife. The knife should slide through without resistance.

Continue cooking for another 5 to 10 minutes when the centres remain firm. Turning the potatoes halfway through promotes even browning. Avoid overcrowding the basket because poor airflow can produce unevenly cooked skins.

You can shorten the air-fryer time by microwaving the pricked potatoes for approximately eight minutes first. Finish them in the air fryer for about 15 minutes to crisp the skins. Browse the air-fryer collection for more recipes using this cooking method.

Building the nacho topping

Warm the chilli beans separately while the potatoes cook. This ensures that both the beans and potato centres remain hot when you assemble the dish. Check the seasoning before adding extra salt because canned chilli beans, cheese, corn chips and salsa already contain plenty of sodium.

Open each potato by cutting a deep cross in the top and gently squeezing the sides. Divide the beans evenly among the potatoes, then add the crushed corn chips and Cheddar. A short return to the air fryer melts the cheese without softening the chips excessively.

Add sour cream, salsa, jalapeรฑo and coriander after cooking. These fresh toppings balance the warm beans and cheese. This combination turns simple baked potatoes into colourful Mexican stuffed potatoes with a mixture of creamy, spicy and crunchy elements.

Nutrition and portion size

The original recipe specified eight potatoes weighing approximately 2.3 kg for four servings. That would provide two very large potatoes per person before adding either topping. This revised version uses four medium potatoes totalling approximately 1.2 kg.

The estimated nutrition includes one potato, one-quarter of every topping and a small amount of cooking spray. Each serving contains approximately 550 calories, 75 g carbohydrates, 20 g protein and 19 g fat. Brands of chilli beans, salsa, cheese and corn chips can change these values significantly.

Sodium remains relatively high at approximately 1,050 mg per portion. Choose reduced-sodium beans and salsa, omit the salt flakes and use less cheese when you want to lower it. Find other meal ideas in the potato collection.

Checking the dietary claims

The standard dish suits vegetarians, pescatarians and flexitarians. It can also qualify as egg-free, gluten-free, wheat-free and nut-free, but only when every packaged ingredient carries suitable allergen information.

Chilli beans, corn chips, salsa and grated cheese can contain unexpected additives or traces of allergens. The Cheddar and sour cream contain cowโ€™s milk and lactose, so the recipe does not suit dairy-free or lactose-free diets. It also does not suit anyone with a cowโ€™s milk allergy.

Storage and safe reheating

Keep the cooked potatoes, bean mixture and cold toppings in separate containers. Refrigerate them within two hours and consume them within two days. Guidance from the FDA about safe food handling explains how to cool and store prepared food safely.

Reheat the potatoes in the air fryer and warm the beans separately. Add fresh sour cream, salsa and herbs only after reheating. Explore the vegetarian recipe collection for more meat-free meals.

Serving and wine pairing

Serve the potatoes with a green salad, avocado or grilled sweetcorn. A fruity Riesling balances the jalapeรฑo and salty cheese, while Sauvignon Blanc offers a drier alternative. Serve the finished loaded nacho potatoes immediately so the skins and corn chips retain their crunch.


Orange Rhubarb Galette

Air-Fried Rhubarb Galette with golden puff pastry, orange zest and whipped cream on a rustic wooden table.

Orange Rhubarb Galette

A rustic air-fried galette with tender rhubarb, orange zest and almond meal enclosed by crisp, golden puff pastry.
Couverts4 servings
Preparation 15 minutes
Preparation time:20 minutes
Cooling Time 10 minutes
estimated costs pp $1.25
Deel op Facebook Print Recipe

Equipment

  • Air fryer, 5- or 6-quart
  • baking paper
  • Pastry brush
  • Sharp knife
  • medium mixing bowl
  • Rolling Pin
  • Zester

Ingredients

  • 1 sheet frozen puff pastry approximately 250 g, thawed
  • 255 g trimmed rhubarb cut into 5 cm pieces
  • 35 g unsalted butter melted and divided
  • 28 g firmly packed brown sugar
  • 14 g almond meal
  • 1 teaspoon finely grated orange zest
  • 5 g icing sugar
  • 80 ml whipped cream
  • 1 teaspoon thin orange zest strips

Instructions

  • Preheat the air fryer to 175ยฐC for 3 minutes.
  • Cut a sheet of baking paper slightly larger than the finished galette.
  • Place the thawed puff pastry on the baking paper.
  • Roll or trim the pastry into a 24 cm round.
  • Combine the rhubarb, brown sugar, orange zest and 20 g melted butter in a medium mixing bowl.
  • Toss until the rhubarb is evenly coated.
  • Sprinkle the almond meal over the pastry.
  • Leave a 4 cm border around the edge.
  • Arrange the rhubarb mixture over the almond meal.
  • Leave any excess liquid behind in the mixing bowl.
  • Fold the pastry border over the outer edges of the filling.
  • Pleat the pastry as you work around the galette.
  • Brush the pastry border with the remaining melted butter.
  • Use the baking paper to carefully lower the galette into the air-fryer basket.
  • Air-fry at 175ยฐC for 20 minutes.
  • Check that the pastry is golden and fully cooked underneath.
  • Check that the rhubarb is tender.
  • Cook for another 3 to 5 minutes if the pastry remains pale or soft.
  • Carefully remove the galette from the air fryer.
  • Allow it to cool for 10 minutes.
  • Dust the galette with icing sugar.
  • Garnish with thin orange zest strips.
  • Cut the galette into 4 equal portions.
  • Serve each portion with whipped cream.

Notes & Wine Advice

Serving Suggestions

Serve the galette slightly warm with whipped cream, vanilla ice cream or crรจme fraรฎche. Fresh strawberries make a suitable accompaniment during the rhubarb season.

Recipe Notes

The preparation time has been adjusted to 15 minutes because trimming the pastry, preparing the filling and folding the galette will usually take longer than the stated 10 minutes. Air-fryer models vary, so check both the top and underside of the pastry after 20 minutes. Leave excess rhubarb liquid in the bowl to help prevent a soggy base.

Variations

Replace half of the rhubarb with strawberries or raspberries. Ground hazelnuts can replace the almond meal, although this changes the allergen information. Add cinnamon, vanilla or finely chopped crystallised ginger for extra flavour.

Storage

Store leftover galette in an airtight container in the refrigerator for up to two days. Keep the whipped cream separate. Reheat the pastry in the air fryer at 160ยฐC for several minutes until warm and crisp. Do not reheat it with the icing sugar or cream already added.

Wine Advice

A lightly sparkling Moscato dโ€™Asti balances the tart rhubarb and complements the orange zest. An off-dry Riesling is a fresher alternative with enough sweetness for the pastry.

Nutrition values

Serving: 1 quarter galette with whipped cream | Calories: 425 kcal | Carbohydrates: 41 g | Protein: 6 g | Fat: 29 g | Saturated Fat: 13 g | Sodium: 190 mg | Sugar: 13 g
————————————————————————————————–

Air fryer rhubarb galette combines crisp puff pastry with tart rhubarb, sweet brown sugar, fragrant orange zest and a layer of almond meal. The air fryer gives the pastry a golden exterior while the rhubarb softens into a colourful filling. Serve this rustic dessert slightly warm with whipped cream.

Air fryer rhubarb galette

A galette offers the flavour of a fruit tart without requiring a special baking tin or precise pastry work. You simply place the filling in the centre and fold the outer edge loosely around it. The pleated border gives the finished dessert its characteristic handmade appearance.

A sheet of frozen puff pastry provides a convenient base. Let it thaw only until you can unfold and shape it. Pastry that becomes too warm turns sticky and may rise less effectively. Return soft pastry to the refrigerator for ten minutes before continuing.

Preparing fresh rhubarb

Choose firm rhubarb stalks with a fresh colour and no soft or damaged sections. Remove and discard every leaf because rhubarb leaves contain harmful compounds and must never be eaten. Wash the stalks, trim both ends and cut them into even pieces.

Brown sugar softens the sharp flavour of rhubarb without making the filling excessively sweet. Orange zest adds a fresh citrus aroma. Grate only the coloured outer layer of the peel because the white pith underneath can taste bitter.

For more seasonal ideas, browse the fruit recipe collection.

Preventing a soggy base

Rhubarb releases plenty of juice as it cooks. Almond meal absorbs some of this moisture and forms a barrier between the fruit and pastry. Sprinkle it evenly over the centre while leaving a clear border for folding.

Toss the filling shortly before assembling the galette. Sugar immediately begins drawing liquid from the rhubarb, so long resting times produce a wetter mixture. Leave excess liquid behind in the bowl rather than pouring it onto the pastry.

This orange rhubarb tart uses butter on the folded edge to encourage browning. Brush on a thin, even layer because too much butter may run into the basket and make the pastry greasy.

Cooking it evenly

Place the galette on baking paper before assembling it. The paper supports the pastry when you lower it into the basket. Trim away excessive paper and keep enough open space around the edges for proper airflow.

Air-fry the galette at 175ยฐC for approximately 20 minutes. Check the underside as well as the top. Some appliances brown the top quickly while leaving the base pale. Add another three to five minutes when necessary.

The rhubarb should feel tender when tested with a small knife. Allow the baked galette to cool for ten minutes before cutting it. This resting period gives the filling time to settle and helps the pastry retain its shape.

Find more desserts made with circulating hot air in the air-fryer collection or explore the pastry recipes.

Dietary and nutritional considerations

The standard recipe contains wheat, gluten, dairy and almonds. It therefore does not qualify as gluten-free, wheat-free, dairy-free, lactose-free, nut-free or suitable for a cowโ€™s milk allergy. Commercial puff pastry may also contain egg or soya, even when those ingredients do not appear separately in the recipe.

Choose verified egg-free pastry and check every packaged ingredient before classifying the dessert as egg-free. The dish suits vegetarians, pescatarians and flexitarians. However, people with allergies should always inspect the pastry, almond meal and whipped cream labels.

The estimated nutrition includes the entire pastry sheet, both quantities of butter, almond meal, sugar and whipped cream. One-quarter provides approximately 425 calories. The brand and weight of the pastry can change the final result significantly.

Storage and serving

Refrigerate leftovers within two hours and consume them within two days. Store the cream separately. Reheat the pastry briefly at 160ยฐC to restore some crispness. The FDA safe food handling guidance offers additional storage advice.

Serve the galette with whipped cream, vanilla ice cream or crรจme fraรฎche. A lightly sparkling Moscato dโ€™Asti complements the tart fruit and buttery pastry. Enjoy the finished air fryer rhubarb galette during spring, when fresh rhubarb reaches its best flavour and texture.


Creamy Chicken Rice Bake

Creamy chicken rice bake with golden chicken thighs and tender seasoned rice

Creamy Chicken Rice Bake

A comforting American casserole with tender chicken, creamy seasoned rice and a lightly browned finish, ideal for an easy family dinner.
Couverts4 servings
Preparation 15 minutes
Preparation time:1 hour 30 minutes
Resting Time 10 minutes
Total time 1 hour 55 minutes
estimated costs pp $2.50
Deel op Facebook Print Recipe

Equipment

  • Aluminium Foil
  • Baking Dish 9 ร— 13-inch
  • Large mixing bowl
  • Measuring cups
  • Meat thermometer
  • Whisk

Ingredients

  • 900 g bone-in skin-on chicken thighs
  • 200 g uncooked long-grain white rice
  • 1 can condensed cream of chicken soup 295 g
  • 1 packet Italian dressing seasoning mix approximately 20 g
  • 475 ml boiling water
  • ยฝ teaspoon ground black pepper
  • ยผ teaspoon fine sea salt

Instructions

  • Preheat the oven to 180ยฐC.
  • Lightly grease a 9 ร— 13-inch baking dish.
  • Rinse the rice briefly under cold water.
  • Drain the rice thoroughly.
  • Spread the rice evenly over the bottom of the baking dish.
  • Whisk together the condensed soup, Italian dressing mix and boiling water in a large mixing bowl.
  • Pour the soup mixture evenly over the rice.
  • Season the chicken thighs with the black pepper and sea salt.
  • Arrange the chicken over the rice with the skin facing upwards.
  • Cover the baking dish tightly with aluminium foil.
  • Bake for 60 minutes.
  • Remove the aluminium foil carefully.
  • Bake uncovered for another 20 to 30 minutes.
  • Check that the rice is tender and has absorbed the liquid.
  • Check that the thickest part of each chicken thigh has reached at least 74ยฐC without touching the bone.
  • Bake for a little longer if the rice remains firm or the chicken has not reached a safe temperature.
  • Remove the casserole from the oven.
  • Allow it to rest for 10 minutes.
  • Serve hot.

Notes & Wine Advice

Serving Suggestions

Serve the casserole with steamed broccoli, green beans, roasted carrots or a crisp green salad. Fresh parsley can add colour and freshness without competing with the creamy rice.

Recipe Notes

The original time of 1 hour and 30 minutes appears to represent the cooking time rather than preparation time. This version therefore uses 15 minutes of preparation, up to 1 hour and 30 minutes of cooking and 10 minutes of resting. The chicken must reach at least 74ยฐC, and the rice should be completely tender before serving. The seasoning mix and condensed soup already contain considerable salt, so only a small amount of extra salt is included.

Variations

Replace the cream of chicken soup with cream of mushroom soup for a more earthy flavour. Add sliced mushrooms, peas or finely diced carrots to the rice mixture. Boneless chicken thighs can also be used, but they may cook faster and should still reach 74ยฐC internally.

Storage

Transfer leftovers to an airtight container within two hours and refrigerate them for up to two days. Reheat only once, until the chicken and rice are piping hot throughout. Add a small splash of water or chicken broth before reheating if the rice has become dry.

Wine Advice

A crisp Chardonnay balances the creamy sauce and savoury chicken. Pinot Grigio offers a lighter pairing with more refreshing acidity.

Nutrition values

Serving: 1 large chicken thigh with rice | Calories: 620 kcal | Carbohydrates: 50 g | Protein: 43 g | Fat: 27 g | Saturated Fat: 8 g | Sodium: 1450 mg | Sugar: 3 g
————————————————————————————————–

Creamy chicken rice bake combines seasoned chicken thighs with tender rice in a rich, savoury sauce. Condensed chicken soup and Italian herbs provide plenty of flavour, while the oven handles most of the work. This comforting casserole suits family dinners, relaxed weekends and colder evenings when you want a substantial meal.

Creamy chicken rice bake

Bone-in chicken thighs work particularly well in this casserole. They remain juicy during the relatively long cooking time, while the skin develops colour after you remove the foil. Placing the chicken on top of the rice also allows its cooking juices to flavour the grains underneath.

Choose chicken thighs of approximately equal size so they finish cooking together. Pat them dry before seasoning and arrange them with the skin facing upwards. Leave a little room between the pieces when possible.

Preparing tender rice

Long-grain white rice provides the most reliable texture. Rinse it briefly to remove excess surface starch, then drain it thoroughly. Spread the rice evenly across the baking dish so every section receives the same amount of liquid.

The recipe uses approximately 2.4 parts liquid to 1 part uncooked rice by volume. Condensed soup thickens the liquid, so the rice needs more moisture than it would when cooked in plain water. Whisk the boiling water, soup and seasoning mix thoroughly before pouring the mixture into the dish.

Brown rice requires considerably more liquid and cooking time, so it does not make a direct substitute here. Visit the rice recipe collection for dishes specifically designed around other varieties.

Checking the cooking time

The complete casserole needs approximately 1 hour and 20 to 30 minutes in the oven. Keep the dish tightly covered during the first hour. The trapped steam cooks the rice and prevents the surface from drying before the chicken has cooked through.

Remove the foil carefully because hot steam will escape. Continue baking uncovered until the rice feels tender and the chicken reaches at least 74ยฐC internally. Insert the thermometer into the thickest part of each thigh without touching the bone.

Ovens, baking dishes and chicken sizes vary, so use the temperature and texture as your final guide. If the chicken finishes before the rice, transfer it to a clean plate and return the covered rice to the oven with a small splash of hot water.

Balancing flavour and salt

Condensed soup and packaged Italian dressing mix both contain substantial amounts of sodium. Taste the finished rice before adding any extra salt at the table. A reduced-sodium soup or homemade seasoning mixture can lower the sodium content considerably.

Black pepper adds warmth without competing with the herbs. Fresh parsley, thyme or chopped chives make useful garnishes. Garlic powder, paprika or dried oregano can strengthen the seasoning when you prefer a bolder casserole.

Serving a complete dinner

This creamy chicken casserole already supplies protein and carbohydrates, so a vegetable side completes the meal. Serve it with steamed broccoli, green beans, roasted carrots or a crisp salad. Browse the vegetable collection or choose something fresh from the salad recipes.

Allow the casserole to rest for ten minutes before serving. This short resting period lets the rice absorb remaining moisture and makes the portions easier to divide.

Food safety and leftovers

Keep raw chicken separate from cooked ingredients, serving plates and clean utensils. Wash your hands, cutting boards and equipment thoroughly after handling it. The FDA safe food handling guidance provides more information about preparing poultry and storing cooked food.

Transfer leftovers to shallow airtight containers within two hours. Refrigerate them for up to two days and reheat each portion only once. Heat the chicken and rice until piping hot throughout, adding a spoonful of water or broth if the rice has become dry.

Wine pairing

A lightly oaked Chardonnay complements the creamy sauce and roasted chicken. Pinot Grigio provides a fresher and lighter alternative. Serve the finished creamy chicken rice bake warm, with vegetables and your chosen wine for a complete comfort-food dinner.


Peanut Curry Chicken Tenders


Peanut curry chicken tenders in a creamy coconut sauce

Peanut Curry Chicken Tenders

Golden chicken tenders served in a creamy peanut and coconut curry sauce with garlic, ginger, lime and a gentle chilli heat.
Couverts4 servings
Preparation 10 minutes
Preparation time:20 minutes
estimated costs pp $4.35
Deel op Facebook Print Recipe

Equipment

Ingredients

  • 680 g chicken tenders
  • ยฝ teaspoon fine sea salt
  • ยผ teaspoon ground black pepper
  • 1 teaspoon curry powder
  • ยฝ teaspoon ground ginger
  • 2 tablespoons olive oil
  • 3 cloves garlic minced
  • 180 ml low-sodium chicken broth
  • 128 g creamy peanut butter
  • 1 tablespoon reduced-sodium gluten-free tamari
  • 1 tablespoon freshly squeezed lime juice
  • 1 teaspoon honey
  • ยฝ teaspoon crushed red pepper flakes optional
  • 60 ml coconut milk
  • 2 tablespoons chopped fresh coriander optional

Instructions

  • Pat the chicken tenders dry with paper towels.
  • Season the chicken with the salt, black pepper, curry powder and ground ginger.
  • Heat the olive oil in a large skillet over medium-high heat.
  • Arrange the chicken tenders in a single layer.
  • Sear them for 4 to 5 minutes.
  • Turn the chicken tenders over with kitchen tongs.
  • Cook for another 4 to 5 minutes.
  • Check that the thickest pieces have reached an internal temperature of 74ยฐC.
  • Transfer the chicken to a clean plate.
  • Reduce the heat to medium.
  • Add the minced garlic to the skillet.
  • Cook for 30 seconds while stirring.
  • Pour in the chicken broth.
  • Whisk in the peanut butter until smooth.
  • Add the tamari, lime juice, honey and coconut milk.
  • Whisk until the sauce is evenly combined.
  • Bring the sauce to a gentle simmer.
  • Cook for 3 to 4 minutes or until slightly thickened.
  • Add a splash of chicken broth if the sauce becomes too thick.
  • Return the cooked chicken tenders and their resting juices to the skillet.
  • Turn the chicken until evenly coated with the sauce.
  • Simmer for 2 to 3 minutes.
  • Sprinkle with red pepper flakes when desired.
  • Garnish with fresh coriander.
  • Serve immediately.

Notes & Wine Advice

Serving Suggestions

Serve the chicken tenders over jasmine rice, brown rice or cauliflower rice. Steamed broccoli, green beans, roasted bell peppers or warm flatbread also pair well with the creamy sauce.

Recipe Notes

The nutritional values have been recalculated from the complete ingredient list and divided into four portions. They include all the olive oil, peanut butter and coconut milk. Sodium varies according to the chicken broth, peanut butter and tamari selected. Use low-sodium products when possible and check that the chicken reaches 74ยฐC internally.

Variations

Replace the chicken tenders with pieces of chicken breast or boneless chicken thigh. Add more red pepper flakes for a hotter sauce or omit them for a mild version. Almond butter can replace peanut butter, although this changes the flavour and allergen information.

Storage

Refrigerate the chicken and sauce in an airtight container for up to three days. Reheat gently in a covered skillet until piping hot, adding a small splash of broth or water to loosen the sauce. Freezing is possible for up to two months, although the sauce may require whisking after thawing.

Wine Advice

An off-dry Riesling balances the curry spices, lime and rich peanut sauce. An aromatic Gewรผrztraminer is another suitable option, particularly when the red pepper flakes are included.

Nutrition values

Serving: 1 portion | Calories: 495 kcal | Carbohydrates: 10 g | Protein: 46 g | Fat: 31 g | Saturated Fat: 7 g | Sodium: 690 mg | Sugar: 4 g
————————————————————————————————–

Looking for more inspiration? Explore our complete chicken recipes guide.


Peanut curry chicken combines golden chicken tenders with a creamy sauce of peanut butter, coconut milk, curry spices and lime. Garlic, ginger and tamari add savoury depth, while a little honey balances the salty, spicy and acidic flavours. You can prepare the complete dish in approximately 30 minutes.

Peanut curry chicken

Chicken tenders have a narrow and relatively even shape, so they cook more quickly than whole chicken breasts. Pat the chicken dry before seasoning to help the surface brown properly. Curry powder and ground ginger create a fragrant coating without requiring a long marinating time.

Sear the chicken for approximately four to five minutes on each side. Thickness and skillet temperature can change the required cooking time. Use a meat thermometer and check that the thickest tender reaches 74ยฐC before removing the chicken from the skillet.

Building the creamy sauce

Peanut butter gives the sauce richness, body and a distinctly nutty flavour. Coconut milk softens the curry spices, while chicken broth prevents the mixture from becoming too heavy. Tamari supplies salt and umami, so taste the sauce before adding any extra seasoning.

Fresh lime juice brightens the sauce and balances the fat from the peanut butter and coconut milk. Honey rounds out the acidity without making the meal noticeably sweet. Add crushed red pepper flakes for extra heat or leave them out when preparing a milder version.

Getting the texture right

Gradually whisk the peanut butter into the warm broth. This method creates a smooth sauce and prevents thick lumps. Add the coconut milk, tamari, lime juice and honey, then keep the heat moderate while the mixture simmers.

The sauce thickens quickly as moisture evaporates. Add chicken broth one tablespoon at a time if it becomes too firm. A properly finished sauce should coat the chicken but remain loose enough to spoon over rice or vegetables.

A practical skillet dinner

This creamy curry chicken requires about ten minutes of preparation and twenty minutes of cooking. That estimate covers seasoning and searing the chicken, making the sauce and simmering everything together. It does not assume that you complete every preparation task during cooking.

For more convenient one-pan meals, browse the stove-top collection. You can also discover more poultry dishes in the chicken recipe collection.

Serving ideas

Jasmine rice makes a natural accompaniment because it absorbs the sauce without competing with its flavours. Brown rice offers a firmer texture, while cauliflower rice keeps the complete meal lower in carbohydrates. Steamed broccoli, green beans, roasted peppers and spinach also pair well with the sauce.

Add fresh coriander and lime wedges immediately before serving for colour and freshness. Warm flatbread works well for scooping up the sauce. Choose gluten-free bread when serving the meal to someone who avoids wheat or gluten.

Food safety and storage

Place cooked chicken on a clean plate rather than returning it to the plate that held the raw meat. Wash knives, boards and utensils thoroughly after they touch uncooked poultry. Read the FDA safe food handling information for additional kitchen safety guidance.

Transfer leftovers to an airtight container within two hours and refrigerate them for up to three days. Reheat the chicken and sauce until piping hot throughout. The sauce thickens during refrigeration, so add a little broth or water while reheating it.

Wine pairing

An off-dry Riesling offers enough acidity to refresh the palate and enough sweetness to soften the curry and chilli. Gewรผrztraminer provides a more aromatic alternative and works especially well with fresh coriander.

Serve the finished peanut curry chicken immediately so the tenders remain juicy and the sauce stays smooth, warm and easy to spoon over your chosen accompaniment.


Roasted Eggplant Bean Ragout

Eggplant bean ragout with sweet potatoes and cannellini beans

Roasted Eggplant Bean Ragout

A warming Mediterranean-style ragout filled with roasted eggplant, tender sweet potatoes, cannellini beans, tomatoes, ginger and aromatic spices.
Couverts4 servings
Preparation 15 minutes
Preparation time:40 minutes
estimated costs pp $1.60
Deel op Facebook Print Recipe

Equipment

  • Large rimmed baking sheet
  • large saucepan
  • Measuring spoons
  • Knife
  • vegetable peeler
  • Wooden spoon

Ingredients

  • 1 medium eggplant approximately 450 g
  • 600 g sweet potatoes peeled and cut into 2 cm cubes
  • 1 can diced tomatoes with liquid 425 g
  • 1 can cannellini beans drained and rinsed, approximately 240 g
  • 240 ml water
  • 2 tablespoons extra-virgin olive oil divided
  • 1 shallot finely chopped
  • 2 cloves garlic grated
  • 2 tablespoons grated fresh ginger
  • 1ยฝ teaspoons ground cumin
  • 1ยฝ teaspoons dried basil
  • ยผ teaspoon cayenne pepper
  • 1 teaspoon coarse sea salt
  • ยผ teaspoon ground black pepper

Instructions

  • Preheat the oven to 200ยฐC.
  • Cut the eggplant lengthwise into 8 wedges.
  • Brush the eggplant with 1 tablespoon of the olive oil.
  • Sprinkle half of the sea salt over the eggplant.
  • Arrange the wedges on a rimmed baking sheet.
  • Roast for 20 minutes or until tender and lightly browned.
  • Heat the remaining olive oil in a large saucepan over medium heat.
  • Add the sweet potatoes and chopped shallot.
  • Cook for 5 minutes while stirring regularly.
  • Add the garlic and ginger.
  • Cook for 1 minute.
  • Stir in the cumin, basil, cayenne, black pepper and remaining sea salt.
  • Cut the roasted eggplant into bite-size pieces.
  • Add the eggplant to the saucepan.
  • Pour in the diced tomatoes and their liquid.
  • Add the water.
  • Stir until combined.
  • Bring the ragout to a boil.
  • Reduce the heat to low.
  • Cover the saucepan.
  • Simmer for 20 minutes.
  • Stir in the drained cannellini beans.
  • Cover and simmer for another 10 minutes.
  • Check that the sweet potatoes are fork-tender.
  • Add a small amount of water if the ragout becomes too thick.
  • Taste and adjust the seasoning when necessary.
  • Divide the ragout among 4 bowls.
  • Serve hot.

Notes & Wine Advice

Serving Suggestions

Serve the ragout on its own or accompany it with quinoa, brown rice or crusty bread. Fresh parsley, basil or a squeeze of lemon can be added immediately before serving.

Recipe Notes

The nutritional values have been recalculated using approximately 600 g sweet potatoes, 450 g eggplant, 240 g drained cannellini beans and the complete quantity of olive oil. The final sodium level depends heavily on the canned tomatoes, beans and salt used. Rinsing the beans thoroughly helps reduce their sodium content.

Variations

Add chopped courgette, mushrooms or red bell pepper for more vegetables. Replace the cannellini beans with chickpeas or butter beans. For a smokier flavour, replace the cayenne with smoked paprika. Vegetable broth can replace the water, although this will normally increase the sodium level.

Storage

Allow the ragout to cool before transferring it to an airtight container. Refrigerate it for up to three days or freeze individual portions for up to three months. Reheat it in a saucepan until piping hot, adding a splash of water if it has thickened.

Wine Advice

A light Pinot Noir complements the roasted eggplant, tomato and earthy beans without overpowering the spices. A dry Grenache-based rosรฉ is a suitable lighter alternative.

Nutrition values

Calories: 320 kcal | Carbohydrates: 56 g | Protein: 10 g | Fat: 7 g | Saturated Fat: 1 g | Sodium: 760 mg | Sugar: 14 g
————————————————————————————————–

Eggplant bean ragout combines roasted eggplant, sweet potatoes, cannellini beans and tomatoes in a warming Mediterranean-style meal. Ginger, cumin, basil and cayenne provide a fragrant balance of earthy, sweet and mildly spicy flavours. The result is a substantial plant-based dinner that can be served on its own or accompanied by grains or bread.

Eggplant bean ragout

Roasting the eggplant before adding it to the saucepan creates deeper flavour and a better texture. Eggplant naturally absorbs oil quickly, so brushing the cut surfaces is preferable to pouring oil directly over them. The wedges become tender and lightly browned without turning unnecessarily greasy.

Cut the roasted eggplant into bite-size pieces only after it has softened. This helps the pieces retain their shape during simmering. Adding raw cubes directly to the saucepan would also work, but the finished ragout would have less roasted flavour.

Building the base

Sweet potatoes provide body, natural sweetness and a soft texture that contrasts with the cannellini beans. Cutting them into evenly sized cubes helps them cook at the same rate. Pieces measuring approximately 2 cm should become tender during the stated simmering time without completely breaking apart.

Shallot, garlic and fresh ginger form the aromatic foundation. Cumin adds warmth, dried basil complements the tomatoes and cayenne provides gentle heat. The cayenne can be reduced or omitted when preparing the dish for children or anyone sensitive to spicy food.

Adding beans and tomatoes

Cannellini beans contribute protein, fibre and a creamy texture. Because canned beans are already cooked, they are added during the final ten minutes. Adding them earlier may cause them to soften excessively or break apart. Drain and rinse the beans thoroughly before use to remove excess canning liquid and reduce some of their sodium.

Diced tomatoes provide both acidity and cooking liquid. Their juices combine with the water, spices and softened vegetables to produce the ragoutโ€™s sauce. If the mixture becomes too thick before the sweet potatoes are tender, add water in small amounts. More dishes using legumes can be found in the bean recipe collection.

Serving a complete meal

This sweet potato stew is substantial enough to serve without additional side dishes. Quinoa or brown rice can be added when a larger meal is wanted. Crusty bread is useful for soaking up the tomato sauce, although a suitable bread must be chosen when keeping the meal gluten-free.

Fresh parsley, coriander or basil provides colour and freshness. A squeeze of lemon can brighten the earthy flavours, while toasted pumpkin seeds add crunch. Browse the stew collection or the vegetable recipes for dishes that can be served alongside it.

Nutrition and dietary considerations

The nutritional calculation is based on approximately 600 g sweet potatoes, one 450 g eggplant, 240 g drained cannellini beans and two tablespoons of olive oil. Each portion supplies approximately 320 calories, 56 g carbohydrates, 10 g protein and 7 g fat.

The sodium content can vary considerably. Canned tomatoes and beans with added salt may substantially increase it. Choosing no-salt-added tomatoes, rinsing the beans and reducing the sea salt are practical ways to lower the final amount.

Storage and reheating

Cool leftovers promptly and transfer them to covered containers. General advice about safely handling and storing prepared food is available in the FDA safe food handling guidance. Refrigerate the ragout for up to three days or freeze individual portions for up to three months.

Reheat refrigerated portions in a saucepan over medium heat until piping hot. Add a splash of water if the sauce has thickened. Frozen portions should preferably be thawed overnight in the refrigerator before reheating.

A light Pinot Noir works well with the roasted eggplant and tomatoes without overwhelming the spices. Serve the finished eggplant bean ragout hot for a comforting autumn or winter dinner with plenty of colour, texture and vegetable flavour.


Citrus-Infused Steak Domani Marinade

Spicy citrus steak marinade with lemon, paprika and serrano chilli

Citrus-Infused Steak Domani Marinade

A bold steak marinade combining fresh lemon juice, tamari, three types of paprika and Parmesan. It gives four steaks a savoury, citrusy flavour with gentle warmth from serrano chilli.
Couverts4 servings
Preparation 10 minutes
Marinating Time 4 hours
estimated costs pp $0.60
Deel op Facebook Print Recipe

Equipment

  • Measuring cups
  • Measuring spoons
  • medium mixing bowl
  • Resealable food bag
  • Whisk

Ingredients

  • 120 ml fresh lemon juice
  • 120 ml gluten-free tamari
  • 2 tablespoons sweet paprika
  • 1 tablespoon Hungarian sweet paprika
  • 1 tablespoon finely grated Parmesan cheese
  • 1 tablespoon serrano chilli powder

Instructions

  • Pour the lemon juice and tamari into a medium mixing bowl.
  • Add the sweet paprika, Hungarian paprika, Parmesan and serrano chilli powder.
  • Whisk until thoroughly combined.
  • Place 4 steaks in a large resealable food bag.
  • Pour the marinade over the steaks.
  • Press out the excess air and seal the bag.
  • Turn the bag several times to coat the steaks evenly.
  • Place the sealed bag in the refrigerator.
  • Marinate for 2 to 4 hours.
  • Turn the bag once or twice during the marinating time.
  • Remove the steaks from the refrigerator approximately 20 minutes before cooking.
  • Take the steaks out of the marinade.
  • Discard the used marinade.
  • Pat the steaks lightly with paper towels to remove excess moisture.
  • Grill or pan-sear the steaks to the preferred doneness.
  • Allow the cooked steaks to rest before serving.

Notes & Wine Advice

Serving Suggestions

Use this marinade with beef steaks before grilling or pan-searing. Serve the cooked steak with roasted potatoes, grilled vegetables, salad or corn on the cob.

Recipe Notes

The lemon juice is strongly acidic, so marinating for 2 to 4 hours is sufficient. Leaving the steaks overnight may make their exterior soft or slightly mushy. Nutrition values are calculated from the prepared marinade, although some marinade will be discarded.

Variations

Reduce the serrano chilli powder for a milder marinade or replace it with smoked paprika. Lime juice can replace the lemon juice. Regular soy sauce may be used when gluten is not a concern.

Storage

Unused marinade that has not touched raw meat can be refrigerated in a sealed container for up to three days. Always discard marinade that has been in contact with raw steak unless it is boiled thoroughly before being used as a sauce.

Wine Advice

A fruity Pinot Noir complements the citrus, paprika and grilled beef. A medium-bodied Tempranillo is another good choice for the chilli and smoky flavours.

Nutrition values

Calories: 50 kcal | Carbohydrates: 5 g | Protein: 4 g | Fat: 3 g | Saturated Fat: 1 g | Sodium: 1800 mg | Sugar: 2 g
————————————————————————————————–

Spicy citrus steak marinade combines lemon juice, tamari, sweet paprika, Hungarian paprika, Parmesan and serrano chilli. The mixture gives beef a bold savoury flavour with fresh acidity, gentle heat and a subtle richness from the cheese.

How the Marinade Flavours Beef

A successful marinade balances acid, salt and seasoning. Lemon juice provides acidity and a fresh citrus flavour. Tamari supplies salt and umami, while Parmesan adds another savoury layer. The three paprika ingredients create warmth, colour and mild heat.

The marinade does not contain added oil. This allows the seasonings to cling directly to the surface of the steaks. If the meat is especially lean or will be cooked on a dry grill, a tablespoon of olive oil can be added.

Using Lemon Juice Carefully

Lemon juice begins changing the texture of the meat as soon as the steaks enter the marinade. A period of 2 to 4 hours is enough to flavour most steaks without making their exterior excessively soft.

Although the original recipe suggested overnight marinating, that is not ideal for this highly acidic mixture. Leaving beef in lemon juice too long may produce a slightly mushy surface. Thicker cuts can use the full four hours, while thin steaks may need only two hours.

Mixing Spicy Citrus Steak Marinade

Whisk the lemon juice and tamari together before adding the dry seasonings. Finely grated Parmesan distributes more evenly than coarse shreds and is less likely to form large clumps. Continue whisking until the paprika is evenly suspended.

Place the steaks in a resealable food bag and add the marinade. Press out as much air as possible before sealing. This keeps the liquid close to the meat and reduces the amount needed for even coverage.

Turn the bag once or twice during refrigeration. This redistributes the spices because paprika and Parmesan may gradually settle. Keep the bag on a plate or in a shallow dish in case it leaks.

Safe Marinating and Cooking

Always marinate beef in the refrigerator rather than on the kitchen counter. Remove the steaks shortly before cooking and discard all used marinade. Do not serve it as a sauce unless it has been brought to a thorough boil.

Patting the steaks lightly with paper towels removes excess surface moisture and helps them brown. Cook them on a grill or in a hot frying pan, then allow them to rest before slicing. Further advice is available on the FDA page about safe food handling.

Managing Heat and Salt

Serrano chilli powder can vary considerably in strength. Start with less when cooking for people who prefer mild food. Smoked paprika is a useful replacement when you want a smoky flavour without as much heat.

Tamari contains a substantial amount of sodium, so the steaks should not need additional salt. Reduced-sodium tamari can be used, although the finished flavour will be slightly less intense. Nutrition values describe the divided prepared marinade, but the amount actually consumed is lower because much of it is discarded.

Serving Suggestions

Serve the cooked steaks with grilled vegetables, roasted potatoes, salad or corn on the cob. Browse the side-dish recipes for additional accompaniments.

More seasoning ideas can be found among the marinade recipes. For outdoor meals, combine the steaks with recipes from the barbecue collection.

Useful Variations

Lime juice can replace the lemon juice for a sharper flavour. Regular soy sauce may replace tamari when gluten is not a concern. Nutritional yeast can be used instead of Parmesan for a dairy-free version.

The marinade also works with firm vegetables, portobello mushrooms or meat substitutes. Those ingredients usually need less marinating time than steak. Thirty minutes to one hour is generally sufficient.

Storage

Freshly prepared marinade that has not contacted raw meat can be refrigerated in a sealed container for up to three days. Stir it thoroughly before use because the spices will settle.

Never return used marinade to the refrigerator for later use without cooking it first. Making a separate portion for serving is safer and produces a fresher sauce. This spicy citrus steak marinade provides four steaks with a concentrated blend of citrus, paprika and savoury flavour.


Spicy Potato Nests

Spicy potato nests served with homemade tomato ketchup

Spicy Potato Nests

Crispy spiralized potato nests seasoned with hot smoked paprika and garlic, served with a tangy homemade spicy tomato ketchup inspired by Spanish patatas bravas.
Couverts4 servings
Preparation 15 minutes
Preparation time:15 minutes
estimated costs pp $0.85
Deel op Facebook Print Recipe

Equipment

Ingredients

For the Potato Nests:

  • 2 large russet potatoes approximately 340 g each
  • 4 tablespoons vegetable oil
  • 2 tablespoons hot smoked paprika
  • 1 teaspoon garlic powder
  • Kosher salt to taste
  • Freshly ground black pepper to taste

For the Spicy Tomato Ketchup:

  • 240 g canned crushed tomatoes
  • 4 tablespoons apple cider vinegar
  • 2 tablespoons dark brown sugar
  • 2 tablespoons Worcestershire sauce
  • 2 teaspoons mild hot sauce

Instructions

For the Potato Nests:

  • Spiralize the potatoes into long, thin strands.
  • Place the potato strands in a large colander.
  • Rinse them under cold running water until the water runs clear.
  • Spread the potatoes over a double layer of paper towels.
  • Pat the strands completely dry.
  • Place the potatoes in a large mixing bowl.
  • Add the vegetable oil, smoked paprika and garlic powder.
  • Season with kosher salt and freshly ground black pepper.
  • Toss until the potato strands are evenly coated.
  • Divide the potatoes into 4 equal portions.
  • Loosely shape each portion into a nest.
  • Arrange the nests in the air fryer basket without overcrowding.
  • Air-fry at 200ยฐC for approximately 15 minutes.
  • Carefully turn the nests halfway through the cooking time.
  • Cook until the potato strands are browned and crisp.

For the Spicy Tomato Ketchup:

  • Combine the crushed tomatoes, apple cider vinegar, brown sugar, Worcestershire sauce and hot sauce in a blender.
  • Blend until completely smooth.
  • Pour the mixture into a small saucepan.
  • Bring it to a gentle simmer over medium heat.
  • Cook for 3 to 5 minutes or until reduced by approximately half.
  • Transfer the ketchup to a serving bowl.
  • Allow it to cool slightly.
  • Serve each potato nest hot with the spicy tomato ketchup.

Nutrition values

Serving: 1 potato nest with ketchup | Calories: 300 kcal | Carbohydrates: 43 g | Protein: 4 g | Fat: 14 g | Saturated Fat: 1 g | Sodium: 460 mg | Sugar: 9 g
————————————————————————————————–

Spicy potato nests transform ordinary russet potatoes into a crisp and distinctive air-fryer dish. The spiralized strands are seasoned with hot smoked paprika and garlic powder, then served with tangy homemade tomato ketchup. The flavours are inspired by Spanish patatas bravas, but the spiral shape gives the potatoes extra crunch and an attractive presentation.

Preparing the Potato Spirals

A spiralizer creates long, thin strands that become crisp around the edges while cooking. If you do not have a spiralizer, cut the potatoes into matchsticks approximately 3 mm thick. Keep the strands as even as possible so that they finish cooking at roughly the same time.

Place the prepared potatoes in a colander and rinse them under cold running water until the water runs clear. This removes excess surface starch, helping prevent the strands from sticking together.

Why Thorough Drying Matters

Spread the rinsed potatoes over a double layer of paper towels and pat them completely dry. Moisture creates steam inside the air fryer, resulting in soft potatoes instead of crisp strands. Taking a few extra minutes for this step makes a noticeable difference.

Toss the dry potatoes with vegetable oil, smoked paprika and garlic powder. Season with salt and freshly ground black pepper. The oil should lightly coat every strand without collecting at the bottom of the bowl.

Spicy Potato Nests in the Air Fryer

Divide the potato strands into four equal portions and loosely shape them into nests. Do not press them together too firmly because the circulating hot air needs to reach the spaces between the strands.

Arrange the nests separately in the air fryer basket and cook them in batches when necessary. Carefully turn them halfway through cooking. They are ready when the outside is golden brown and crisp. More recipes using this cooking method are available in the air-fryer collection.

Making the Tomato Ketchup

The homemade ketchup combines crushed tomatoes, apple cider vinegar, dark brown sugar, Worcestershire sauce and mild hot sauce. Blending creates a smooth consistency, while simmering reduces the sauce and concentrates its flavour.

Taste the ketchup after it has thickened. Add extra hot sauce for more heat or a little brown sugar when the tomatoes are particularly acidic. Use anchovy-free Worcestershire sauce when preparing a vegetarian or vegan version. Find more accompaniments in the sauce recipe collection.

Serving Suggestions

Serve these spiralized paprika potatoes immediately with the tomato ketchup in a separate bowl. Their individual shape makes them suitable for tapas platters, game days, parties and casual family meals.

They pair well with burgers, grilled vegetables, sandwiches or other small appetisers. Make smaller nests when serving them as finger food. Additional ideas for a shared meal can be found among the tapas recipes.

Variations and Adjustments

Sweet smoked paprika can replace the hot variety for a milder result. Add cayenne pepper or chilli flakes for extra heat. Dried oregano provides a more herbal flavour, while a little grated Parmesan creates a savoury cheese topping.

The same seasoning can be used with ordinary potato wedges or French fries. Cooking time will vary according to their thickness, so check them regularly and shake the basket several times.

Storage and Food Safety

The nests are best served immediately because the thin potato strands soften as they cool. Store leftovers separately from the ketchup in covered containers in the refrigerator for up to two days. Reheat the potatoes in the air fryer at 190ยฐC for three to five minutes.

Use clean utensils when preparing the ketchup and refrigerate leftovers promptly. Consult the FDA safe food handling guidance for further information about preparing, cooling and storing food.

With their crisp strands, smoky seasoning and tangy dipping sauce, spicy potato nests provide a playful and flavourful alternative to conventional fries.


Spiced Cocktail Nuts

Spiced cocktail nuts with rosemary and thyme in a serving bowl

Spiced Cocktail Nuts

A crunchy air-fried mixture of cashews, pecans, walnuts and almonds coated with rosemary, thyme, brown sugar and warming spices. Ready in only 11 minutes.
Couverts4 servings
Preparation 5 minutes
Preparation time:6 minutes
estimated costs pp $1.75
Deel op Facebook Print Recipe

Equipment

  • Large mixing bowl
  • Measuring spoons
  • serving bowl
  • spatula

Ingredients

  • 70 g raw cashews
  • 50 g raw pecan halves
  • 50 g raw walnut halves
  • 70 g raw whole almonds
  • 2 tablespoons olive oil
  • 1 tablespoon light brown sugar
  • 1 teaspoon fresh rosemary leaves finely chopped
  • 1 teaspoon fresh thyme leaves finely chopped
  • 1 teaspoon kosher salt
  • 1/2 teaspoon ground coriander
  • 1/4 teaspoon onion powder
  • 1/4 teaspoon freshly ground black pepper
  • 1/8 teaspoon garlic powder

Instructions

  • Place the cashews, pecans, walnuts and almonds in a large mixing bowl.
  • Add the olive oil, brown sugar, rosemary, thyme, kosher salt, ground coriander, onion powder, black pepper and garlic powder.
  • Toss thoroughly until all the nuts are evenly coated.
  • Transfer the seasoned nuts to the air fryer basket.
  • Spread them into an even layer.
  • Air-fry at 175ยฐC for approximately 6 minutes.
  • Shake the basket halfway through the cooking time.
  • Check the nuts frequently during the final 2 minutes to prevent burning.
  • Remove them when golden brown and fragrant.
  • Transfer the nuts to a serving bowl.
  • Allow them to cool for several minutes.
  • Serve warm.

Notes & Wine Advice

Serving Suggestions

Serve the cocktail nuts warm with chilled drinks, cheese, olives or other finger foods. Place them in several small bowls so guests can easily share them during a party or movie night.

Recipe Notes

Nuts can brown quickly in an air fryer. Check them regularly during the final minutes and remove them as soon as they become fragrant and golden. They will continue to become crisp while cooling.

Variations

Use any combination of raw nuts totalling approximately 240 g. Add cayenne pepper for heat, smoked paprika for a deeper flavour or maple syrup for a sweeter coating. When using salted, pre-roasted mixed nuts, reduce the salt by half and begin checking them after 4 minutes.

Storage

Allow the nuts to cool completely before transferring them to an airtight container. Store them in a cool, dry place at room temperature for up to one week.

Wine Advice

A dry sparkling wine such as Champagne balances the richness of the nuts and complements the aromatic herbs. A crisp Sauvignon Blanc is a suitable still-wine alternative.

Nutrition values

Serving: 1 1/2 cup | Calories: 420 kcal | Carbohydrates: 15 g | Protein: 10 g | Fat: 38 g | Saturated Fat: 4 g | Sodium: 490 mg | Sugar: 4 g
————————————————————————————————–

Spiced cocktail nuts are a warm and crunchy mixture of cashews, pecans, walnuts and almonds coated with fresh herbs and savoury spices. They take only a few minutes to prepare in the air fryer, making them ideal for unexpected guests, cocktail parties, movie nights or a relaxed drink at home.

A Balanced Nut Mixture

Combining several varieties creates more flavour and texture than using only one type of nut. Cashews are creamy and slightly sweet, pecans have a buttery flavour, walnuts provide an earthy note and almonds add a firm crunch.

The mixture is flexible, so you can replace any of the nuts with hazelnuts, Brazil nuts, peanuts or macadamias. Keep the total quantity close to 240 g so the amount of oil and seasoning remains balanced. Raw, unsalted nuts provide the greatest control over the final flavour and sodium level.

Flavour from Herbs and Spices

Fresh rosemary and thyme give the mixture a fragrant, savoury character. Ground coriander adds warmth, while onion powder, garlic powder and black pepper provide extra depth. A small amount of light brown sugar balances the salt and spices without making the nuts overly sweet.

Olive oil helps the seasonings adhere to the nuts and encourages even browning. Toss everything thoroughly so every nut receives a thin coating of oil, herbs, sugar and spices.

Spiced Cocktail Nuts in the Air Fryer

Spread the nuts evenly inside the air fryer basket. A loose, level layer allows the hot air to circulate around them. Shake the basket halfway through cooking so the nuts brown evenly and the herbs do not collect at the bottom.

Nuts contain natural oils and can change from golden to burnt very quickly. Check them frequently during the final two minutes. Remove them as soon as they smell toasted and have developed a slightly deeper colour. Find more quick recipes in the air-fryer collection.

Cooling and Serving

The nuts may still feel slightly soft when first removed from the air fryer. They become crisp as they cool, so transfer them immediately to a serving bowl and leave them for several minutes. Avoid tasting them straight from the basket because the centres can be extremely hot.

Serve these seasoned mixed nuts with cocktails, sparkling wine, cold beer or alcohol-free drinks. They also work well on a grazing board with cheese, olives, crackers and fresh fruit. Browse the appetiser recipes for more dishes suitable for a shared table.

Useful Variations

Add cayenne pepper or chilli flakes for a hotter version. Smoked paprika provides extra depth, while cinnamon creates a warmer and slightly sweeter mixture. Maple syrup can replace the brown sugar, but use it sparingly because too much liquid prevents the nuts from becoming crisp.

A can of pre-roasted mixed nuts provides a convenient shortcut. These nuts are usually already salted, so reduce the kosher salt by at least half. Begin checking them after four minutes because they need less time than raw nuts.

The mixture also makes a practical homemade gift. Let the nuts cool completely before placing them in a clean glass jar. Add them to a selection of recipes from the finger-food collection when preparing a party table.

Storage and Food Safety

Store completely cooled nuts in an airtight container at room temperature for up to one week. Keep the container in a cool, dry cupboard away from direct sunlight. Warm leftovers briefly in the air fryer if you prefer to serve them hot again.

Trapped heat can create condensation and make the nuts soft, so never seal them while warm. Discard nuts that develop a rancid or unpleasant smell. Consult the FDA safe food handling guidance for further storage information.

Quick, adaptable and easy to keep on hand, spiced cocktail nuts provide a fragrant snack for parties, festive gatherings and quiet evenings with a chilled drink.


Crispy Spanish Potato Nests

Crispy spiralized potato nest seasoned with smoked paprika and served with spicy homemade tomato ketchup on a rustic wooden table.

Crispy Spanish Potato Nests

Crispy Spanish Potato Nests turn spiralized potatoes into golden air fryer nests seasoned with hot smoked paprika and garlic. A homemade spicy tomato ketchup adds sweet, tangy, and savory flavor inspired by Spanish patatas bravas.
Couverts4 servings
Preparation 15 minutes
Preparation time:15 minutes
estimated costs pp $0.85
Deel op Facebook Print Recipe

Equipment

Ingredients

For the Potato Nests

  • 2 large russet potatoes approximately 340 g each
  • 4 tablespoons vegetable oil
  • 2 tablespoons smoked paprika hot
  • 1 teaspoon garlic powder
  • Kosher salt to taste
  • Black pepper freshly ground, to taste

For the Spicy Tomato Ketchup

  • 240 g crushed tomatoes canned
  • 4 tablespoons apple cider vinegar
  • 2 tablespoons dark brown sugar
  • 2 tablespoons Worcestershire sauce
  • 2 teaspoons hot sauce mild

Instructions

  • Spiralize the potatoes into long, thin strands.
  • Place the potatoes in a colander and rinse under cold running water until the water runs clear.
  • Spread the potato strands over paper towels and pat them thoroughly dry.
  • Combine the potatoes, vegetable oil, smoked paprika, and garlic powder in a large mixing bowl.
  • Season with salt and black pepper, then toss until evenly coated.
  • Divide the potatoes into 4 equal portions and loosely shape each portion into a nest.
  • Arrange the nests in the air fryer basket without overcrowding.
  • Air fry at 200ยฐC for 15 minutes.
  • Carefully turn the nests halfway through cooking.
  • Continue cooking until crisp and golden brown.
  • Combine the crushed tomatoes, apple cider vinegar, brown sugar, Worcestershire sauce, and hot sauce in a blender.
  • Blend until smooth.
  • Pour the sauce into a saucepan and bring to a gentle simmer over medium heat.
  • Cook for 3 to 5 minutes until the sauce has reduced by approximately half.
  • Transfer the spicy tomato ketchup to a serving bowl.
  • Serve each potato nest hot with the ketchup.

Notes & Wine Advice

Serving Suggestions

Serve each potato nest hot with the spicy tomato ketchup on the side. These nests work well as a tapas-style appetiser, a party snack or a crispy side dish for grilled foods.

Recipe Notes

Dry the spiralized potatoes thoroughly before adding the oil and seasoning. Excess moisture prevents them from becoming crisp. Cook the nests in batches when they cannot be arranged without touching.

Variations

If a spiralizer is unavailable, cut the potatoes into matchsticks approximately 3 mm thick. Use sweet smoked paprika instead of hot paprika for a milder version. For a vegetarian or vegan recipe, choose Worcestershire sauce without anchovies.

Storage

Store the potato nests and ketchup separately in covered containers in the refrigerator for up to two days. Reheat the nests in the air fryer at 190ยฐC for 3 to 5 minutes. The ketchup can be served cold or gently reheated.

Wine Advice

A fruity Tempranillo complements the smoked paprika and tomato sauce. A crisp Sauvignon Blanc is a refreshing alternative when serving the nests as an appetiser.

Nutrition values

Serving: 1 potato nest with ketchup | Calories: 300 kcal | Carbohydrates: 43 g | Protein: 4 g | Fat: 14 g | Saturated Fat: 1 g | Sodium: 460 mg | Sugar: 9 g
————————————————————————————————–

Spicy potato nests transform a simple russet potato into a crisp and eye-catching air-fryer dish. The spiralized strands are seasoned with hot smoked paprika and garlic powder, then served with homemade spicy tomato ketchup. The result combines the crunchy character of Spanish patatas bravas with the familiar appeal of fries and ketchup.

Preparing the Potato Spirals

A spiralizer creates long, thin potato strands that become crisp around the edges during cooking. If you do not have a spiralizer, cut the potato into matchsticks approximately 3 mm thick. Aim for an even thickness so that all the strands finish cooking at roughly the same time.

Place the prepared potatoes in a colander and rinse them under cold running water. Continue until the water runs clear. This removes excess surface starch, preventing the strands from sticking together and helping them develop a crisp exterior.

Why Drying Matters

Spread the rinsed potatoes over a double layer of paper towels and pat them completely dry. Remaining water creates steam inside the air fryer and makes the potatoes soft. Taking a few extra minutes to dry the strands properly noticeably improves the final texture.

Toss the potatoes with vegetable oil, hot smoked paprika, garlic powder, salt and black pepper. The oil should lightly coat every strand without leaving the potatoes dripping. Hot smoked paprika adds colour, warmth and a distinctive smoky flavour.

Spicy Potato Nests in the Air Fryer

Divide the seasoned potato strands into four portions and loosely form each portion into a nest. Do not compress them too firmly because circulating hot air needs to reach the spaces between the strands. Arrange the nests separately in the basket and cook them in batches if necessary.

Carefully turn the nests or shake the basket halfway through cooking. They are ready when the outside is golden brown and crisp. Air-fryer models vary, so check them during the final few minutes. You can find more recipes using this method in the air-fryer recipe collection.

Homemade Spicy Ketchup

The dipping sauce combines crushed tomatoes, apple cider vinegar, dark brown sugar, Worcestershire sauce and mild hot sauce. Blending produces a smooth texture, while simmering concentrates the tomato flavour and creates a thicker consistency.

Taste the ketchup after it has reduced. Add extra hot sauce for more heat or a little brown sugar if the tomatoes taste especially acidic. Vegetarian or vegan cooks should choose Worcestershire sauce without anchovies. Explore the sauce collection for other homemade accompaniments.

Serving and Variations

Serve these spiralized paprika potatoes immediately with the ketchup in a separate bowl. They make an attractive tapas-style appetiser and also work as a side dish with burgers, grilled vegetables or sandwiches. Their individual shape makes them convenient for parties and shared snack platters.

Sweet smoked paprika can replace the hot variety for a milder version. Add cayenne pepper for additional heat or dried oregano for a more herbal flavour. The potatoes can also be shaped into smaller bite-sized nests for finger food. More serving inspiration is available among the tapas recipes.

Storage and Food Safety

The potato nests are best eaten immediately. Refrigerate leftovers separately from the ketchup for up to two days. Reheat the potatoes in the air fryer at 190ยฐC for three to five minutes. Store the ketchup in a sealed container and serve it cold or gently reheated.

Use clean utensils when preparing the sauce and refrigerate leftovers promptly. Consult the FDA safe food handling guidance for further advice about preparing, cooling and storing food safely.

With smoky seasoning, crisp potato strands and tangy homemade ketchup, spicy potato nests provide a playful alternative to ordinary fries and make a distinctive addition to any informal meal.


Spiced sweet potato fries combine naturally sweet potato with smoked paprika, cumin, turmeric, mustard and cayenne pepper. Cooking the wedges in an air fryer gives them a lightly crisp exterior while keeping the centre soft and tender. The cool garlic sour cream dip balances the warm spices and makes the fries suitable as a snack, appetiser or flavourful side dish.

Preparing the Sweet Potatoes

Cut the sweet potatoes into wedges of approximately equal thickness. Evenly sized wedges cook at the same rate and reduce the chance of ending up with burnt edges and undercooked centres. Leaving the skin on is possible, but scrub the potatoes thoroughly before cutting them.

The mixture of smoked paprika, chilli powder, cumin, turmeric, mustard powder and cayenne creates several layers of flavour. Smoked paprika adds depth, cumin provides warmth and turmeric contributes an earthy note. Cayenne supplies the heat, so reduce it when preparing the dish for children or guests who prefer milder food.

How to Get Crisp Edges

Sweet potatoes contain more moisture and natural sugar than ordinary potatoes, so they do not become quite as crisp as traditional French fries. The best results come from arranging the wedges loosely in the basket. Cook them in batches rather than filling the air fryer too deeply.

Shaking the basket halfway through exposes different sides of the wedges to the circulating hot air. Returning the cooked wedges to the bowl with the remaining seasoned oil gives them a final coating of spice. Serve them immediately because their edges gradually soften as they cool. More ideas using this cooking method are available in the air-fryer recipe collection.

Spiced Sweet Potato Fries with Dip

The garlic sour cream dip requires only sour cream, freshly grated garlic, salt and black pepper. Grating the garlic creates a fine paste that blends evenly through the sour cream. Prepare the dip before the fries finish cooking so the garlic has a few minutes to flavour the mixture.

For a lighter alternative, replace the sour cream with thick Greek yogurt. A dairy-free sour cream can be used when serving vegan guests. Fresh chives, parsley or coriander can also be stirred into the dip. Browse the dip recipes for other sauces that pair well with air-fried vegetables.

Serving Ideas

These seasoned sweet potato wedges work well with veggie burgers, grilled chicken, bean dishes or a fresh salad. They can also be placed on a shared snack platter with vegetable sticks, olives and several dips. For a casual meal, serve them in small bowls or paper cones with the garlic dip on the side.

The fries are particularly suitable for game days, barbecues, picnics and relaxed weekend meals. If you are serving them at a gathering, cook several smaller batches and keep the finished wedges warm in a low oven. Additional options for informal meals can be found among the snack recipes.

Variations and Storage

For a smoky version, increase the smoked paprika slightly. Add more cayenne or a pinch of chilli flakes for extra heat. Curry powder can replace the cumin, turmeric and mustard powder when a simpler spice mixture is preferred. A little lemon or lime zest provides a fresh contrast to the sweetness.

Store leftover fries and dip separately in covered containers in the refrigerator for up to two days. Reheat the wedges in the air fryer at 190ยฐC for several minutes. The dip should remain refrigerated and must not be reheated. Follow the FDA safe food handling advice when cooling and storing prepared food.

Spiced sweet potato fries offer a satisfying balance of sweetness, smoke, warmth and gentle heat. With their creamy garlic dip and quick air-fryer preparation, they are an easy addition to everyday meals and informal gatherings.