Homemade Cheese Crackers

Cheese Crackers freshly baked until golden brown and served in a rustic bowl on a wooden table.

Homemade Cheese Crackers

Homemade Cheese Crackers are crispy, cheesy, and wonderfully crunchy. Made with simple pantry ingredients and rich cheese seasoning, they’re perfect for snacking, serving with soups and dips, or adding to lunchboxes. Freshly baked, they have a satisfying crunch that’s hard to resist.
Couverts4 servings
Total time 1 hour 40 minutes
estimated costs pp $1.10 per person
Deel op Facebook Print Recipe

Equipment

  • Baking sheet
  • Fork
  • Mixing bowl
  • Pizza Cutter
  • Rolling Pin
  • Skewer or toothpick

Ingredients

Instructions

  • Preheat the oven to 325ยฐF (160ยฐC).
  • Combine the flour, baking soda, baking powder, and cheese powder in a large mixing bowl.
  • Cut the shortening into the dry ingredients until the mixture resembles coarse crumbs.
  • Pour in the buttermilk and stir until a sticky dough forms.
  • Gradually add part of the reserved flour until the dough is easy to handle.
  • Transfer the dough to a lightly floured work surface.
  • Knead for 60 to 90 seconds until smooth.
  • Wrap the dough in plastic wrap.
  • Refrigerate for 1 hour.
  • Lightly grease a baking sheet.
  • Roll one-third of the dough to just under 1/16 inch thick.
  • Trim the edges with a pizza cutter.
  • Transfer the dough to the prepared baking sheet.
  • Cut into 1-inch squares.
  • Poke a small hole in the center of each square with a skewer or toothpick.
  • Sprinkle lightly with salt if desired.
  • Bake for 8 to 10 minutes.
  • Carefully stir the crackers.
  • Bake for another 3 to 5 minutes until lightly golden.
  • Repeat with the remaining dough.
  • Cool completely before serving or storing.

Notes & Wine Advice

Recipe Notes

Roll the dough as evenly as possible so every cracker bakes to the same crisp texture.
Allow the crackers to cool completely before storing because they become even crispier as they cool.
Store the crackers in an airtight container at room temperature for up to one week.
Serve them with soups, salads, dips, or as part of a cheese or charcuterie board.

Wine Advice

A chilled Rosรฉ offers a refreshing contrast to the rich cheese flavor.
A light Pinot Noir also pairs beautifully with these crispy homemade crackers.

Nutrition values

Calories: 350 kcal | koolhydraten: 25 g | Eiwitten: 15 g | Vet: 22 g | Verzadigd vet: 8 g | Natrium: 420 mg | Suiker: 1 g
————————————————————————————————–
Cuisine; American
Season: All Seasons
Diets; Vegetarian

About This Recipe

Cheese Crackers are one of the easiest homemade snacks you can bake using everyday pantry ingredients. They have a crisp texture, a rich cheesy flavor, and a satisfying crunch that makes them perfect for snacking throughout the day. Unlike many store-bought crackers, this recipe lets you control the ingredients while creating fresh crackers that taste even better straight from the oven. Whether you serve them with soup, add them to a lunchbox, or enjoy them with your favorite dip, these crackers are always a welcome addition.

Why You’ll Love These Homemade Crackers

These homemade cheese crackers are simple enough for beginner bakers while producing bakery-quality results. Chilling the dough makes it easier to roll thin, which is the secret to achieving the perfect crispy bite. They are ideal for anyone who enjoys making snacks from scratch. If you like homemade baking, don’t forget to browse our Snack Recipes, Finger Food Recipes, Cheese Recipes, Rustic Baking Recipes, and American Recipes.

Making Cheese Crackers at Home

Preparing cheese crackers is straightforward. After mixing the dough, allow it to chill before rolling it as thin as possible. Thin dough produces crisp crackers with an even texture and beautiful golden color. Poking a small hole in each cracker helps them bake evenly while giving them their familiar appearance. Once baked, let them cool completely before storing so they stay wonderfully crunchy.

Serving Ideas

These homemade cheese crackers are delicious on their own, but they also pair well with hummus, salsa, spinach dip, soups, salads, and charcuterie boards. They’re equally at home during movie nights, picnics, family gatherings, birthday parties, or packed into lunchboxes for an easy homemade snack. Their rich cheese flavor also makes them an excellent addition to appetizer platters.

Storage and Freshness Tips

Store the crackers in an airtight container at room temperature for up to one week. If they lose a little crispness, place them in a warm oven for a few minutes to refresh their texture. Always allow them to cool completely before storing to avoid trapped moisture. For additional food storage recommendations, visit the FDA Food Safety website.

Cheese Crackers combine simple ingredients, easy preparation, and plenty of crunchy flavor, making them a homemade snack you’ll want to bake again and again.


Carl’s Jr. Famous Star Copycat Recipe

Famous Star Copycat burger with grilled beef, lettuce, tomato, pickles, onions, and burger sauce on a sesame bun.

Carl’s Jr. Famous Star Copycat Recipe

Recreate the iconic Carl’s Jr. Famous Star at home with this easy-to-follow recipe. Juicy grilled beef, crisp lettuce, fresh tomato, pickles, onions, and a tangy homemade burger sauce come together in a toasted sesame bun for an authentic restaurant-style burger.
Couverts4 servings
Total time 16 minutes
estimated costs pp $3.85 per serving
Deel op Facebook Print Recipe

Equipment

Ingredients

Instructions

  • Preheat a barbecue grill or grill pan over high heat.
  • Toast the hamburger bun, cut-side down, in a skillet over medium heat.
  • Set the toasted bun aside.
  • Cut the onion rings into quarters.
  • Mix the ketchup and sweet pickle relish in a small bowl to make the burger sauce.
  • Shape the ground beef into a thin patty slightly larger than the bun.
  • Season the patty lightly with salt.
  • Grill the burger for 2 to 3 minutes per side until cooked to your preferred doneness.
  • Spread 1 teaspoon of mayonnaise on the bottom bun.
  • Top with the lettuce and tomato slices.
  • Place the grilled beef patty on top.
  • Add the pickle slices and onion pieces.
  • Spoon over the burger sauce.
  • Spread the remaining mayonnaise inside the top bun.
  • Close the burger and serve immediately.

Notes & Wine Advice

Recipe Notes

Use ground beef with about 20% fat for the juiciest burger and the best restaurant-style flavor.
Toast the bun until lightly golden to help prevent it from becoming soggy after assembly.
Serve with crispy fries, onion rings, or coleslaw for a complete American diner meal.
Prepare the burger sauce a few hours ahead to allow the flavors to blend even better.

Wine Advice

A smooth Merlot complements the juicy beef and tangy burger sauce beautifully.
If you prefer beer, a crisp lager makes a classic partner for this American-style burger.

Nutrition values

Calories: 490 kcal | koolhydraten: 35 g | Eiwitten: 28 g | Vet: 26 g | Verzadigd vet: 10 g | Natrium: 690 mg | Suiker: 7 g
————————————————————————————————–

About This Recipe

Famous Star Copycat lets you recreate one of America’s most popular fast-food burgers at home. A juicy grilled beef patty, crisp lettuce, fresh tomato, crunchy pickles, onions, and creamy burger sauce come together on a toasted sesame bun. The result is a homemade burger that captures the familiar restaurant flavor while using fresh ingredients.

Why This Copycat Burger Is So Popular

This copycat burger is quick to prepare and delivers everything you expect from a classic American burger. The toasted bun adds texture, the fresh vegetables provide crunch, and the homemade burger sauce brings the perfect balance of sweetness and tanginess. Discover more favorites in our Beef Recipes, Sandwich Recipes, American Recipes, Barbecue Recipes, and Dinner Recipes.

Building the Perfect Famous Star Copycat

Preparing a Famous Star Copycat starts with shaping a thin beef patty that cooks quickly while staying juicy. Fresh lettuce, tomato, onions, and pickles create the familiar texture, while the simple sauce made from ketchup, mayonnaise, and sweet pickle relish delivers the signature flavor that makes this burger instantly recognizable.

Serving Suggestions for Your Copycat Burger

Your copycat burger tastes great with crispy fries, onion rings, potato wedges, or creamy coleslaw. Add a pickle spear and your favorite dipping sauce to complete the restaurant-style meal. It’s an excellent choice for a Family Dinner, a Game Day, a Barbecue, or a relaxed Weekend gathering.

Storing Your Famous Star Copycat

Store the cooked patties separately from the fresh toppings to maintain the best texture. Reheat the beef in a hot skillet or on the grill before assembling the burger. Fresh lettuce and tomato should always be added just before serving. For safe food handling recommendations, visit the FDA Food Safety website.

Famous Star Copycat is an easy way to enjoy a restaurant favorite without leaving home. Every bite combines juicy beef, crisp vegetables, creamy sauce, and a toasted bun for a satisfying homemade burger.


Thai Chicken Pizza

Peanut Chicken Pizza topped with grilled chicken, mozzarella, bean sprouts, carrots, scallions, chopped peanuts, and fresh cilantro.

Thai Chicken Pizza

Thai Chicken Pizza combines a crispy pizza crust with tender chicken, creamy peanut sauce, mozzarella cheese, crunchy vegetables, and fresh cilantro. Inspired by the famous California Pizza Kitchen favorite, this homemade pizza delivers bold Asian-inspired flavors in every bite.
Couverts4 servings
Total time 55 minutes
estimated costs pp $4.95 per serving
Deel op Facebook Print Recipe

Equipment

  • grater
  • Large skillet
  • medium saucepan
  • Mixing bowls
  • Pizza Cutter
  • Pizza stone or baking sheet
  • Rolling Pin
  • Wooden spoon

Ingredients

For the Peanut Sauce

For the Chicken

For the Pizza

Instructions

  • Combine all the peanut sauce ingredients in a medium saucepan.
  • Bring to a gentle boil over medium heat.
  • Simmer for 1 minute.
  • Divide the sauce into two portions.
  • Heat the olive oil in a large skillet over medium-high heat.
  • Cook the chicken for 5 to 6 minutes until fully cooked.
  • Allow the chicken to cool.
  • Coat the chicken with part of the peanut sauce.
  • Refrigerate until needed.
  • Preheat the oven to 245ยฐC (475ยฐF).
  • Preheat the pizza stone if using one.
  • Roll the pizza dough into a 9-inch circle.
  • Spread part of the peanut sauce over the dough, leaving a small border.
  • Sprinkle with mozzarella cheese.
  • Top with the chicken, scallions, bean sprouts, and carrots.
  • Add a little more mozzarella and sprinkle with chopped peanuts.
  • Bake for 9 to 10 minutes until the crust is golden and the cheese is bubbling.
  • Remove from the oven and garnish with fresh cilantro.
  • Repeat with the remaining dough and toppings to make the second pizza.

Notes & Wine Advice

Recipe Notes

For the crispiest crust, preheat a pizza stone for at least 30 minutes before baking.
Do not overload the pizza with toppings, as this can make the crust soft.
The peanut sauce can be prepared up to three days in advance and stored in the refrigerator.
Garnish with fresh cilantro immediately after baking for the brightest flavor and color.

Wine Advice

A lightly chilled Riesling balances the spicy peanut sauce and savory chicken beautifully.
For a more aromatic pairing, a glass of Gewรผrztraminer complements the sweet, spicy, and nutty flavors perfectly.

Nutrition values

Serving: 1 1/8 of a pizza | Calories: 330 kcal | koolhydraten: 28 g | Eiwitten: 16 g | Vet: 17 g | Verzadigd vet: 6 g | Natrium: 540 mg | Suiker: 5 g
————————————————————————————————–

About This Recipe

Thai Pizza is a delicious fusion recipe inspired by the famous California Pizza Kitchen favorite. Instead of a traditional tomato sauce, this pizza features a creamy peanut sauce layered with juicy chicken, mozzarella cheese, crisp vegetables, roasted peanuts, and fresh cilantro. The combination creates a perfect balance of sweet, savory, spicy, and nutty flavors, making every slice unforgettable.

Why You’ll Love Thai Pizza

This Thai chicken pizza is an excellent choice when you’re looking for something different from a classic pizza. The homemade peanut sauce delivers rich flavor, while the fresh vegetables add crunch and freshness. The recipe is surprisingly simple to prepare and produces restaurant-quality results in your own kitchen. Discover more delicious ideas in our Pizza Recipes, Chicken Recipes, Fusion Recipes, American Recipes, and Thailand Recipes.

Making the Best Thai Pizza

Creating Thai Pizza starts with preparing a smooth peanut sauce that replaces the traditional pizza sauce. The cooked chicken is coated with additional sauce before being added to the crust, creating even more flavor in every bite. Bean sprouts, carrots, scallions, mozzarella, chopped peanuts, and fresh cilantro complete this colorful Thai chicken pizza, giving it the signature taste that made the original restaurant version so popular.

Serving Thai Pizza

Thai Pizza pairs beautifully with a crisp cucumber salad, Asian slaw, steamed vegetables, or a light green salad. It is perfect for a Family Dinner, Game Day, Party Food, a Gourmet dinner, or a relaxed Weekend meal. Every slice offers bold flavors without being difficult to prepare.

Storing Leftovers

Store leftover Thai chicken pizza in an airtight container in the refrigerator for up to three days. Reheat slices in a hot oven or air fryer to restore the crispy crust and melted cheese. Fresh cilantro can be added after reheating for the best flavor and appearance. For safe food storage recommendations, visit the FDA Food Safety website.

Whether you’re recreating a famous restaurant favorite or trying a creative homemade pizza for the first time, Thai Pizza delivers bold flavors, crisp textures, and an unforgettable combination of ingredients that will quickly become a family favorite.


Classic French Dressing

Classic French Dressing in a glass jar with a smooth, creamy texture, ready for salads and vegetables.

Classic French Dressing

Classic French Dressing is a smooth, tangy, and slightly sweet homemade salad dressing inspired by the famous Brown Derby recipe. Made with ketchup, vinegar, Worcestershire sauce, and simple pantry ingredients, this versatile dressing is perfect for salads, sandwiches, and vegetable platters.
Couverts4 servings
Total time 40 minutes
estimated costs pp $0.65 per serving
Deel op Facebook Print Recipe

Equipment

  • Jar with lid
  • Measuring cups
  • Mixing bowl
  • Whisk

Ingredients

Instructions

  • Add the ketchup, apple cider vinegar, vegetable oil, Worcestershire sauce, sugar, paprika, dry mustard, salt, black pepper, and garlic to a mixing bowl.
  • Whisk until the dressing is smooth and fully emulsified.
  • Pour the dressing into a clean jar with a tight-fitting lid.
  • Refrigerate for at least 30 minutes to allow the flavors to develop.
  • Shake well before serving.

Notes & Wine Advice

Recipe Notes

Refrigerating the dressing before serving allows the flavors to blend and creates a smoother taste.
Shake or whisk the dressing well before each use, as natural separation may occur during storage.
This dressing is delicious on green salads, Cobb salads, sandwiches, and as a dipping sauce for fresh vegetables.
Store the dressing in a sealed jar in the refrigerator for up to one week.

Wine Advice

A chilled dry Rosรฉ complements the tangy and slightly sweet flavors beautifully.
A crisp Sauvignon Blanc is another excellent choice for salads served with this classic dressing.

Nutrition values

Serving: 2 tablespoons | Calories: 90 kcal | koolhydraten: 8 g | Eiwitten: 1 g | Vet: 7 g | Verzadigd vet: 1 g | Natrium: 180 mg | Suiker: 6 g
————————————————————————————————–

About This Recipe

Classic French Dressing is a timeless homemade salad dressing inspired by the famous Brown Derby recipe. Combining ketchup, apple cider vinegar, Worcestershire sauce, paprika, and garlic creates a smooth dressing with the perfect balance of sweet, tangy, and savory flavors. This versatile recipe is ideal for fresh green salads, sandwiches, grain bowls, and even as a dipping sauce for crisp vegetables.

Why You’ll Love Classic French Dressing

This homemade French dressing comes together in just a few minutes using simple pantry ingredients. Unlike many bottled dressings, you can adjust the sweetness, acidity, or seasoning to suit your own taste. If you enjoy making homemade condiments, be sure to browse our Dressing Recipes, Condiment Recipes, Sauce Recipes, Salad Recipes, and American Recipes.

Making Classic French Dressing at Home

Classic French Dressing requires no special equipment beyond a bowl and whisk. Simply combine the ingredients until smooth and refrigerate the dressing to allow the flavors to develop. The ketchup provides body and color, while vinegar adds brightness, Worcestershire sauce contributes depth, and paprika gives the dressing its characteristic flavor. After chilling, the dressing becomes even smoother and more balanced.

Serving Homemade French Dressing

This homemade French dressing is delicious over green salads, Cobb salads, pasta salads, grilled chicken, or roasted vegetables. It also works well as a sandwich spread or a dipping sauce for fresh vegetables. Whether you’re preparing a Family Dinner, a Picnic, a Barbecue, or a relaxed Weekend meal, this dressing adds bright flavor to almost any dish.

Storage Tips for Classic French Dressing

Store Classic French Dressing in a tightly sealed jar in the refrigerator for up to one week. Shake the jar well before each use because natural separation may occur. Keeping the dressing chilled allows the flavors to continue developing while maintaining freshness. For safe food storage recommendations, visit the FDA Food Safety website.

Once you try this homemade dressing, you’ll discover how easy it is to prepare a fresh, flavorful recipe that tastes better than many store-bought varieties and complements countless everyday meals.

Homestyle Boston Meatloaf

Boston Meatloaf topped with a rich tomato glaze and sliced on a serving platter with mashed potatoes and green beans.

Homestyle Boston Meatloaf

Homestyle Boston Meatloaf is a hearty American comfort food made with seasoned ground beef, breadcrumbs, garlic, onion, and a rich tomato glaze. Moist, flavorful, and easy to prepare, this classic family dinner pairs perfectly with mashed potatoes and vegetables.
Couverts4 servings
Total time 1 hour 20 minutes
estimated costs pp $3.20 per serving
Deel op Facebook Print Recipe

Equipment

  • Large mixing bowl
  • Measuring cups
  • oven
  • Small mixing bowl
  • spatula

Ingredients

**For the Meatloaf**

**For the Glaze**

Instructions

  • Preheat the oven to 175ยฐC (350ยฐF).
  • Combine the ground beef, breadcrumbs, egg, onion, garlic, milk, Worcestershire sauce, salt, pepper, oregano, and parsley in a large mixing bowl.
  • Mix until just combined.
  • Transfer the mixture to a greased baking dish and shape it into a loaf.
  • Mix the ketchup, brown sugar, mustard, and Worcestershire sauce in a small bowl.
  • Spread half of the glaze over the meatloaf.
  • Bake for 45 minutes.
  • Spread the remaining glaze over the top.
  • Bake for another 15 minutes or until the internal temperature reaches 75ยฐC (165ยฐF).
  • Let the meatloaf rest for 5 minutes before slicing and serving.

Notes & Wine Advice

Recipe Notes

Mix the meat mixture gently to keep the finished meatloaf tender and juicy.
Allow the meatloaf to rest before slicing so the juices stay inside the loaf.
Serve with creamy mashed potatoes, steamed green beans, roasted carrots, or buttered corn for a classic meal.
Leftovers make excellent sandwiches and can be refrigerated for up to three days.

Wine Advice

A smooth Merlot pairs beautifully with the rich beef and sweet tomato glaze.
A fruity Zinfandel is another excellent choice for this hearty American comfort food.

Nutrition values

Calories: 380 kcal | koolhydraten: 22 g | Eiwitten: 30 g | Vet: 20 g | Verzadigd vet: 8 g | Natrium: 720 mg | Suiker: 10 g
————————————————————————————————–

About This Recipe

Boston Meatloaf is a classic American comfort food inspired by the popular Boston Market favorite. This hearty recipe combines seasoned ground beef, breadcrumbs, garlic, onion, and a rich tomato glaze that caramelizes beautifully while baking. The result is a tender, juicy meatloaf that’s perfect for family dinners and comforting weekend meals.

Why You’ll Love This Recipe

This homestyle meatloaf is easy to prepare with everyday ingredients and delivers the familiar flavors of a traditional American dinner. The savory meat mixture stays moist thanks to the milk and egg, while the sweet and tangy glaze adds a delicious finishing touch. If you enjoy hearty homemade meals, browse our Meat Recipes, Comfort Food Recipes, Main Course Recipes, Oven Recipes, and American Recipes.

Making Boston Meatloaf

Boston Meatloaf comes together in just a few simple steps. Mix the ingredients gently to keep the texture tender, shape the loaf, and finish it with two layers of the flavorful tomato glaze. Baking the glaze in two stages creates a rich coating that adds color and enhances every slice without overpowering the beef.

Serving Suggestions

This homestyle meatloaf is delicious with mashed potatoes, roasted carrots, buttered corn, steamed green beans, or creamy macaroni and cheese. It also makes a satisfying centerpiece for a Family Dinner, a Thanksgiving meal, or a relaxing Weekend dinner with family and friends.

Storage Tips

Store leftover Boston Meatloaf in an airtight container in the refrigerator for up to three days. Reheat individual slices in the oven or microwave until thoroughly heated. The cooked meatloaf also freezes well for up to three months, making it an excellent make-ahead meal. For safe food storage recommendations, visit the FDA Food Safety website.

Whether you’re recreating a restaurant favorite or preparing a comforting homemade dinner, Boston Meatloaf delivers tender beef, rich tomato glaze, and classic American flavor that never goes out of style.


Homestyle Rotisserie Chicken

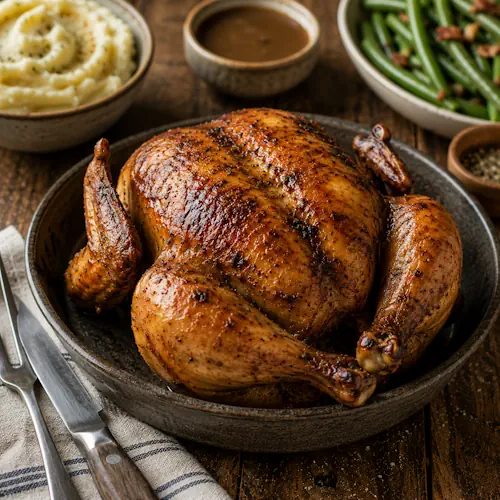
Rotisserie Chicken with crispy golden skin served on a platter with roasted vegetables.

Homestyle Rotisserie Chicken

Homestyle Rotisserie Chicken is a juicy, oven-roasted whole chicken seasoned with garlic, herbs, paprika, and a touch of lemon. Inspired by the famous Boston Market favorite, this easy recipe delivers tender meat, crispy golden skin, and classic comfort food flavor that’s perfect for family dinners and special occasions.
Couverts4 servings
Total time 1 hour 35 minutes
estimated costs pp $4.25 per serving
Deel op Facebook Print Recipe

Equipment

Ingredients

Instructions

  • Preheat the oven to 190ยฐC (375ยฐF).
  • Pat the chicken dry with paper towels.
  • Rub the chicken all over with the olive oil.
  • Mix the garlic powder, onion powder, thyme, rosemary, paprika, salt, pepper, and lemon zest in a small bowl.
  • Rub the seasoning mixture evenly over the chicken.
  • Stuff the cavity with the lemon quarters if using.
  • Place the chicken breast-side up in a baking dish or on a roasting rack.
  • Roast for 1 hour and 15 minutes or until the internal temperature reaches 75ยฐC (165ยฐF).
  • Remove the chicken from the oven.
  • Let it rest for 10 minutes before carving.
  • Slice and serve with your favorite side dishes.

Notes & Wine Advice

Recipe Notes

Patting the chicken dry before seasoning helps create beautifully crisp, golden skin during roasting.
Always use a meat thermometer and cook until the thickest part of the breast or thigh reaches 75ยฐC (165ยฐF).
Let the chicken rest for at least 10 minutes before carving so the juices remain inside the meat.
Leftover chicken is perfect for sandwiches, salads, soups, wraps, or casseroles the next day.

Wine Advice

A lightly oaked Chardonnay pairs beautifully with the juicy roasted chicken and fragrant herbs.
If you prefer a fresher style, a crisp Sauvignon Blanc offers a bright contrast to the savory seasoning.

Nutrition values

Calories: 270 kcal | koolhydraten: 1 g | Eiwitten: 36 g | Vet: 14 g | Verzadigd vet: -13 g | Natrium: 340 mg | Suiker: 0 g
————————————————————————————————–

About This Recipe

Rotisserie Chicken is one of America’s favorite comfort food meals, inspired by the well-known Boston Market classic. This recipe uses a whole chicken seasoned with garlic, herbs, paprika, and olive oil before roasting it until the skin turns crisp and golden. The meat stays juicy, tender, and full of flavor. With only a handful of everyday ingredients, you can prepare a restaurant-style dinner in your own kitchen.

Why You’ll Love Rotisserie Chicken

This homestyle roast chicken is simple to prepare and requires very little hands-on time. The seasoning creates flavorful, crispy skin while allowing the natural taste of the chicken to shine. The oven does most of the work, making this recipe ideal for busy weeknights and relaxed weekends alike. Browse our Poultry Recipes, Comfort Food Recipes, Main Course Recipes, American Recipes, and Oven Recipes for more inspiration.

How to Make Homestyle Roast Chicken

Prepare Rotisserie Chicken by drying the chicken thoroughly before adding the seasoning mixture. This simple step helps the skin become beautifully crisp during roasting. Roast the chicken until the thickest part reaches 75ยฐC (165ยฐF). Let it rest before carving so the juices stay inside the meat. Every slice remains tender, moist, and full of flavor.

Serving Homestyle Roast Chicken

This homestyle roast chicken tastes delicious with mashed potatoes, roasted vegetables, buttered corn, stuffing, rice, or a fresh garden salad. Serve it for a Family Dinner, a Thanksgiving celebration, a Holiday gathering, or a relaxing Weekend meal.

Storage Tips

Store leftover Rotisserie Chicken in an airtight container for up to four days in the refrigerator. Freeze portions for up to three months if needed. Use the leftovers in sandwiches, wraps, soups, casseroles, or fresh salads for quick meals throughout the week. For safe food storage recommendations, visit the FDA Food Safety website.

Rotisserie Chicken delivers juicy meat, crispy skin, and classic homemade flavor. It is an easy recipe that works equally well for everyday dinners and special family occasions.


Homemade Sweetened Condensed Milk

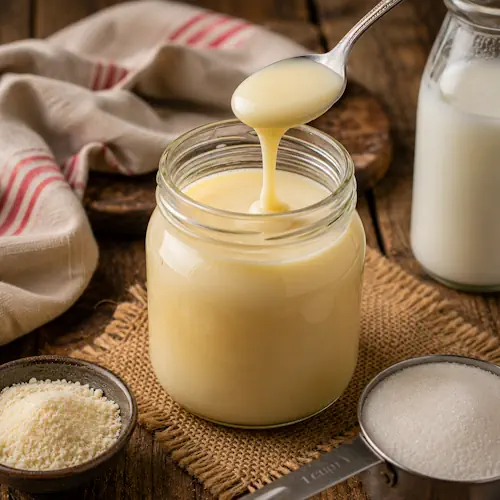
Homemade Sweetened Condensed Milk in a glass jar ready for baking and dessert recipes.

Homemade Sweetened Condensed Milk

Homemade Sweetened Condensed Milk is a rich, creamy pantry staple that’s easy to make and perfect for baking, desserts, candy, coffee, and countless sweet treats. This simple recipe delivers smooth, sweet flavor whenever you need it.
Couverts4 servings
Total time 5 minutes
estimated costs pp $0.65 per person
Deel op Facebook Print Recipe

Equipment

  • Can opener
  • Mixing bowl
  • spoon

Ingredients

  • 1 can 14 oz sweetened condensed milk

Instructions

  • Open the can of sweetened condensed milk with a can opener.
  • Pour the condensed milk into a mixing bowl or directly into your recipe.
  • Use it for pies, cheesecakes, cookies, cakes, candies, ice cream, or coffee.
  • Transfer any leftovers to an airtight container.
  • Store in the refrigerator until needed.

Notes & Wine Advice

Recipe Notes

Sweetened condensed milk adds rich sweetness and a creamy texture to countless desserts.
Keep any unused portion in an airtight container and refrigerate for up to one week.
Stir before using if the mixture thickens during storage.
Use it in pies, cheesecakes, cookies, fudge, caramel, ice cream, or coffee for extra richness.

Wine Advice

A chilled Moscato complements the creamy sweetness beautifully.
For an elegant dessert pairing, try a glass of Dessert Wine.

Nutrition values

Calories: 130 kcal | koolhydraten: 22 g | Eiwitten: 3 g | Vet: 4 g | Verzadigd vet: 2.5 g | Natrium: 35 mg | Suiker: 21 g
————————————————————————————————–
Cuisine; American
Season: All Seasons
Diets; Vegetarian

About This Recipe

Homemade Sweetened Condensed Milk is a rich, creamy ingredient that belongs in every baker’s kitchen. Its smooth texture and concentrated sweetness make it an essential addition to countless desserts, candies, frostings, and beverages. Whether you’re preparing a classic pie, homemade fudge, creamy cheesecake, or a refreshing iced coffee, this versatile ingredient delivers consistent results with very little effort.

Why You’ll Love Homemade Sweetened Condensed Milk

This condensed milk recipe is incredibly versatile and works in recipes all year round. Its thick consistency blends easily into batters, fillings, and sauces while adding both sweetness and creaminess. If you enjoy homemade desserts, be sure to browse our Dessert Recipes, Basic Recipes, Baking Recipes, American Recipes, and Condiment Recipes for even more inspiration.

Using Sweetened Condensed Milk

Homemade Sweetened Condensed Milk is perfect for key lime pie, caramel slices, cheesecakes, cookies, cakes, brownies, homemade ice cream, and fudge. It also creates delicious coffee drinks, milkshakes, and dessert sauces. Because of its concentrated sweetness, a small amount adds plenty of flavor and richness to your favorite recipes.

Storage and Serving Tips

This condensed milk recipe should always be stored in an airtight container after opening. Keep it refrigerated and use it within one week for the best flavor and texture. Stir well before using if it thickens slightly during storage. It also makes a wonderful topping for fresh fruit, pancakes, waffles, and baked desserts.

A Pantry Essential

Every home baker benefits from keeping Homemade Sweetened Condensed Milk on hand. Its versatility, creamy texture, and rich sweetness make it one of the most useful ingredients in the kitchen. For safe food storage information, visit the FDA Food Safety website.

Homemade Sweetened Condensed Milk is a dependable pantry staple that transforms everyday desserts into rich and delicious homemade treats.


Easy Homemade Pizza Crust

Easy Homemade Pizza Crust baked until golden brown and ready for pizza toppings.

Easy Homemade Pizza Crust

Easy Homemade Pizza Crust is the perfect foundation for creating delicious homemade pizzas in minutes. It bakes with a crisp exterior and a soft, chewy center, making it ideal for family dinners, pizza nights, or quick weeknight meals. Simply add your favorite sauce, cheese, and toppings for a pizza everyone will love.
Couverts4 servings
Total time 30 minutes
estimated costs pp $2.10 per person
Deel op Facebook Print Recipe

Equipment

  • Baking sheet
  • oven
  • Pizza Cutter
  • Rolling pin (optional)
  • spoon

Ingredients

Instructions

  • Preheat the oven to 450ยฐF (230ยฐC).
  • Place the pizza crust on a baking sheet.
  • Brush the crust lightly with olive oil if desired.
  • Sprinkle with the garlic powder, oregano, and basil.
  • Bake for 10 to 12 minutes until lightly golden.
  • Remove the crust from the oven.
  • Spread your favorite pizza sauce over the crust.
  • Add cheese and your preferred toppings.
  • Return the pizza to the oven.
  • Bake for another 8 to 10 minutes until the cheese is melted and bubbly.
  • Slice and serve immediately.

Notes & Wine Advice

Recipe Notes

Roll the dough evenly.
Allow the crackers to cool completely.
Store in an airtight container.
Serve with your favorite dips.

Wine Advice

A chilled Rosรฉ pairs beautifully.
A light Pinot Noir is another excellent choice.

Nutrition values

Calories: 180 kcal | koolhydraten: 24 g | Eiwitten: 4 g | Vet: 7 g | Verzadigd vet: 1 g | Natrium: 260 mg | Suiker: 1 g
————————————————————————————————–
Course; Bread / Main Course / Pizza / Snack
Cuisine; American
Season: All Seasons
Diets; Vegetarian

About This Recipe

Easy Homemade Pizza Crust is the perfect starting point for creating delicious homemade pizzas with very little effort. It bakes into a crisp, golden crust with a soft interior, making it suitable for everything from simple cheese pizzas to fully loaded family favorites. Because the crust is partially prepared, you can have a hot pizza on the table in about 30 minutes, making it ideal for busy weeknights.

Why You’ll Love This Pizza Crust

This homemade pizza base is quick, reliable, and easy to customize. Add your favorite tomato sauce, cheeses, vegetables, or meats to create a pizza that suits everyone’s taste. If you enjoy making pizza at home, be sure to browse our Pizza Recipes, Bread Recipes, Main Course Recipes, Snack Recipes, and American Recipes for even more inspiration.

Making Easy Homemade Pizza Crust

Easy Homemade Pizza Crust requires only a few minutes of preparation. Pre-bake the crust until lightly crisp, then add your sauce, cheese, and toppings before returning it to the oven. This two-step baking method helps keep the base crisp while ensuring the toppings cook evenly.

Serving Ideas

This homemade pizza base is perfect for family pizza nights, parties, movie nights, or weekend dinners. Serve it with a fresh green salad, garlic bread, or roasted vegetables for a complete meal. You can also prepare several pizzas with different toppings so everyone can enjoy their favorite combination.

Storage Tips

Leftover pizza keeps well in an airtight container in the refrigerator for up to three days. Reheat slices in a hot oven or air fryer to restore a crispy crust. For additional food safety information, visit the FDA Food Safety website.

Easy Homemade Pizza Crust gives you complete freedom to create your favorite pizza at home using fresh ingredients and endless topping combinations. Whether you prefer a classic cheese pizza, spicy pepperoni, grilled vegetables, or gourmet flavors, this simple crust provides a reliable base that turns every homemade pizza into a delicious meal everyone can enjoy.


Creamy Broccoli Cheddar Soup

Creamy Broccoli Cheddar Soup served in a rustic bowl with fresh broccoli and melted cheddar cheese.

Creamy Broccoli Cheddar Soup

Creamy Broccoli Cheddar Soup is a rich, velvety comfort food packed with tender broccoli, sharp cheddar cheese, and Parmesan. This easy homemade soup comes together in just 40 minutes and makes a satisfying lunch or dinner on chilly days.
Couverts4 servings
Total time 40 minutes
estimated costs pp $2.45 per person
Deel op Facebook Print Recipe

Equipment

Ingredients

Instructions

  • Melt the butter in a large pot over medium heat.
  • Add the onion and garlic.
  • Cook for about 5 minutes until softened.
  • Sprinkle the flour over the vegetables.
  • Cook for 1 to 2 minutes while stirring.
  • Gradually whisk in the vegetable broth until smooth.
  • Bring the soup to a gentle simmer.
  • Add the broccoli florets.
  • Cook for 10 to 12 minutes until tender.
  • Blend the soup with an immersion blender or carefully transfer it to a blender until smooth.
  • Return the soup to the pot if needed.
  • Stir in the milk, cheddar cheese, and Parmesan cheese.
  • Continue stirring until the cheese has completely melted.
  • Season with salt and black pepper.
  • Serve immediately while hot.

Notes & Wine Advice

Recipe Notes

Fresh broccoli gives the soup the best flavor and a vibrant green color.
Blend only part of the soup if you prefer a chunkier texture with pieces of broccoli.
Add extra cheddar just before serving for an even richer finish.
Serve with crusty bread, garlic bread, or a fresh green salad for a complete meal.

Wine Advice

A buttery Chardonnay pairs beautifully with the creamy cheese flavors.
A crisp Sauvignon Blanc provides a fresh contrast to the rich soup.

Nutrition values

Calories: 250 kcal | koolhydraten: 22 g | Eiwitten: 10 g | Vet: 16 g | Verzadigd vet: 9 g | Natrium: 540 mg | Suiker: 5 g
————————————————————————————————–
Cuisine; American
Season: Winter

About This Recipe

Creamy Broccoli Cheddar Soup is a rich and comforting classic that’s perfect for chilly days or whenever you’re craving a warm, satisfying meal. Fresh broccoli, sharp cheddar cheese, Parmesan, and a creamy broth come together to create a smooth soup that’s packed with flavor. It’s simple enough for a weeknight dinner while being delicious enough to serve guests for lunch or as a starter.

Why You’ll Love Creamy Broccoli Cheddar Soup

This broccoli cheese soup is easy to prepare using everyday ingredients. Fresh broccoli provides a vibrant color and wholesome flavor, while cheddar and Parmesan create a creamy texture that makes every spoonful satisfying. If you enjoy comforting homemade meals, browse our Soup Recipes, Comfort Food Recipes, Vegetarian Recipes, Main Course Recipes, and American Recipes.

Making Broccoli Cheese Soup

Creamy Broccoli Cheddar Soup starts by cooking onion and garlic in butter before creating a light roux. Vegetable broth and broccoli are then added and simmered until tender. Blending the soup creates its silky texture, while cheddar and Parmesan melt into the broth to produce a rich, creamy finish. You can blend the soup completely smooth or leave a few broccoli pieces for extra texture.

Serving Ideas

This broccoli cheese soup pairs wonderfully with crusty bread, garlic bread, crackers, or a crisp green salad. It also makes an excellent lunch, light dinner, or starter for a larger meal. Add crispy bacon, homemade croutons, or extra shredded cheddar as optional toppings for even more flavor and texture.

Storage Tips

Store leftover Creamy Broccoli Cheddar Soup in an airtight container in the refrigerator for up to three days. Reheat gently over low heat while stirring to maintain its smooth consistency. Avoid boiling after adding the cheese to help prevent separation. For additional food safety information, visit the FDA Food Safety website.

Creamy Broccoli Cheddar Soup is a comforting homemade favorite that combines fresh vegetables, creamy cheese, and simple preparation into a recipe you’ll enjoy throughout the year.


Ultimate Garlic Cheese Bread

Ultimate Garlic Cheese Bread baked with mozzarella, Parmesan, garlic butter, and parsley on a rustic wooden board.

Ultimate Garlic Cheese Bread

Ultimate Garlic Cheese Bread is loaded with creamy garlic butter, melted mozzarella, Parmesan cheese, and fresh parsley, then baked until perfectly golden and crisp. It’s the ultimate side dish for pasta, barbecue, soups, or simply sharing as a delicious snack.
Couverts4 servings
Total time 25 minutes
estimated costs pp $2.35 per person
Deel op Facebook Print Recipe

Equipment

  • Baking sheet
  • Bread knife
  • Mixing bowl
  • oven
  • Pastry brush

Ingredients

Instructions

  • Preheat the oven to 190ยฐC (375ยฐF).
  • Slice the French bread in half lengthwise.
  • Combine the softened butter, garlic, parsley, salt, and black pepper in a mixing bowl.
  • Mix until smooth.
  • Spread the garlic butter evenly over both halves of the bread.
  • Sprinkle the mozzarella over the buttered bread.
  • Top with the grated Parmesan cheese.
  • Place the bread on a baking sheet.
  • Bake for 12 to 15 minutes until the cheese is melted and golden.
  • Slice into portions.
  • Serve warm.

Notes & Wine Advice

Recipe Notes

Use freshly grated mozzarella and Parmesan for the best melting texture and flavor.
For extra crispy edges, broil the bread for the final minute while watching carefully.
Add a pinch of chili flakes or Italian seasoning for additional flavor if desired.
Serve warm alongside pasta, soups, salads, grilled meats, or your favorite barbecue dishes.

Wine Advice

A crisp Sauvignon Blanc balances the rich garlic butter and melted cheese beautifully.
For a smooth red pairing, enjoy a light Pinot Noir with this cheesy garlic bread.

Nutrition values

Calories: 310 kcal | koolhydraten: 32 g | Eiwitten: 9 g | Vet: 18 g | Verzadigd vet: 10 g | Natrium: 540 mg | Suiker: 3 g
————————————————————————————————–
Course; Bread / Pie / Side Dish / Snack
Cuisine; American
Season: All Seasons
Diets; Vegetarian

About This Recipe

Ultimate Garlic Cheese Bread is everything you want from a homemade garlic bread. A crispy French loaf is generously coated with creamy garlic butter, topped with mozzarella and Parmesan cheese, and baked until golden, bubbly, and irresistibly cheesy. It’s a simple recipe that delivers bakery-style results, making it perfect as a side dish, appetizer, or snack for any occasion.

Why You’ll Love Ultimate Garlic Cheese Bread

This cheesy garlic bread recipe comes together with just a handful of everyday ingredients while delivering bold flavor and a wonderfully crisp texture. The combination of buttery garlic, fresh parsley, and two melted cheeses creates a crowd-pleasing favorite that’s ideal for family dinners, parties, and barbecues. If you enjoy homemade bread recipes, browse our Bread Recipes, Side Dish Recipes, Snack Recipes, American Recipes, and Barbecue Recipes.

Making Cheesy Garlic Bread

Softened butter is mixed with fresh garlic, parsley, salt, and pepper before being spread generously over sliced French bread. A layer of mozzarella followed by Parmesan creates a beautifully golden topping as the bread bakes. The result is crisp around the edges, soft in the middle, and packed with rich garlic flavor in every bite.

Serving Suggestions

Ultimate Garlic Cheese Bread pairs perfectly with pasta dishes, soups, fresh salads, grilled chicken, steaks, burgers, and barbecue favorites. It also makes an excellent appetizer for parties or a quick snack served with marinara sauce for dipping. Slice it into smaller pieces for sharing at family gatherings or game day celebrations.

Storage Tips

Store leftover cheesy garlic bread in an airtight container in the refrigerator for up to three days. Reheat in the oven or air fryer for a few minutes to restore the crispy crust and melted cheese. Avoid microwaving if possible, as it softens the bread. For additional food storage recommendations, visit the FDA Food Safety website.

Ultimate Garlic Cheese Bread is an easy homemade favorite that combines crispy bread, buttery garlic, and bubbling cheese into a comforting recipe everyone will happily reach for again and again.